Service Engine Soon (SES) and/or Reduced Power Lamp Illuminating Following Cold Engine Start Up In Subfreezing Temperatures with Diagnostic Trouble Codes (DTC) P0638, P1510 and/or P1516 Stored in ECM

| Subject: | Service Engine Soon (SES) and/or Reduced Power Lamp Illuminating Following Cold Engine Start Up In Subfreezing Temperatures, Diagnostic Trouble Codes (DTC) P0638, P1510 and/or P1516 Stored in Engine Control Module (ECM) (Re-locate Small Primary Positive Crankcase Ventilation [PCV] Hose) |
| Models: | 2000-2005 Saturn L-Series Vehicles with 3.0L V-6 Engine (VIN R - RPO L81) |
| Attention: | Fixed Operations Manager and Technician |
Condition
Some customers may comment on the Service Engine Soon (SES) and/or Reduced Power lamp illuminating and limited throttle response immediately following cold engine start up during subfreezing temperatures. Diagnostic trouble codes (DTC) P0638 or P1510 and/or P1516 may be stored in the engine control module (ECM).
Cause
This condition may be caused by crankcase vapors inside the throttle body collecting at the throttle plate base as engine cools down while shut off, resulting in restricted throttle plate movement immediately following cold engine start up during subfreezing temperatures.
Correction
Re-locate primary positive crankcase ventilation (PCV) hose from throttle body to intake manifold upper plenum. Refer to service procedure in this bulletin.
Service Procedure
- Disconnect negative battery cable.
- Remove the air cleaner hose assembly from the throttle body.
- Disconnect the throttle body electrical connection.
- Remove electrical connection and vacuum hoses from intake plenum switch over valve solenoid.
- Remove the vacuum hose from the fuel pressure regulator.
- Remove the front intake plenum hose clamps, pipe bolts, and plenum bolts.
- On 2000-2003 vehicles only, remove EGR pipe bolts and pipe from intake plenum.
- Lift the plenum and remove the throttle body heater hoses.
- Remove the front intake runner.
- Remove the intake plenum.
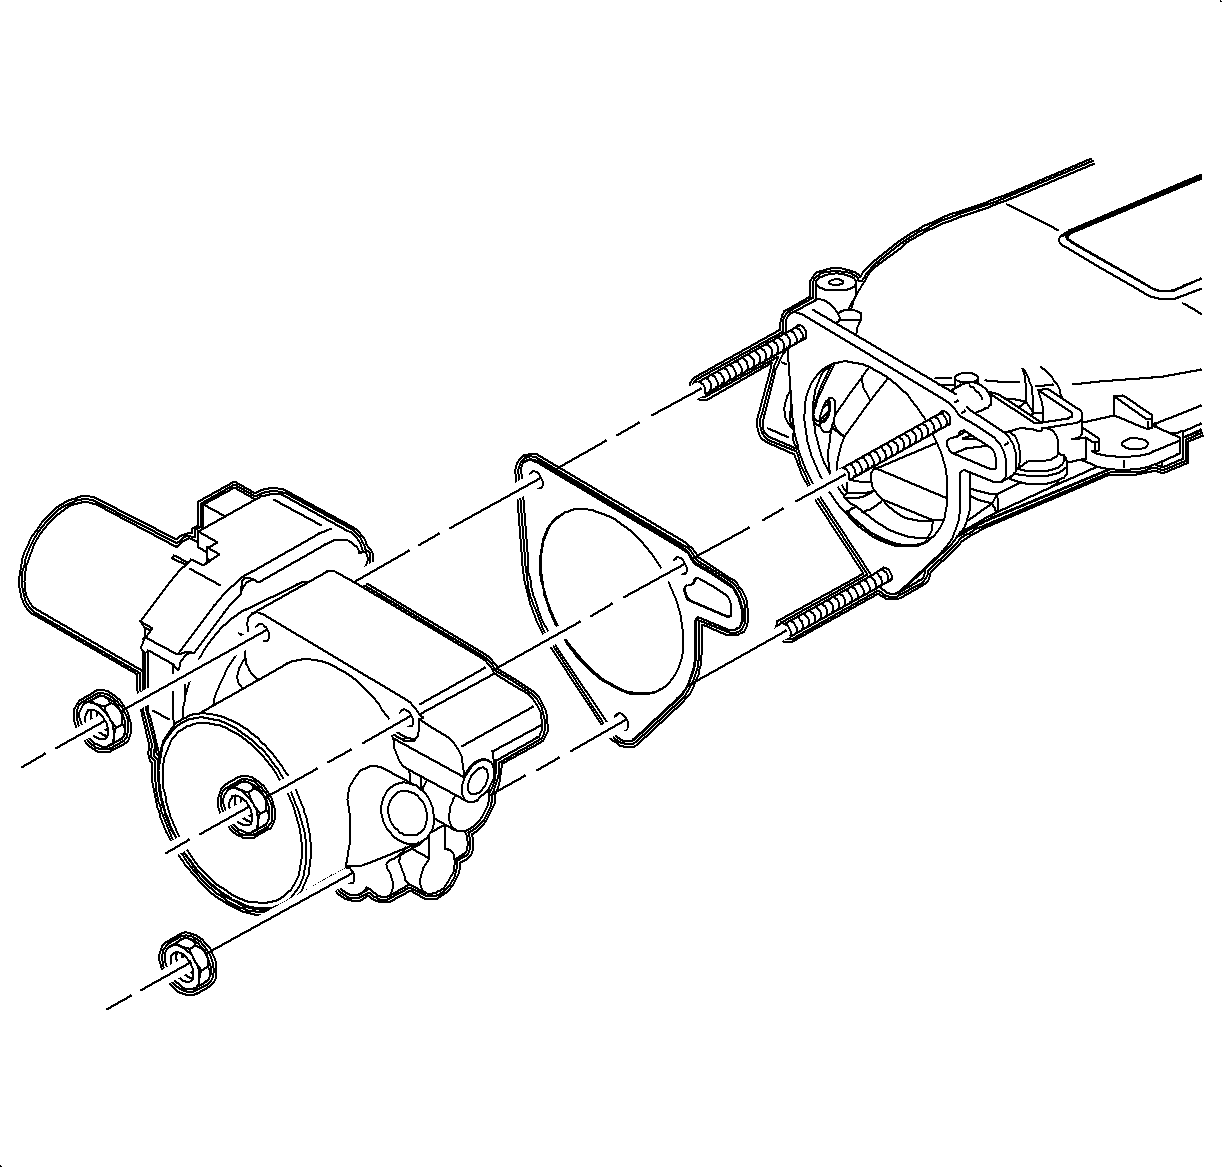
- Remove the throttle body nuts and throttle body assembly.
- Remove throttle body-to-plenum gasket.
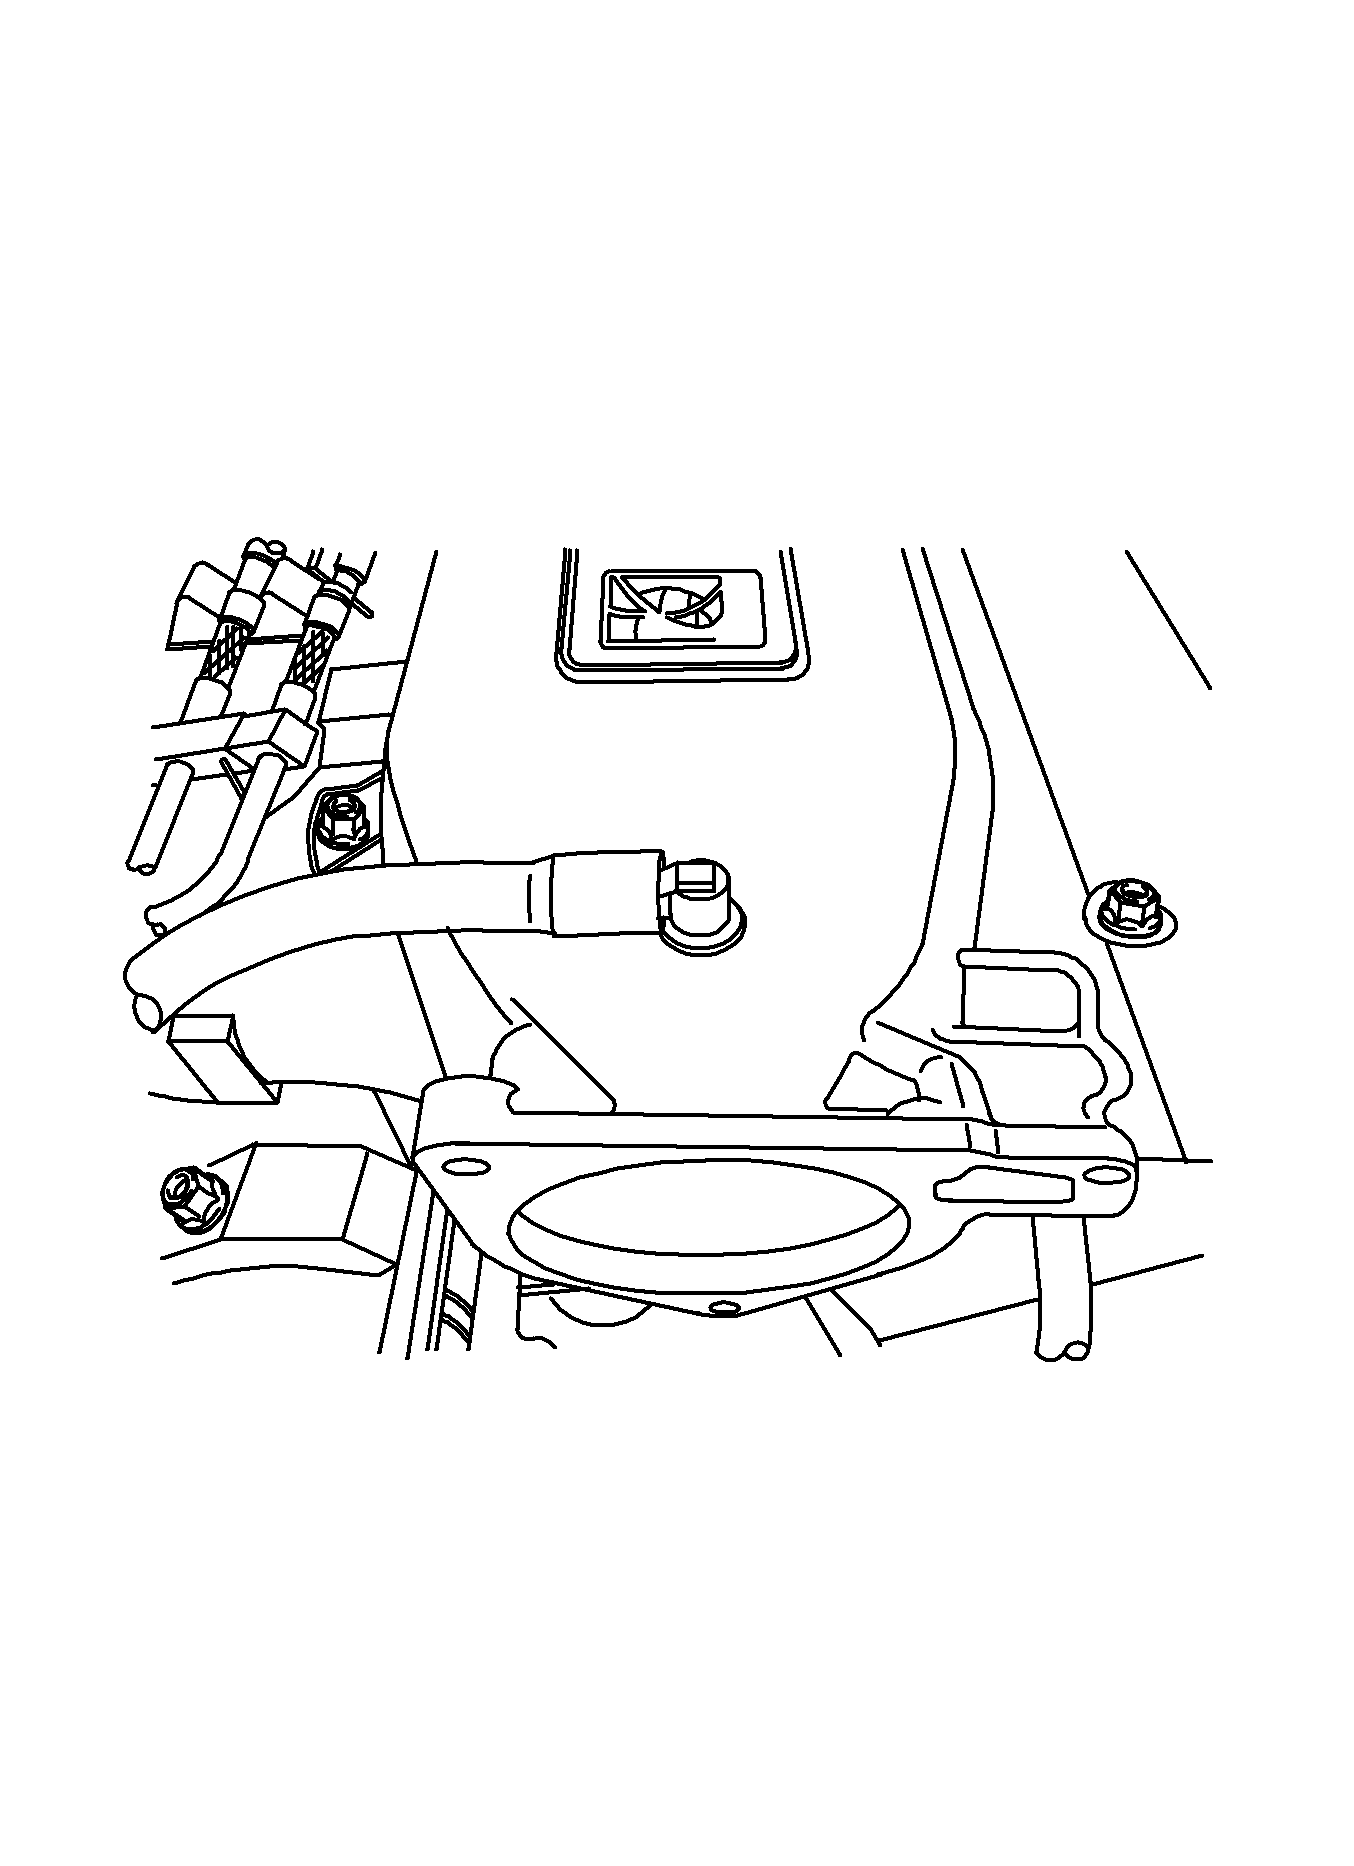
- Drill a 2 mm to 3 mm (0.079 in to 0.118 in) pilot hole through the intake manifold located 52 mm (2.04 in) from front edge at throttle body end and centered so the hole is just in front of the center divider inside the manifold.
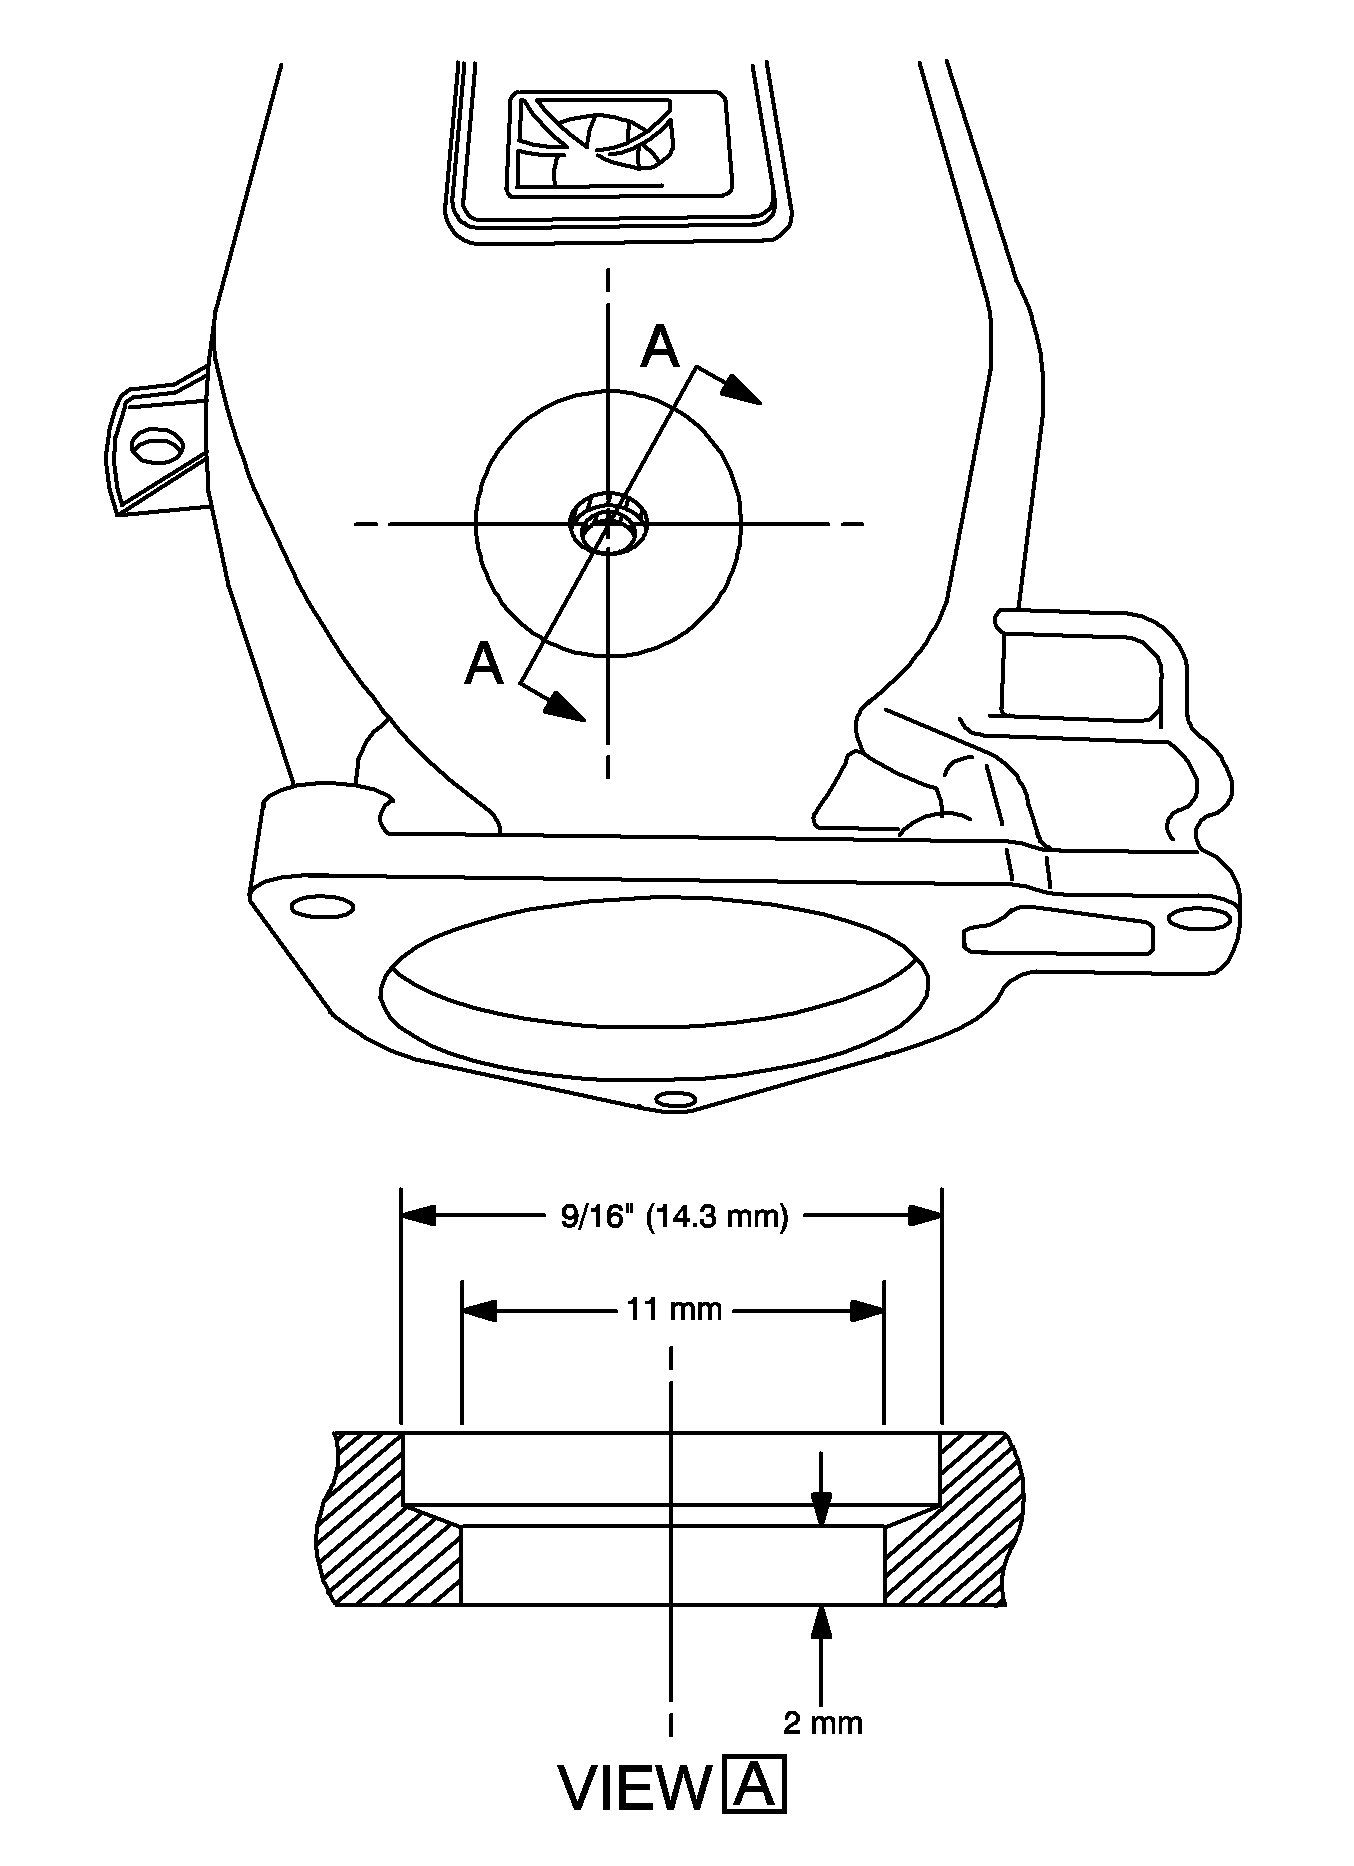
- Enlarge hole on intake manifold to 11 mm.
- Use 14.3 mm (9/16 in) twist drill to bevel the hole. Ensure the intake manifold at the 11 mm diameter hole is 1.5 mm to 2 mm thick for grommet to be retained.
- Remove any burrs from both sides of the drilled hole in the intake manifold.
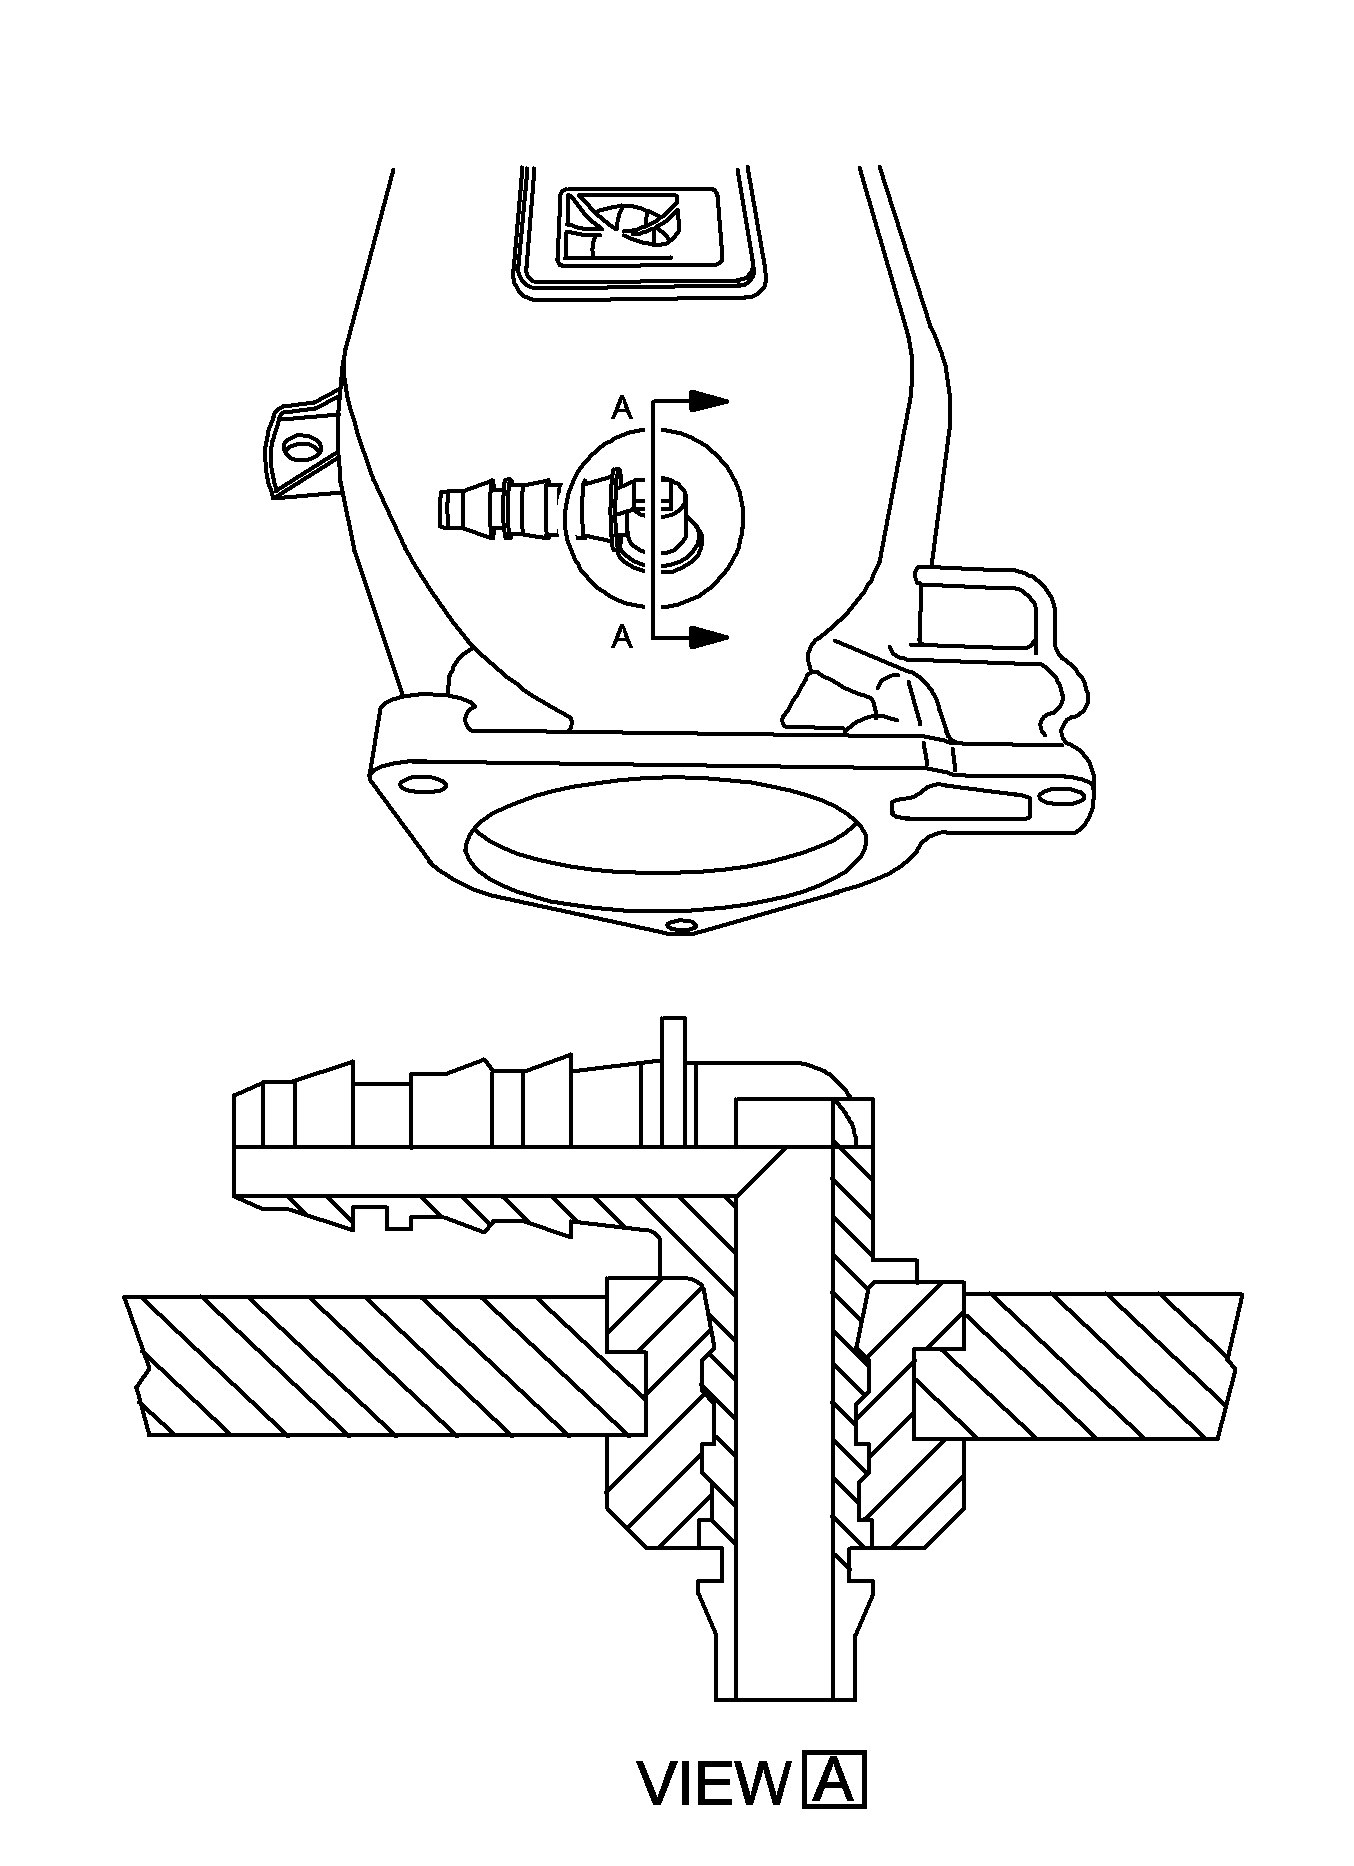
- Install grommet from kit, P/N 15207750, in intake manifold cover. Use water or a drop of engine oil to ease installation of grommet in cover. Ensure grommet has been fully seated on inside of intake manifold.
- Install 90° plastic vacuum fitting from kit, P/N 15207750, into grommet.
- Clean intake manifold cover before installing to prevent metal filings from entering the engine.
- Install the throttle body gasket to the plenum.
- Install the throttle body to the plenum.
- Install the throttle body nuts.
- Attach the heater and vent hose to the throttle body.
- Install the intake plenum and intake plenum bolts. Finger tighten the bolts.
- Install the EGR pipe bolts on 2000-2003 vehicles.
- Install the intake plenum bolts.
- Install the front manifold runner and tighten the clamps.
- Install the intake runner bolts.
- Remove primary PCV hose from throttle body.
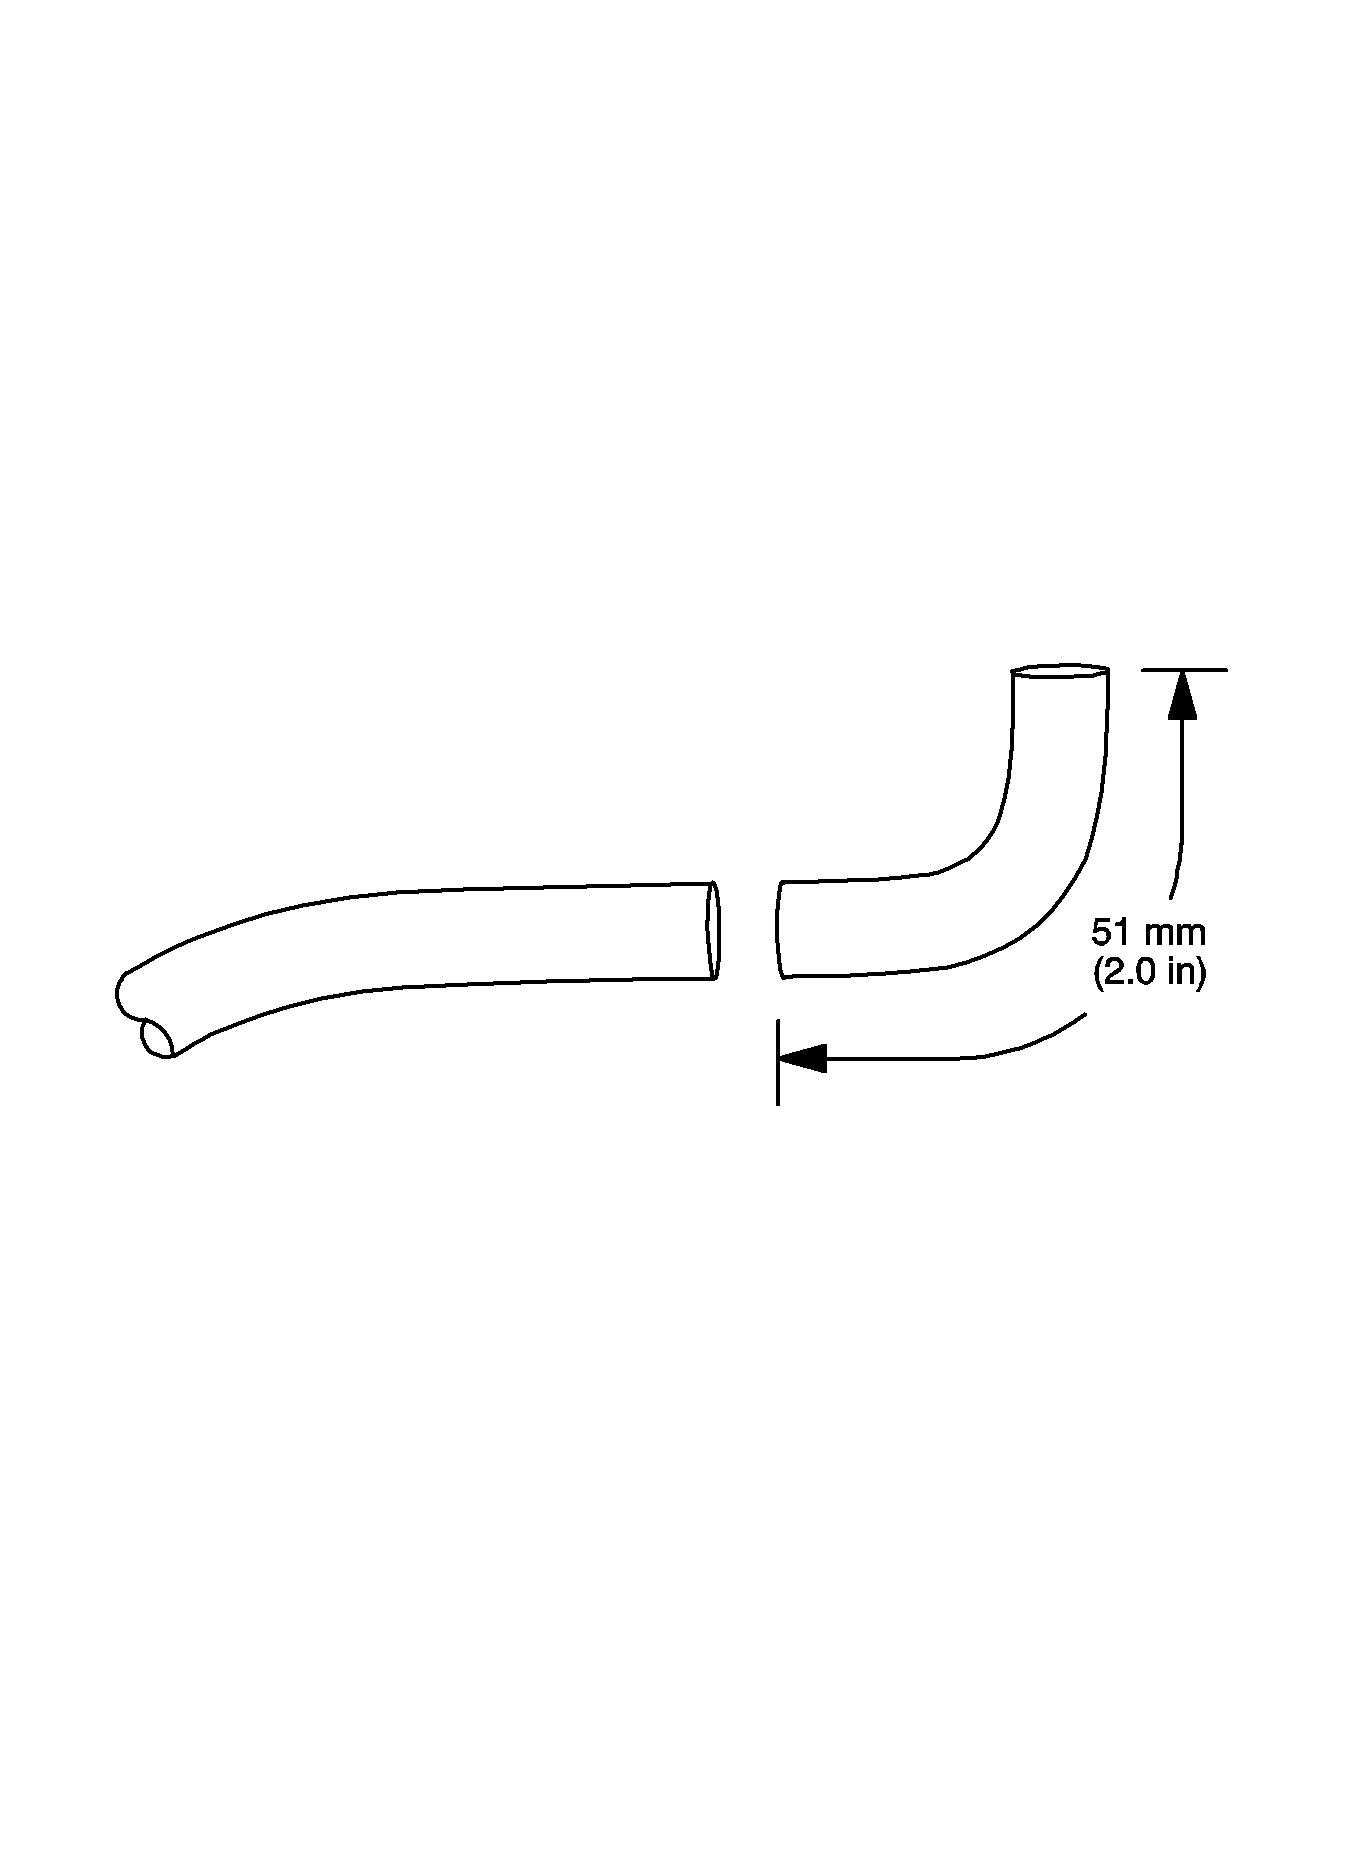
- Cut the primary PCV hose to length as shown. Remove 51 mm (2.0 in) from the throttle body end of the hose.
- Install primary PCV hose on 90° fitting on intake manifold.
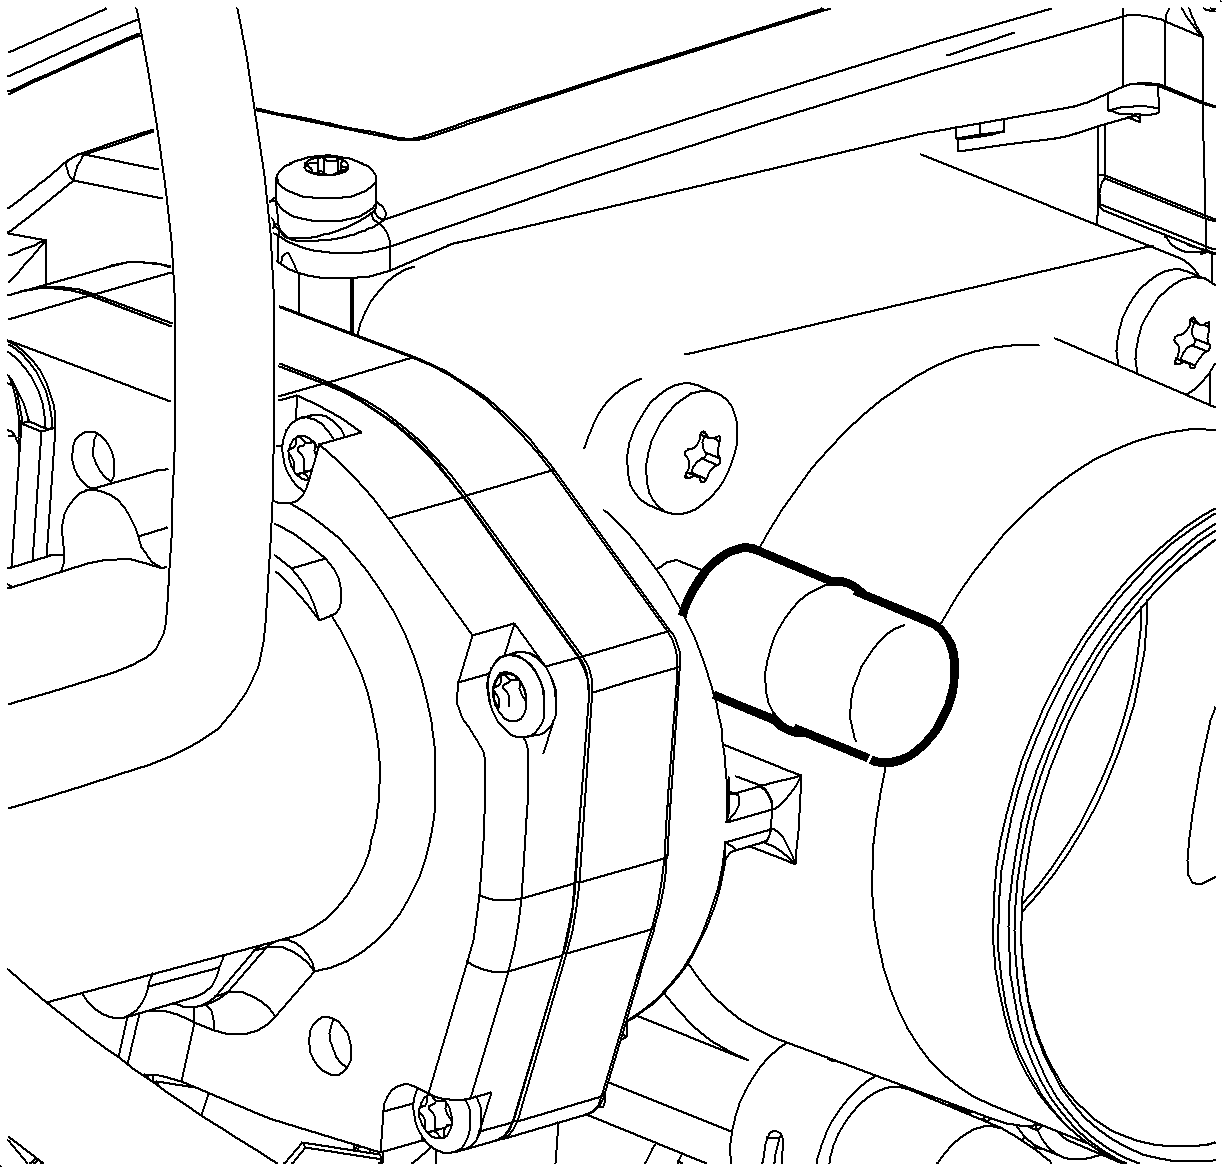
- Install vacuum plug from kit, P/N 15207750, on original primary PCV fitting on throttle body assembly.
- Connect negative battery cable.
- Verify repair and clear DTCs from ECM.
Caution: Do not allow smoking or the use of open flames in the area where work on the fuel or EVAP system is taking place. Anytime work is being done on the fuel system, disconnect the negative battery cable, except for those tests where battery voltage is required.
Caution: Before servicing any electrical component, the ignition key must be in the OFF or LOCK position and all electrical loads must be OFF, unless instructed otherwise in these procedures. If a tool or equipment could easily come in contact with a live exposed electrical terminal, also disconnect the negative battery cable. Failure to follow these precautions may cause personal injury and/or damage to the vehicle or its components.
| 1.1. | Record all of the customer's radio station presets. |
| 1.2. | Turn off all the lamps and accessories. |
| 1.3. | Make sure the ignition switch is in the OFF position. |
| 1.4. | Remove the battery ground (negative) cable and bolt from the battery. |
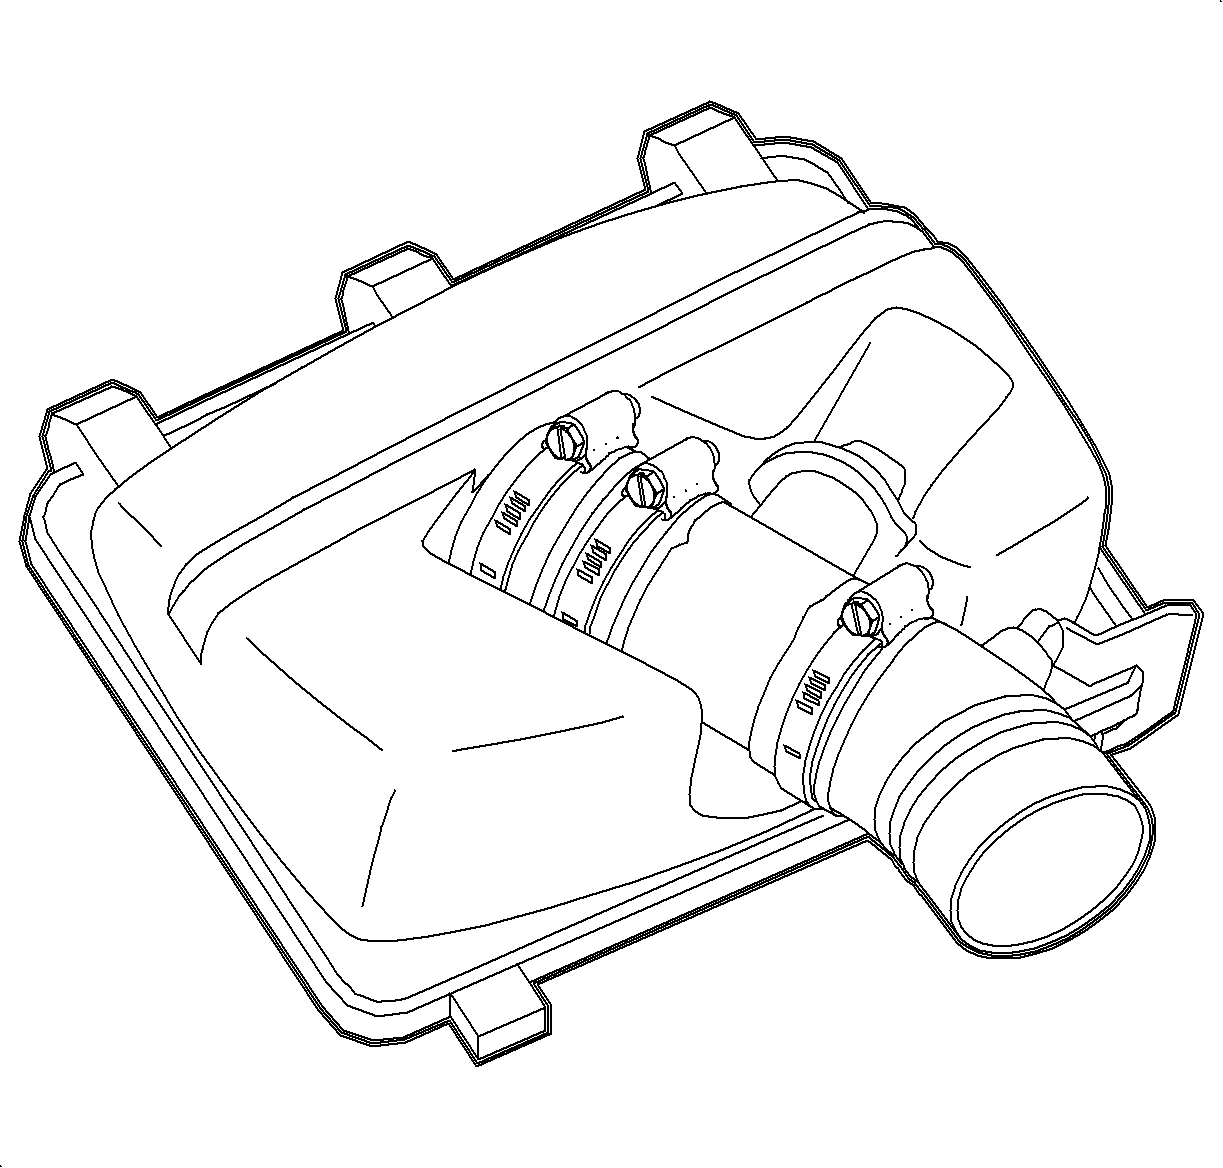
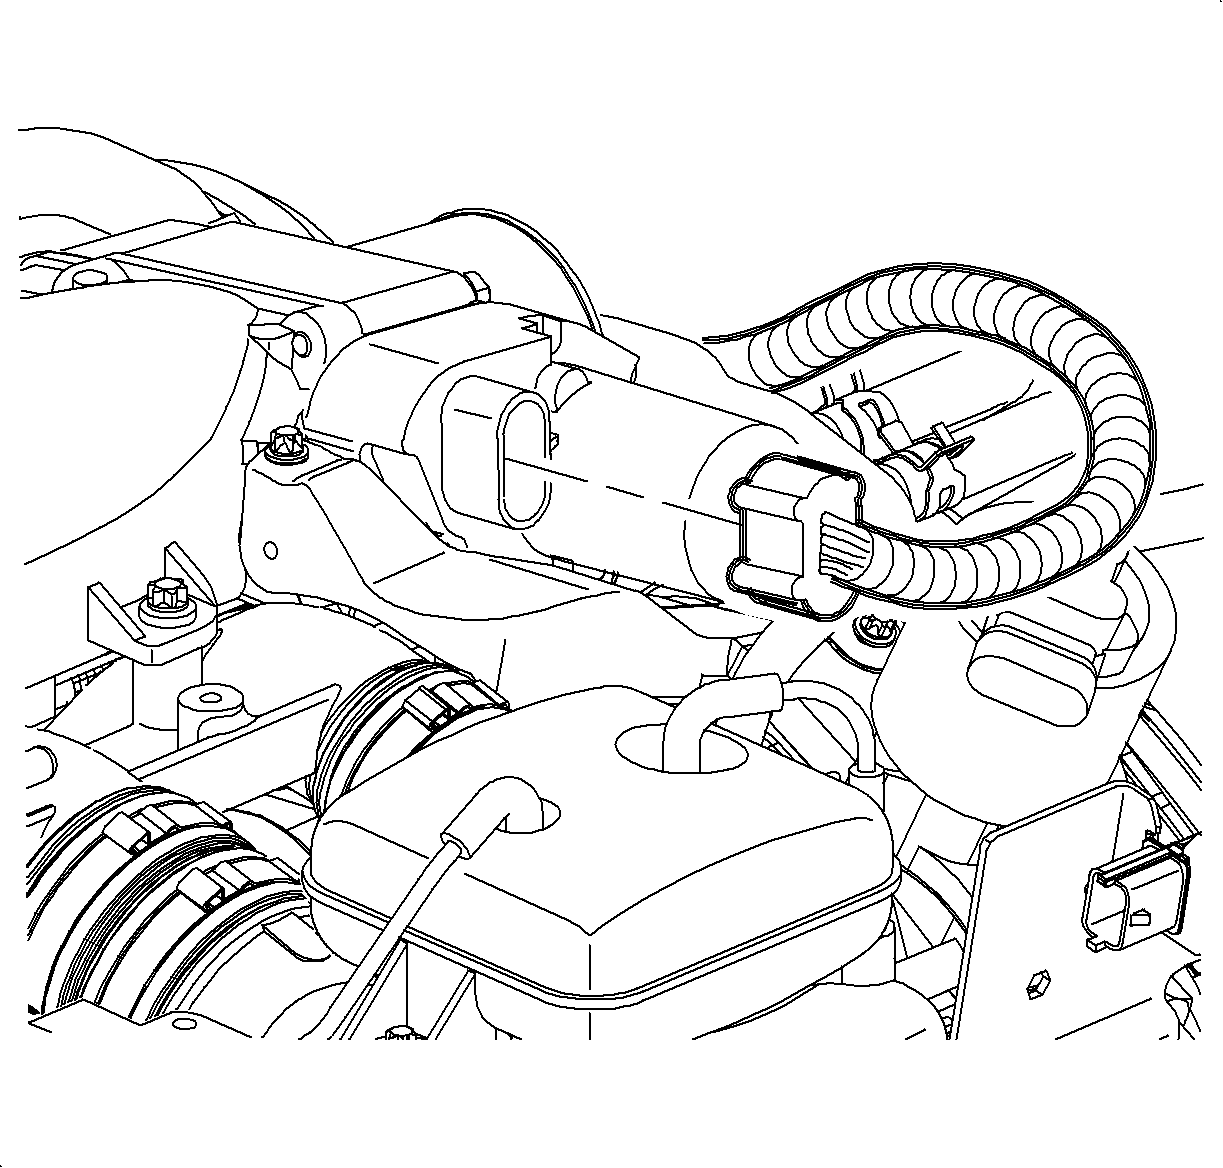
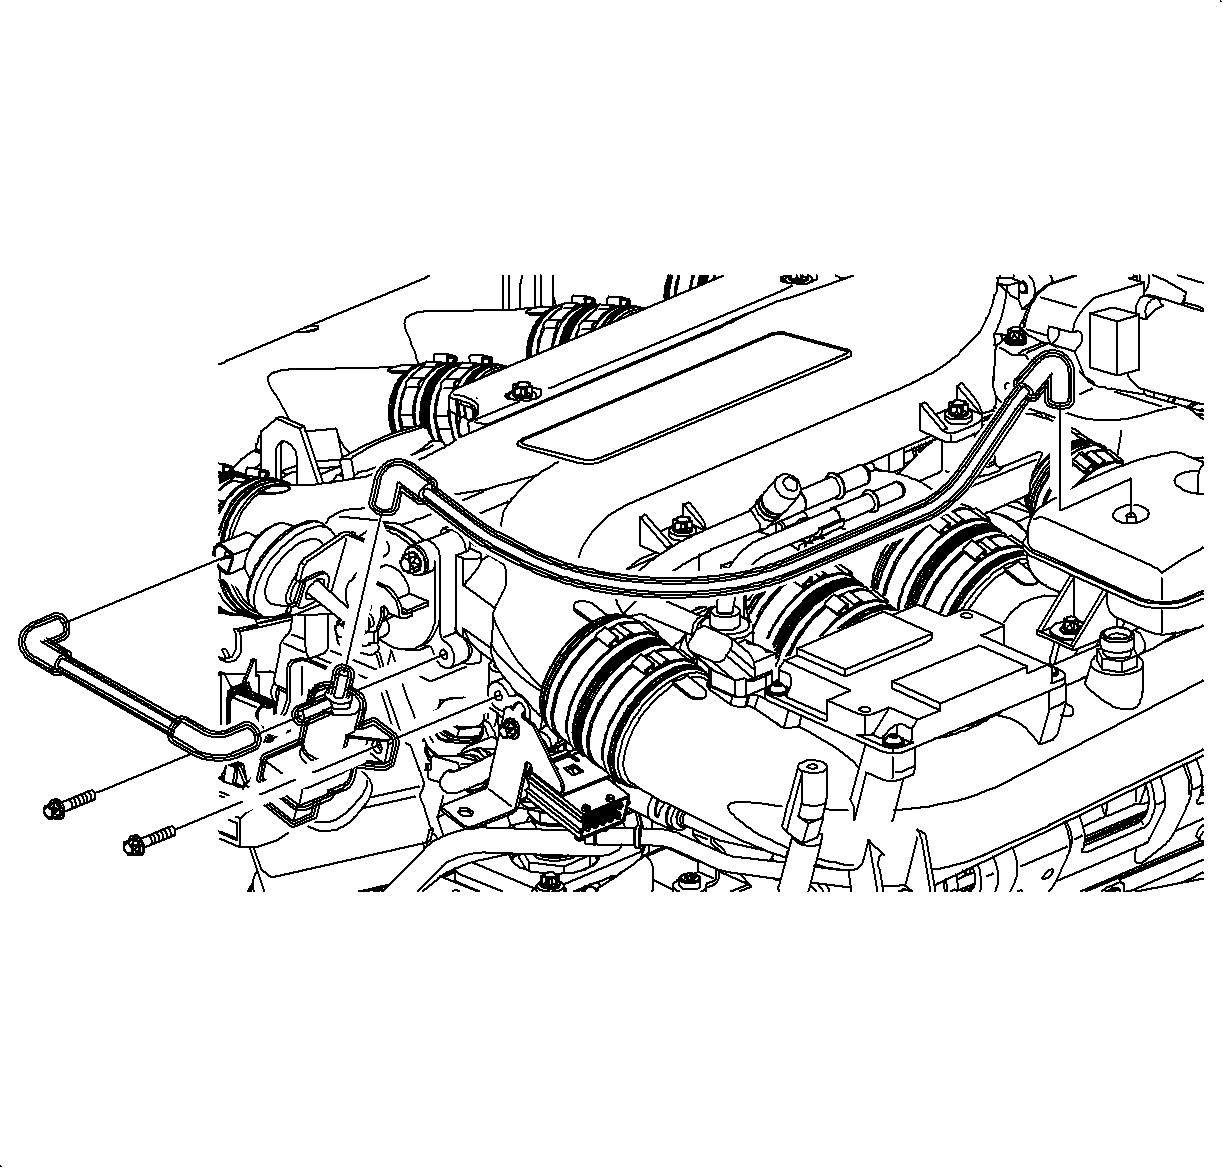
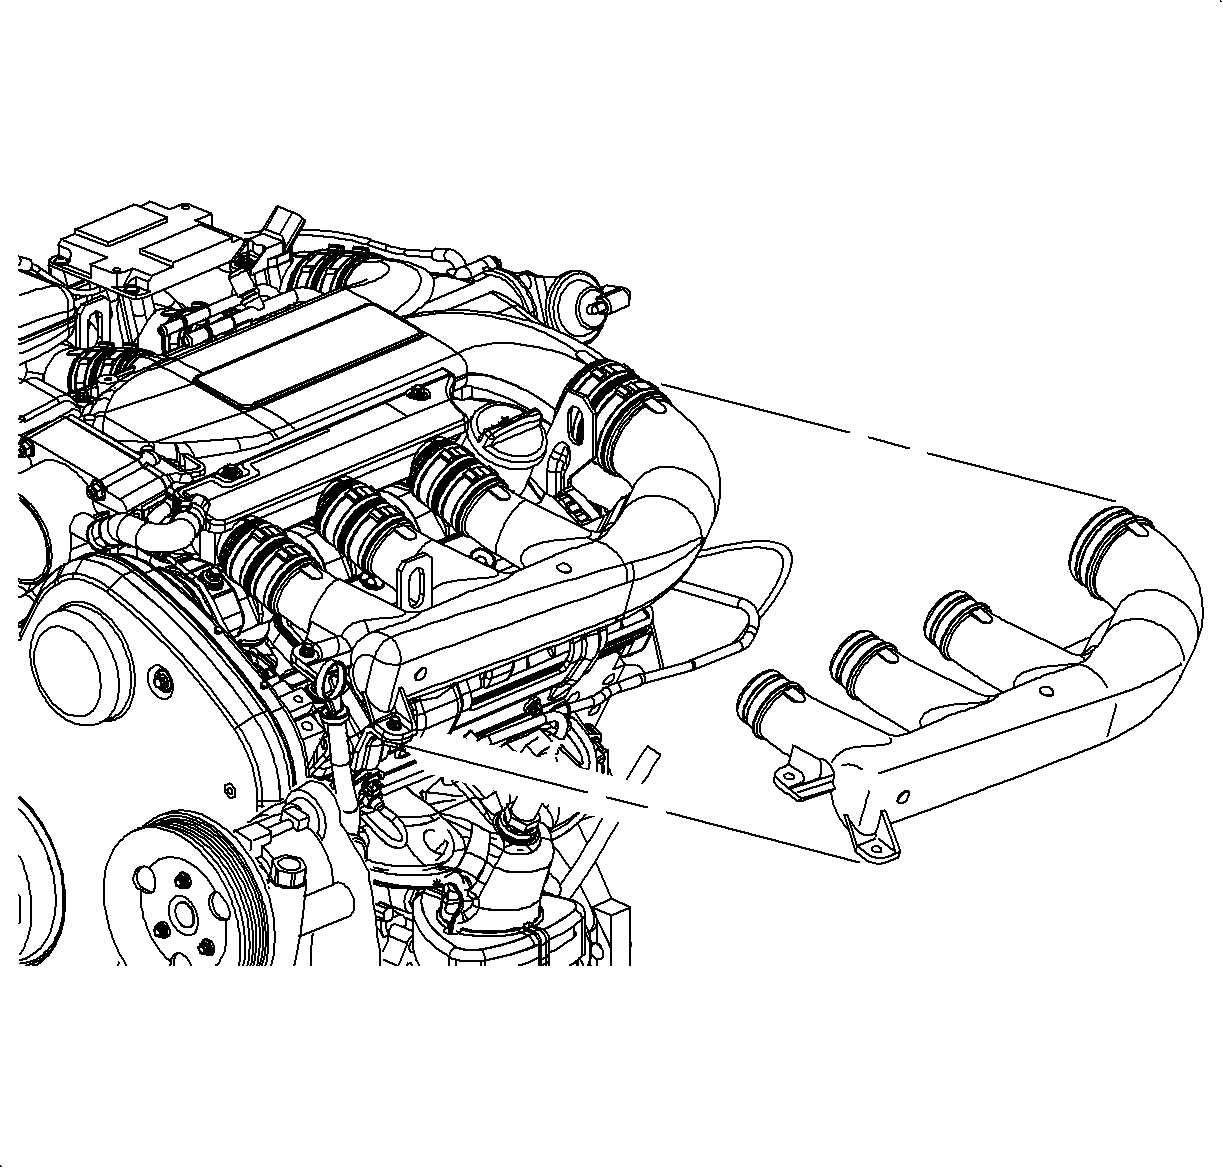
Notice: Mask off the ports to the intake manifold spacer. Failure to mask off the ports may allow foreign objects to enter the engine resulting in severe damage to the engine.
Important: It is not necessary to remove the rear intake runner.
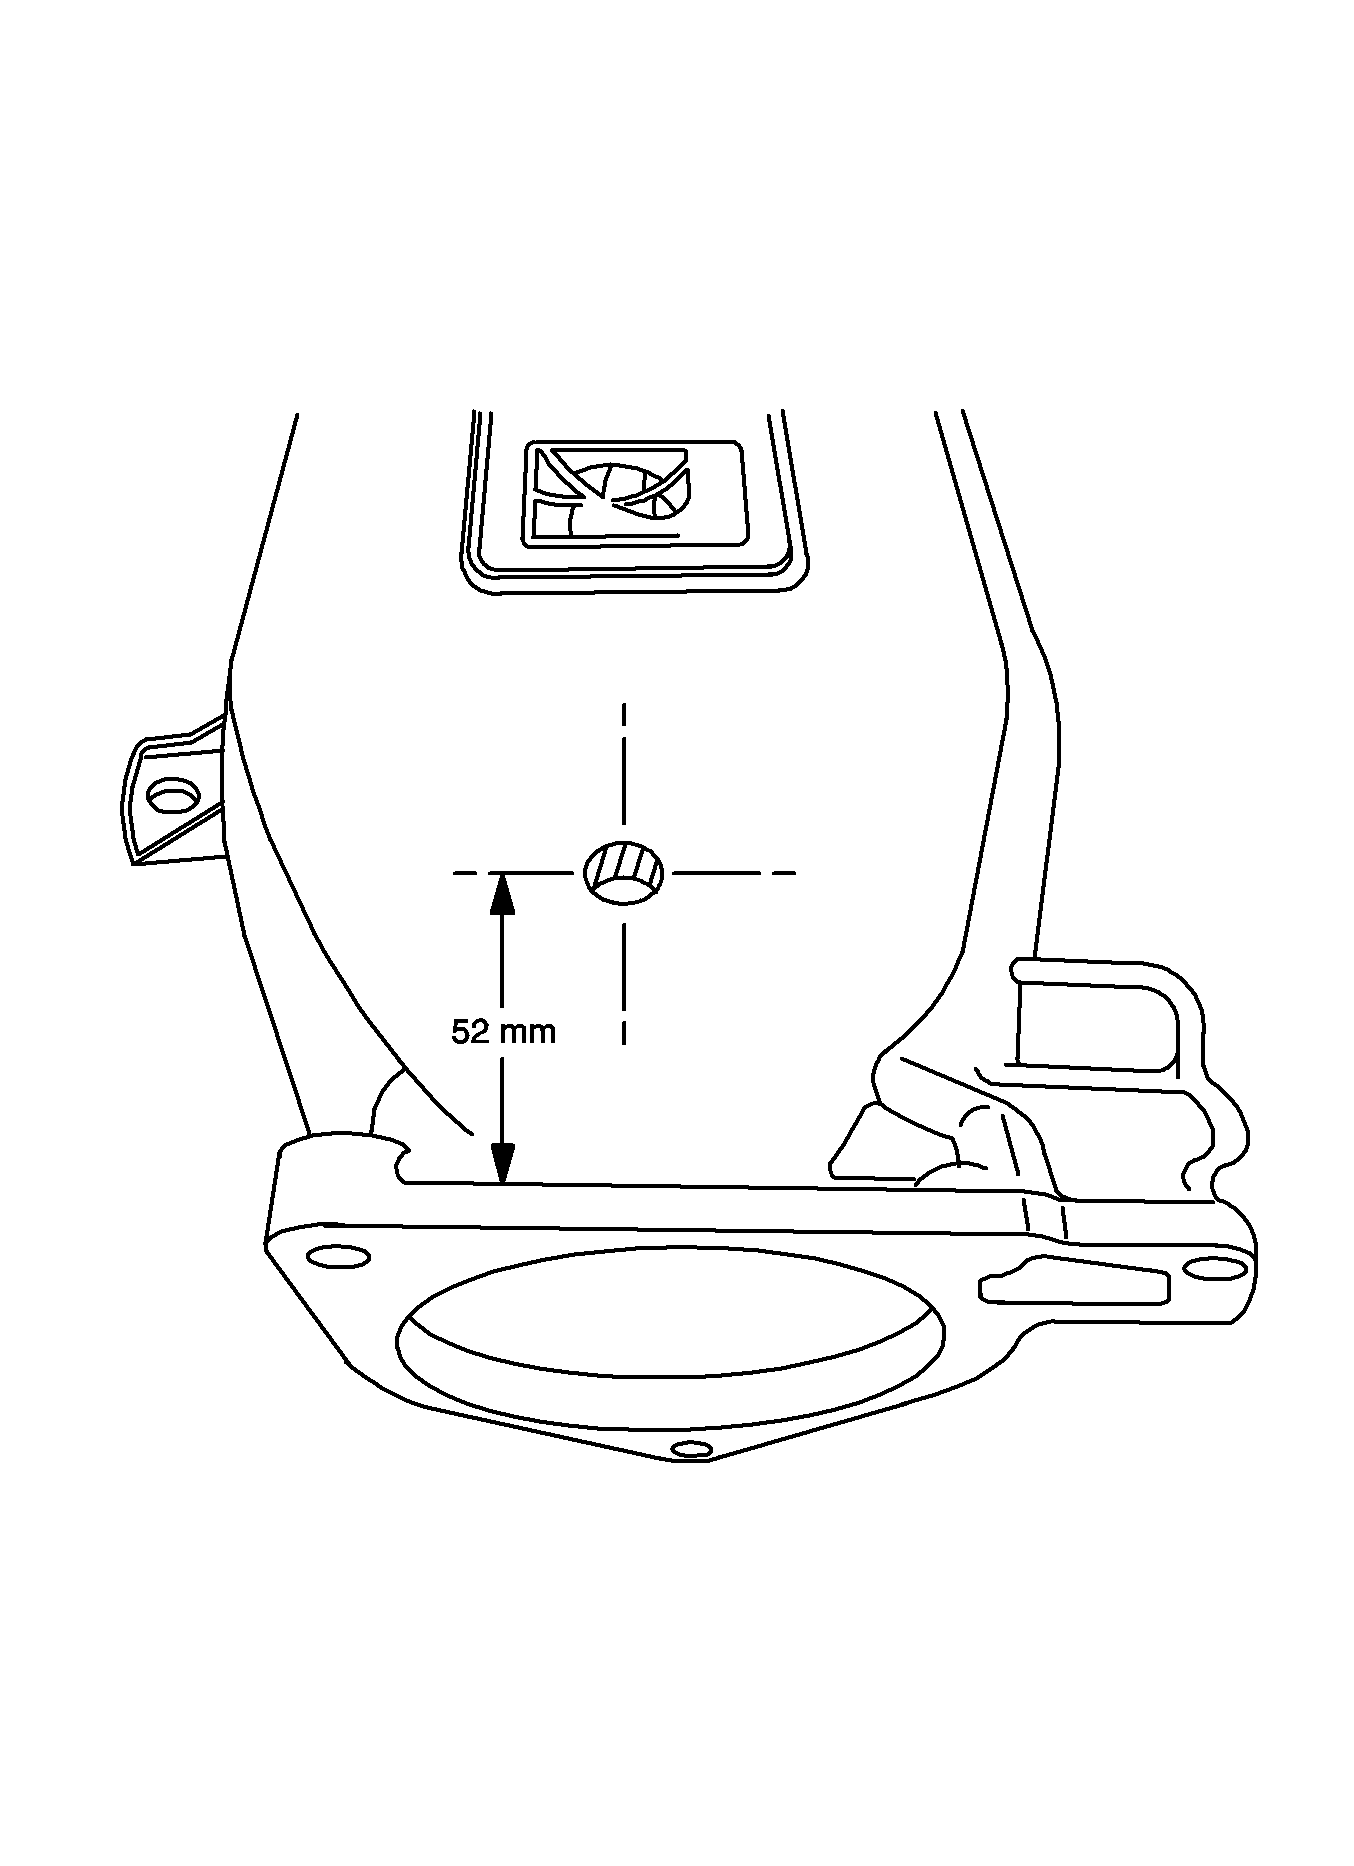
Important: Use metric 11 mm drill bit. This dimension is critical for grommet retention.

Notice: Use the correct fastener in the correct location. Replacement fasteners must be the correct part number for that application. Fasteners requiring replacement or fasteners requiring the use of thread locking compound or sealant are identified in the service procedure. Do not use paints, lubricants, or corrosion inhibitors on fasteners or fastener joint surfaces unless specified. These coatings affect fastener torque and joint clamping force and may damage the fastener. Use the correct tightening sequence and specifications when installing fasteners in order to avoid damage to parts and systems.
Tighten
Tighten the throttle body nuts to 8 N·m (71 in-lbs).
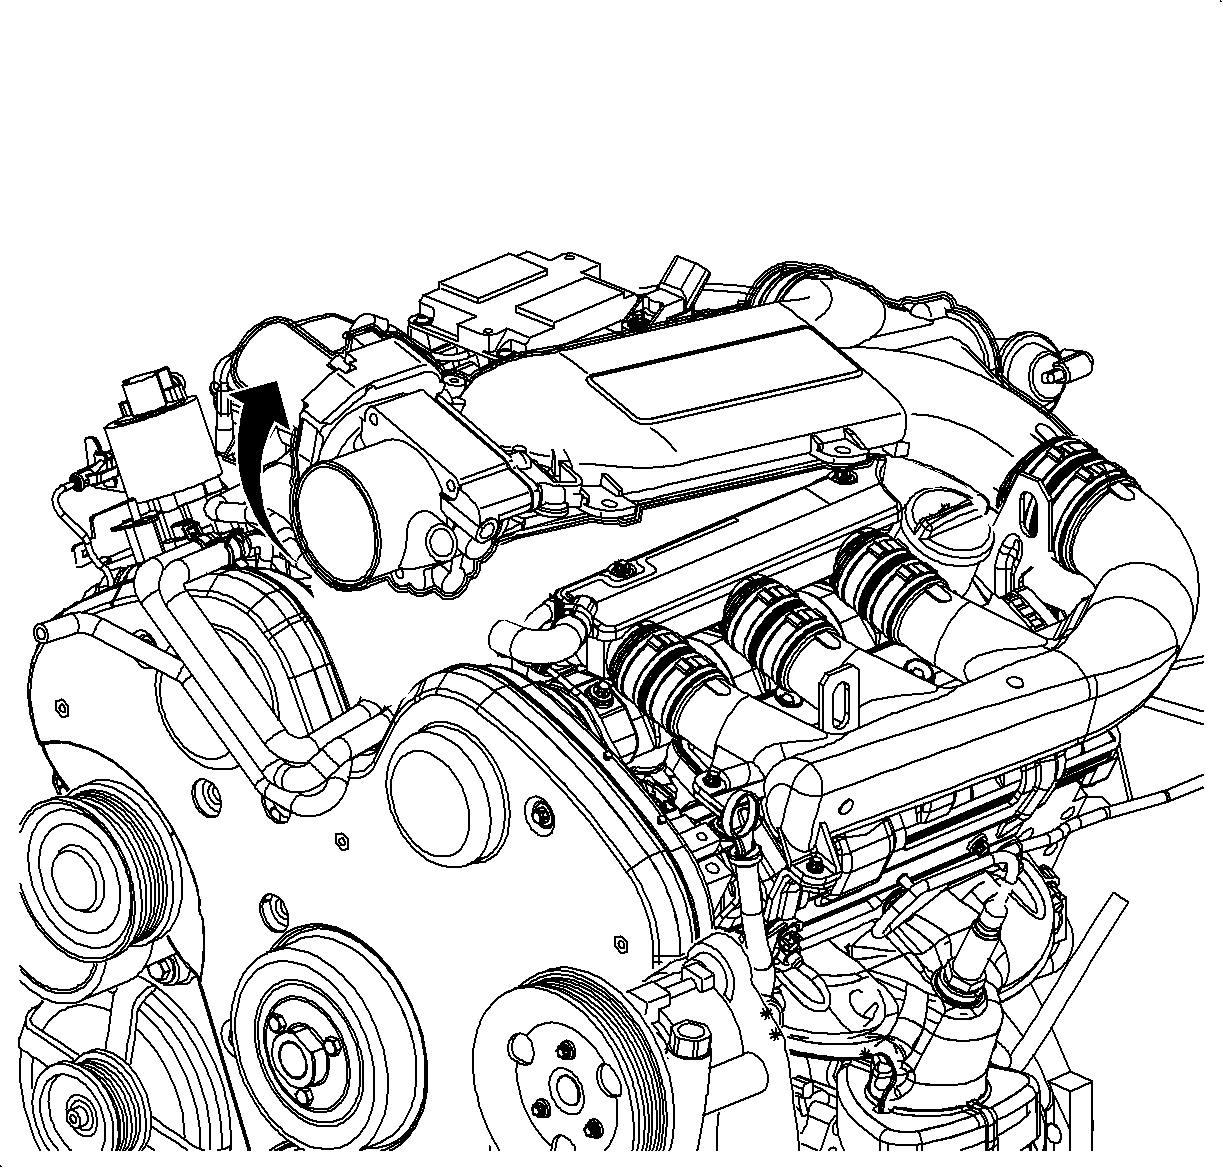
Tighten
Tighten the EGR pipe bolts to 25 N·m (18 ft-lbs).
Tighten
Tighten the intake plenum bolts to 8 N·m (71 in-lbs).

Tighten
Tighten the intake manifold runner bolts to 8 N·m (71 in-lbs).
| Important: Clean any existing corrosion from the battery terminal bolt flange and the battery cable end. |
| 33.1. | Install the battery ground (negative) cable and bolt to the battery. |
Tighten
Tighten the battery terminal bolt to 17 N·m (13 lb-ft).
| 33.2. | Program all of the customer's radio station presets and set the radio clock to the current time. |
Parts Information
Part Number | Description |
|---|---|
15207750 | Tube pkg - PCV |
Claim Information
To receive credit for this repair during the warranty coverage period, submit a claim through the Saturn Dealer System for J6020 (Hose, Crankcase Ventilation - Replace). An Add Time has been included for re-routing the PCV hose to the Intake Manifold. This Add Time can only be used once per vehicle.
