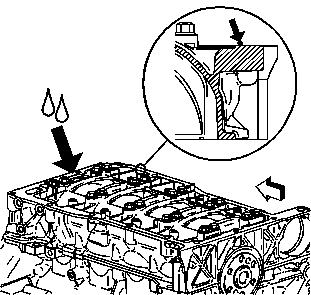
- Make sure that the oil pan and mounting surface on the lower crankcase are free of all oil and debris.
- Apply a 2 mm bead of GM P/N 12346286 (Canadian P/N 10953472) or equivalent around the perimeter of the oil pan and the oil suction port opening.
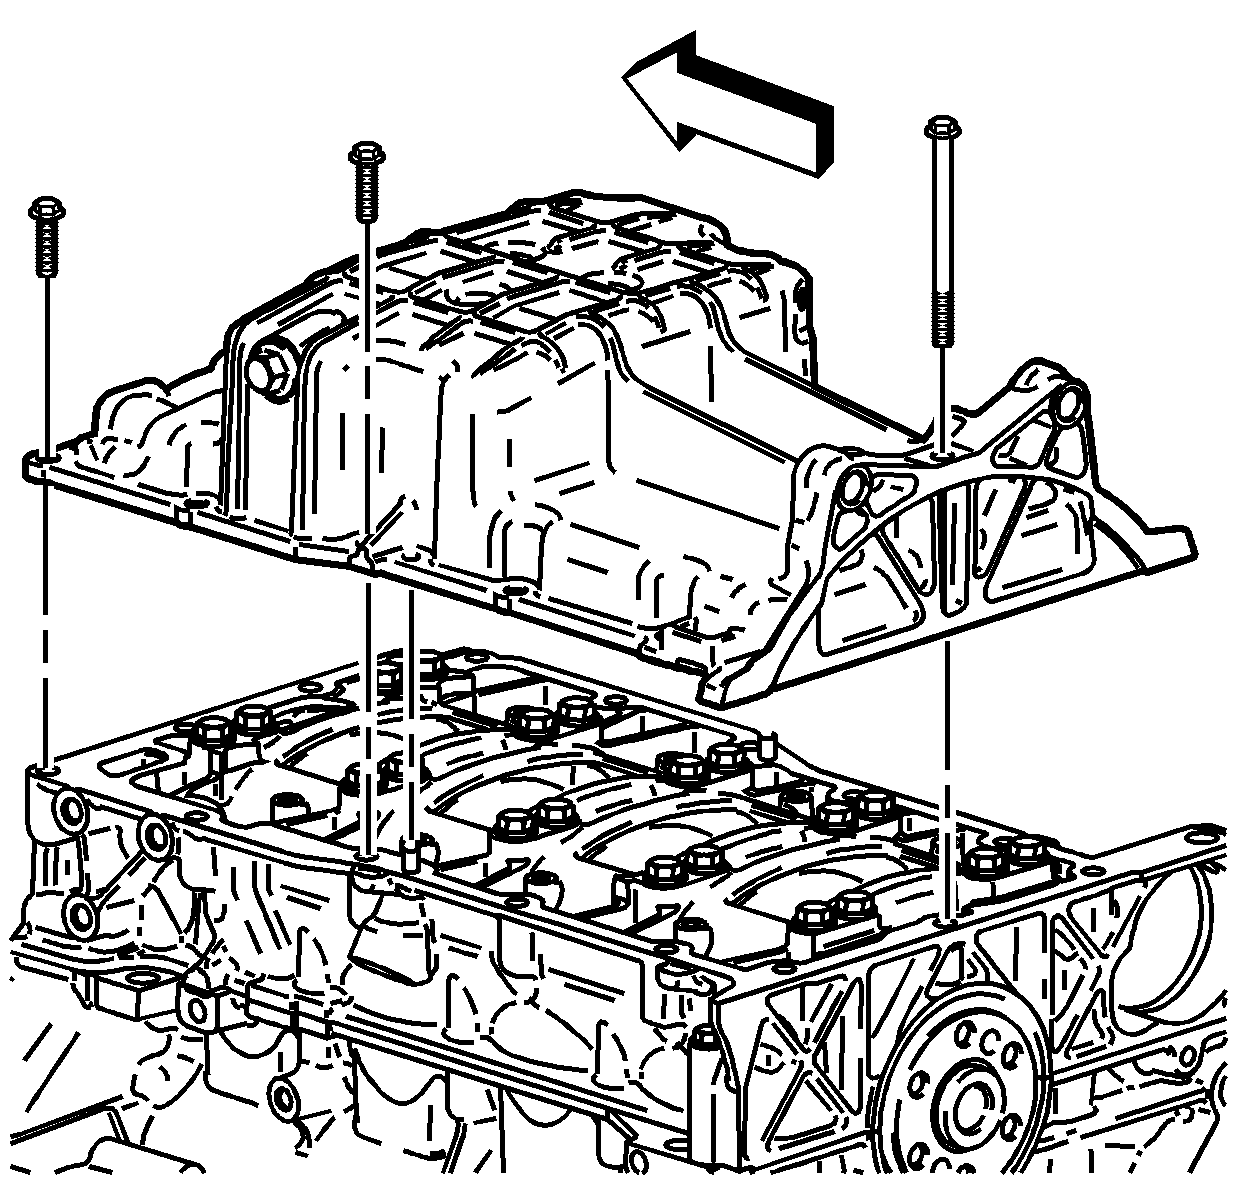
- Install the oil pan.
- Install the oil pan bolts.
Notice: Use the correct fastener in the correct location. Replacement fasteners must be the correct part number for that application. Fasteners requiring replacement or fasteners requiring the use of thread locking compound or sealant are identified in the service procedure. Do not use paints, lubricants, or corrosion inhibitors on fasteners or fastener joint surfaces unless specified. These coatings affect fastener torque and joint clamping force and may damage the fastener. Use the correct tightening sequence and specifications when installing fasteners in order to avoid damage to parts and systems.
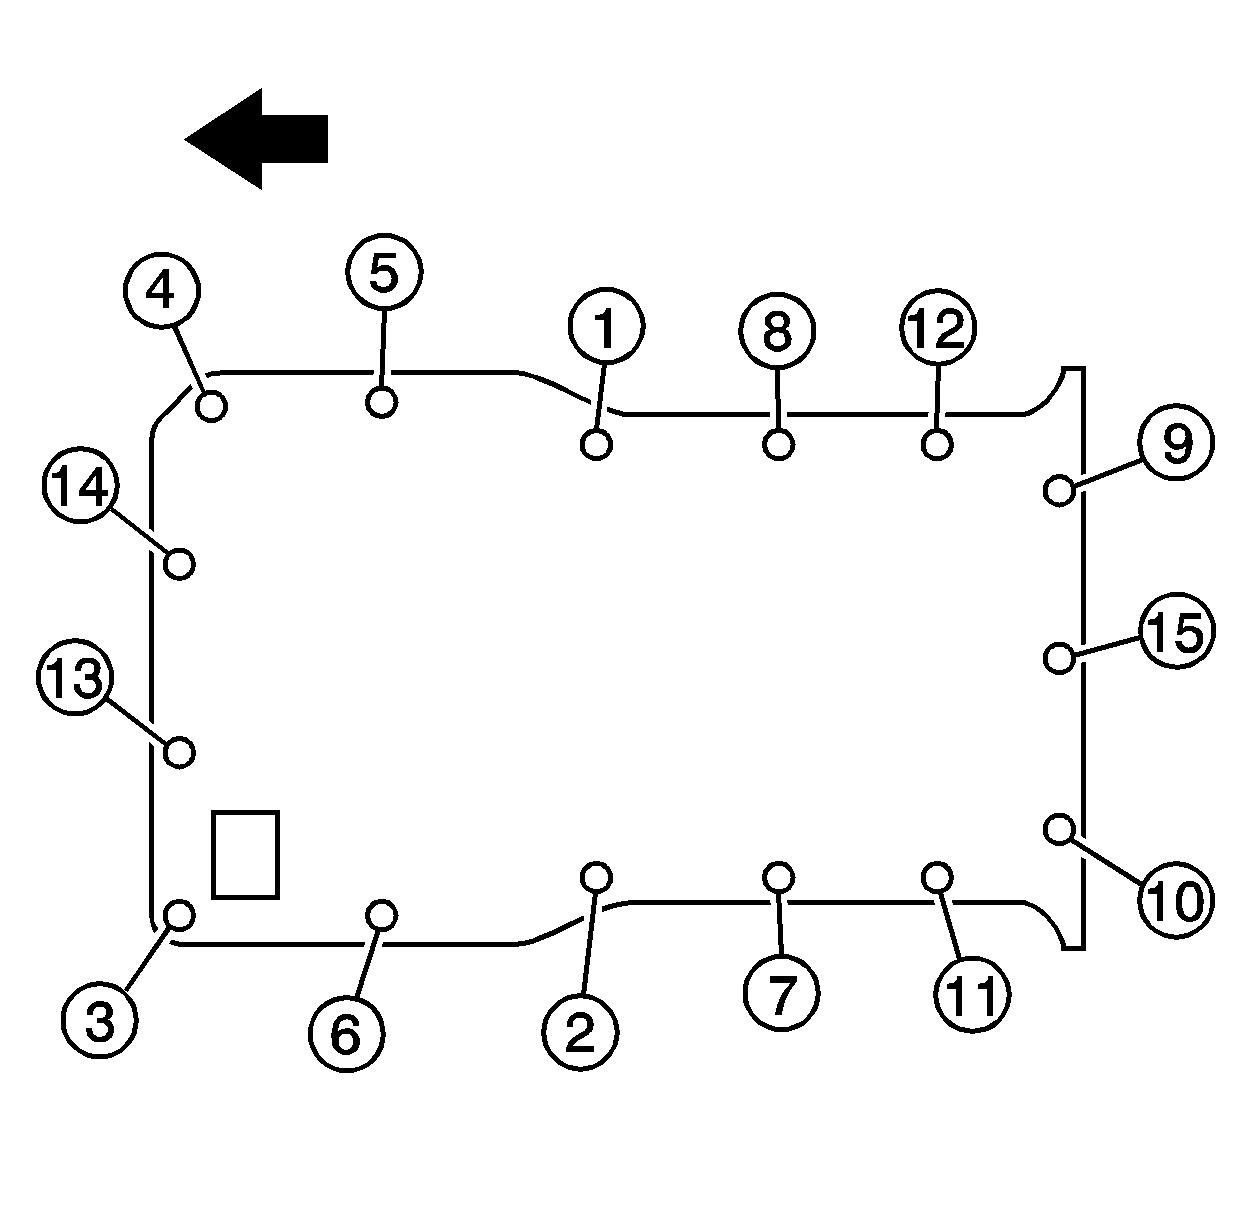
Tighten
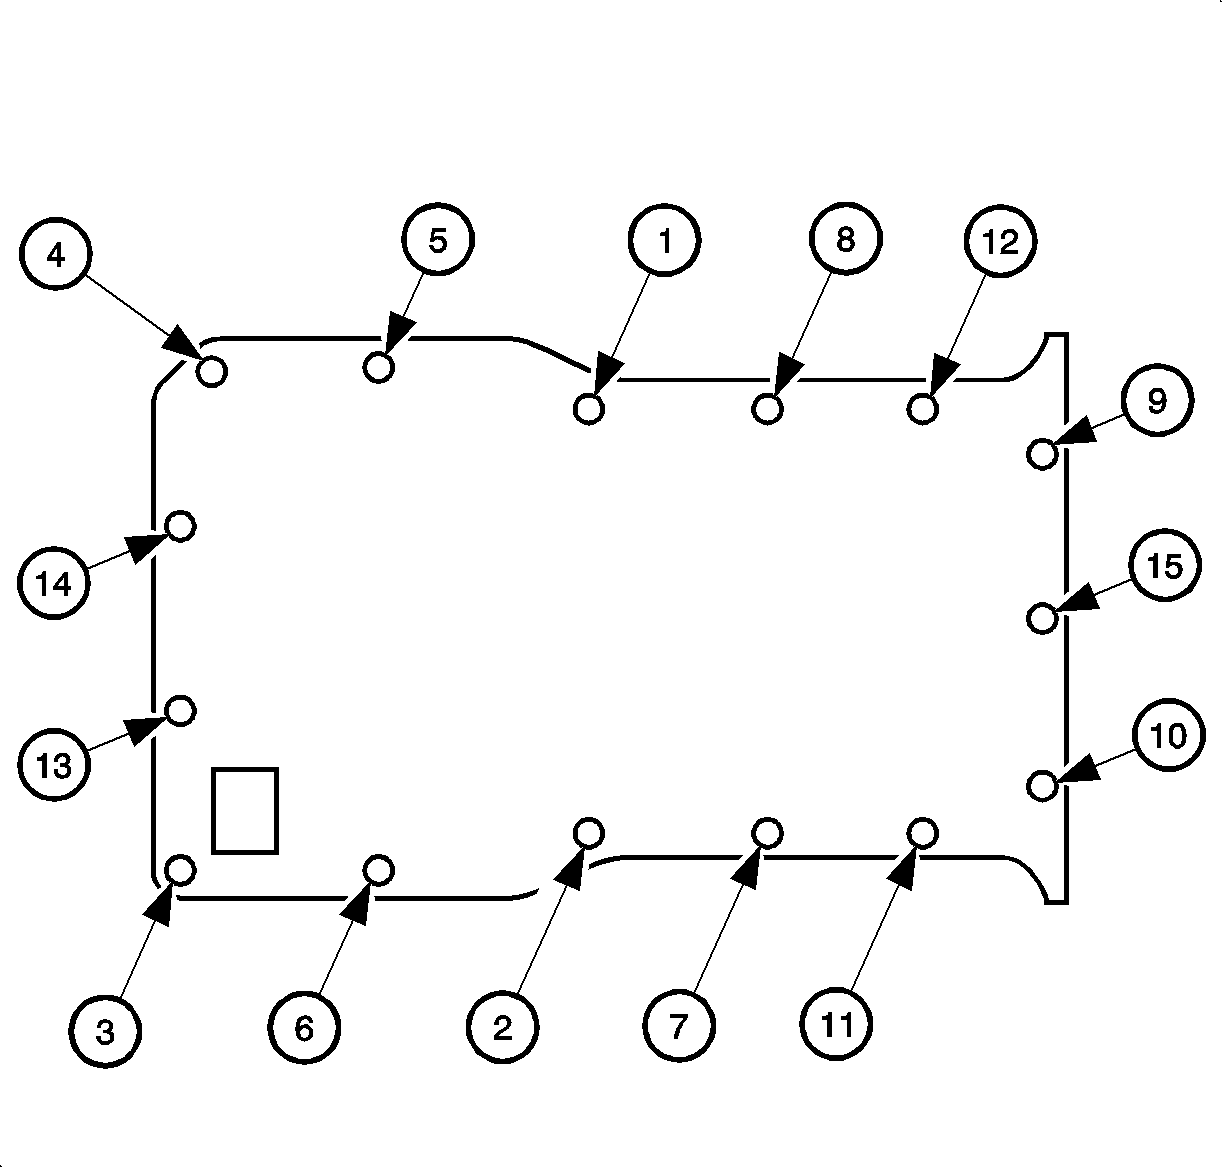
Tighten the oil pan bolts to 25 N·m
(18 lb ft) in sequence.
- Make sure that the oil pan and mounting surface on the lower crankcase are free of all oil and debris.
- Apply a 2 mm (0.08 in) bead of RTV P/N 12346286 around the perimeter of the oil pan and suction port opening. Do not apply more than a 2 mm (0.08 in) bead.
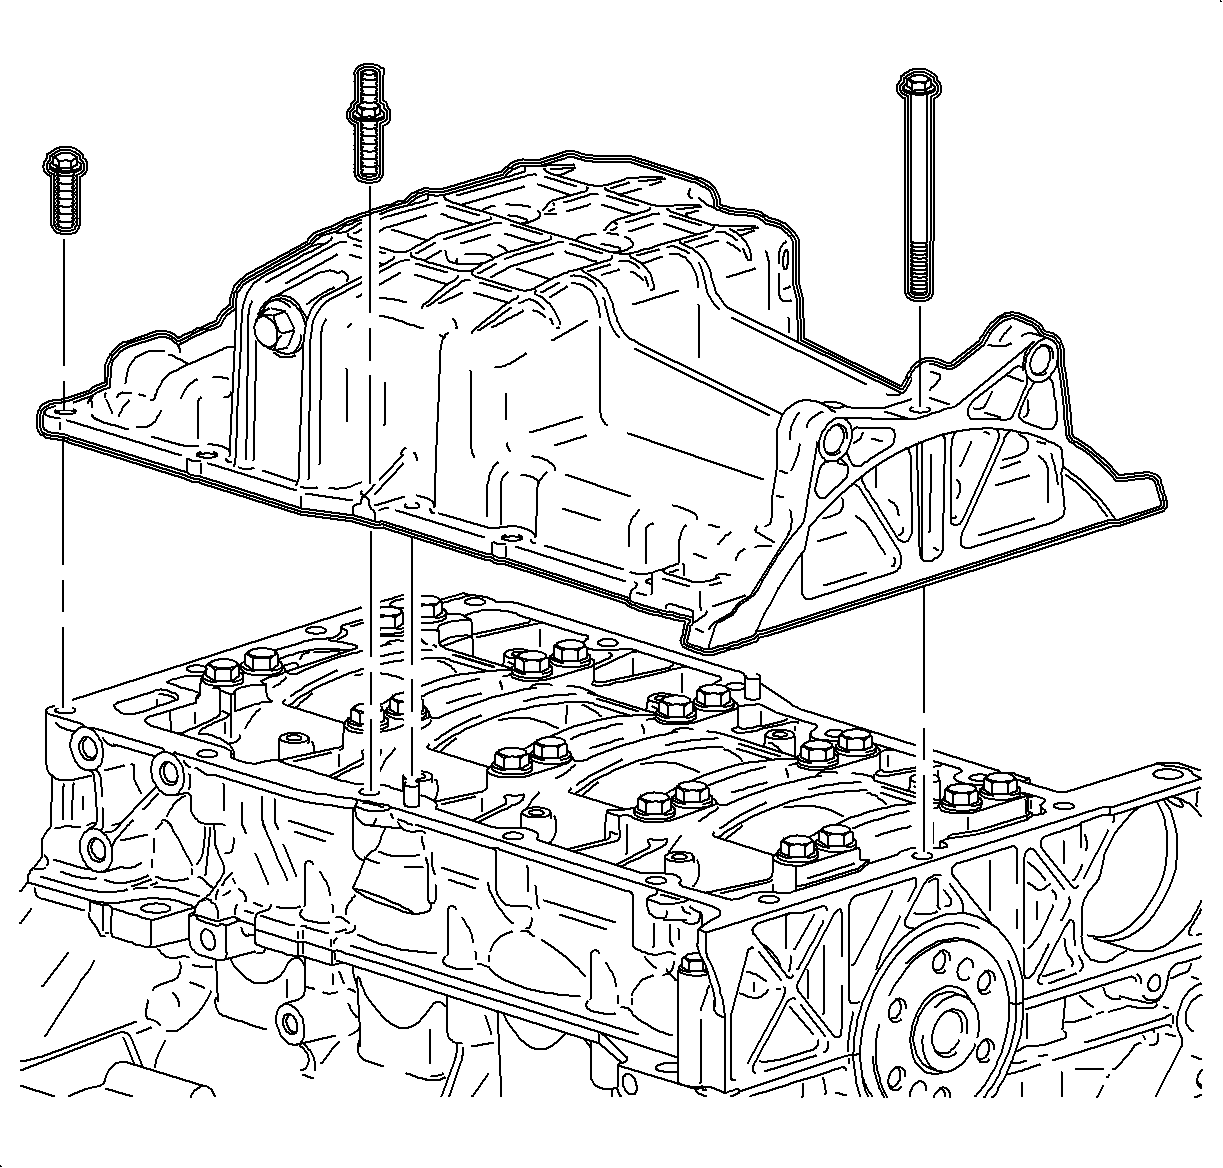
- Install the oil pan.
- Install the oil pan bolts finger tight then tighten using the torque sequence.
Important: Ensure that there is not any excessive RTV around the oil pickup gallery flange area.
Tighten
Tighten the oil pan-to-block bolts to 25 N·m (18 lb ft).
