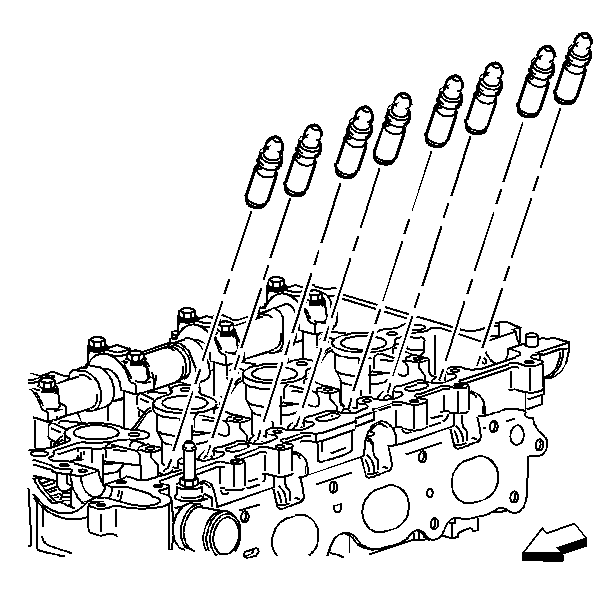
- Install the hydraulic element lash adjusters into their bores in the cylinder head.
- Lubricate the hydraulic lash adjusters with GM P/N United States 12345501, GM P/N Canada 992704.
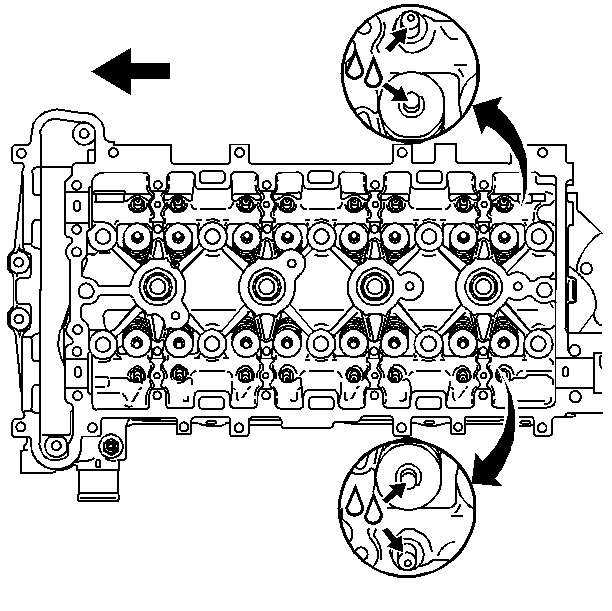
- Lubricate the valve tips.
- Position the roller followers on the tip of the valve stem and on the lash adjustor. Lubricate roller followers with GM P/N United States 12345501, GM P/N Canada 992704.
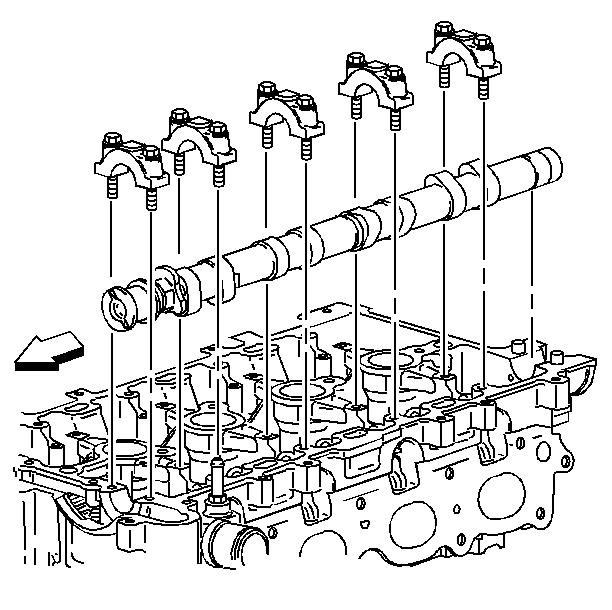
- Set the intake camshaft on top of the roller followers in the camshaft bearing journals. Lubricate with GM P/N United States 12345501, GM P/N Canada 992704.
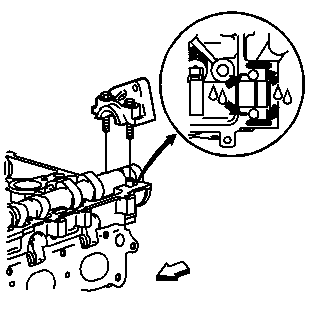
- Install the camshaft bearing caps and hand start the camshaft cap bolts.
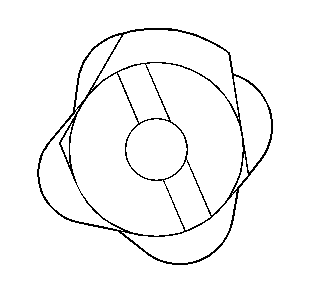
- The timing chain sprocket alignment notch should be oriented to the eleven o'clock position.
- Tighten the camshaft bearing cap bolts in increments of three turns until they are seated.
- Apply anerobic sealer, 5 mm (0.197 in) bead, GM P/N United States 1052942, GM P/N Canada 10953466 to rear intake camshaft bearing cap.
- Install the rear intake camshaft bearing cap bolts.
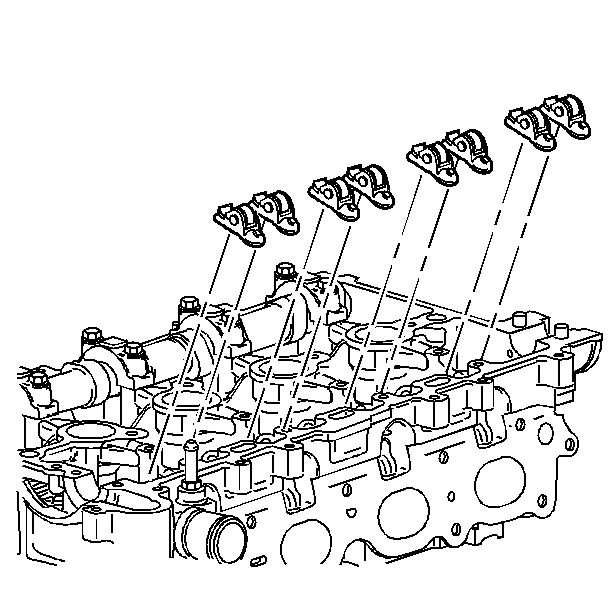
Important: Used roller followers must be returned to the original position on the camshaft. If the camshaft is being replaced, the roller followers actuated by the camshaft must also be replaced.
Notice: Use the correct fastener in the correct location. Replacement fasteners must be the correct part number for that application. Fasteners requiring replacement or fasteners requiring the use of thread locking compound or sealant are identified in the service procedure. Do not use paints, lubricants, or corrosion inhibitors on fasteners or fastener joint surfaces unless specified. These coatings affect fastener torque and joint clamping force and may damage the fastener. Use the correct tightening sequence and specifications when installing fasteners in order to avoid damage to parts and systems.
Tighten
Tighten the camshaft bearing caps to 10 N·m (89 lb in).
Tighten
Tighten the bolts to 25 N·m (18 lb ft).
- Install the hydraulic element lash adjusters into their bores in the cylinder head.
- Lubricate the hydraulic lash adjusters with engine oil supplement.
- Lubricate the valve tips with engine oil supplement.
- Position the roller followers on the tip of the valve stem and on the lash adjuster. Lubricate the roller followers with engine oil supplement.
- Set the intake camshaft on top of the roller followers in the camshaft bearing journals and lobes. Lubricate with engine oil supplement.
- Install the camshaft bearing caps and hand start the camshaft cap bolts.
- The timing chain sprocket alignment notch should be oriented to the eleven o'clock position.
- Tighten the camshaft bearing cap bolts in increments of three turns until they are seated.
- Apply Permatex® Anaerobic Gasket Maker 51813, 3.5 mm (0.138 in) bead, to rear intake camshaft bearing cap.
- Install the rear intake camshaft bearing cap bolts.


Important: Used roller followers must be returned to the original position on the camshaft. If the camshaft is being replaced, the roller followers actuated by the camshaft must also be replaced.


Notice: Use the correct fastener in the correct location. Replacement fasteners must be the correct part number for that application. Fasteners requiring replacement or fasteners requiring the use of thread locking compound or sealant are identified in the service procedure. Do not use paints, lubricants, or corrosion inhibitors on fasteners or fastener joint surfaces unless specified. These coatings affect fastener torque and joint clamping force and may damage the fastener. Use the correct tightening sequence and specifications when installing fasteners in order to avoid damage to parts and systems.
Tighten
Tighten the camshaft bearing caps to 10 N·m (89 lb in).

Tighten
Tighten the bolts to 25 N·m (18 lb ft).
