For 1990-2009 cars only
Removal Procedure
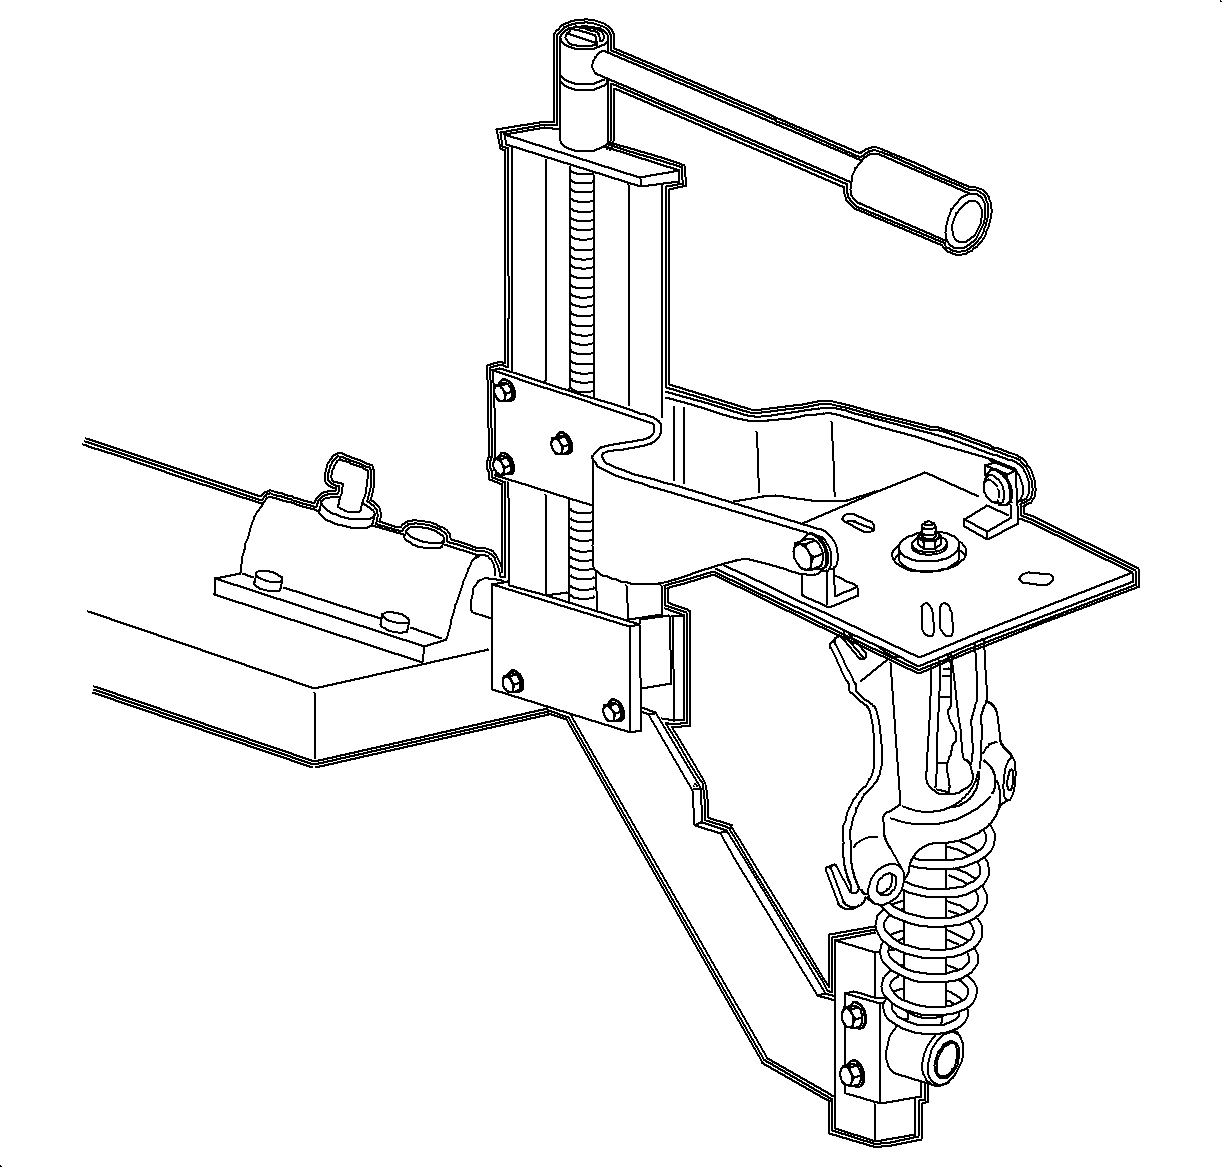
- Mount the SA9155S or equivalent, in the holding fixture.
- Mount the strut assembly to the spring compressor using the SA9155-3
- Compress the spring enough to completely unload the upper spring supports.
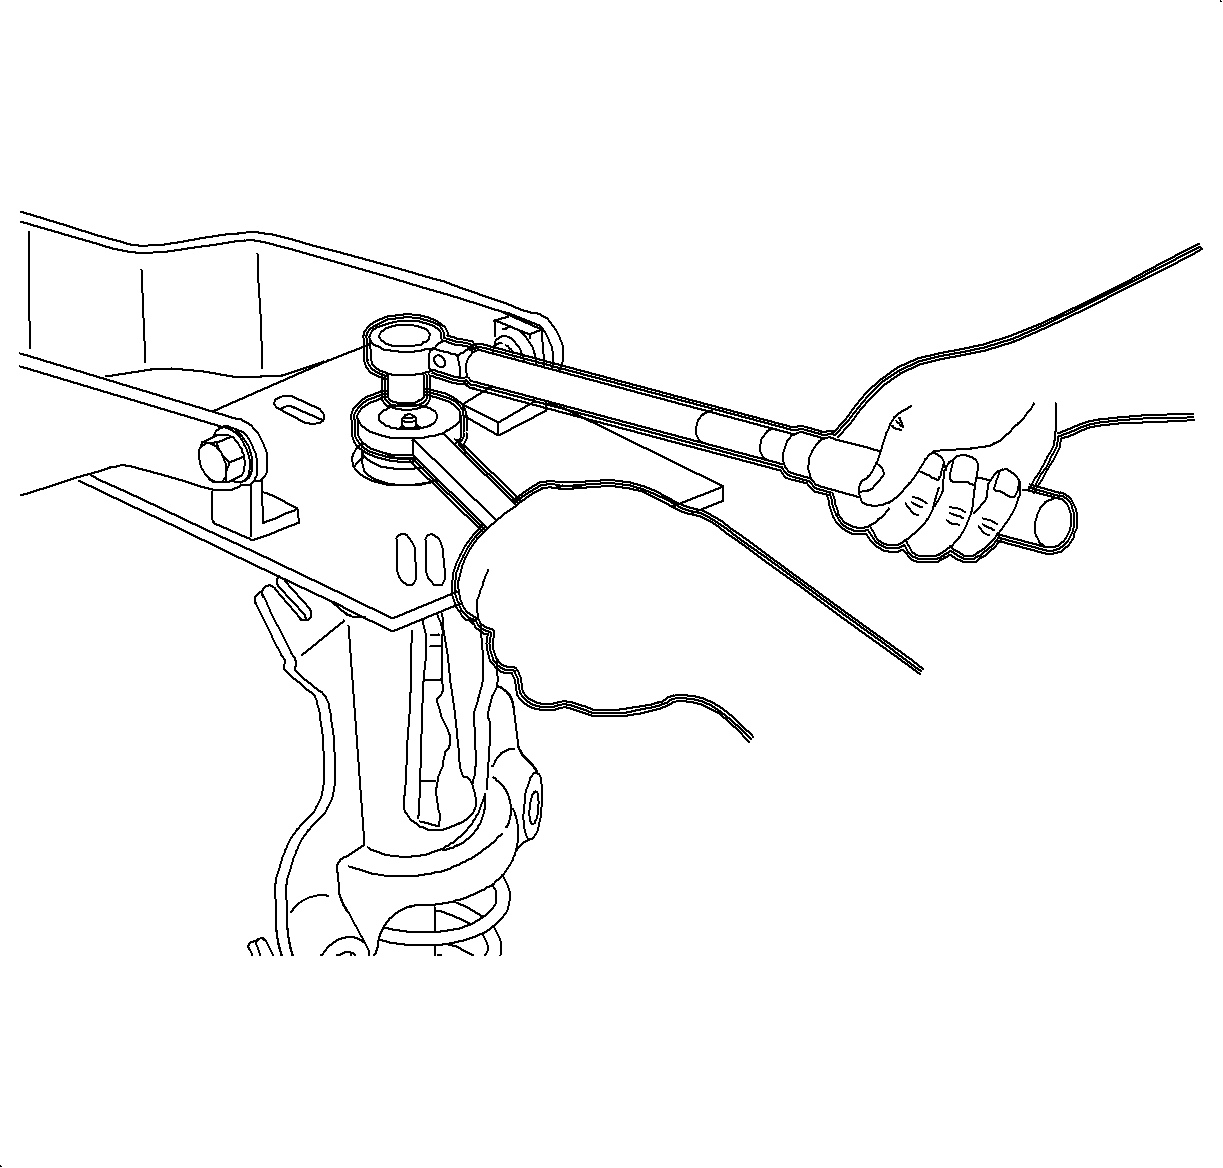
- Remove the shock absorber shaft nut using a wrench, while holding the shaft with a socket.
- Release the spring compressor and remove the carrier assembly.
- Remove the rear suspension support and inspect the inner and outer shock absorber bumpers for cracks or deterioration. Replace if necessary.
- Inspect the bumpers for cracks and deterioration. Replace if necessary.
- Inspect the rear spring upper insulator.
- Extend and retract the strut shock absorber and check for smooth, even resistance.

Notice: Spring is under a high compressive load. Do not remove the strut shaft upper support nut without first relieving the upper and lower spring supports of spring pressure, using the proper spring compressing tool.


Installation Procedure
- Place the shock into the spring compressor.
- Extend the shock absorber shaft to the limit of its travel.
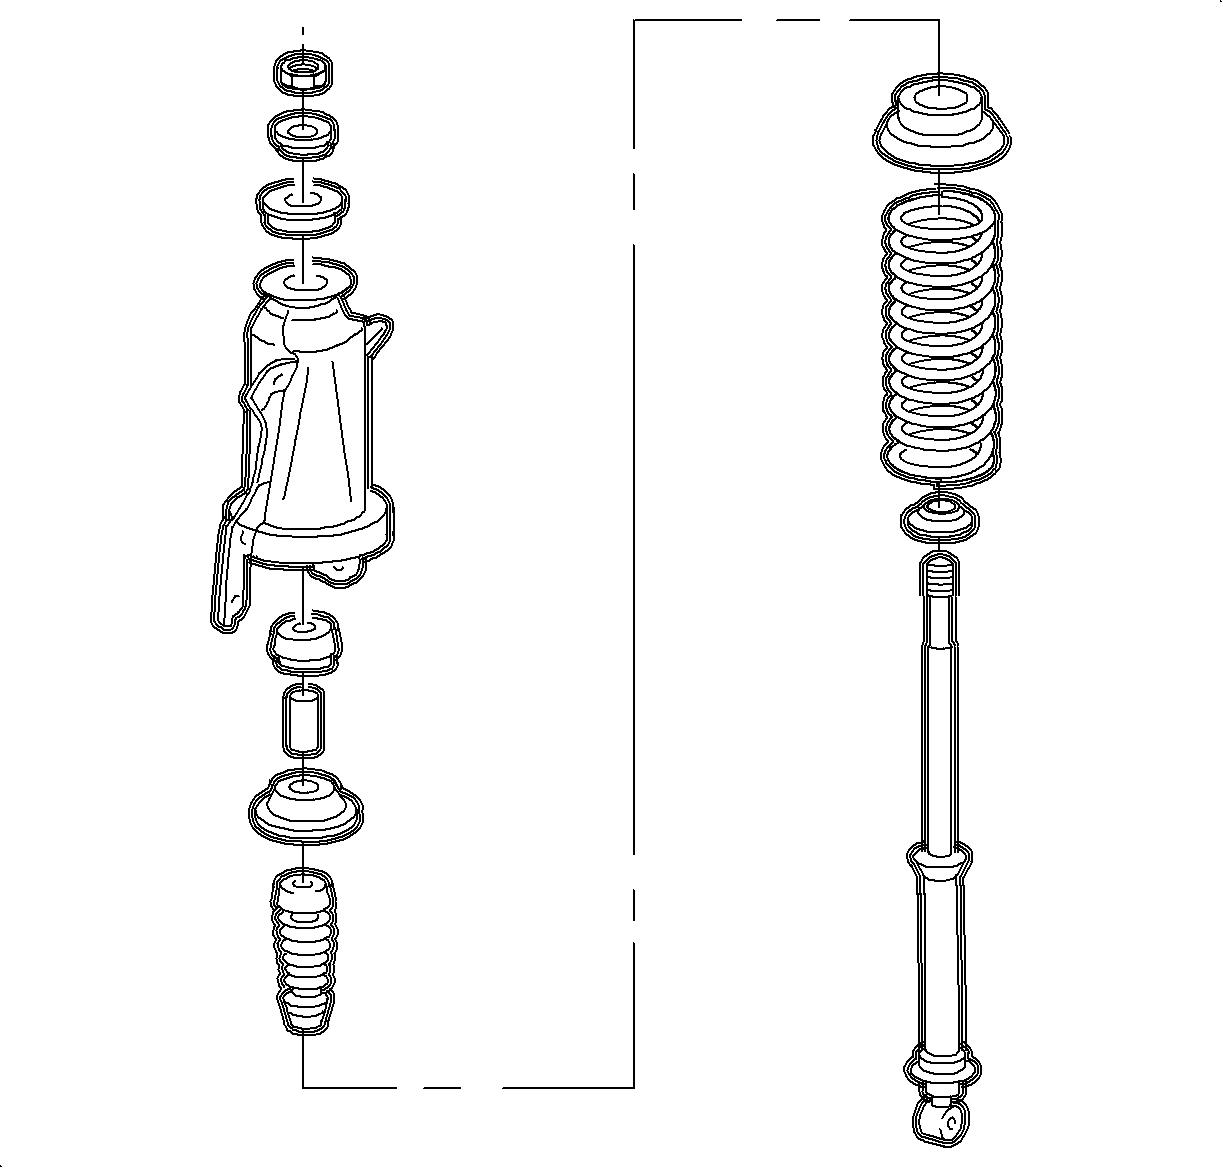
- Assemble the carrier components as shown.
- Compress the spring while guiding the shock absorber shaft through the upper mount until the upper washer and shaft nut can be installed. Do not over compress the spring.
- Tighten the shaft using a wrench, while holding the shaft nut with a socket.
- Release the spring compressor tool.
- Remove the carrier from the compressor.
Important: Make sure that the lower spring seat liner is assemble onto the shock absorber.
Important: Make sure that the springs are correctly positioned in their spring support seats.

Tighten
Tighten the spring seat nut-to-rear shock absorber shaft to 20 N·m
(15 lb ft).
