Removal
- Remove all related panels and components.
- Restore as much of the damage as possible to factory specifications.
- Note the location and remove the following as necessary:
- The windshield pillar outer may be sectioned anywhere between the points of 100 mm (4 in.) through 200 mm (8 in.) when measured down from the windshield header flange. Refer to the shaded portion of the illustration shown above.
- The rocker panel outer may be sectioned anywhere between the rear point of the down turned tab on the upper pinch weld flange and 325 mm (13 in.) when measured rearward of the down turned tab. Refer to the shaded portion of the illustration shown above.
- Mark section locations and cut through outer panel only where sectioning is to be performed.
- Locate and drill out all factory welds. Note the number and location of welds for installation of the service part.
- Remove damaged front body hinge pillar outer sections.
- Remove structural reinforcement insert material and adhesive from inner panels if present.

Important: Sedan shown; wagon similar
Important: Some parts have structural weld-thru adhesive in the joint areas. It is necessary to replace this with additional spot welds at the attachment points. This can be accomplished by adding an additional weld between each factory weld in all areas.
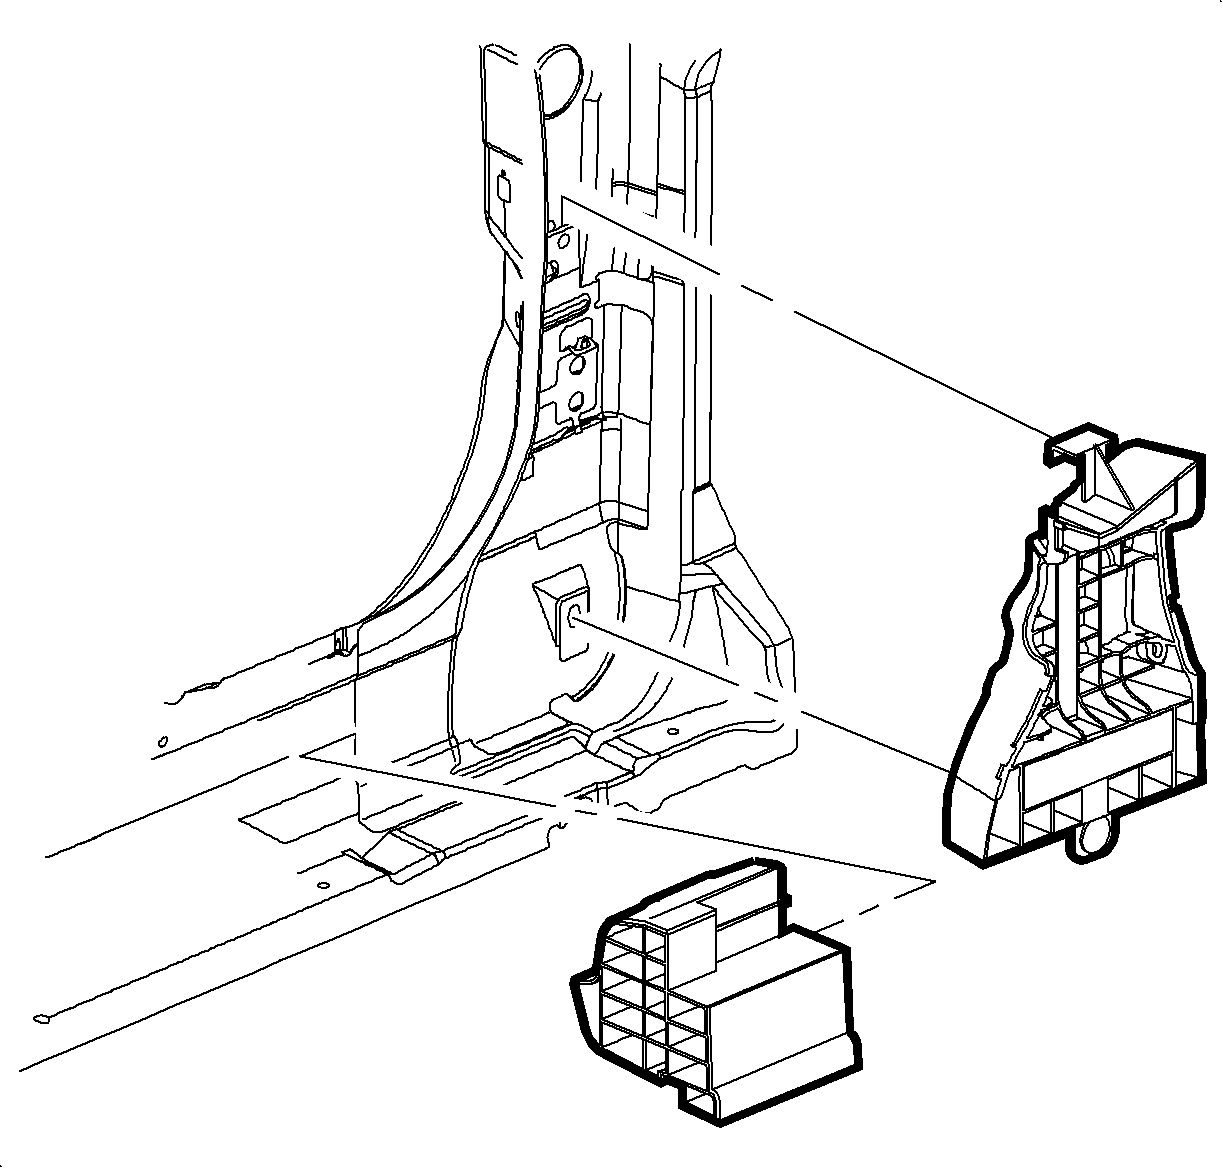
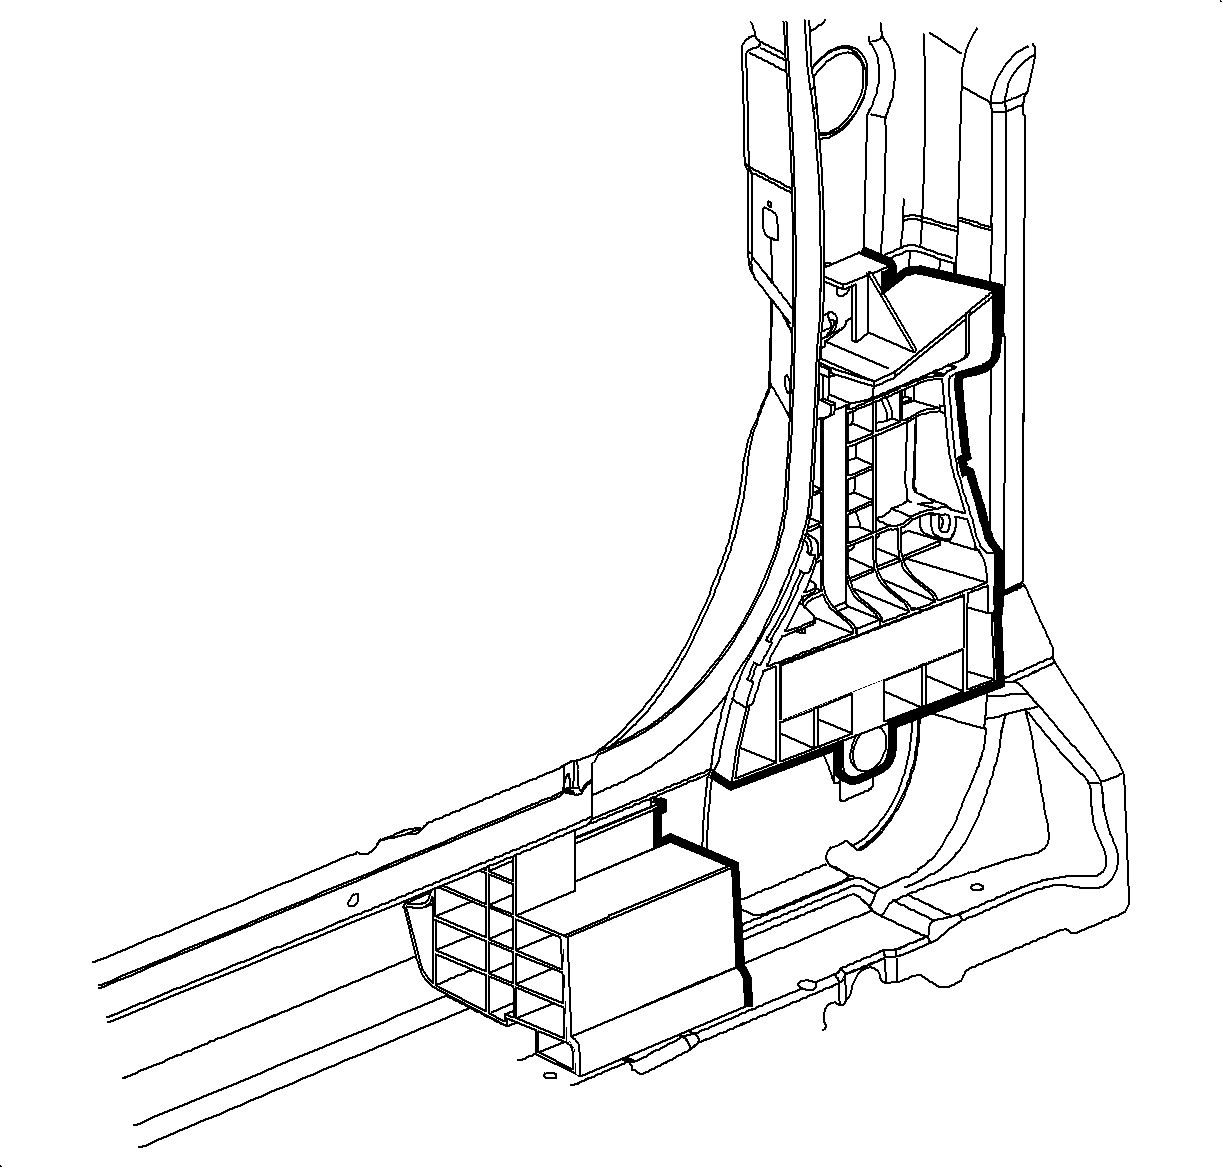
Important: Some 2001 and all 2002, 2003 vehicles are equipped with structural reinforcement inserts located in the front body hinge pillar/rocker area, and upper center pillar roof area. Contact your SATURN Retailer with the vehicles VIN to determine if the 2001 vehicle you are repairing was originally equipped with structural reinforcement inserts. Structural reinforcement inserts are ONLY to be replaced if the vehicle was originally equipped with structural reinforcement inserts. Failure to replace any structural reinforcement inserts as described above will compromise the structural integrity of the vehicle.
Important: Sectioning should be performed only in the recommended areas. Failure to do so will compromise the structural integrity of the vehicle. The side door frame openings feature a unique modular build design to improve manufacturing quality. The side door frame openings are composed of pre-assembled components. Some 2000 model year vehicles were manufactured with weld on hinges. The hinges supplied with the replacement parts must have final welding done when the door is fitted to the body after the new service part is installed!
| 3.1. | Sealers |
| 3.2. | Sound Deadeners |
| 3.3. | Anti-Corrosion |
Important: Do not damage any inner panels or reinforcements when performing section cuts.
Installation
- Cut service part to fit remaining original panel. To ensure a secure weld, sectioning joints should have a gap of approximately one and a half times the thickness of the metal.
- Construct 100 mm (4 in.) backing plate for rocker panel section joint, from unused portion of service part or undamaged sections of original panel. Trim backing plate as necessary to fit behind sectioning joint.
- Construct 50 mm (2 in.) backing plate for windshield pillar section joint, from unused portion of service part or undamaged sections of original panel. Trim backing plate as necessary to fit behind sectioning joint.
- Drill 8 mm (5/16 in.) MIG plug weld holes as necessary along sectioning cuts and in locations noted from original panel.
- Prepare all attachment surfaces as necessary.
- Apply 3M weld-thru coating P/N 05913 (or equivalent) to all bare metal surfaces.
- Install backing plates halfway into rocker and windshield pillar section joints, clamp in place. Check for proper fit and MIG plug-weld to vehicle.
- Position service part on vehicle. Clamp in place and check for proper fit.
- Remove service part.
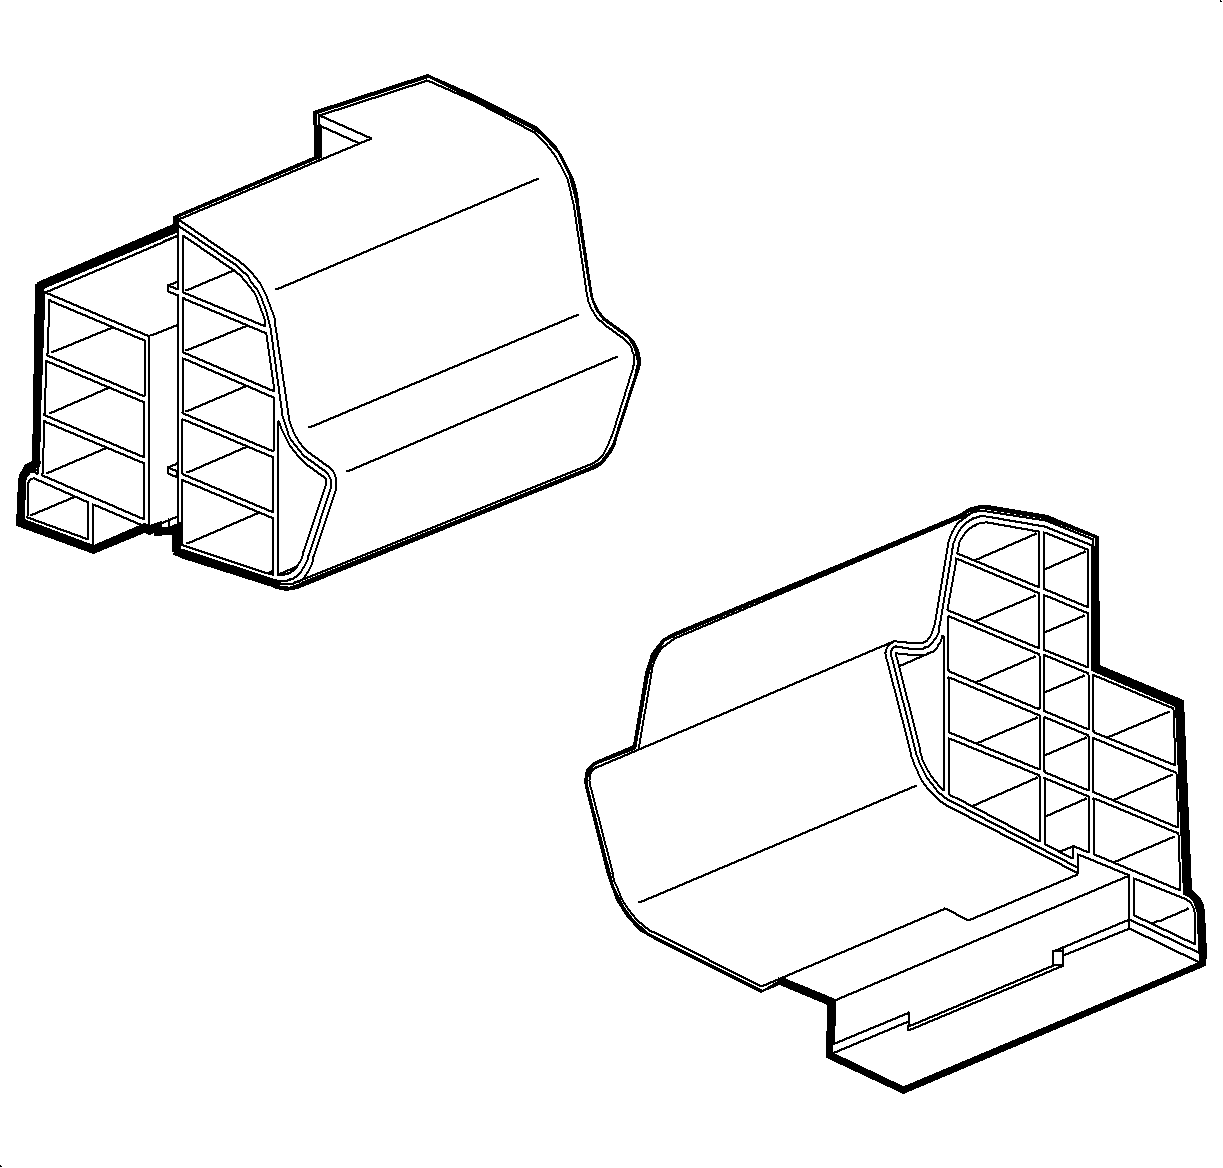
- Apply 3M Pinchweld Urethane Primer P/N 08686 (or equivalent) to structural reinforcement inserts. Refer to shaded area of illustration for appropriate placement. Allow primer to dry for 5-10 minutes. Apply 3M Fast Cure Autoglass Urethane P/N 08690 (or equivalent) to primed areas of structural reinforcement inserts.
- Attach structural reinforcement inserts to service part outer panel as shown in illustration.
- Apply 3M Pinchweld Urethane Primer P/N 08686 (or equivalent) to structural reinforcement insert. Refer to shaded area of illustration for appropriate placement. Allow primer to dry for 5-10 minutes. Apply 3M Fast Cure Autoglass Urethane P/N 08690 (or equivalent) to primed areas of structural reinforcement insert.
- Position service part on vehicle. Clamp in place and check for proper fit.
- MIG plug weld flanges accordingly.
- Stitch weld along both rocker and windshield pillar section joint, make 25 mm (1 in.) stitch welds along the seam with 25 mm (1 in.) gaps between, then go back and complete the stitch weld until entire joint is welded.
- Clean and prepare all welded surfaces.
- Apply the following as necessary:
- Refinish as necessary.
- Install all related panels and components.
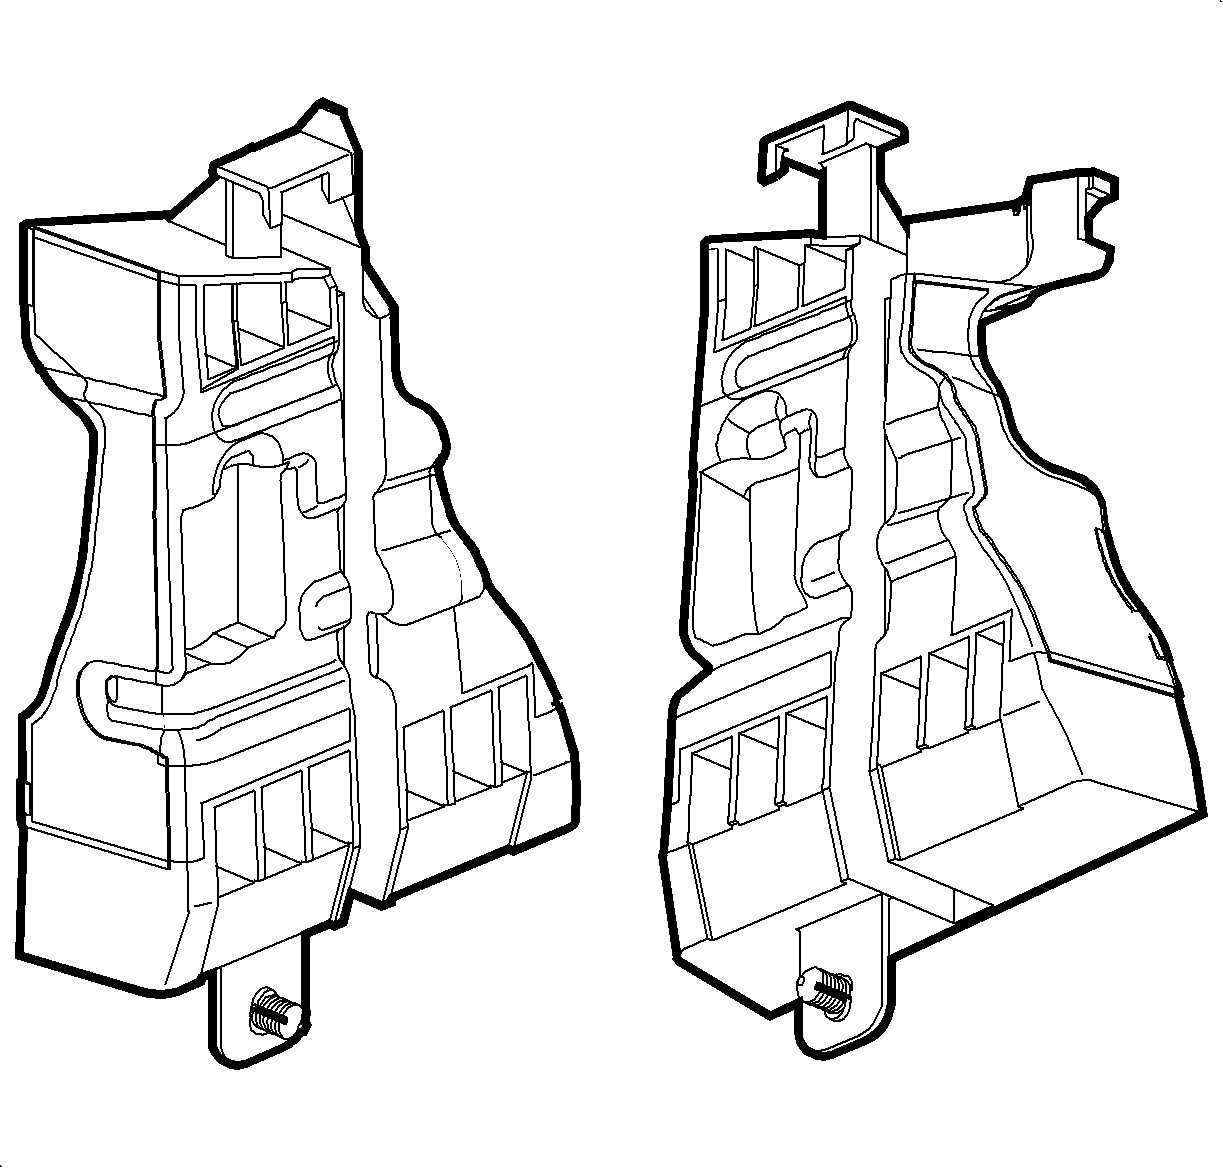
Important: Structural reinforcement inserts are to be installed only if vehicle was originally equipped with structural reinforcement inserts. If vehicle was not originally equipped with structural reinforcement inserts proceed to step 14
Important: Ensure that urethane adhesive does not contact lower hinge adjustment plate, or block sunroof drain hose channel.
Caution: When using tools that may create smoke when cutting or heating urethane adhesive, work should be done in a well ventilated area and/or with a NIOSH/MSHA approved air supplied respirator to prevent possible harmful exposure. When the urethane adhesive is heated enough to give off smoke, high levels of methylene diisocyanate may be present. Unprotected exposure to methylene diisocyanate may result in severe, chronic, debilitating respirator problems.
Important: It is important that proper corrosion protection processes are used on all repair areas. Apply sealers and corrosion protection materials according to information in the "Body Paint" section of this service manual or paint manufacturer's recommendations.
| • | Anti-Corrosion Materials |
| • | Sound Deadeners |
| • | Sealers |
