For 1990-2009 cars only
Removal Procedure
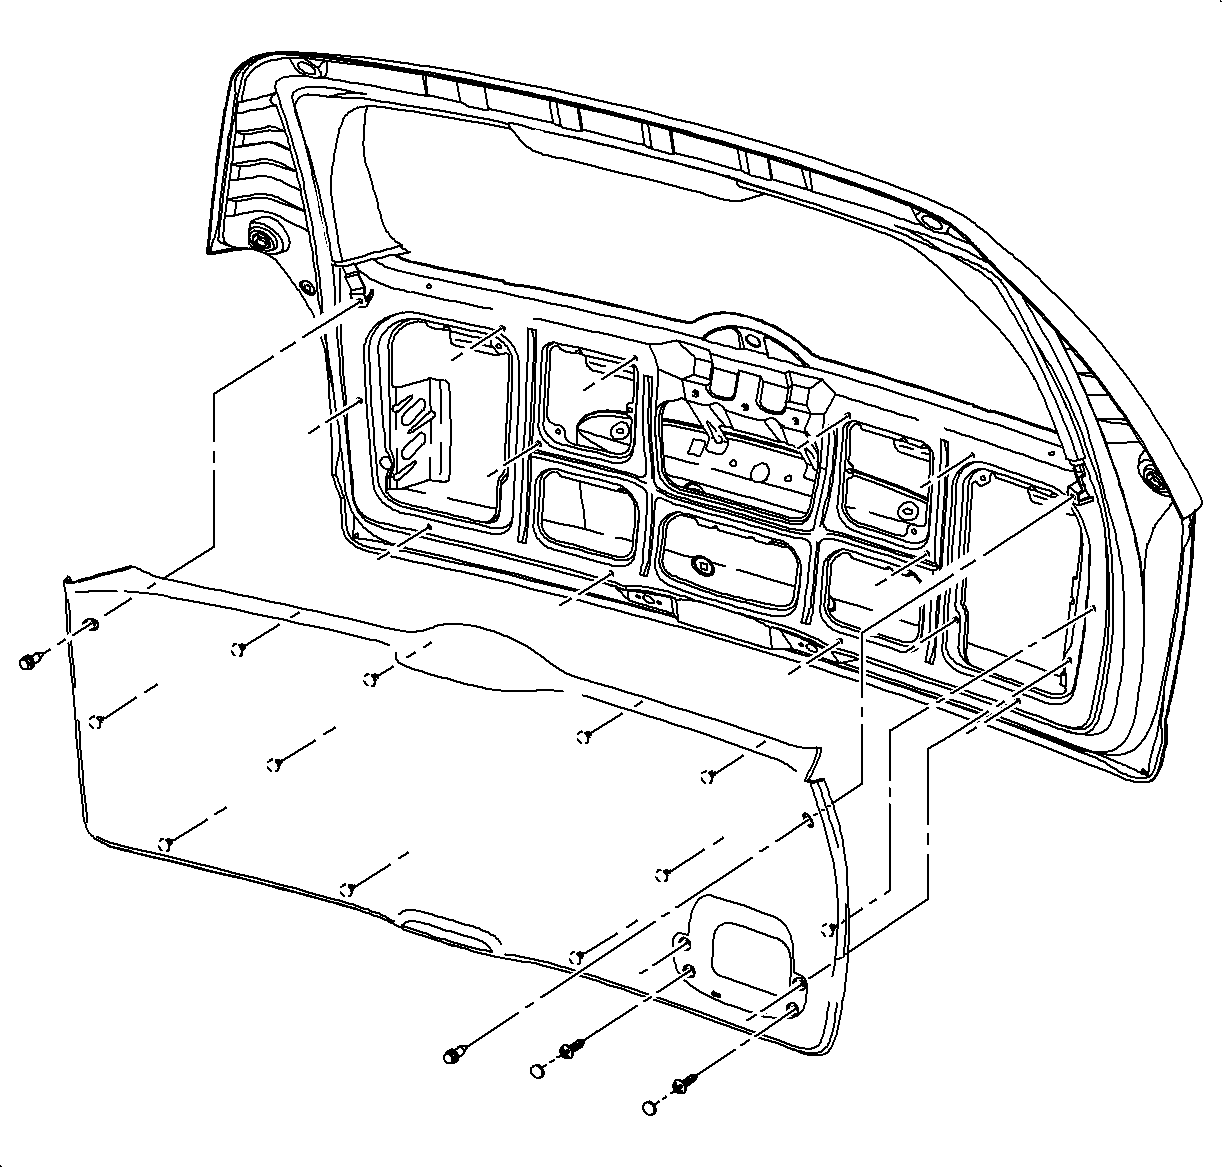
- Remove the liftgate pull handle plugs.
- Remove the fasteners and liftgate pull handle.
- Remove the liftgate trim panel retainers.
- Remove the trim panel.
- Remove the two electrical connectors.
- Remove the liftgate latch assembly retaining bolts.
- Pull down into view.
- Disconnect the latch cable from the latch assembly by using a small screwdriver to disengage the clip.
- Remove the latch assembly.

Installation Procedure
- Reconnect the latch cable to the latch assembly.
- Position the latch assembly in the liftgate and install onto the lock cylinder assembly.
- Install the liftgate latch-to-liftgate bolts.
- Install the electrical connectors.
- Position the liftgate trim panel to the liftgate.
- Secure the liftgate trim panel to structure by pushing at retainer locations.
- Install the trim panel retainers.
- Install the liftgate pull handle using fasteners.
- Install the liftgate pull handle plugs.
Notice: Refer to Fastener Notice in the Preface section.
Tighten
Tighten the Liftgate Latch-to-Liftgate Bolts to 10 N·m (89 lb in).
Tighten
Tighten the liftgate pull handle fasteners to 5 N·m (44 lb in).
