Removal Procedure
Care should be taken to prevent water leaks in the rear compartment. Inner spoiler attachment holes in the compartment lid must be sealed with pre-sealed fasteners. If the sealing is questionable, apply a body caulking compound or equivalent to prevent water intrusion. The gasket used on the factory option spoiler is used as an aid in manufacturing and is not needed in service.
- Open the rear compartment.
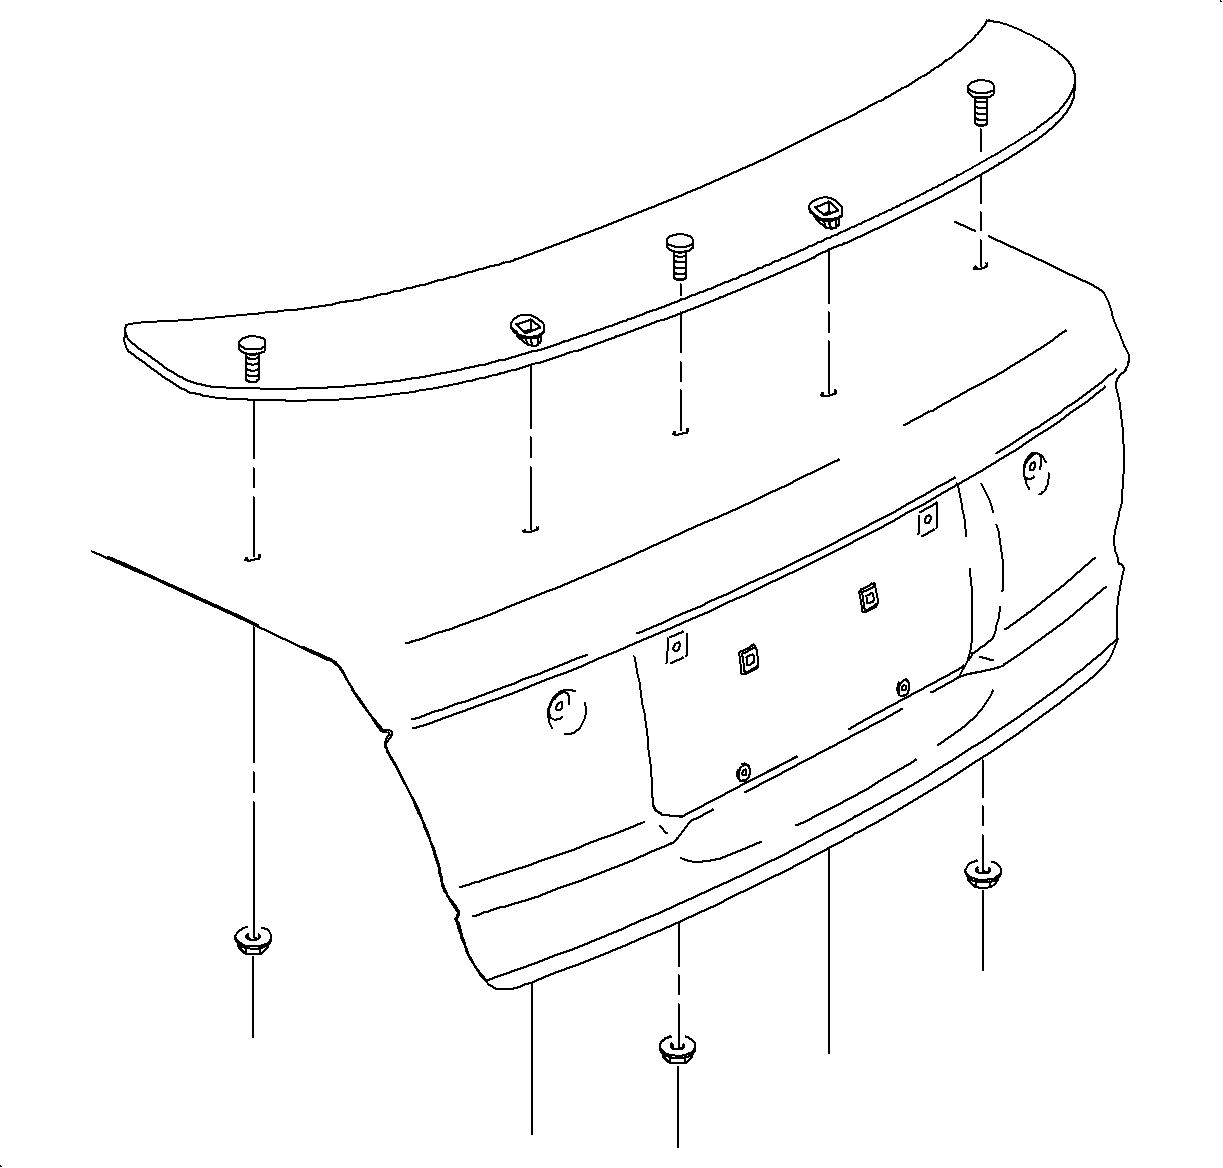
- Remove the 3 nuts from the underside of the spoiler.
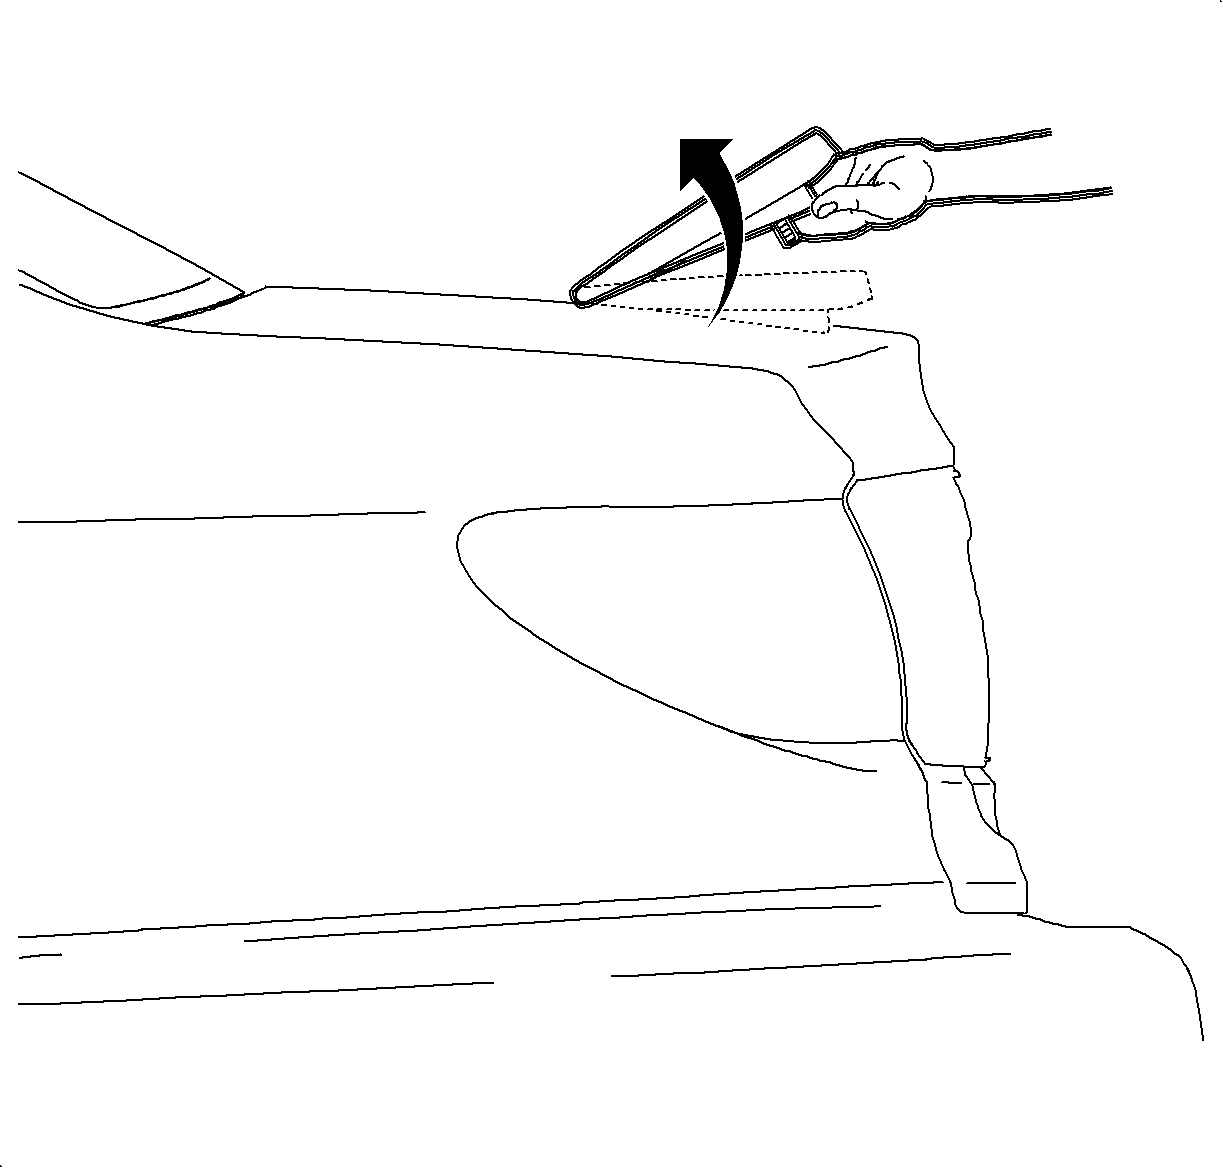
- Remove the spoiler from the 2 snap retainers in the rear compartment lid by pushing the spoiler up and forward from the rear being careful not to scratch the paint.
Installation Procedure
If the spoiler holes are located in the rear compartment lid, start with Step 11.
- Place a prop rod under the rear compartment lid that will safely support the lid.
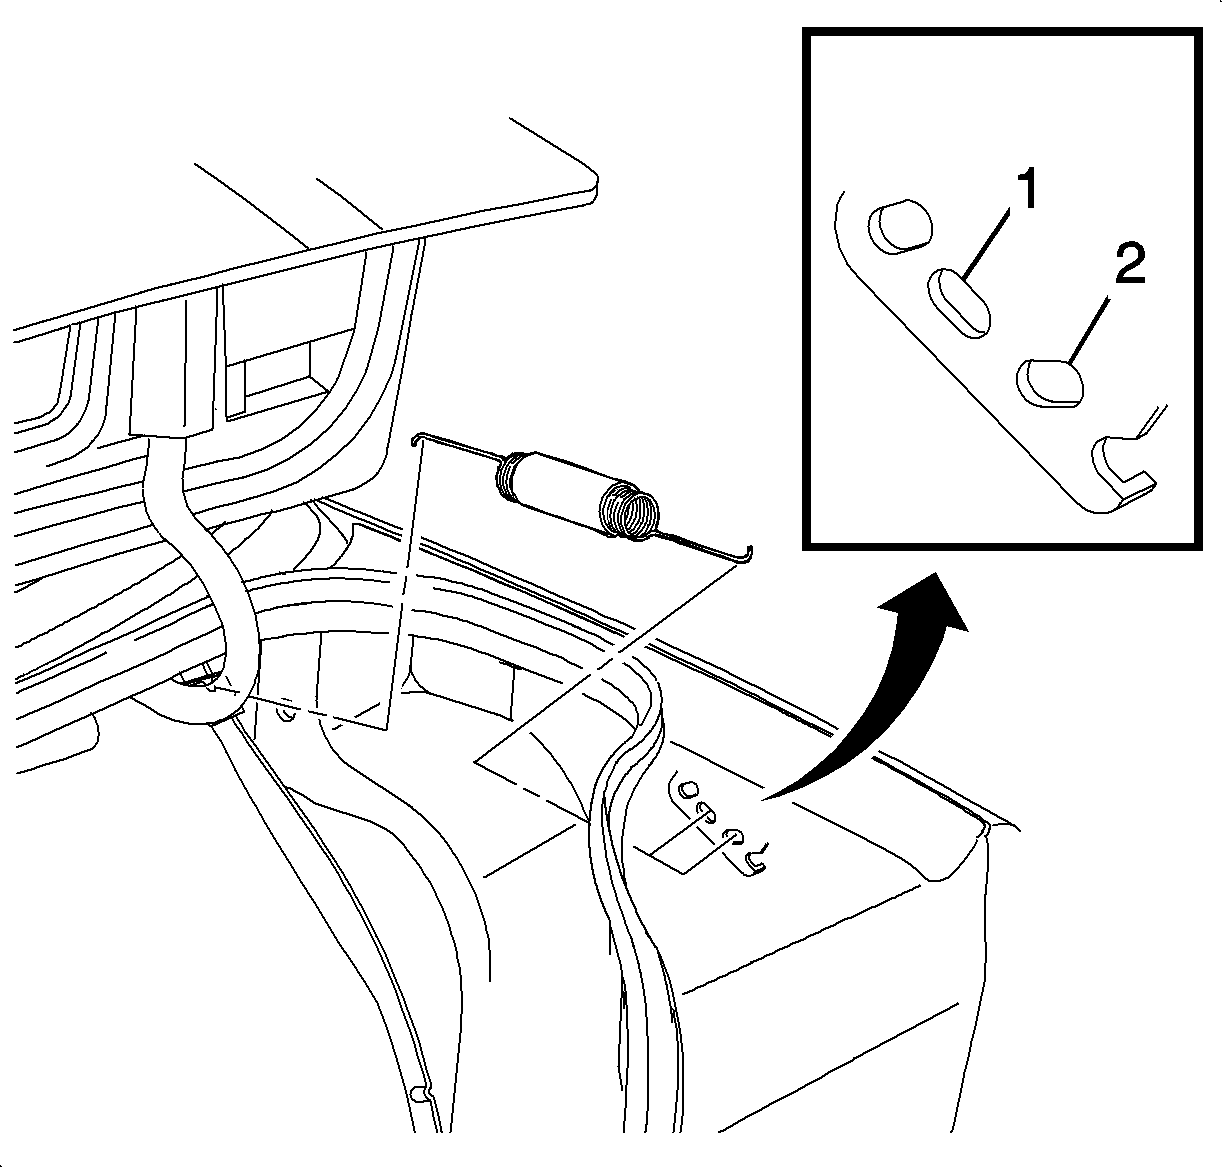
- Move the compartment support springs from location (1) to location (2) as shown in the illustration.
- Remove the prop rod and close the rear compartment.
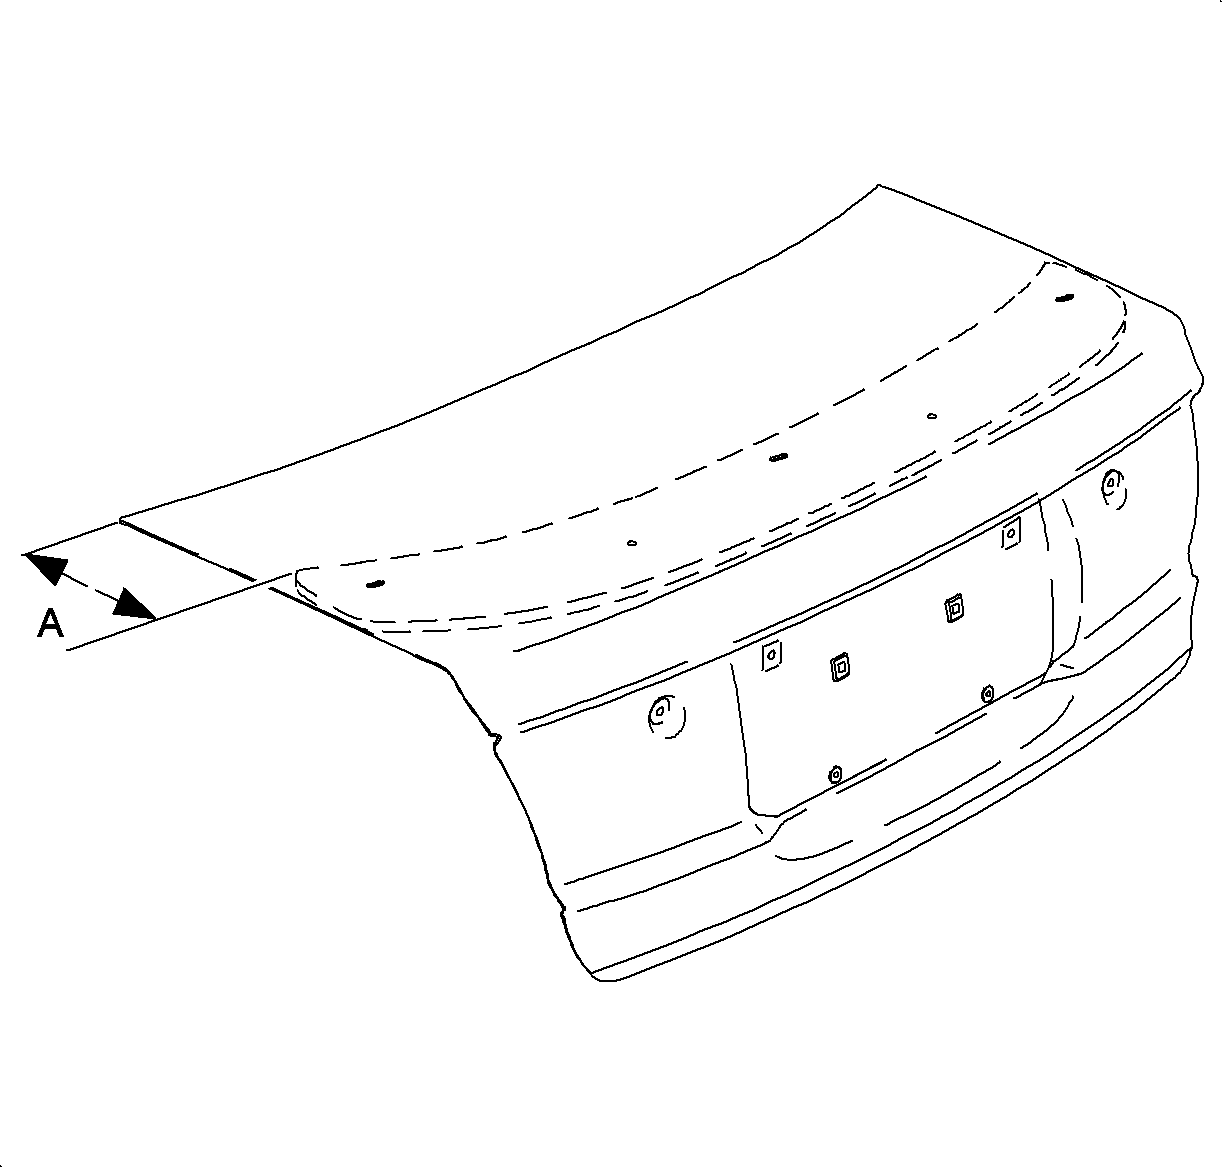
- Measure (a) 254 mm (10 in) from the leading edge of the rear compartment lid, and place the template on the rear of the compartment lid as shown in the illustration.
- Locate the 5 holes to be drilled in the rear compartment lid on the template. Lightly mark the holes with a center punch and hammer.
- Remove the template from the rear compartment lid.
- Drill the center hole 7 mm (9/32 in).
- Drill the 2 middle holes 20 mm (13/16 in) using either a hole cutter or a drill bit.
- Drill 2 outer holes 10 mm (13/32 in).
- Clean the metal shavings from the vehicle.
- Position the spoiler onto the rear compartment lid to ensure the proper fit of the studs into the holes.
- Tuch-up the paint the in the drilled holes.
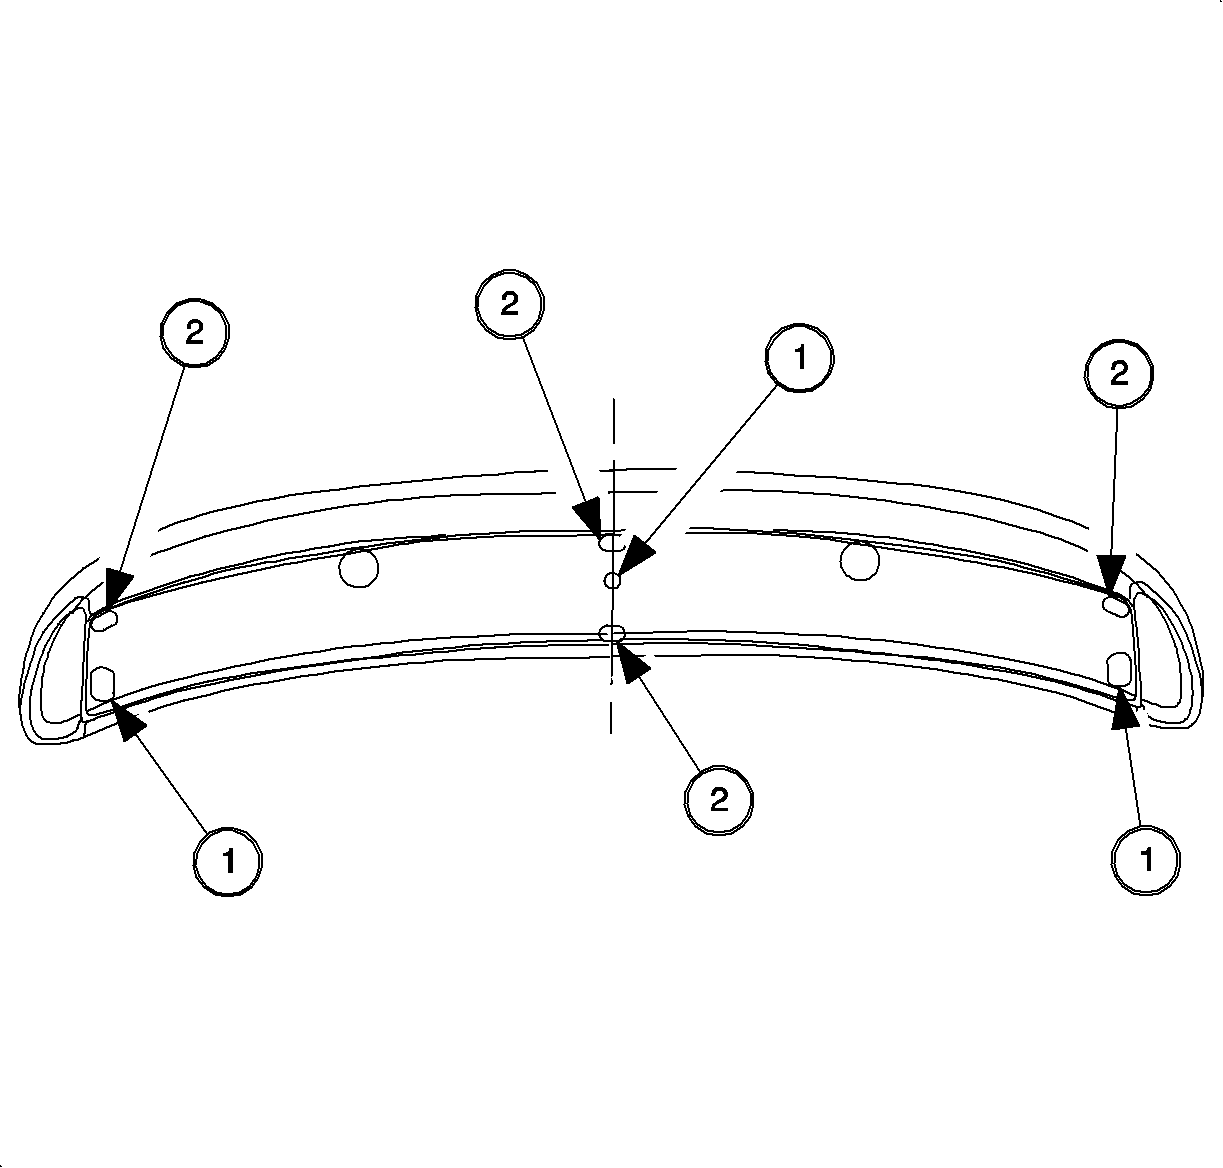
- Install the gaskets onto the spoiler. The illustration shows the locations where the gaskets are applied after the spoiler is painted. Callout (1) represents 3 foam gaskets which are installed around the mounting studs. Callout (2) represents the location where 4 rubber anti-rattle pads are mounted.
- Install the plastic retainer clips to the spoiler studs.
- Install the spoiler to the rear compartment lid and push down on the spoiler directly over the area where the plastic retainer clips are located.
- Carefully open the compartment.
- Install the pre-sealed nuts to the spoiler.
- Water test the rear compartment lid to ensure that all fasteners are sealed properly.
Important: If installing the spoiler on a replacement rear compartment lid, use the proper Saturn template to ensure that the holes in the rear compartment lid are properly placed.
Hold down the template with an automotive grade masking tape, or similar temporary adhesive.
Make one small indentation for each hole to be drilled.
Important: When drilling the two outer holes, make sure that the drill bit does not come in contact with the quarter panel.
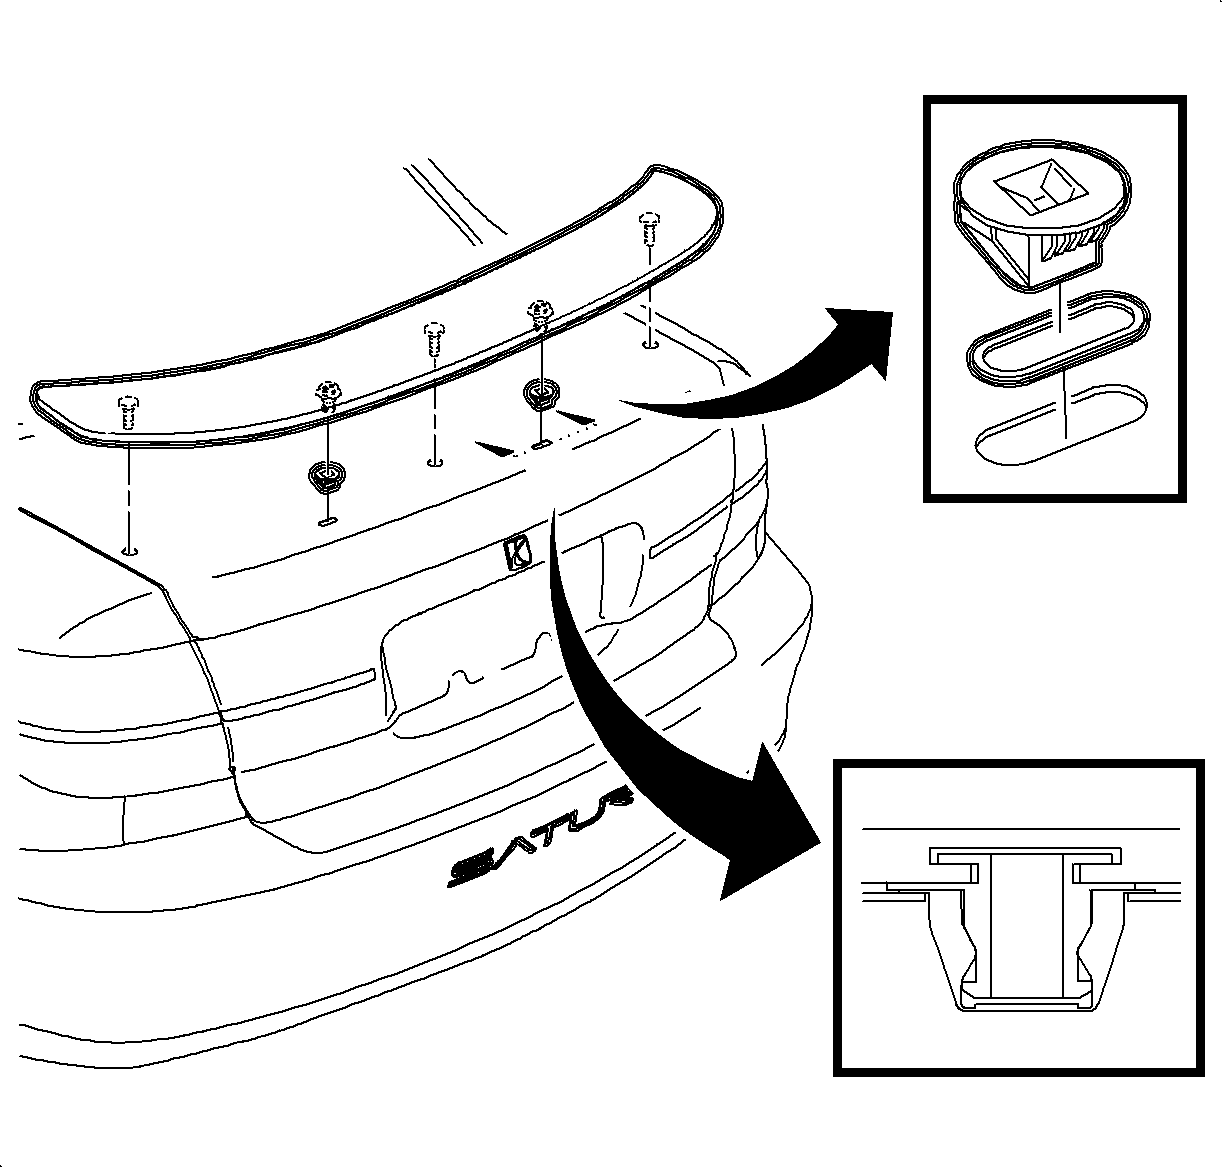
Important: Holes in the compartment lid must be sealed with an integral gasket and pre-sealed fasteners.
Ensure that the plastic retainer clips are securely locked in the hole before attempting to open the compartment.
Notice: Refer to Fastener Notice in the Preface section.
Tighten
Tighten the nuts to 5 N·m (44 lb in).
