Removal Procedure
- Remove the lift gate trim panel.
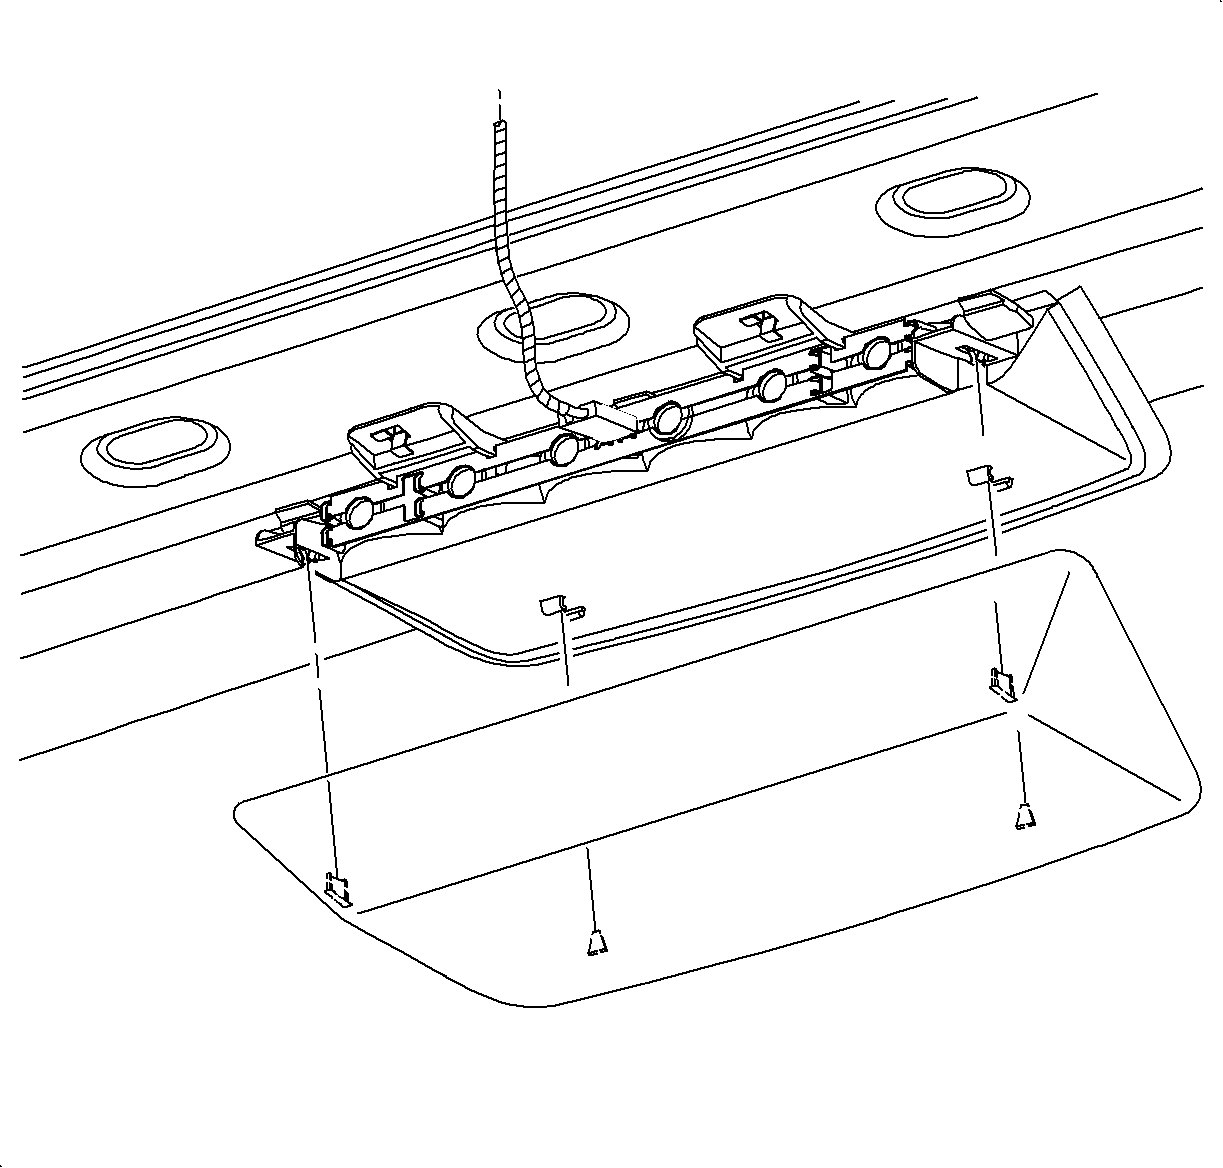
- Unsnap the center high-mount stop lamp cover.
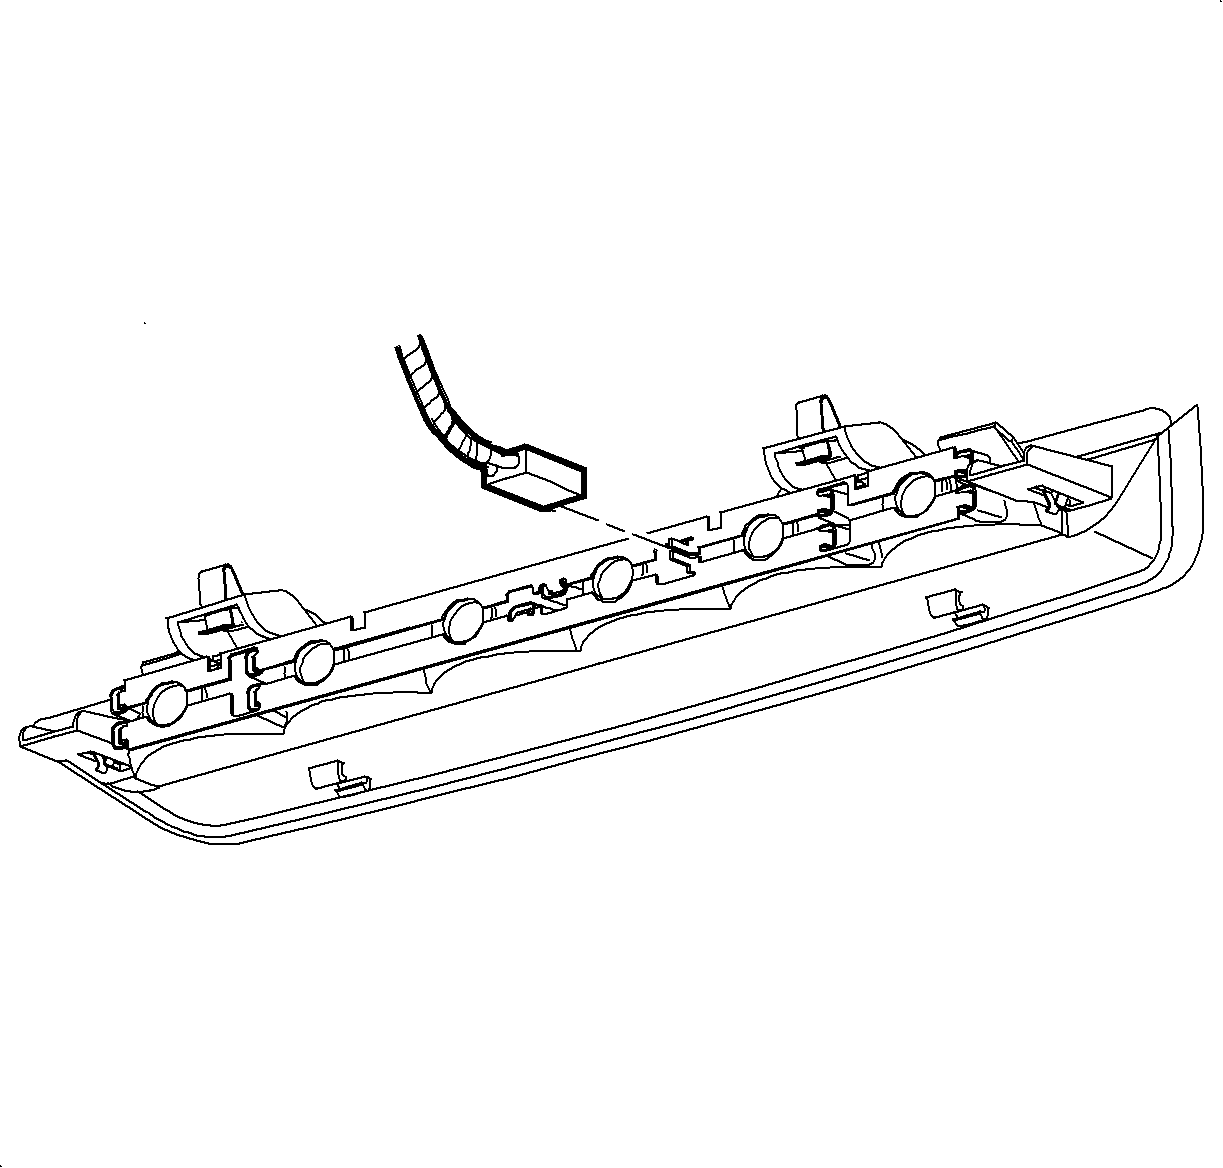
- Unsnap the center high-mount stop lamp housing and disconnect the wire connector.
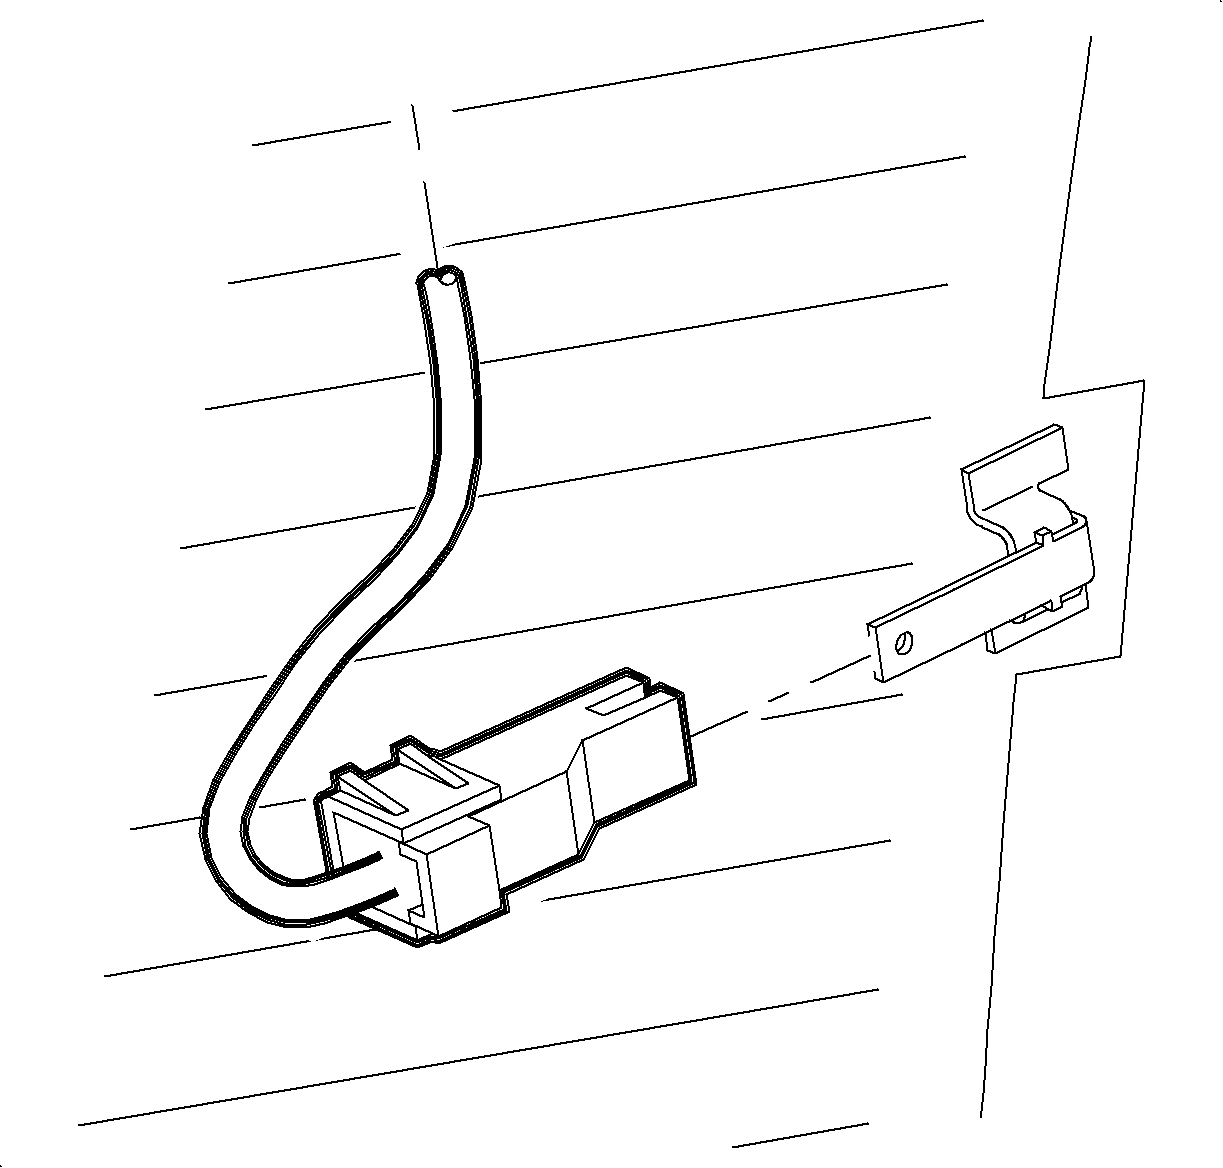
- Remove the electrical connectors from the rear window defogger bus bars. Mark both the inside and outside of the glass with tape to identify the electrical connector locations. Position the electrical connectors so not to damage the wiring/connectors when using the urethane power removal tool.
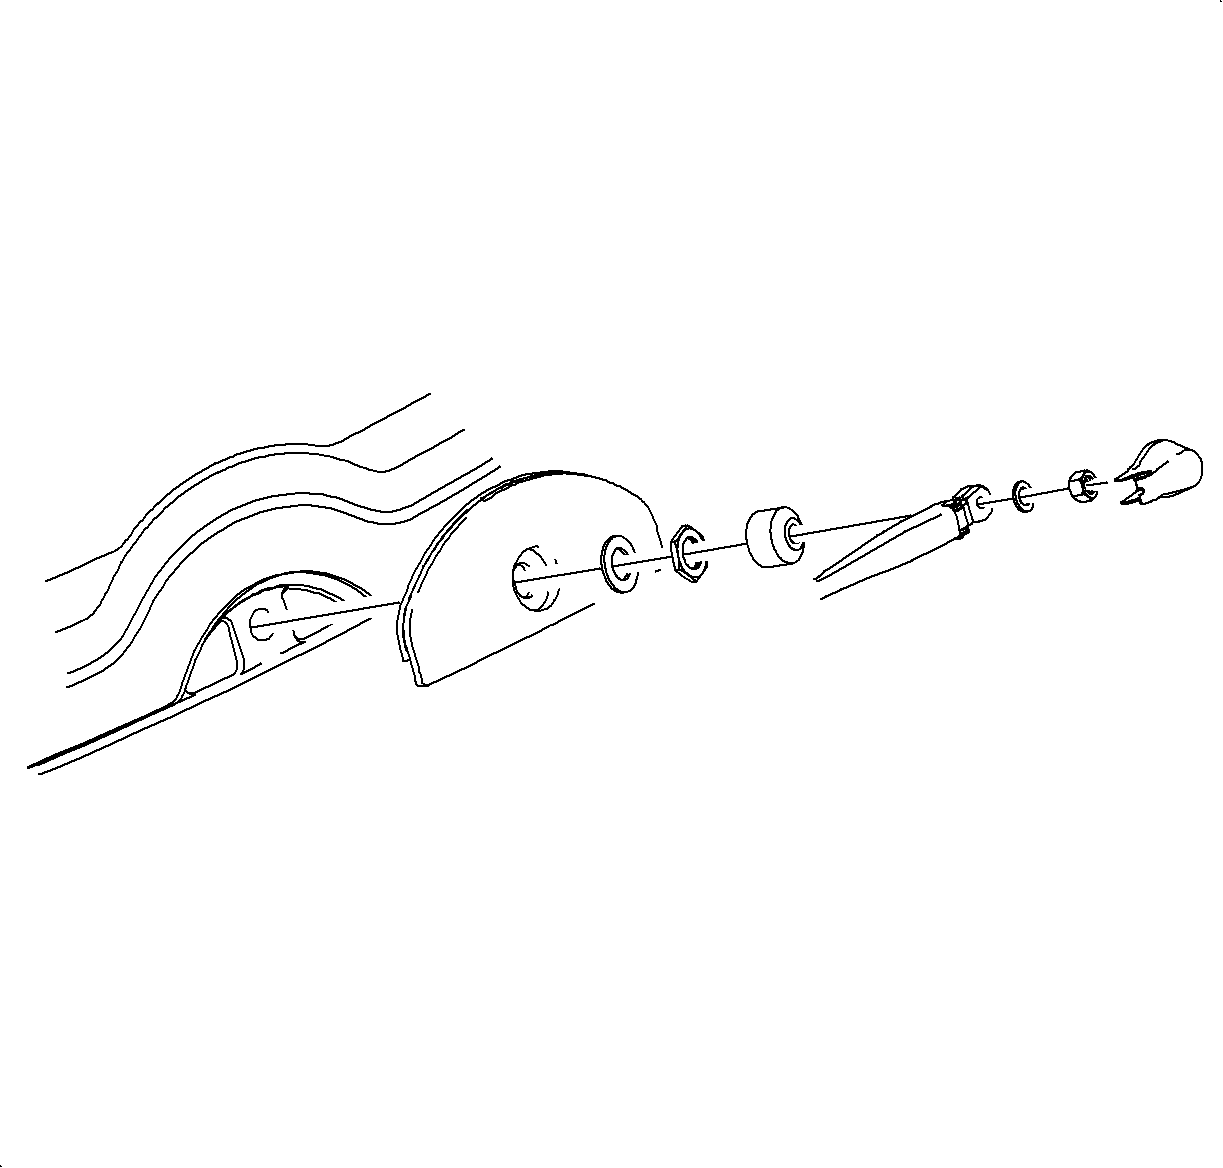
- Remove the wiper arm, finish cap, nut, and washer.
- Remove the spacer, shaft nut, washer, and bezel.
- Apply two 15 cm (6 in) pieces of duct tape to the top and bottom of the glass to prevent it from falling out when the urethane adhesive is cut.
- From the inside of the lift gate, cut the urethane around the glass using a power glass removal tool.
- Remove the window assembly.
Caution: Refer to Glass and Sheet Metal Handling Caution in the Preface section.
Notice: Care must be taken to avoid damaging paint around glass during removal.
Caution: Refer to Urethane Smoke Caution in the Preface section.
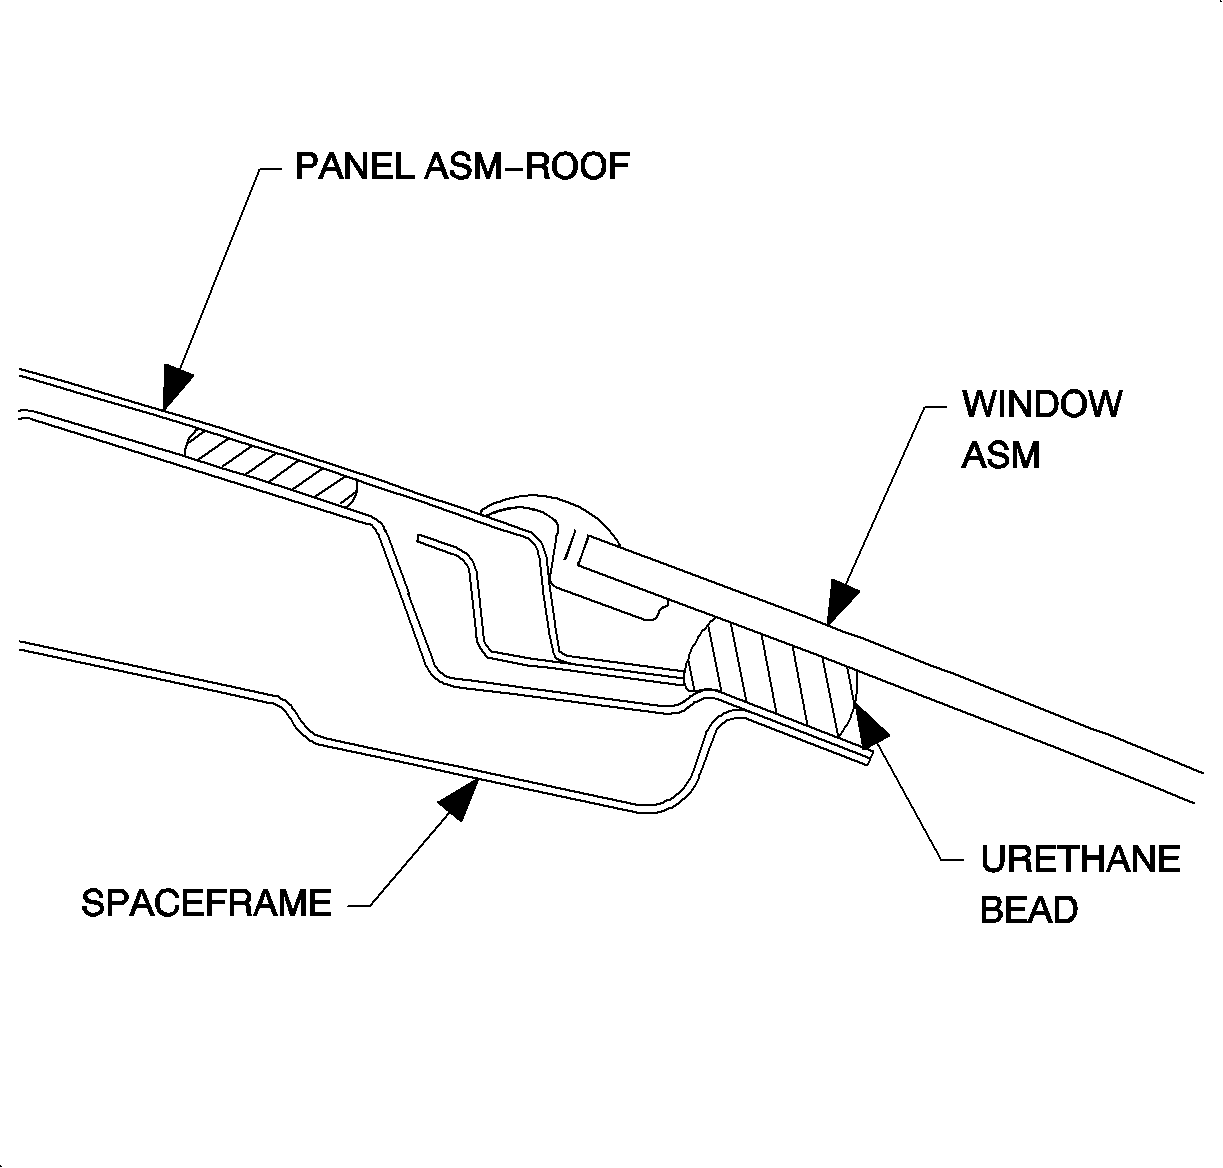
Installation Procedure
- Remove the old urethane with a razor knife leaving a thin film, approximately 1-2 mm (0.04-0.08 in) around the perimeter of the window opening and window assembly, if being reused.
- Clean the surface of the glass where the adhesive is to be applied with a clean, alcohol-dampened cloth. Allow to air dry.
- For new lift gate glass only, apply the glass prep primer (Clear #1) around the entire perimeter of the glass using a dauber. Wipe dry with a clean, lint-free cloth.
- With a new dauber, apply the glass primer (Black #2) around the entire perimeter over Clear #1. Allow the primer to dry 5 minutes.
- Apply a smooth continuous bead of urethane adhesive around the perimeter of the lift gate glass. Apply the urethane up to the edge of the encapsulated molding.
- With the aid of an assistant, align the window assembly onto the wiper module shaft. Press the glass firmly around the perimeter of the wiper module shaft and glass to wet-out and set the adhesive. Use care to avoid excessive squeeze out which would cause an appearance problem. Use tape from the glass to the lift gate to hold in position until the urethane adhesive is cured.
- Watertest the vehicle using a soft spray. Use warm or hot water if available. Do not direct a hard stream of water at the fresh adhesive material. Water applied on top of the urethane adhesive, either during watertest or part of a separate operation, will speed up the cure of the urethane.
- Inspect for leaks from inside the vehicle. Paddle in extra adhesive at the leak points using a tongue depressor or similar flat flexible tool.
- Install the bezel, washer, shaft nut, and spacer.
- Install the wiper arm.
- Install the washer and nut.
- Install the wiper arm finish cap.
- Connect the rear window defogger electrical connectors to the bus bars.
- Install the center high-mount stop lamp.
- Install the center high-mount stop lamp cover.
- Install the lift gate trim panel.
Important: Loose urethane and/or a rough surface on the remaining urethane may cause sealing problems during installation.
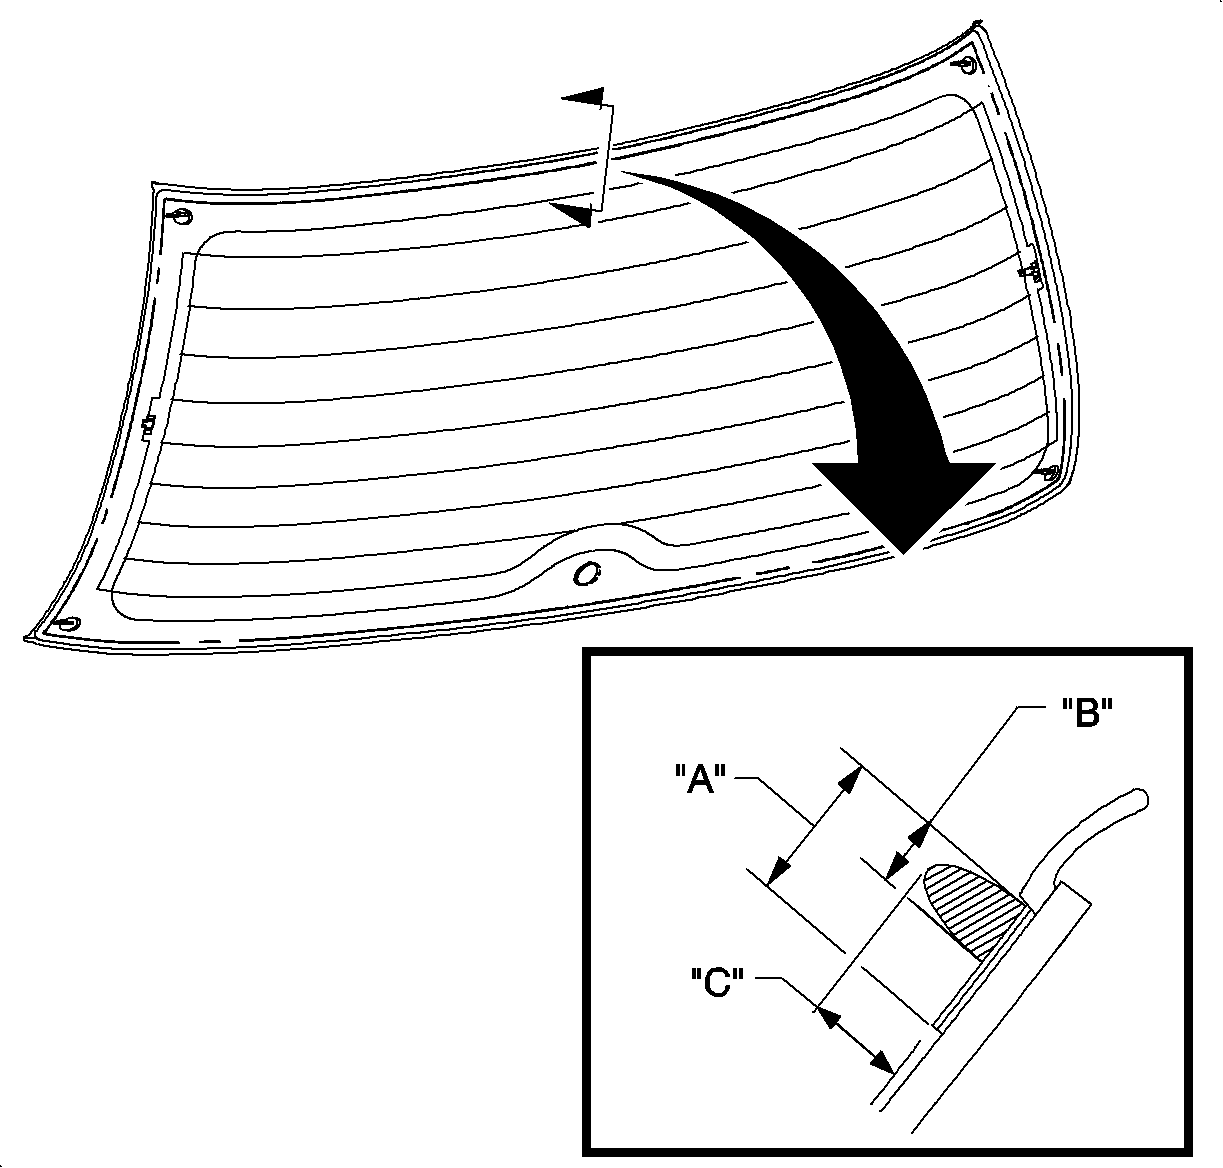
Important: Shake the glass prep primer (Clear #1) well before using.
Specification
The primer area minimum width (A) is
18 mm (0.71 in).
Important: Shake the glass primer (Black #2) well before using.
Specification
The primer are minimum width (A) is
18 mm (0.71 in).
Specification
| • | The bead dimension for the minimum width (B) is 8 mm (0.32 in). |
| • | The bead dimension for the minimum height (C) is 14 mm (0.55 in). |
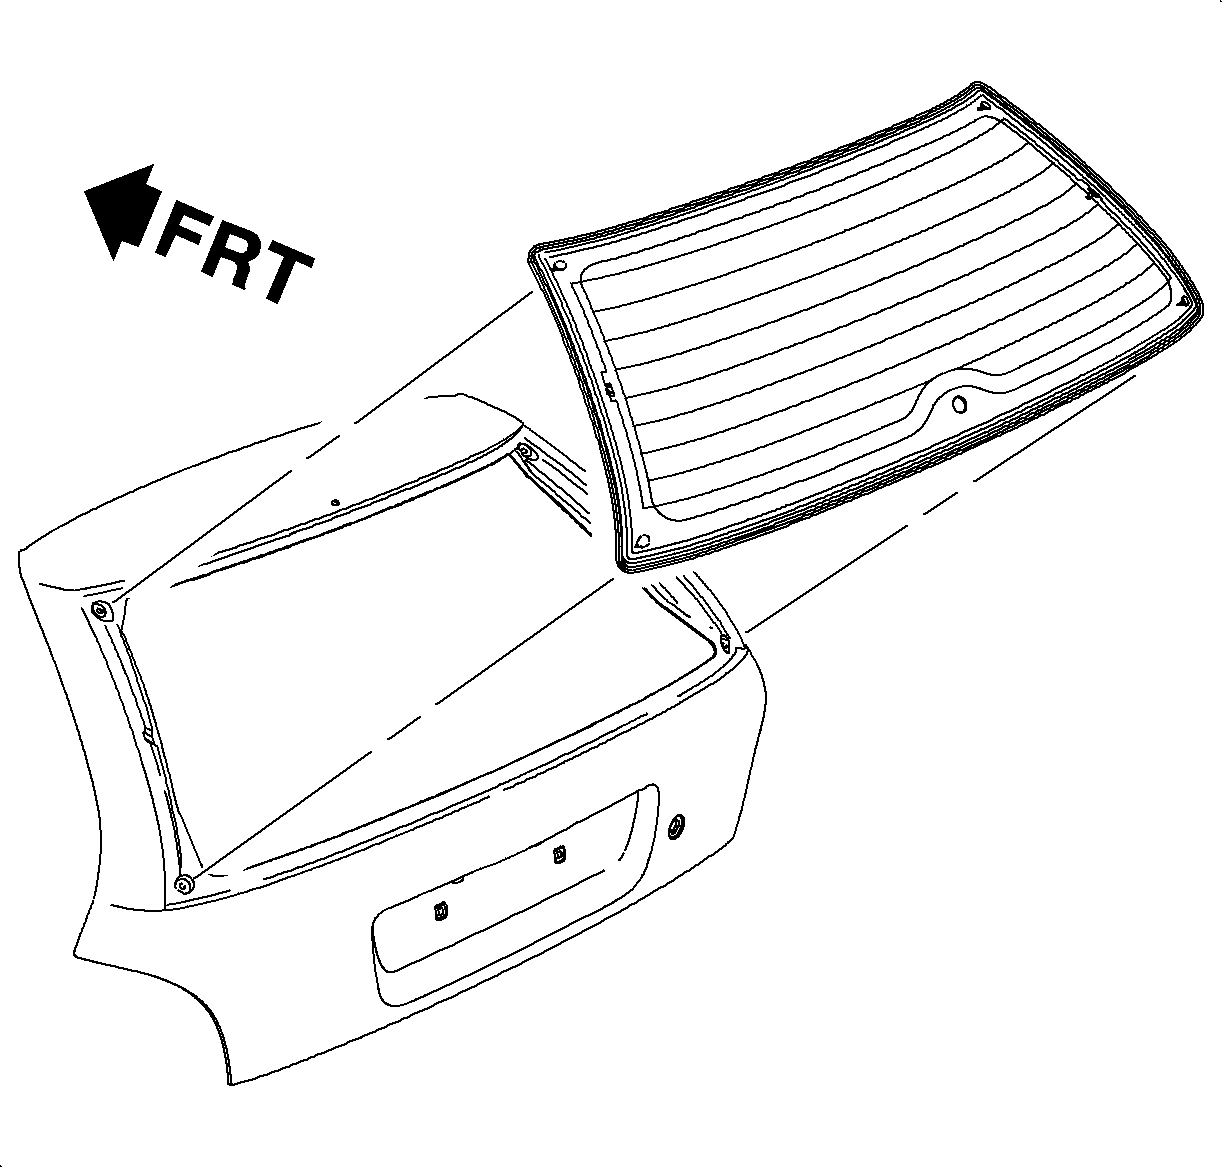
Notice: Until the new urethane has cured, air pressure from a closing door may cause the glass to move. To prevent this, lower the opposite side door window a minimum of 76 mm (3 in) before closing the door.

Notice: Refer to Fastener Notice in the Preface section.
Tighten
Tighten the rear wiper arm nut to 8 N·m
(72 lb in).


Important: The vehicle must remain at normal room temperature for 6 hours to complete the proper cure of the adhesive. Refer to the manufacturer's recommendation.
