For 1990-2009 cars only
Removal Procedure
- Remove the suction/liquid line clamp nut from the horn bracket stud.
- Reposition the suction/liquid line clamp from the horn bracket stud.
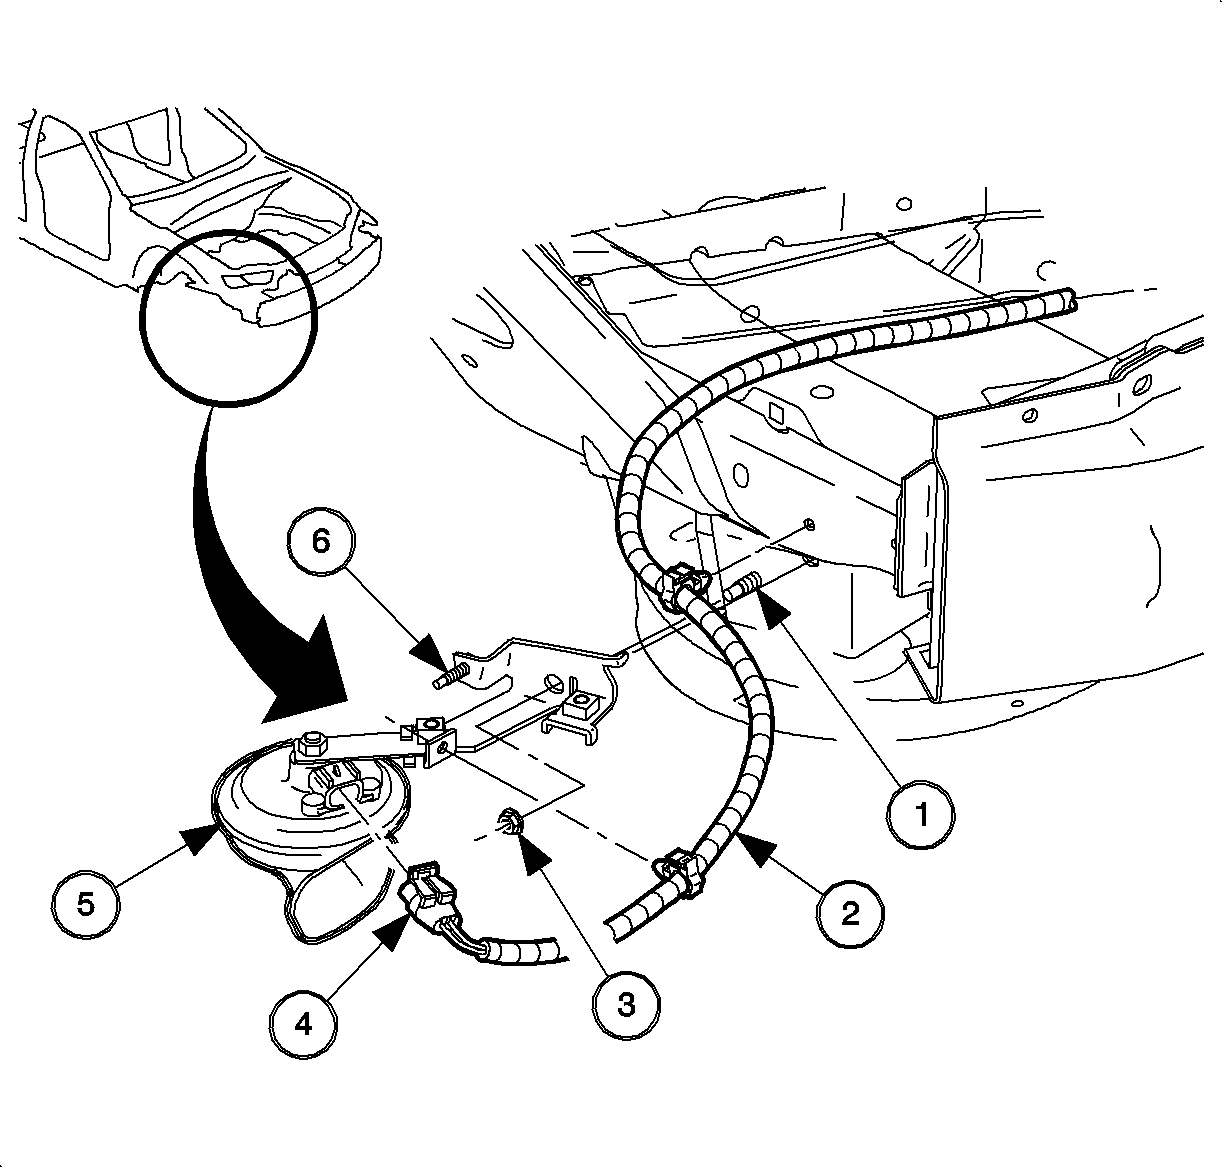
- Disconnect the electrical connector (4) from the horn.
- Remove the horn bracket-to-frame rail nut (3).
- Remove the horn (5) and horn bracket (6).
- Remove the horn-to-horn bracket nut.

Installation Procedure
- Position the horn to the horn bracket.
- Install the horn-to-horn bracket attaching the nut.
- Install the horn bracket onto the frame rail stud (1).
- Install the horn bracket-to-frame rail attaching nut (3).
- Connect the electrical connector to the horn (4).
- Reposition the suction/liquid line clamp to the horn bracket stud.
- Install the suction/liquid line clamp nut.

Important: If the tuning bracket is removed from the horn, position the bracket in the exact position as before and tighten to 12 N·m (106 lb in), then inspect the horn for proper operation.
Notice: Refer to Fastener Notice in the Preface section.
Tighten
Tighten the nut to 18 N·m (13 lb ft).
Tighten
Tighten the nut to 20 N·m (15 lb ft).
Tighten
Tighten the nut to 10 N·m (89 lb in)
