For 1990-2009 cars only
Removal Procedure
- Disconnect the negative battery cable.
- Disconnect the positive battery cable.
- Remove the fan control module by sliding up and off of the bracket. Leaving the wiring connected, lay the fan control module out of the way.
- Remove the battery hold down/fan control module bracket bolt and bracket.
- Remove the battery.
- Uncover the battery feed on the fuse block cover.
- Disconnect the battery feed to the fuse block.
- Unsnap the engine cooling hose from the fuse block cover.
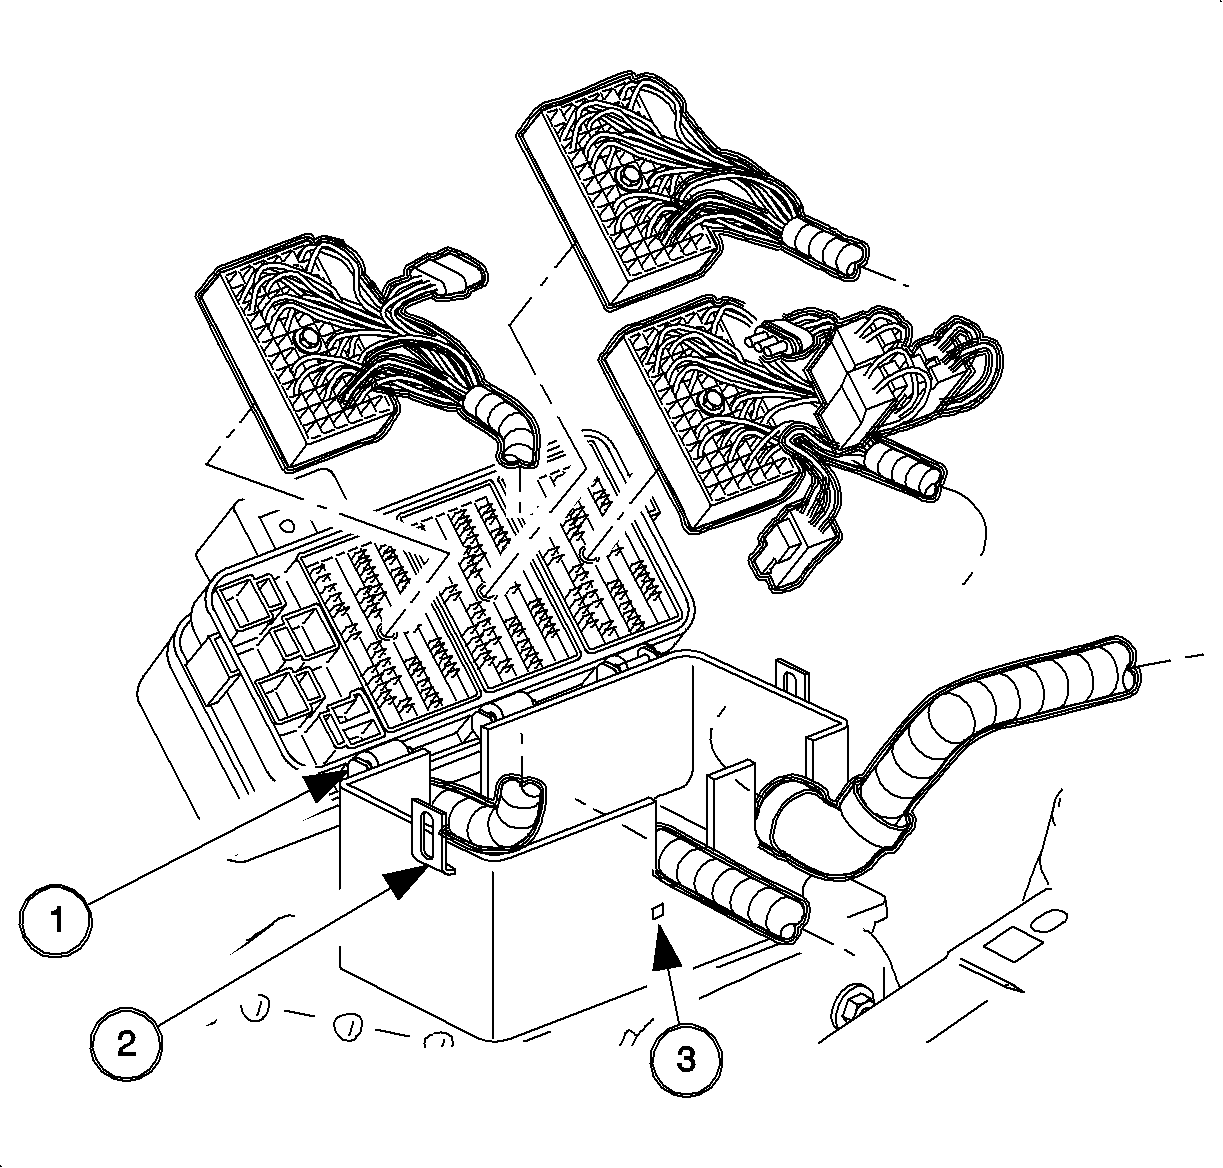
- Push on the tabs at the end of the fuse block and lift off the cover (2).
- Push in the tabs (3) on the end of the fuse block case and roll back the fuse block (1).
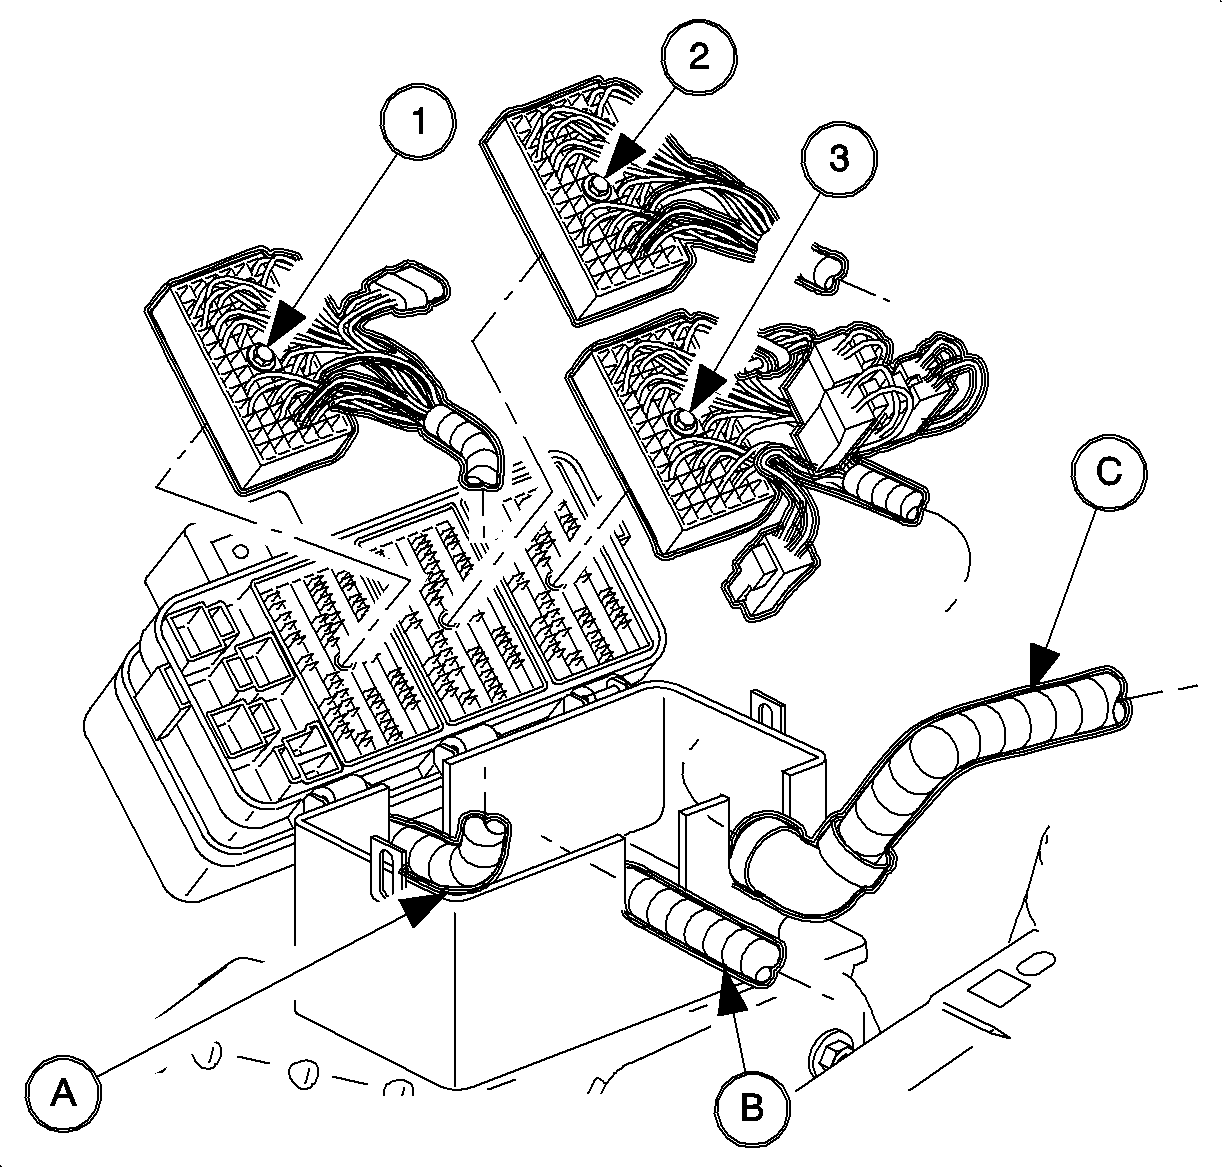
- Remove the following connectors:
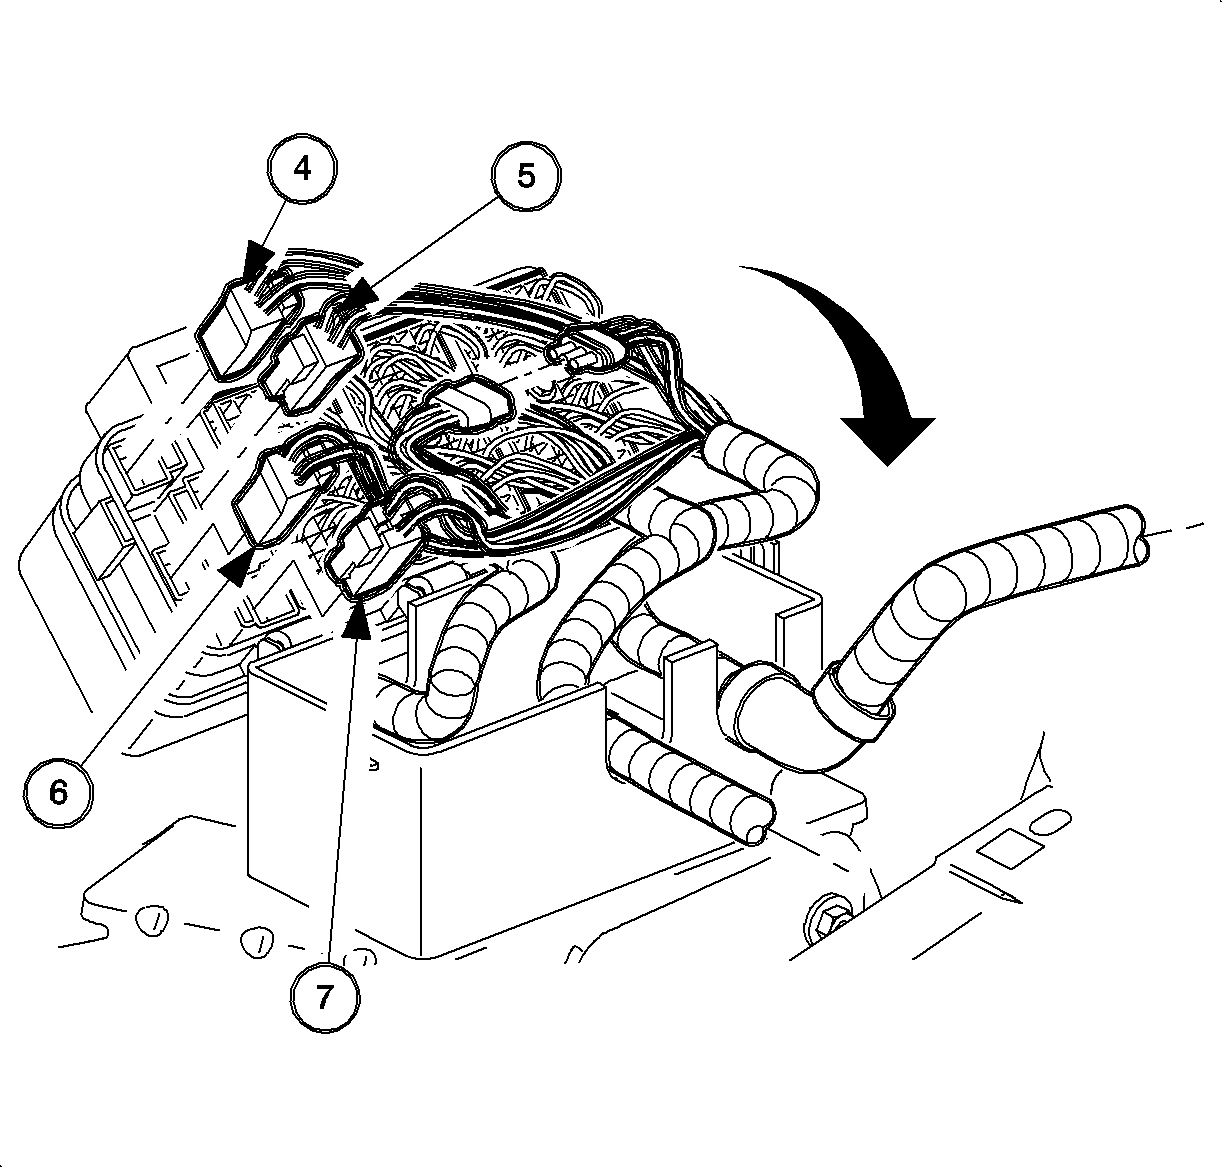
- Remove the following connectors:
- Lift the fuse block off the case.
- Remove the routed harnesses. (Engine (A), Forward Lamp (B), and I/P (C))
- Remove the bolt on the bottom of the fuse block case and lift the case off the battery tray.
Important: It is not necessary to disconnect the fan control module wiring from the module. Additional wiring has been included in the harness for diagnosis and service.


| • | Engine 68 Way (1) |
| • | Forward Lamp 68-Way (2) |
| • | I/P 68-Way (3) |

| • | Forward Lamp 2-Way (White) (4) |
| • | I/P 2-Way (Black) (5) |
| • | I/P 2-Way (Green) (6) |
| • | I/P 2-Way (Brown) (7) |

Important: There are two tabs that hold the hard shell grommets in place at the bottom of the grommet. Disengage these tabs and slide the grommet off.
Installation Procedure
- Place the fuse block case on the battery tray.
- Line the fuse up using the locator tabs.
- Install the bolt in the bottom of the fuse block case.
- Route the engine harness (A) into the fuse block case. push the grommet until the tabs catch.
- Re-hinge the fuse block-to-case.
- Route the I/P (C) and forward lamp (B) harnesses into the fuse block case making sure the tabs catch.
- Connect the following connectors to the fuse block:
- Connect the following connectors to the fuse block:
- Close the fuse block and latch (2).
- Replace the fuse block cover and latch.
- Snap the engine cooling hose back in place on the cover.
- Hook up the battery feed to fuse block.
- Place the battery feed cover over the battery feed terminal.
- Make sure the battery tray is clean.
- Install the battery.
- Install the battery hold down/fan control module bracket bolt and bracket.
- Tighten the bracket bolt.
- Install the fan control module by sliding down onto the battery hold down/fan control module bracket.
- Connect the positive battery cable.
- Connect the negative battery cable.


| • | (4) Forward Lamp 2-Way (White) |
| • | (5) I/P 2-Way (Black) |
| • | (6) I/P 2-Way (Green) |
| • | (7) I/P 2-Way (Brown |

| • | (1) Engine 68 Way |
| • | (2) Forward Lamp 68-Way |
| • | (3) I/P 68-Way |

Important: The battery foam shield must be used or the battery life will be reduced.
Tighten
Tighten the battery hold-down bracket to 20 N·m (15 lb ft).
