Rear Seat Entertainment DVD Screen will not Latch in Stowed Position

| Subject: | Rear Seat Entertainment DVD Screen will not Latch in Stowed Position (Replace Mounting Spring and Button) |
| Models: | Rear Seat Entertainment DVD Screen will not Latch in Stowed Position (Replace Mounting Spring and Button) |
Condition
Rear Seat Entertainment DVD Screen will not Latch in Stowed Position (Replace Mounting Spring and Button)
Cause
Rear Seat Entertainment DVD Screen will not Latch in Stowed Position (Replace Mounting Spring and Button)
Correction
Rear Seat Entertainment DVD Screen will not Latch in Stowed Position (Replace Mounting Spring and Button)
Service Procedure
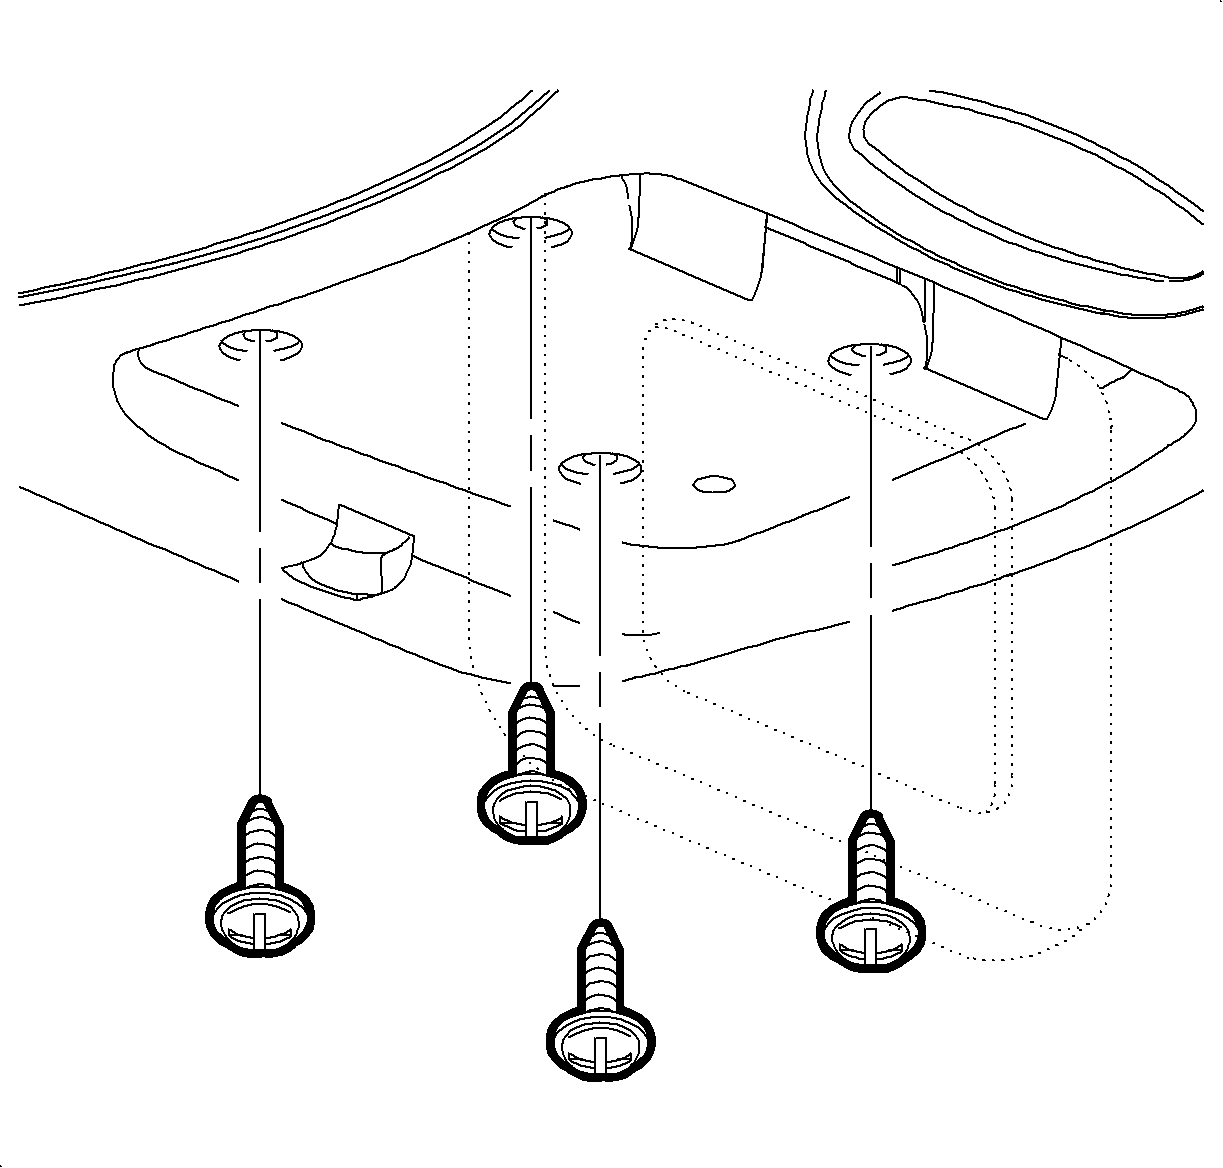
- Lower roof console display screen to access four mounting screws.
- Remove four mounting screws.
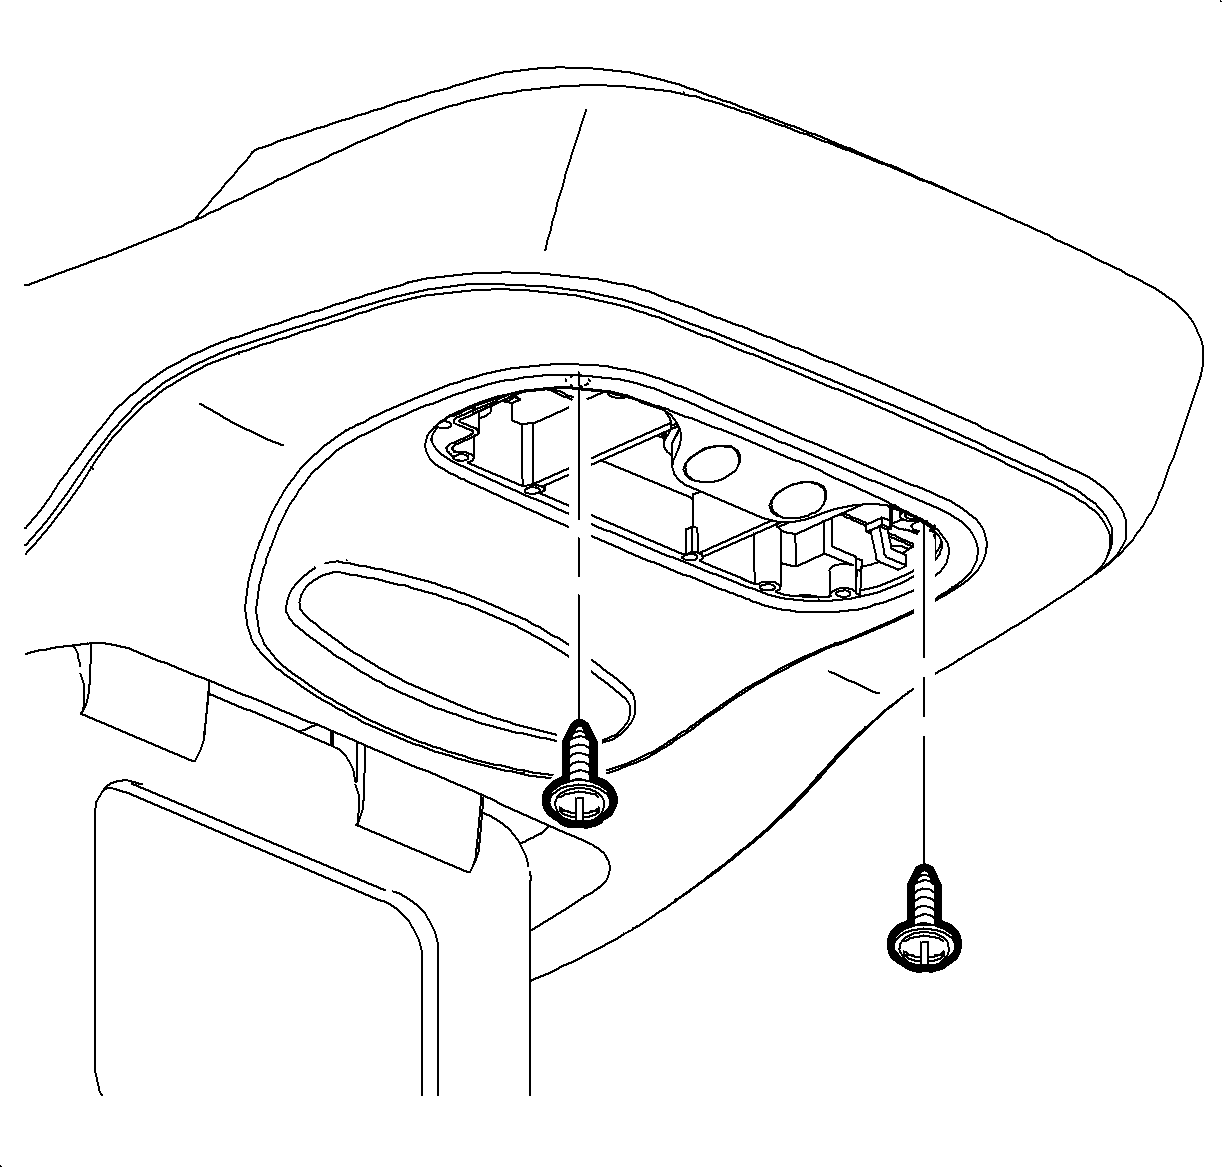
- At left-hand side of dome lamp lens, place small flat head screwdriver into indentation and pry lens loose.
- Remove two screws inside dome lamp.
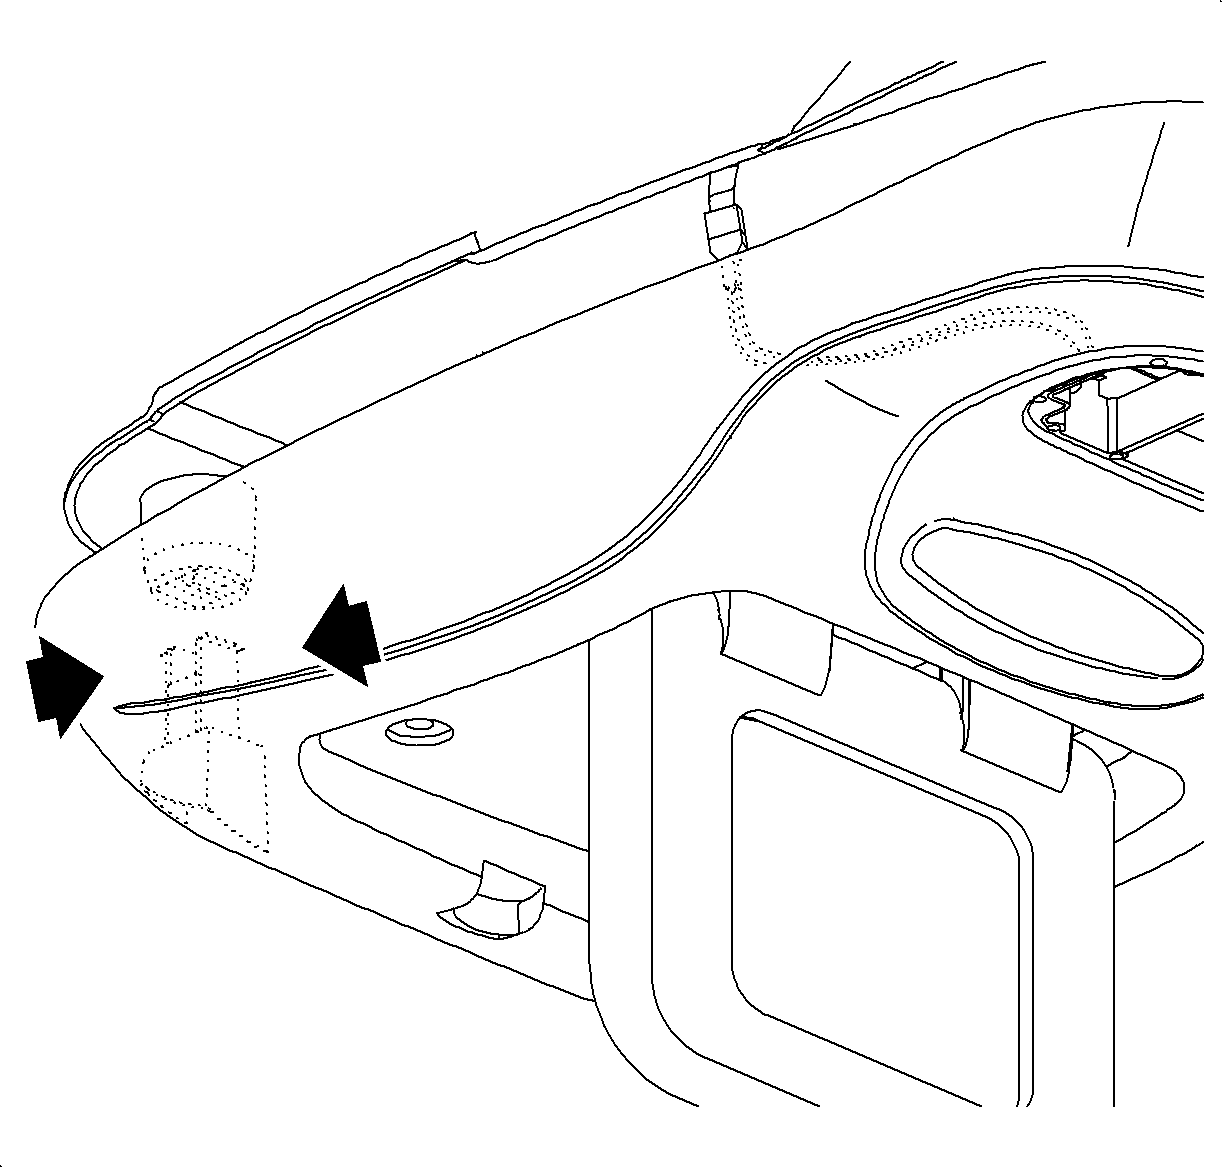
- Gently lower roof console to expose locking tabs located in front left-hand corner.
- Pinch locking tabs together and lower roof console.
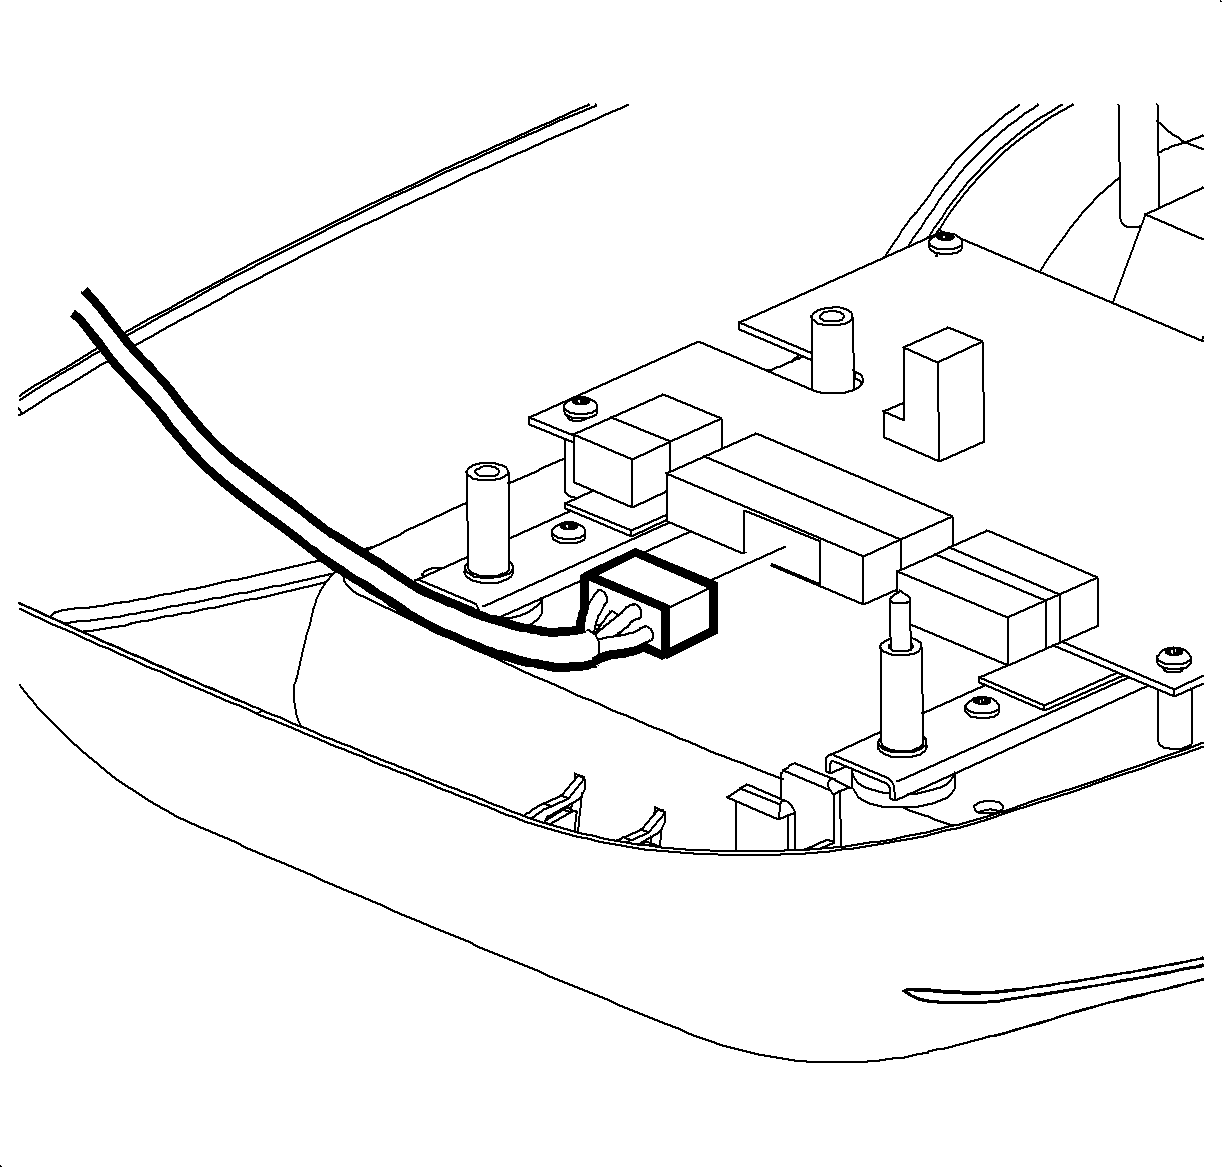
- Disconnect dome lamp wire harness at connector.
- Disconnect roof console wire harness from circuit board.
- Remove roof console.
- Push-down on two locking tabs on the latch.
- Push latch rearward and un-hook spring.
- If the original console spring mounting tab is left on the console, carefully remove it. This can be performed with wire cutters and file if necessary.
- Push latch button into console housing until locking tabs engage.
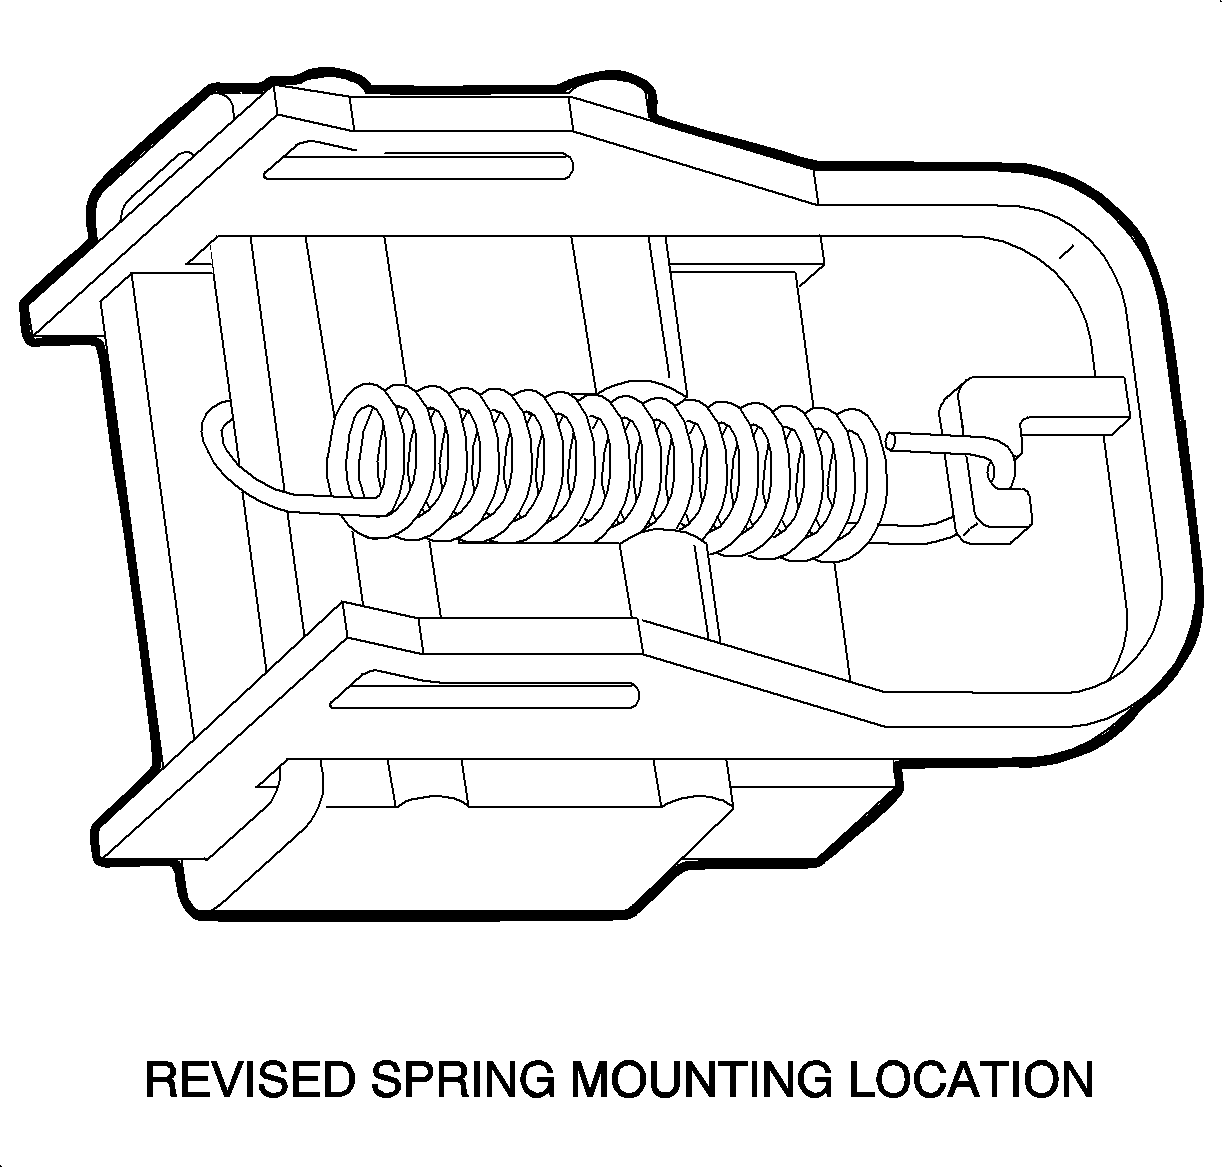
- Attach latch spring to console housing at revised location.
- Using needle nose pliers attach the other end of the spring to the tab located on the latch button.
- Connect roof console wire harness to circuit board.
- Connect dome lamp wire harness.
- Line-up roof console locking tabs with roof bracket.
- Push-up on roof console to engage locking tabs.
- Support rear of roof console.
- Install two screws inside dome lamp.
- Snap dome lamp lens into place.
- Install four screws above roof console display.
Important: Support rear of roof console while performing next step.
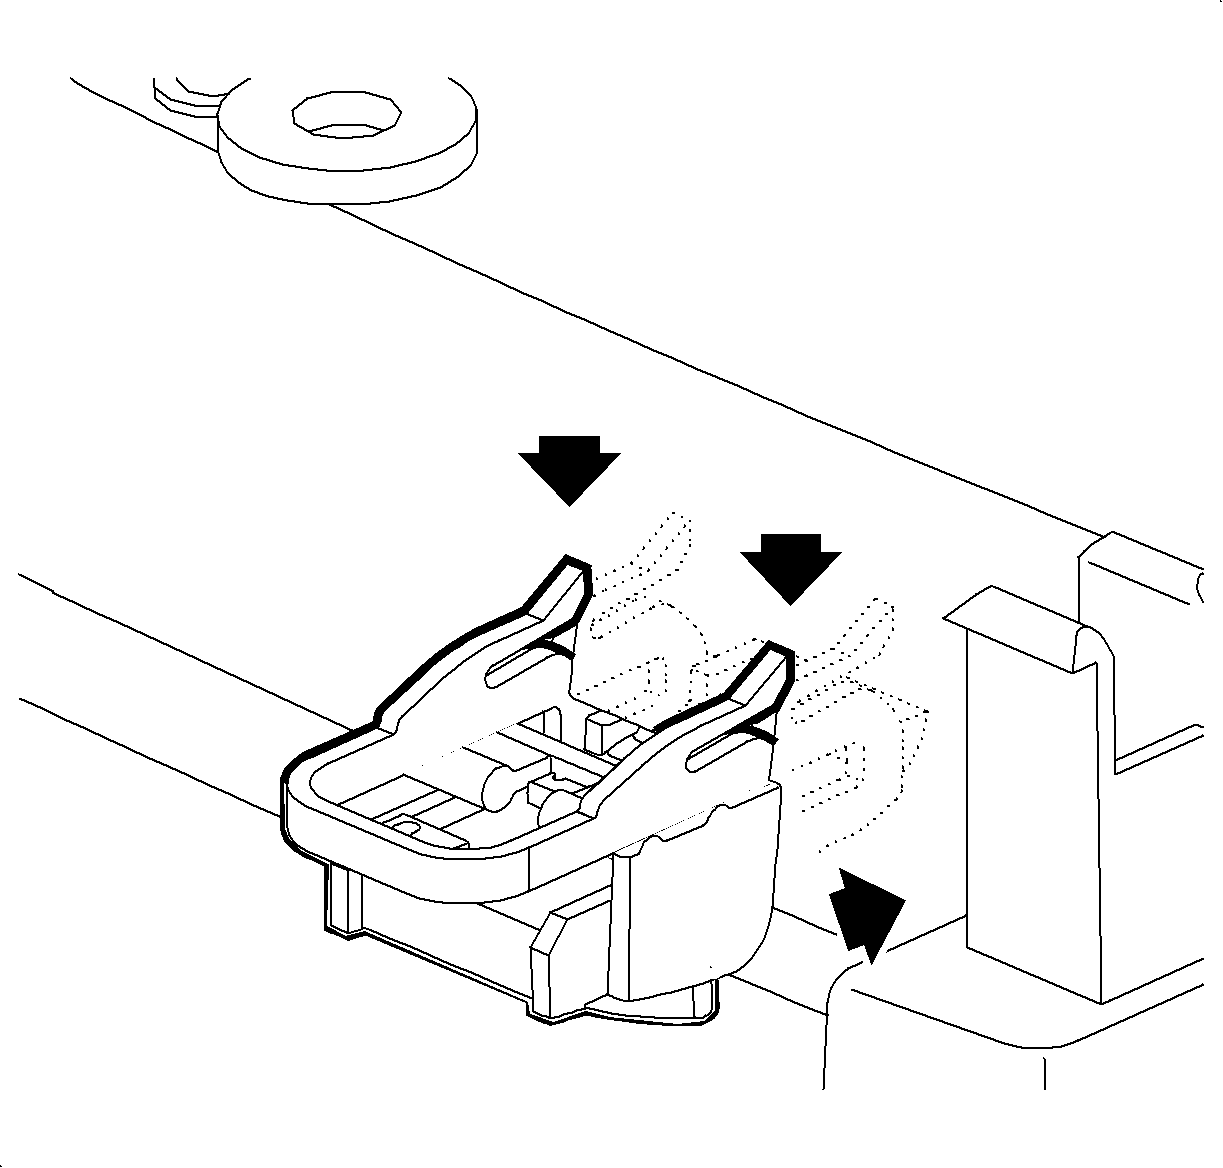
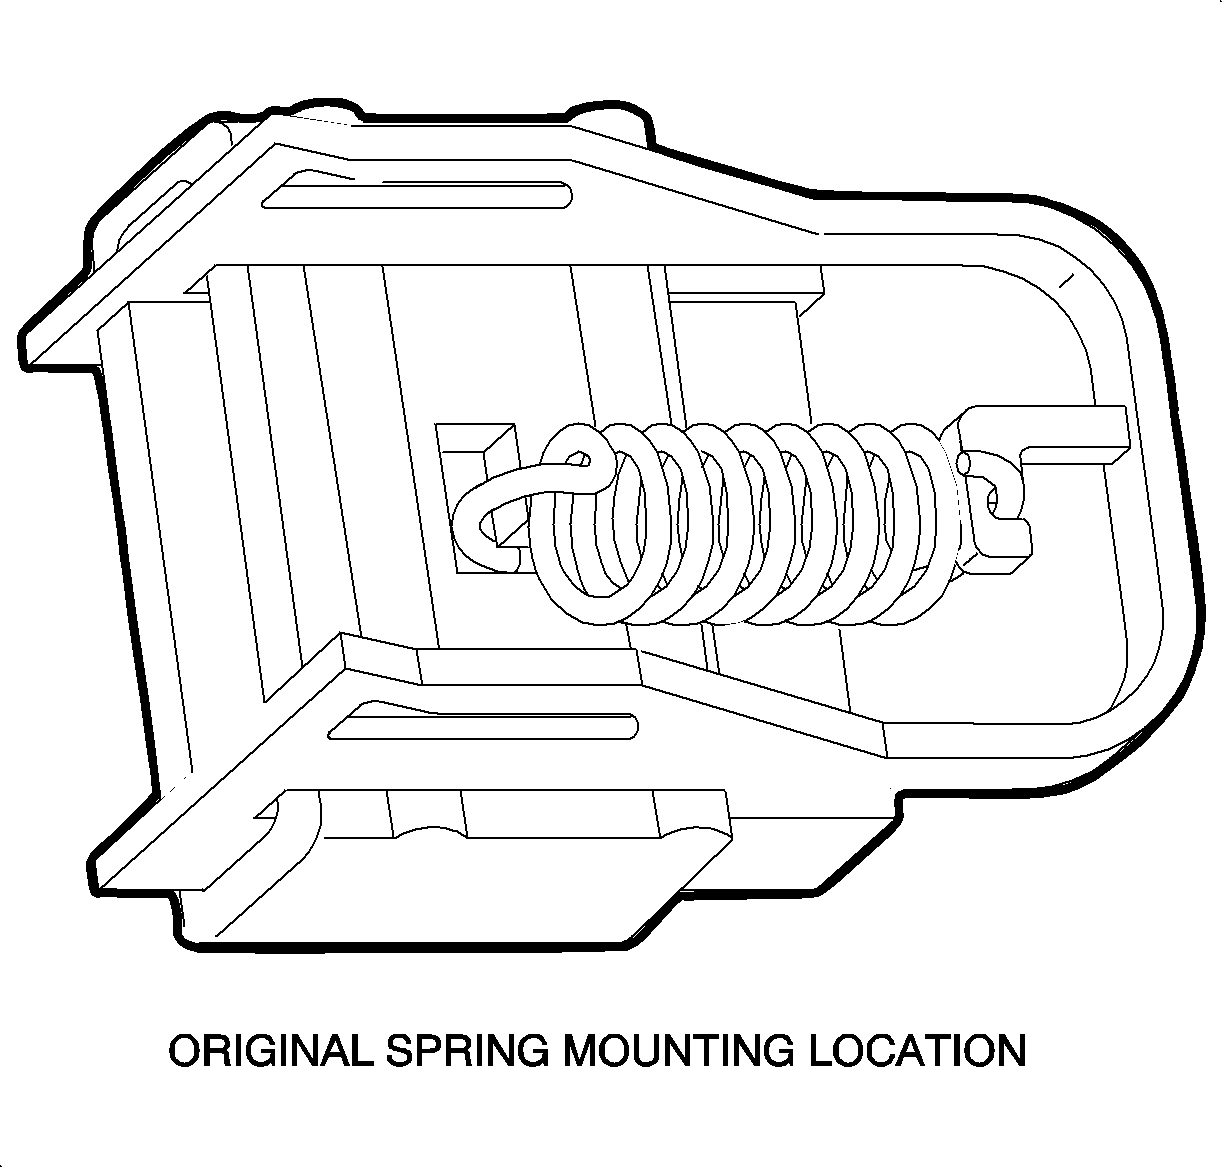
Important: The replacement spring is designed to attach to the revised location, therefore the original mounting tab must be removed.
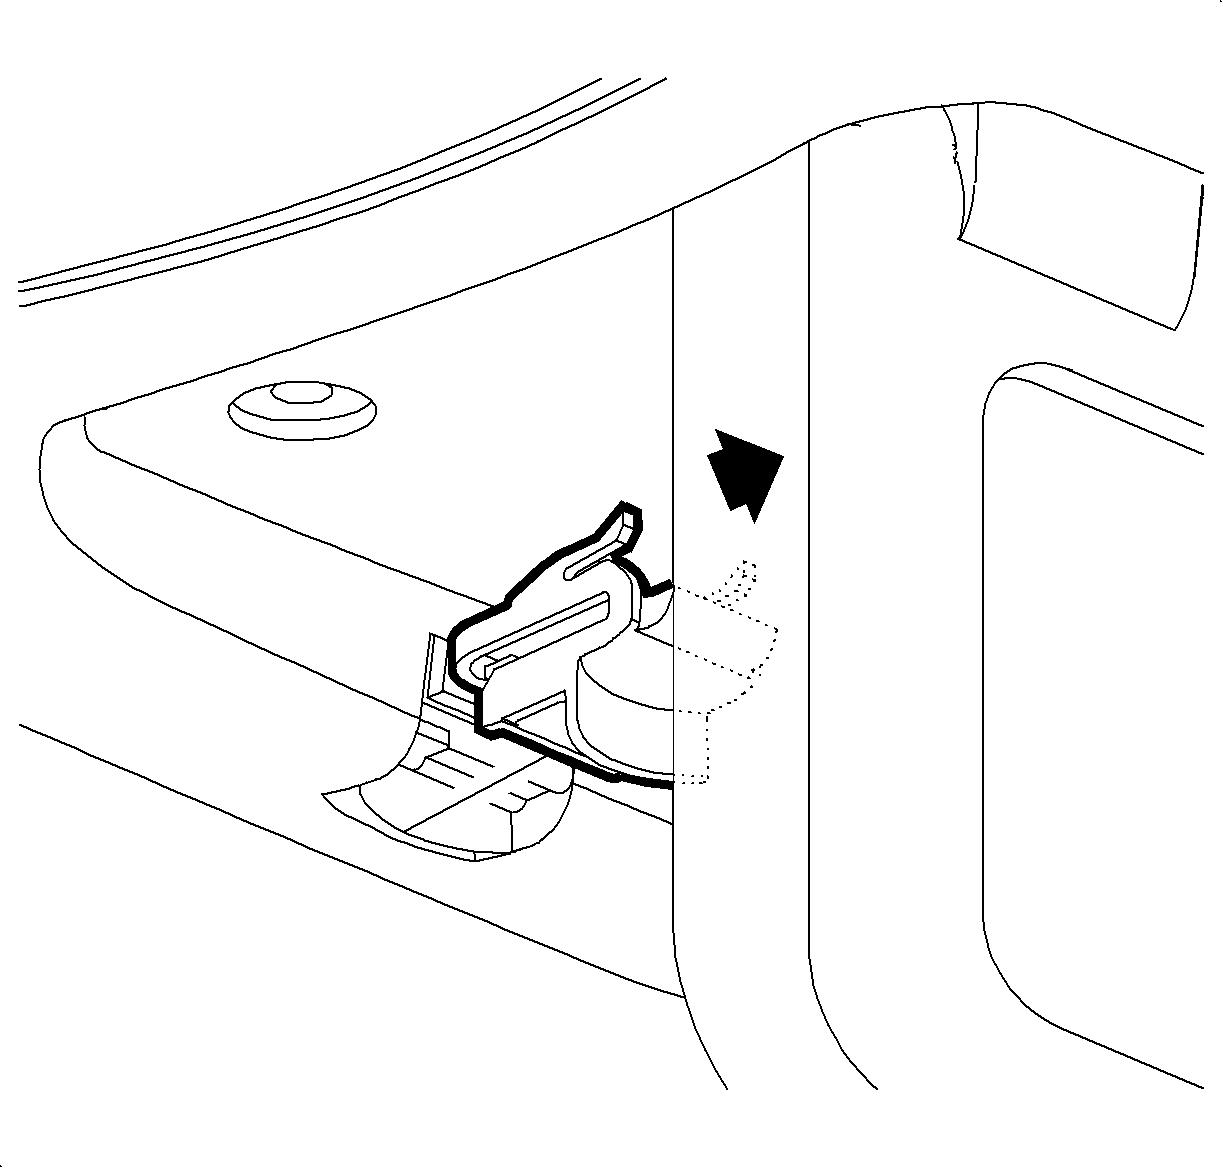


Tighten
Tighten the roof console to bracket to 2.0 N·m (18 lb -in).

Tighten
Tighten the roof console to bracket to 2.0 N·m (18 lb -in).
Parts Requirements
22709343 | Push Button Kit Video Display Latch |
Claim Information
To receive credit for this repair during the warranty coverage period, submit a claim through the Saturn Dealer System for R5555 (Latch, Video Screen Replace (Includes Overhead Console R&I)), or if another procedure is performed, refer to the appropriate Electronic Labor Time Guide for the correct Labor Operation Code and Time.
