Headliner Sags or Hangs Too Low at Rear of Sunroof Opening

| Subject: | Headliner Sags or Hangs Too Low at Rear of Sunroof Opening (Perform Dome Lamp Inspection and, if Necessary, Service Procedure in 99-T-69B before Proceeding with Service Procedure in this Bulletin -- Due to revised service procedure, this bulletin has been revised and supersedes bulletin 00-T-17B, which should be discarded. -- IMPORTANT: It is not necessary to perform procedure in 99-T-69B if hook-and-loop material is already stapled to dome lamp and riveted to sunroof module. -- Refer to Technical Bulletin 99-T-69B for information regarding rattle noises from headliner area. If necessary, perform procedure in 99-T-69B before performing procedure for sagging headliner in this bulletin. |
| Models: | 2000 - 2002 Saturn L-Series Sedans with sunroof (RPO CF5) |
Condition
Some customers may comment about the headliner sagging or hanging too low at the rear of the sunroof opening.
Cause
This condition may be caused by either the hook-and-loop fastening material not being secure, or the hook-and-loop fastening material is releasing from inner roof panel or rear of dome lamp housing.
Correction
Dome Lamp Inspection
Remove dome lamp assembly by performing steps 2 through 4 outlined in this bulletin and inspect the hook-and-loop fastening material.
| • | If hook-and-loop fastening material is stapled to dome lamp and riveted to sunroof module, reinstall dome lamp assembly and push firmly on the dome lamp housing and around entire sunroof opening to fully engage hook-and-loop fastening material. |
| • | If hook-and-loop fastening material is not secure, it will be necessary to install rivets through dome lamp housing and into sunroof module. Refer to following procedure outlined in this bulletin. |
Procedure
- Inspect headliner at rear of sunroof opening to verify customer concern.
- Remove dome lamp lens cover by pulling down gently.
- Remove reading and dome light bulbs from dome lamp assembly.
- Remove dome lamp assembly by prying retaining tabs upward and inward.
- Disconnect dome lamp wiring harness connector and remove dome lamp.
- Inspect hook-and-loop material on dome lamp assembly and sunroof module.
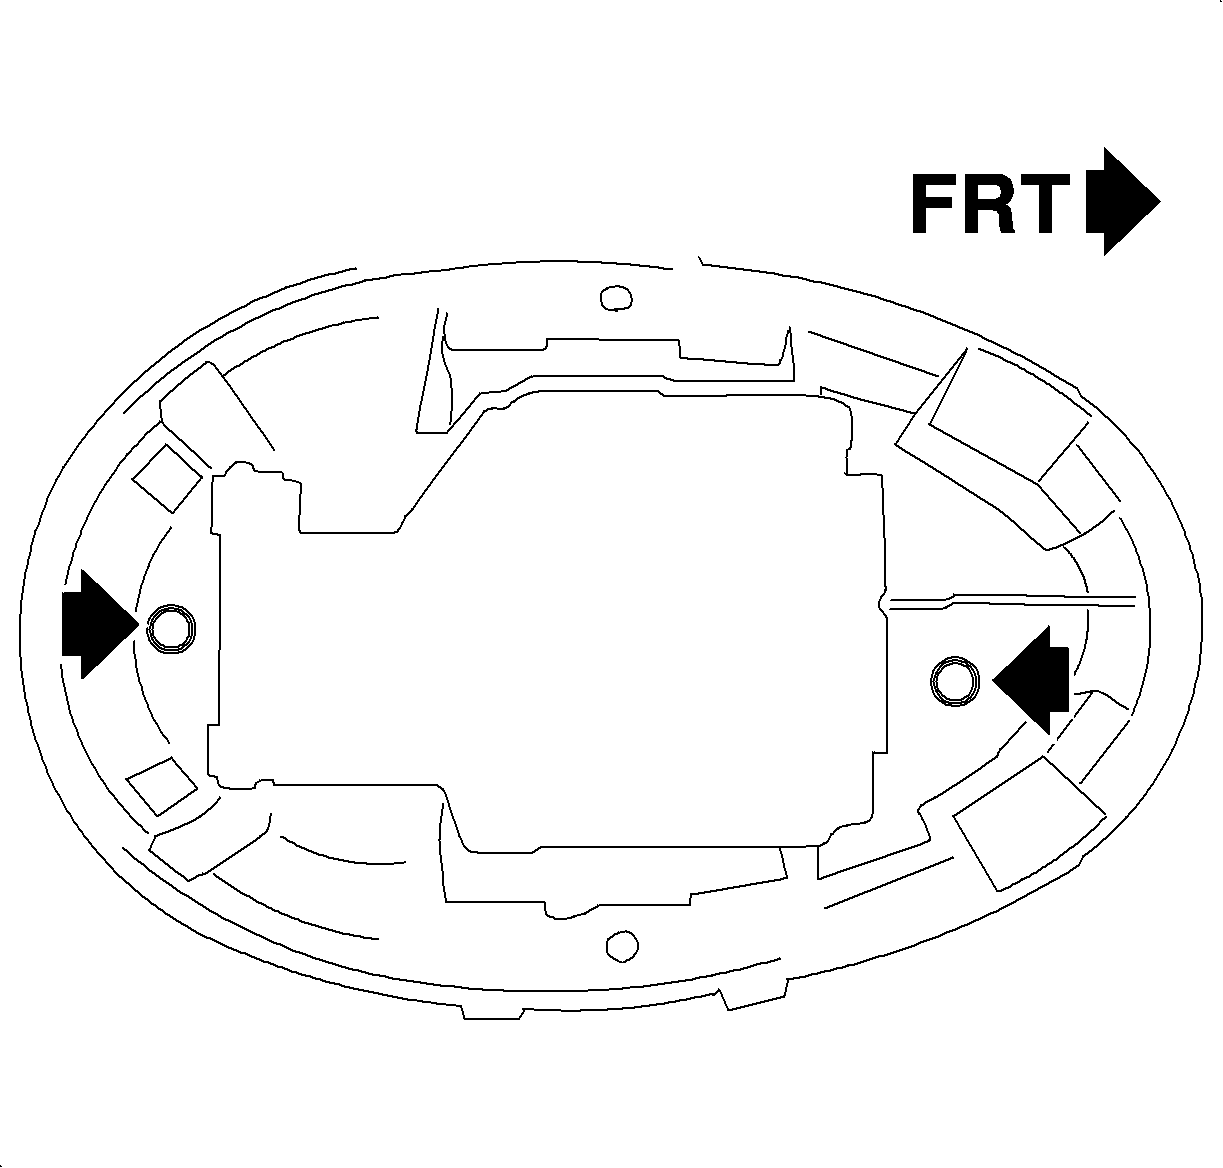
- Locate the circles molded in the surface of dome lamp assembly. One is in either of the front reading lamp bulb mounting areas and one is in the dome lamp bulb mounting area.
- Drill a 3.5 mm (9/64 in.) hole in the center of the front location and in the center of the rear location. These holes must penetrate the hook-and-loop fastening material that was previously installed on dome lamp assembly.
- Position dome lamp assembly back up to headliner.
- Connect dome lamp wiring harness connector.
- Install dome lamp assembly by tucking side mounted retaining tabs into headliner and gently pushing dome lamp upward.
- Move sunroof sunshade to the full closed position.
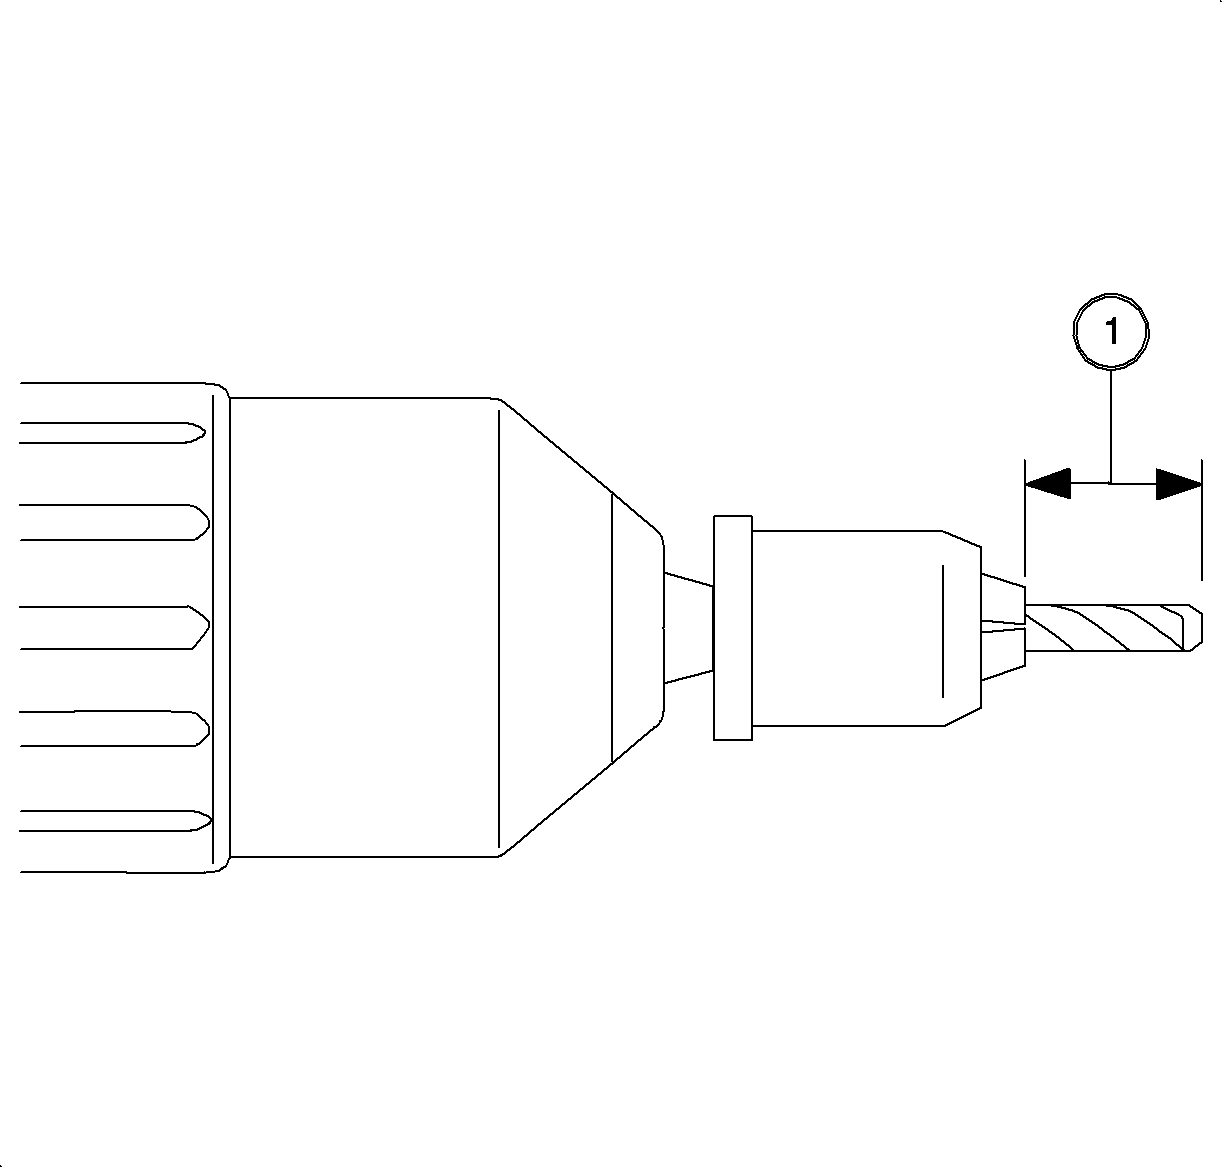
- Install a drill stop or equivalent device to a 3.5 mm (9/64 in.) drill bit. Leave 19 mm (0.75 in.) protruding from the edge of drill stop at location (1) as shown in illustration. The drill stop will act as a guide when drilling mounting holes in the sunroof module and prevent drill bit from penetrating the roof sheet metal.
- Install a drop cloth, or equivalent protective cover, in the interior of the vehicle to prevent drill shavings from landing on vehicle interior surfaces.
- Hold the dome lamp firmly against sunroof module and drill 3.5 mm (9/64 in.) holes through the holes previously drilled in dome lamp assembly.
- Hold dome lamp assembly firmly against sunroof module and install a 1/8 in. X 3/8 in. aluminum rivet through the front drilled hole. Ensure rivet engages both layers of sheet metal.
- Install a 1/8 in. X 1/4 in. aluminum rivet through rear drilled hole.
- Operate sunshade from full closed to full open positions to ensure there is no interference between sunshade and rivets.
- Install reading and dome lamp bulbs.
- Install dome lamp lens cover.
- Function dome and reading lamps to ensure proper operation.
- Ensure that no metal shavings from drilling process remain in vehicle.
Important: If necessary, perform procedure in Technical Bulletin 99-T-69B to correct rattle noises in headliner area before performing the following procedure.


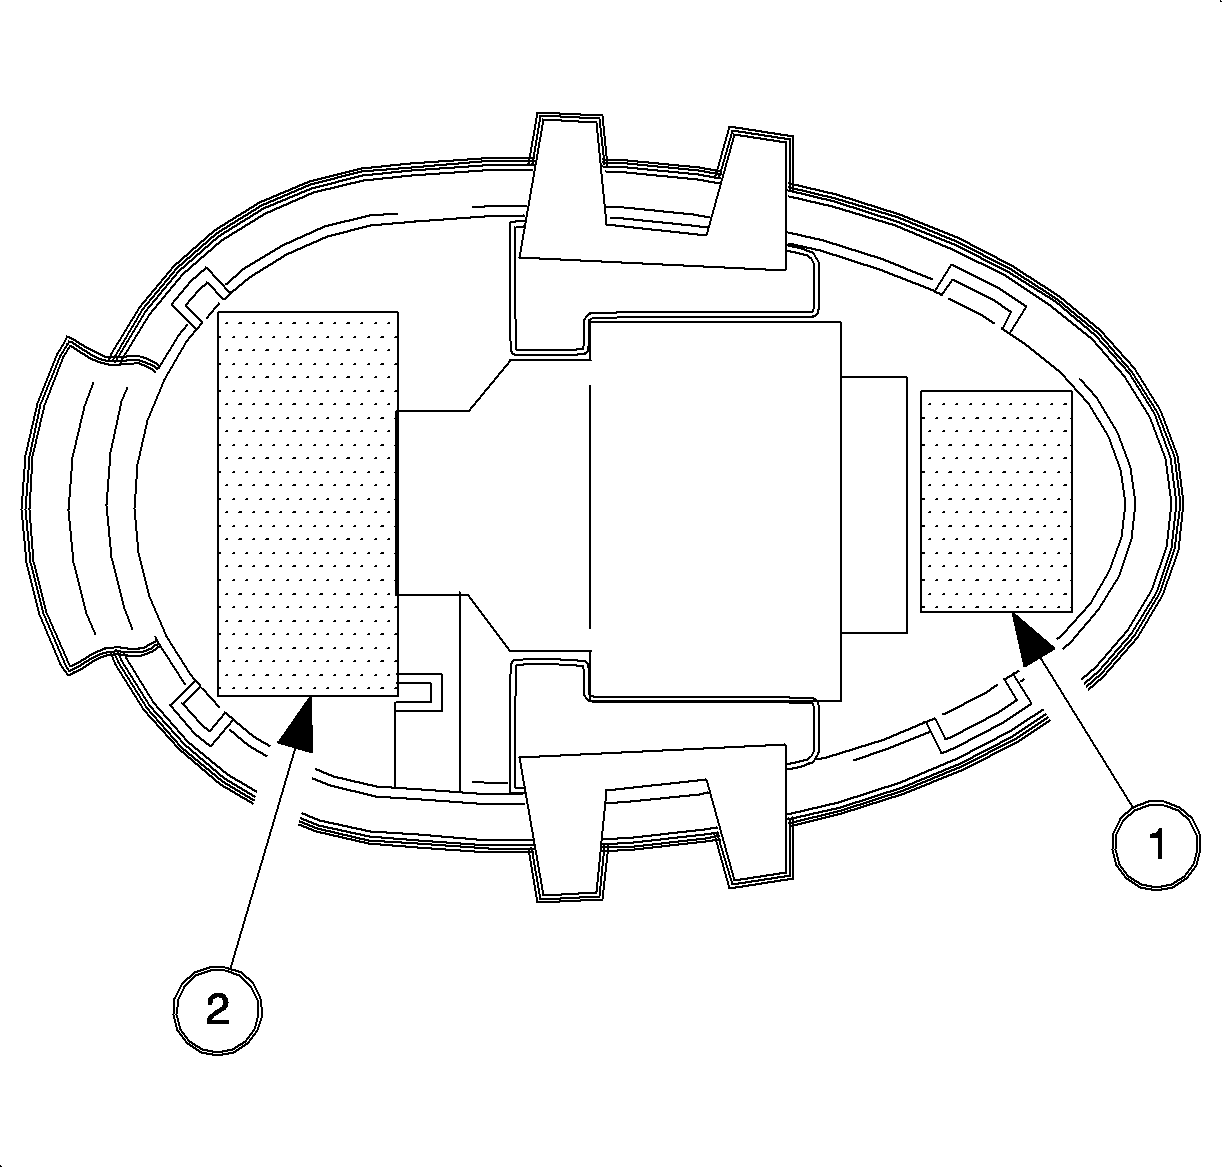
Important: It is critical that hook-and-loop material is installed properly to ensure proper positioning and alignment of dome lamp to sunroof module. At front of dome lamp assembly at location (1), only the piece of loop material is required. At rear of dome lamp assembly at location(2), both of the hook-and-loop pieces are required.
| • | Inspect hook-and-loop material at rear of dome lamp assembly. |
| - | If hook-and-loop material has separated properly leaving one piece on the dome lamp assembly and one piece on the sunroof module, this area is OK and can be drilled as is for a rivet. |
| - | If hook-and-loop material did not separate properly and has detached from either mounting surface, clean the mounting surface and apply a new piece of adhesive-backed hook-and-loop material to the dome lamp assembly or sunroof module as needed. |
| • | Inspect hook-and-loop material at front of dome lamp assembly. |
| - | If hook-and-loop material has separated properly leaving one piece on the dome lamp assembly and one piece on the sunroof module, leave the piece on the dome lamp assembly and remove and discard the piece on the sunroof module. |
| - | If hook-and-loop material did not separate properly and has detached from the dome lamp mounting surface, clean the dome lamp mounting surface and apply a new piece of adhesive-backed hook-and-loop material only to the dome lamp assembly. This loop material is only to act as a spacer. So, the hook material on the sunroof module is not required. Remove hook-and-loop material from sunroof module and clean sunroof module mounting surface where hook-and-loop material was located. |


Notice: Do not allow drill bit to penetrate holes being drilled any further than drill stop placed on bit. Roof panel damage may result if holes are drilled too far.
Important: Drill bit must penetrate two layers of sheet metal at front hole location and one layer of sheet metal at rear hole location.
Parts Requirements
One 1/8 in. X 1/4 in. aluminum rivet is required
One 1/8 in. X 3/8 in. aluminum rivet is required
Additional hook-and-loop fastening material may be required
Claim Information
To receive credit for this repair during the warranty coverage period, submit a claim through the Saturn Dealer System as follows:
Labor Operation | Description | Labor Time | Labor Time |
|---|---|---|---|
VW | Install Rivets in Dome Lamp Assembly | Z4091 | 0.4 hrs. |
