Engine Coolant Thermostat Replacement 2.2L (L61)
Removal Procedure
- Drain the coolant. Refer to Cooling System Draining and Filling .
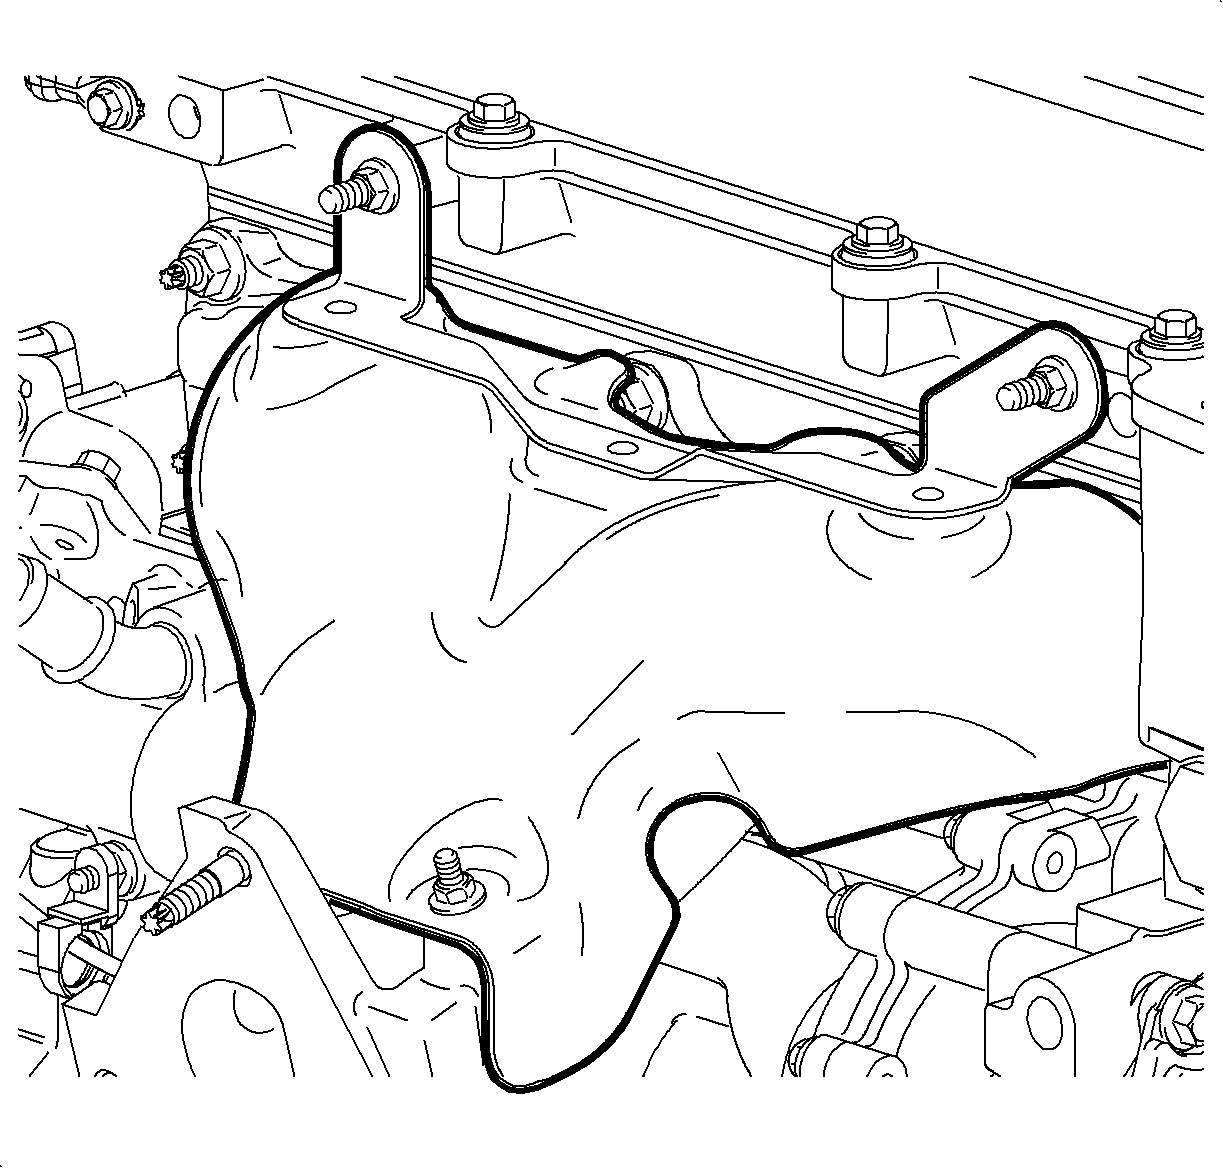
- Remove the exhaust heat shield bolts.
- Remove the exhaust heat shield.
- Raise the vehicle.
- Drain the coolant from the water pump drain plug.
- Remove the thermostat cover bolts from the thermostat housing.
- Remove and discard the thermostat housing O-seal.
- Remove the water pipe from the water pump assembly.
- Remove and discard the seals from the water pipe.
- Remove the inner thermostat sleeve.
- Remove the thermostat assembly.
Notice: The thermostat will not function correctly once it is contacted by oil. If oil is found in the cooling system, it must be flushed and the thermostat's cartridge replaced.
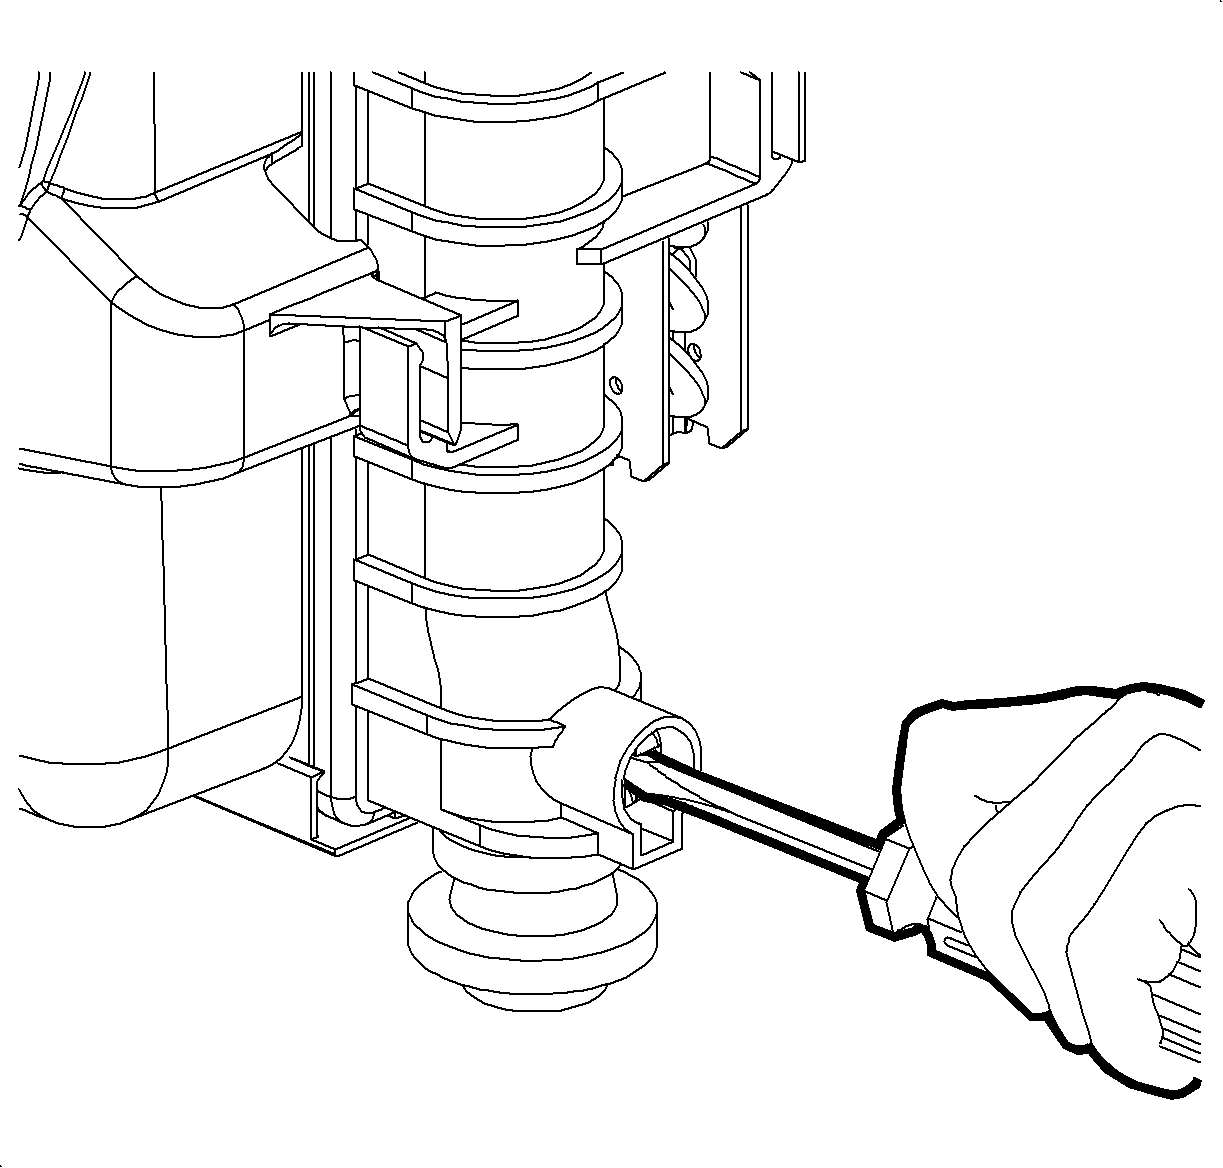
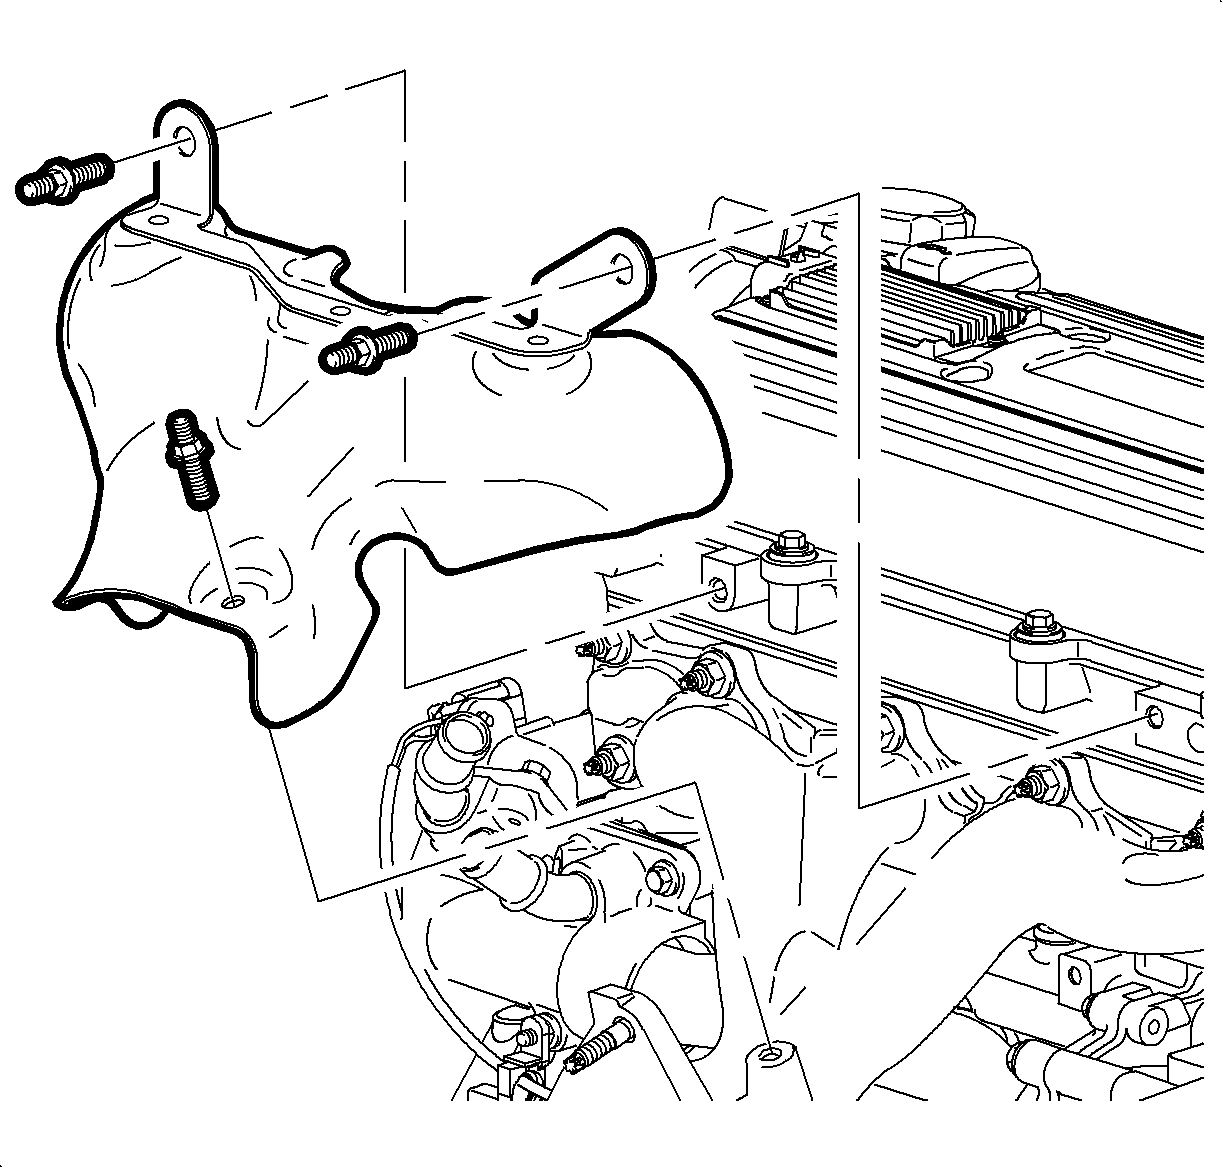
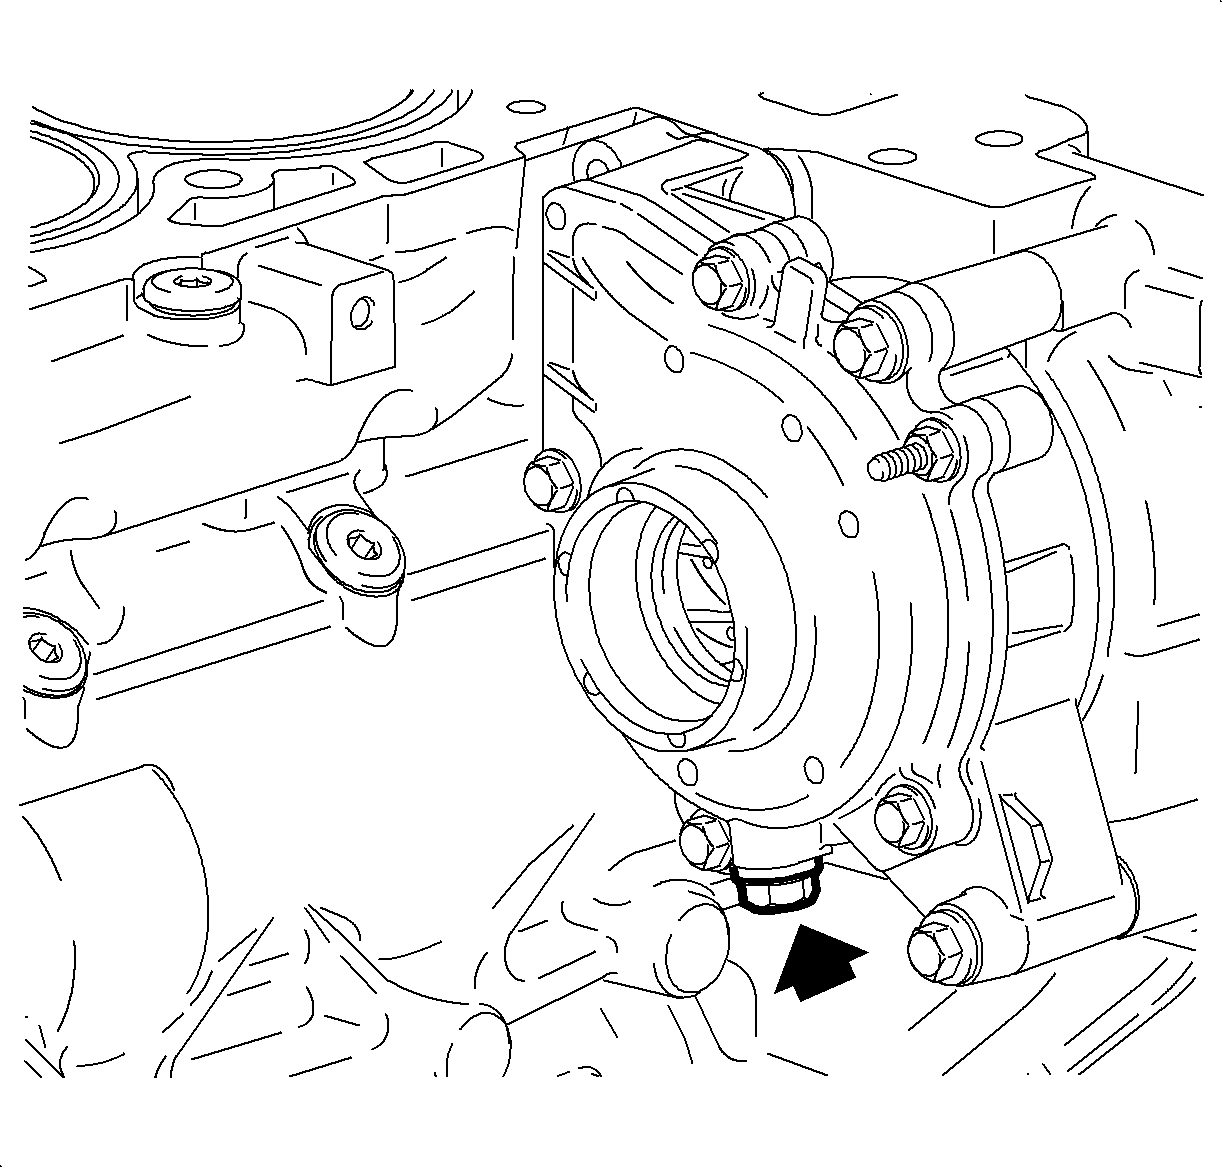
Important: A drain plug has been provided at the bottom of the water pump assembly for additional coolant drainage from the engine block and water pump.
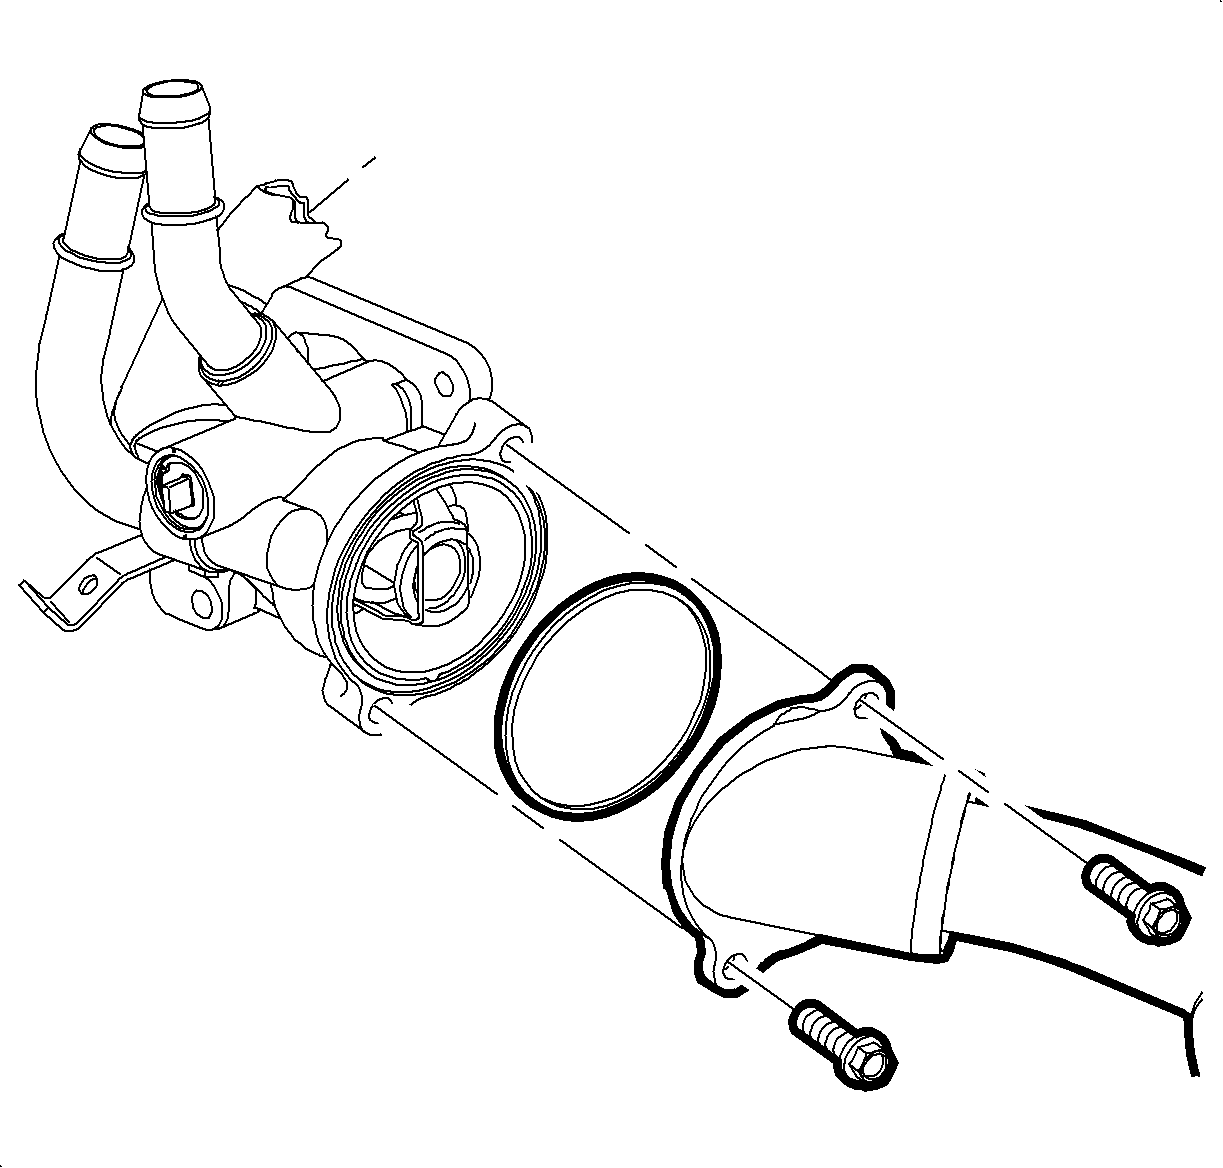
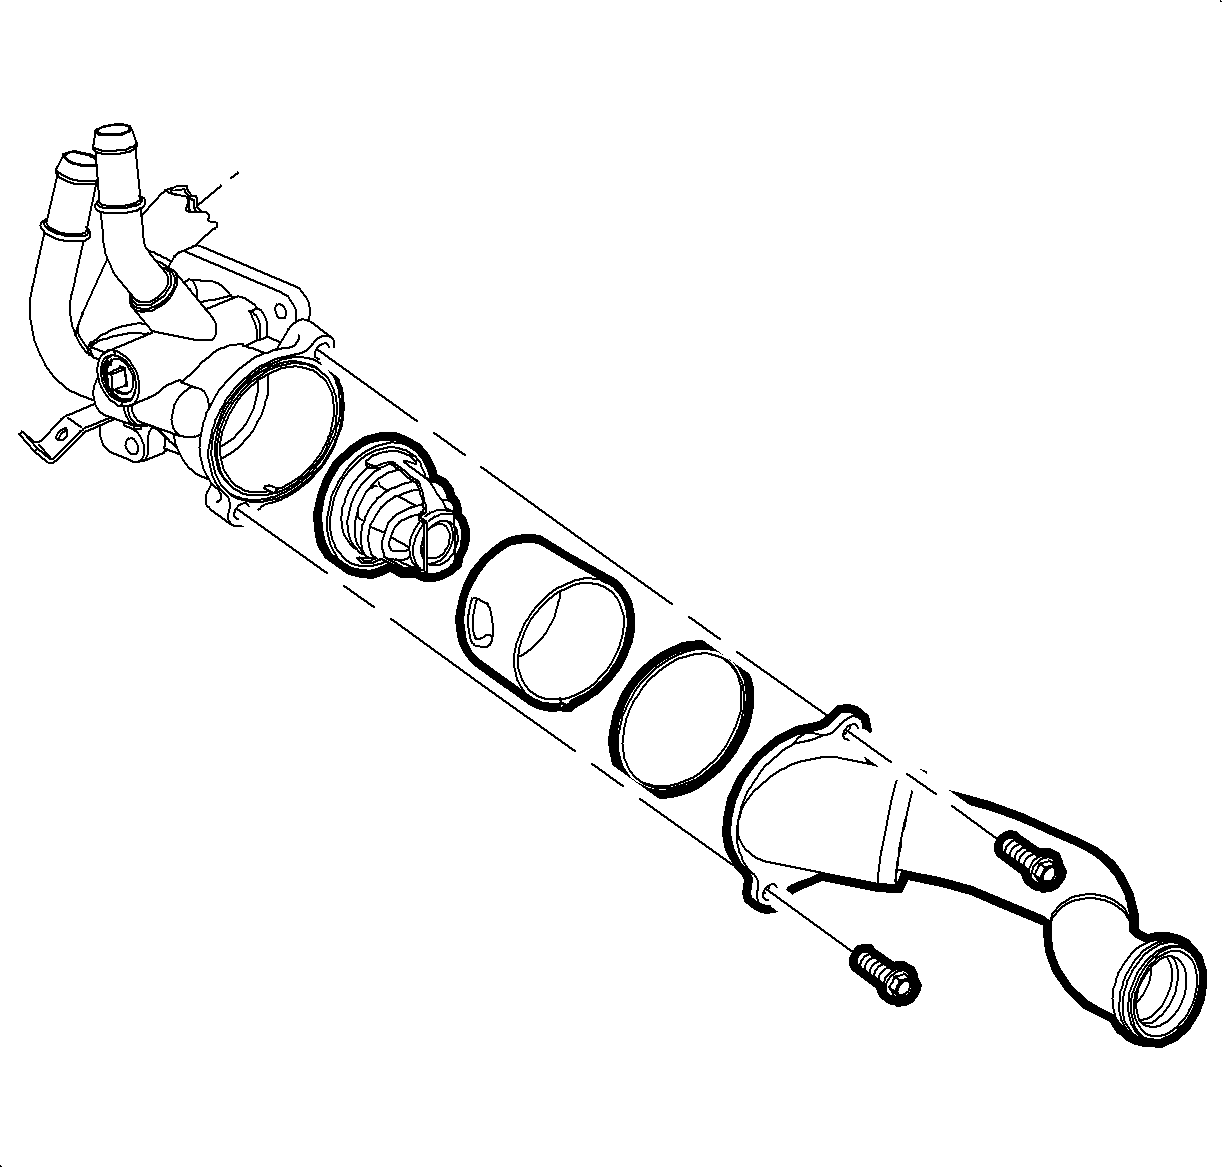
Important: Twist the water feed pipe while pulling to remove it from the water pump.
Installation Procedure
- Install the thermostat cartridge into the thermostat housing while aligning the cartridge tangs up with the thermostat housing bolt holes. This will assure the inner sleeve can be completely installed.
- Align and insert the inner sleeve notch into the thermostat housing. If the inner sleeve notch is not properly positioned, the sleeve will not completely seat into the housing.
- Install a new O-seal on the water pipe.
- Position the water pipe into the water pump assembly.
- Seat the water feed O-seal by pushing and twisting toward the water pump. Take care not to tear or damage the O-ring.
- Install the thermostat housing cover to the water pipe. The water feed pipe has a locating tab to assure proper alignment.
- Install a new thermostat housing cover seal into the recess groove.
- Position the thermostat housing cover into position.
- Install the thermostat housing cover bolts.
- Lower the vehicle.
- Install the exhaust manifold heat shield.
- Install the exhaust manifold heat shield bolts.
- Verify the drain valve at the radiator and the water pump are closed.
- Fill the engine coolant . Refer to Cooling System Draining and Filling .
- Verify the repair and inspect for any leaks.
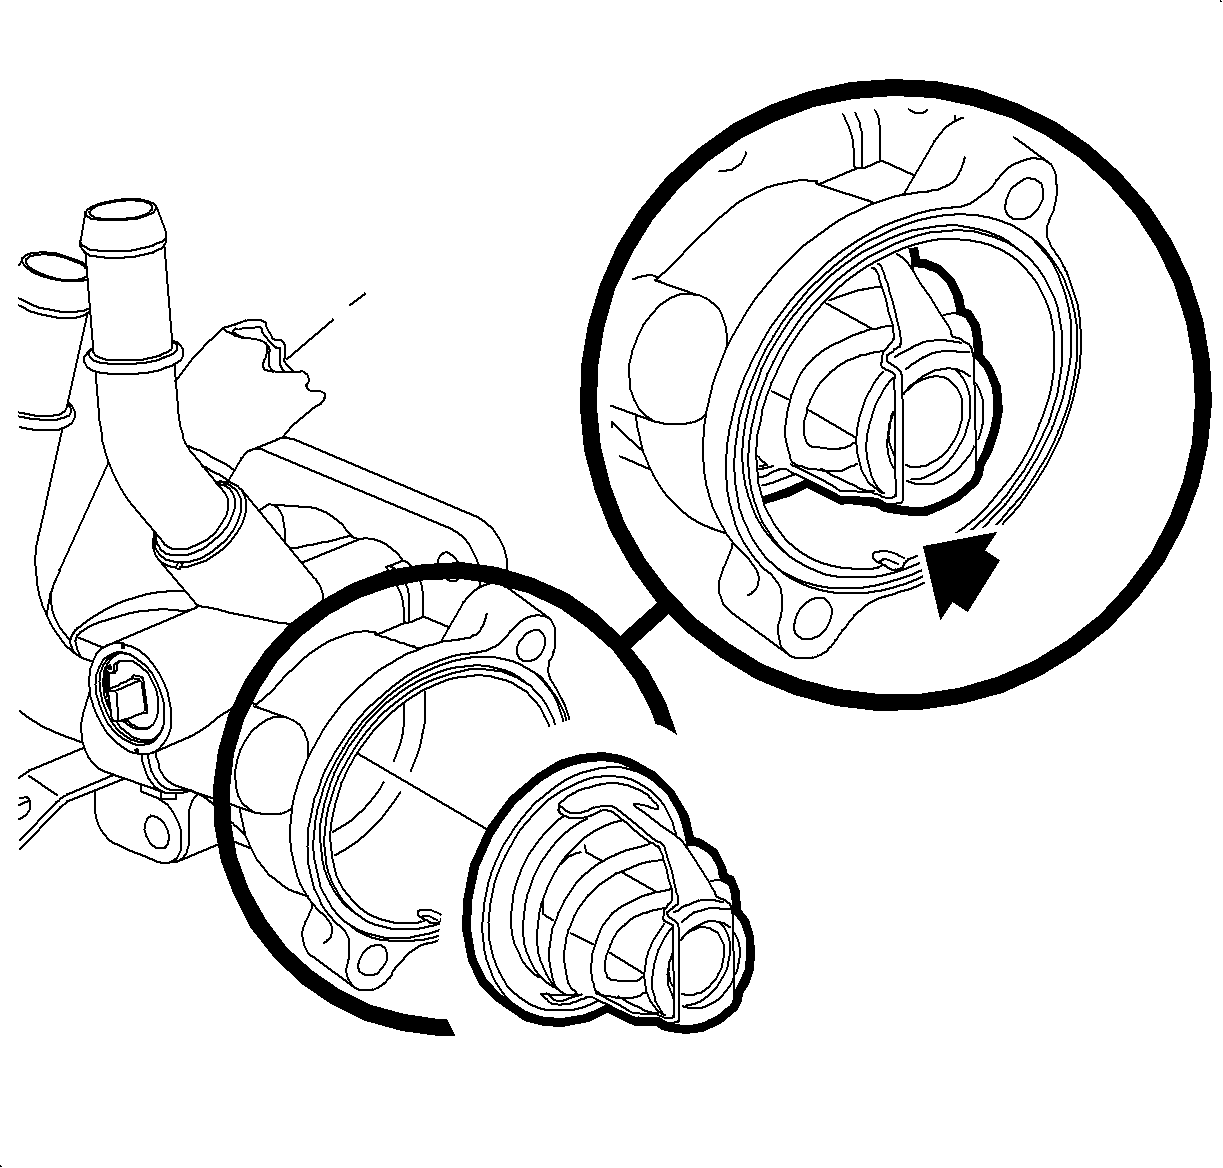
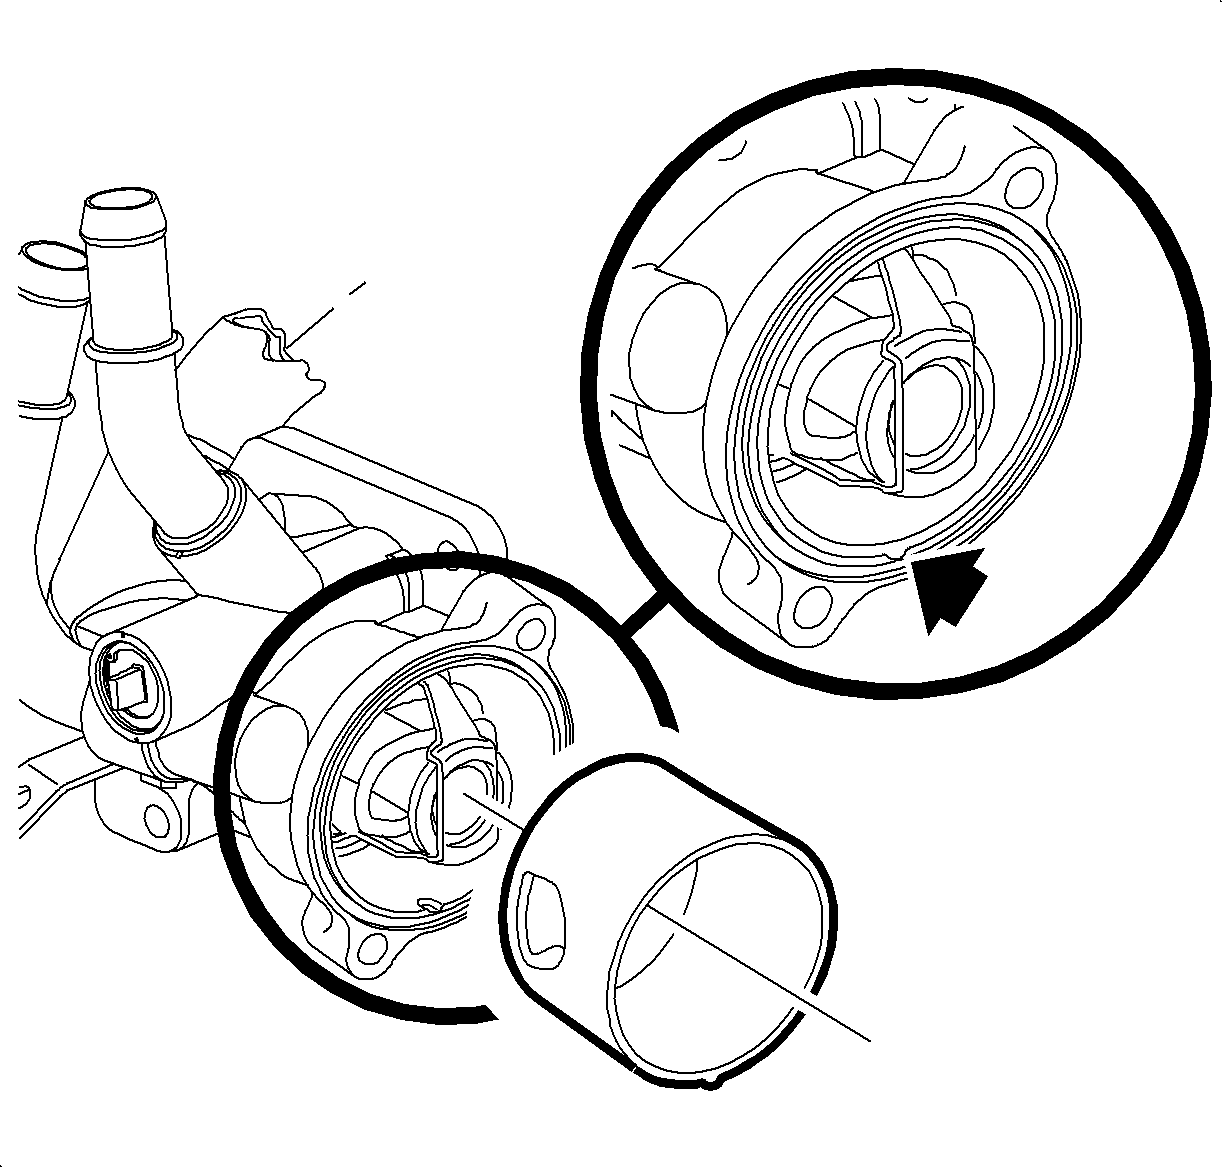
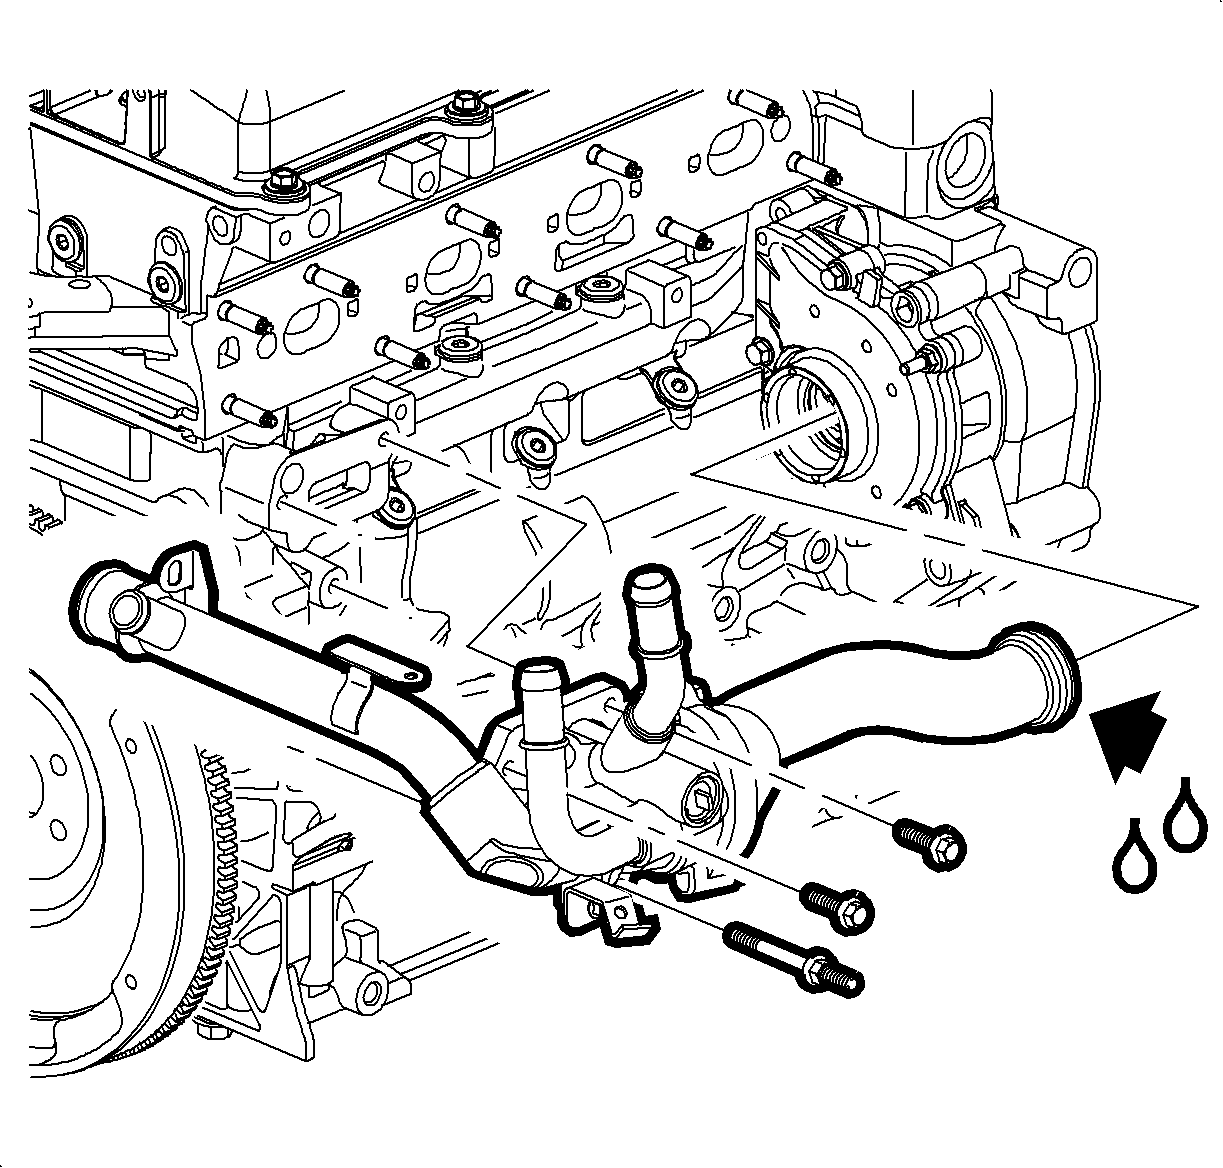
Important: The water feed pipe seals can be slightly lubricated with silicone gel to aid during installation.

Notice: Refer to Fastener Notice in the Preface section.
Tighten
Tighten the thermostat housing cover-to-thermostat housing bolts to 10 N·m (89 lb in).
Tighten
Tighten the exhaust manifold heat shield bolts to 23 N·m (17 lb ft).

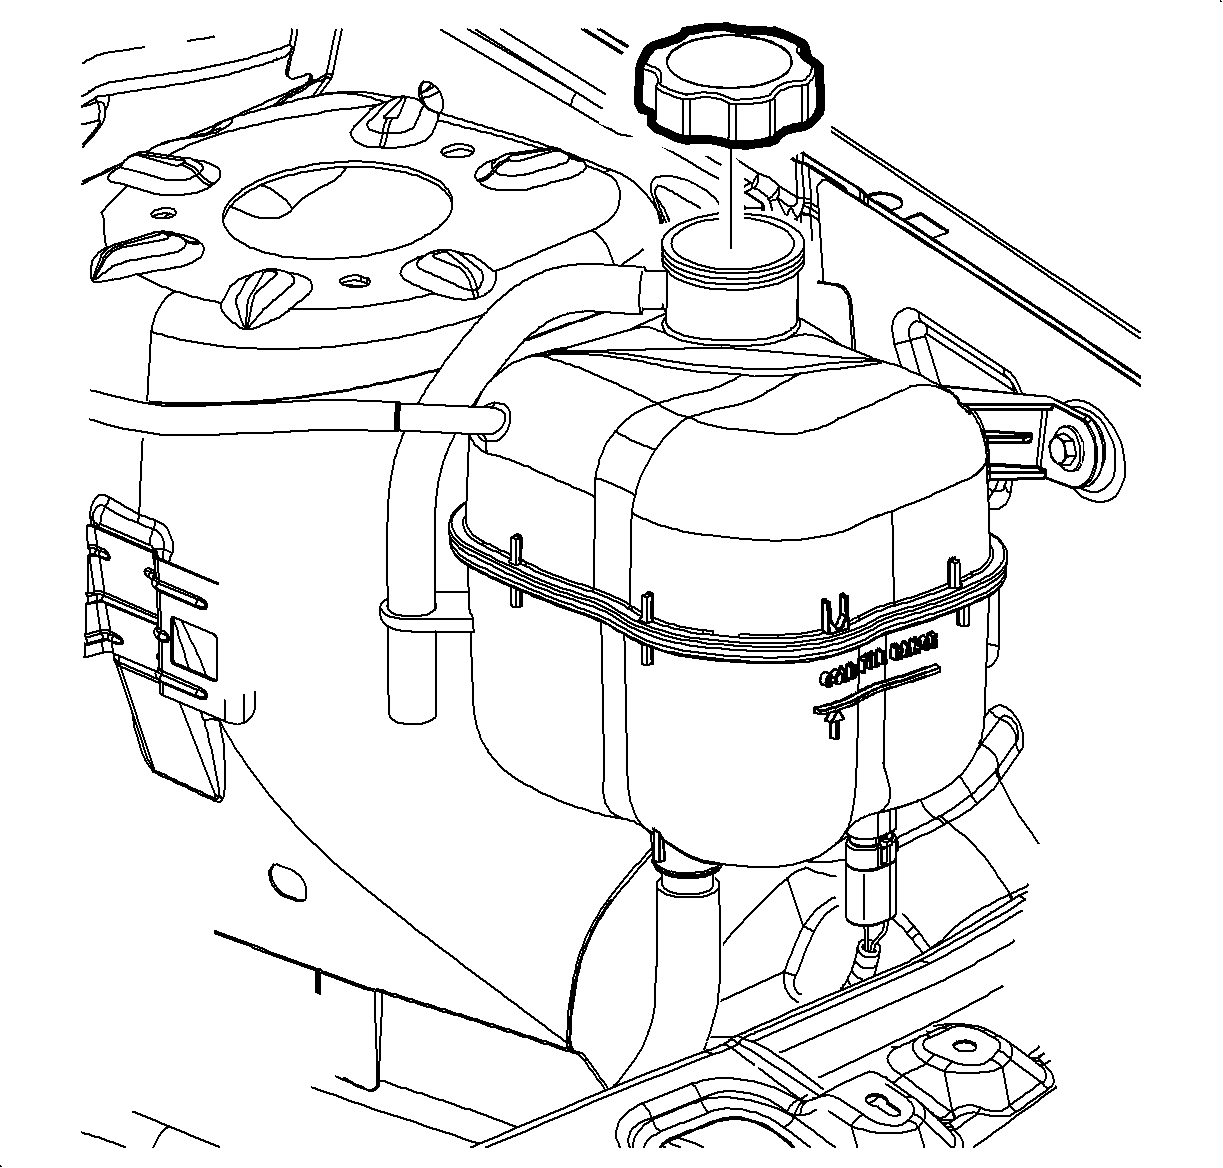
Important: The vehicle must be level when filling the cooling system.
Engine Coolant Thermostat Replacement L81
Removal Procedure
- Drain the coolant. Refer to Cooling System Draining and Filling .
- Lift and support the intake manifold. Refer to Intake Manifold Replacement .
- Disconnect the radiator hose from the coolant pipe.
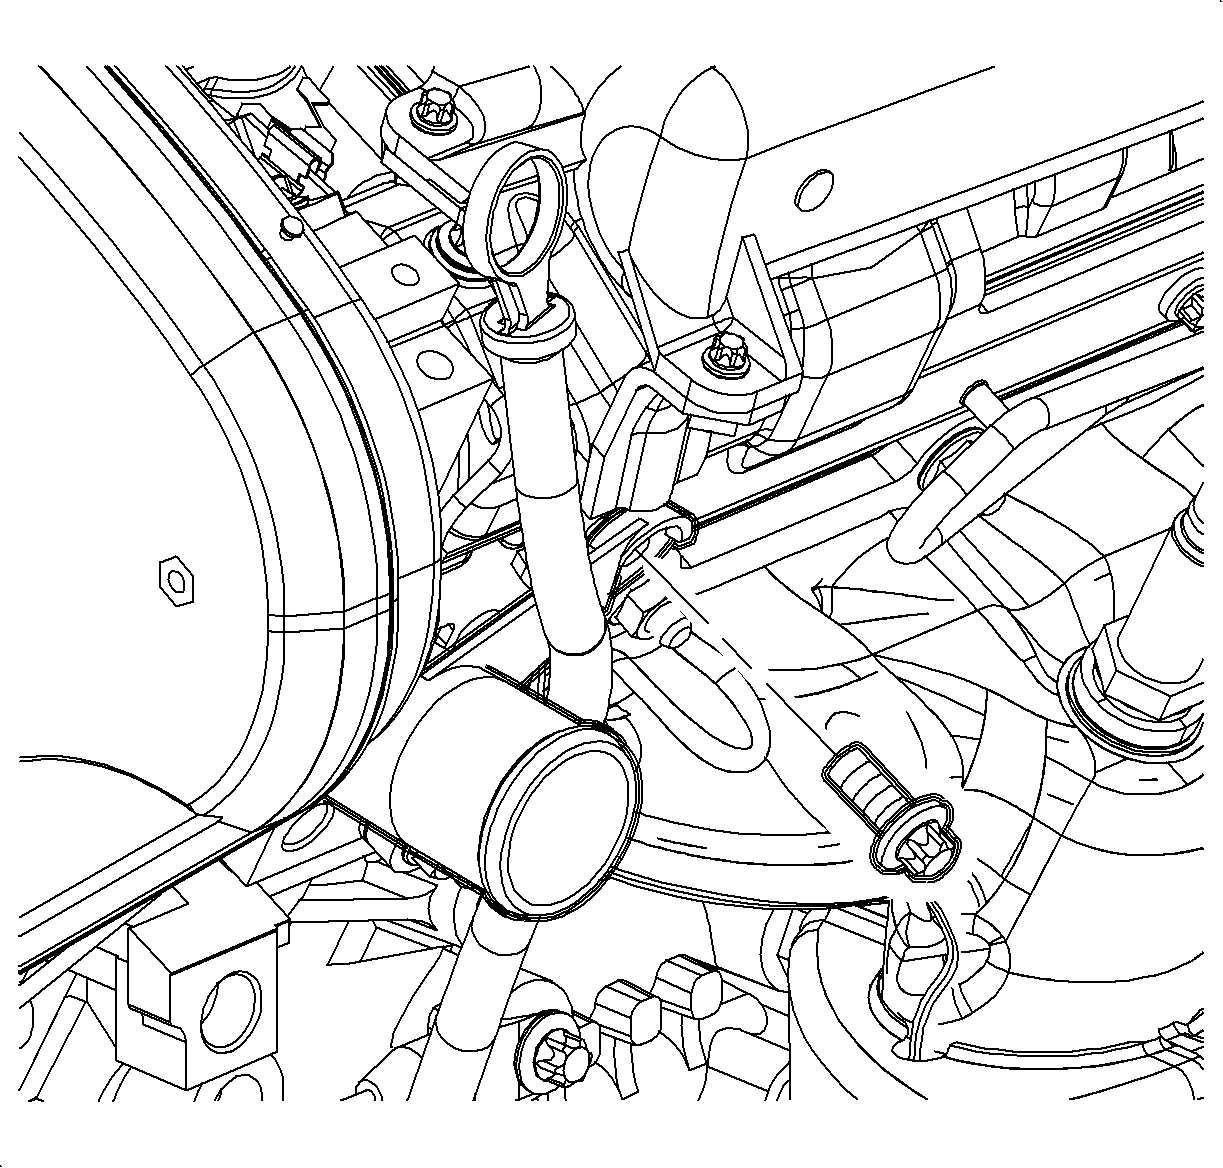
- Remove the coolant pipe/engine lift bracket bolt.
- Rotate the oil level indicator and tube away from the pipe.
- Remove the thermostat extension pipe.
- Remove and discard the O-ring seals.
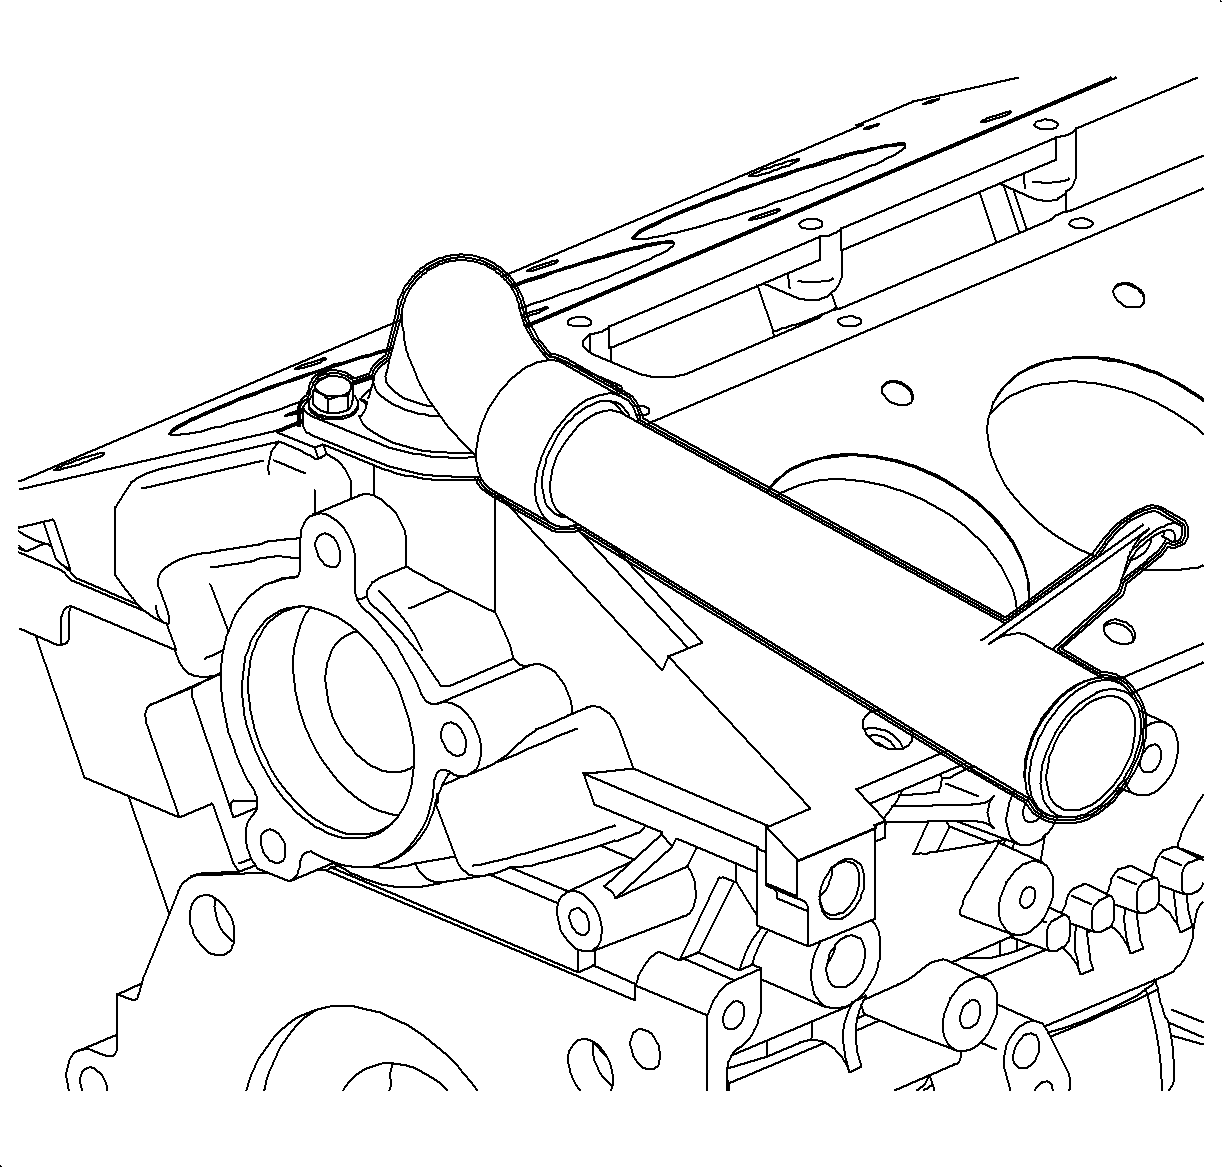
- Remove the thermostat with the housing.
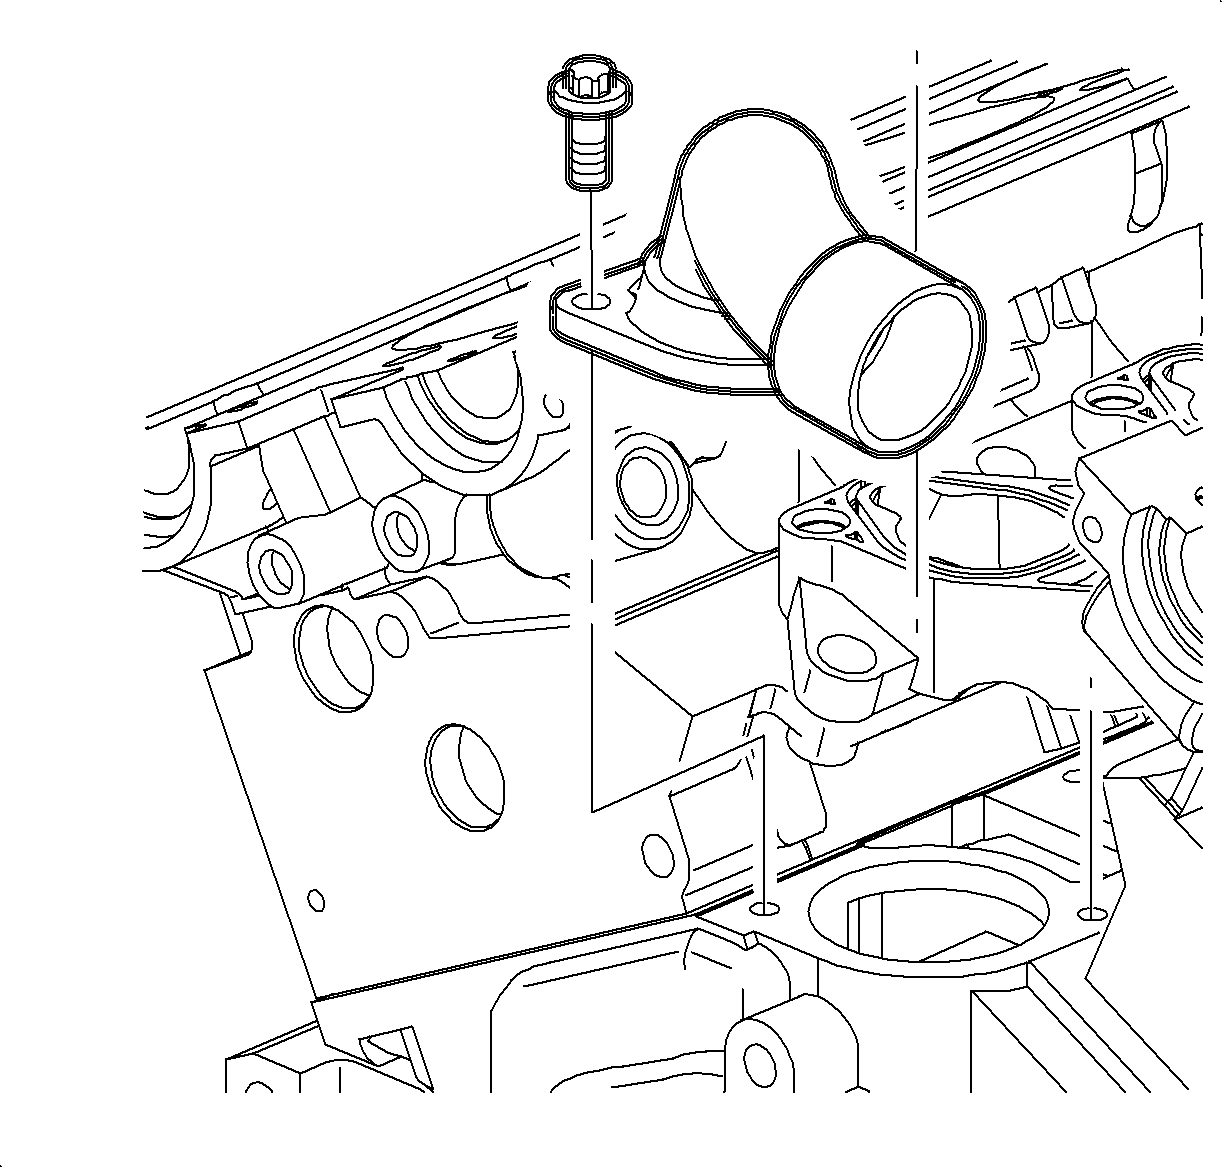
| 8.1. | Remove the bolts. |
| 8.2. | Tilt the rear of the thermostat housing upward. |
| 8.3. | Lift out the housing. |
| 8.4. | Remove and discard the O-ring Seal. |
Installation Procedure
- Install the thermostat with housing.
- Lubricate the coolant pipe O-rings with coolant.
- Install the O-rings on the coolant pipe.
- Properly position the engine lift bracket.
- Install the coolant pipe into the thermostat housing.
- Rotate the oil level tube into position.
- Install the coolant pipe engine lift bracket bolt.
- Connect the radiator hose to the coolant pipe.
- Install the intake manifold. Refer to Intake Manifold Replacement .
- Fill the cooling system. Refer to Cooling System Draining and Filling .
Important: The SUV thermostat housing is different from L-Series.

| 1.1. | Install a new O-ring seal. |
| 1.2. | Position the thermostat with the housing. |
| 1.3. | Apply thread sealant PST 565® to the bolt threads. |
Notice: Refer to Fastener Notice in the Preface section.
| 1.4. | Install the housing bolts. |
Tighten
Tighten the thermostat housing bolts 20 N·m (15 lb ft).
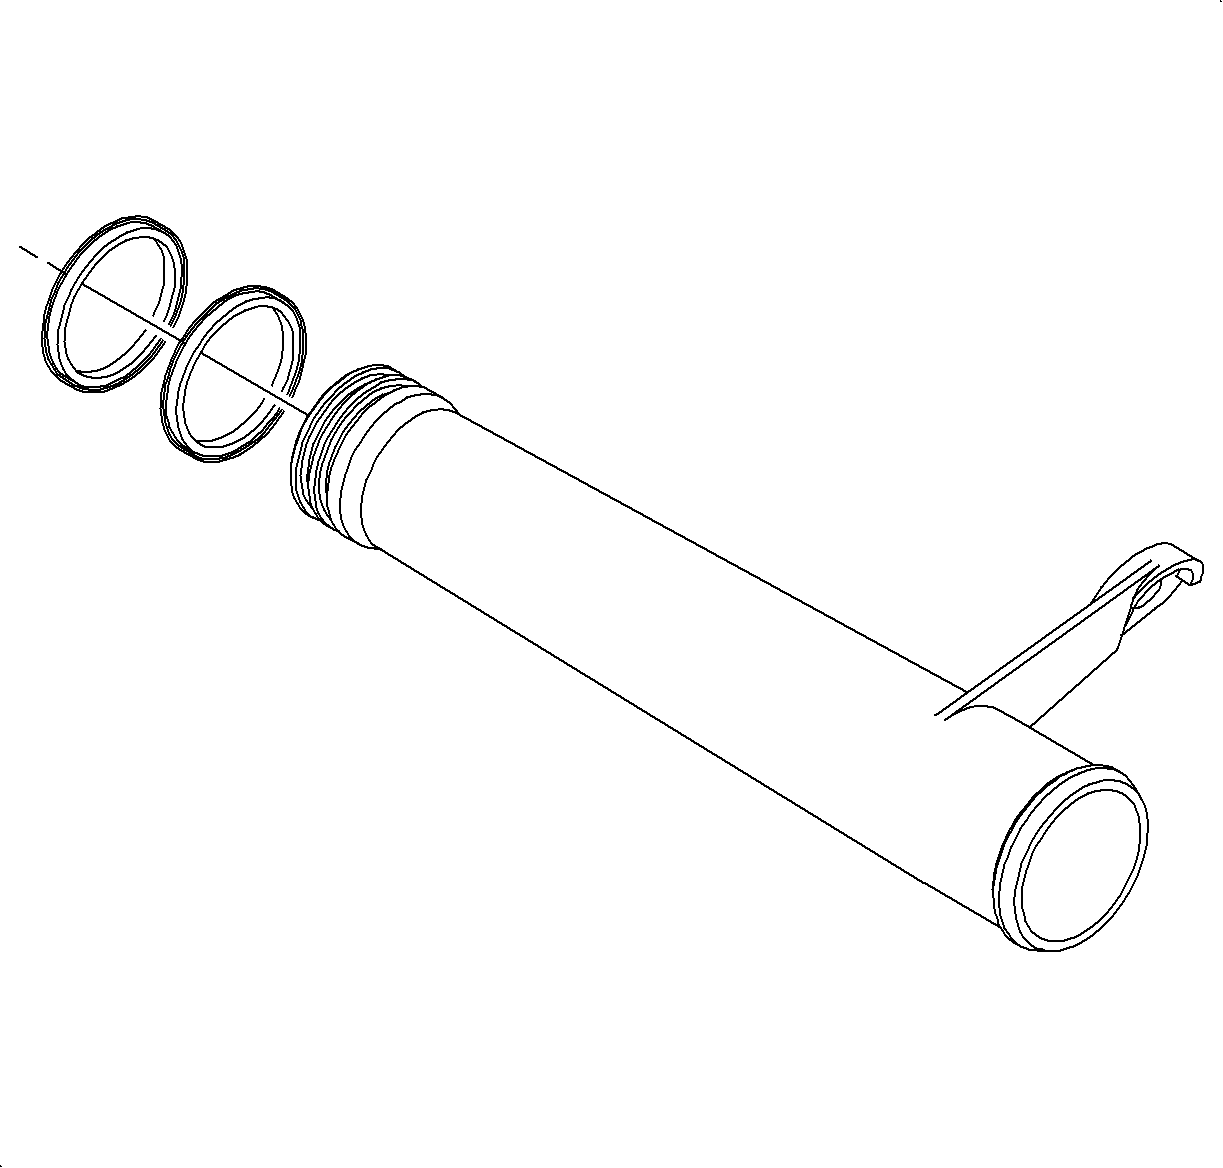

Important: The correct stack up should be cylinder, head, engine lift bracket, coolant extension housing
Tighten
Tighten the coolant pipe engine bracket bolt to 20 N·m (15 lb ft).
Engine Coolant Thermostat Replacement Second Design
Removal Procedure
- Drain the coolant. Refer to Cooling System Draining and Filling .
- Remove the exhaust heat shield bolts.
- Remove the exhaust heat shield.
- Raise the vehicle.
- Drain the coolant from the water pump drain plug.
- Remove the thermostat cover bolts from the thermostat housing.
- Remove and discard the thermostat housing O-seal.
- Remove the water pipe from the water pump assembly.
- Remove and discard the seals from the water pipe.
- Remove the inner thermostat sleeve.
- Remove the thermostat assembly.
Notice: The thermostat will not function correctly once it is contacted by oil. If oil is found in the cooling system, it must be flushed and the thermostat's cartridge replaced.


Important: A drain plug has been provided at the bottom of the water pump assembly for additional coolant drainage from the engine block and water pump.


Important: Twist the water feed pipe while pulling to remove it from the water pump.
Installation Procedure
- Install the thermostat cartridge into the thermostat housing while aligning the cartridge tangs up with the thermostat housing bolt holes.
- Align and insert the inner sleeve notch into the thermostat housing.
- Install a new O-seal on the water pipe.
- Position the water pipe into the water pump assembly.
- Seat the water feed O-seal by pushing and twisting toward the water pump. Take care not to tear or damage the O-ring.
- Install the thermostat housing cover to the water pipe. The water feed pipe has a locating tab to assure proper alignment.
- Install a new thermostat housing cover seal into the recess groove.
- Position the thermostat housing cover into position.
- Install the thermostat housing cover bolts.
- Lower the vehicle.
- Install the exhaust manifold heat shield.
- Install the exhaust manifold heat shield bolts.
- Verify the drain valve at the radiator and the water pump are closed.
- Fill the engine coolant . Refer to Cooling System Draining and Filling .
- Verify the repair and inspect for any leaks.

This will assure the inner sleeve can be completely installed.

If the inner sleeve notch is not properly positioned, the sleeve will not completely seat into the housing.

Important: The water feed pipe seals can be slightly lubricated with silicone gel to aid during installation.

Notice: Refer to Fastener Notice in the Preface section.
Tighten
Tighten the thermostat housing cover-to-thermostat housing bolts to 10 N·m (89 lb in).

Tighten
Tighten the exhaust manifold heat shield bolts to 23 N·m (17 lb ft).

Important: The vehicle must be level when filling the cooling system.

Engine Coolant Thermostat Replacement First Design
Removal Procedure
- Drain coolant. Refer to Cooling System Draining and Filling .
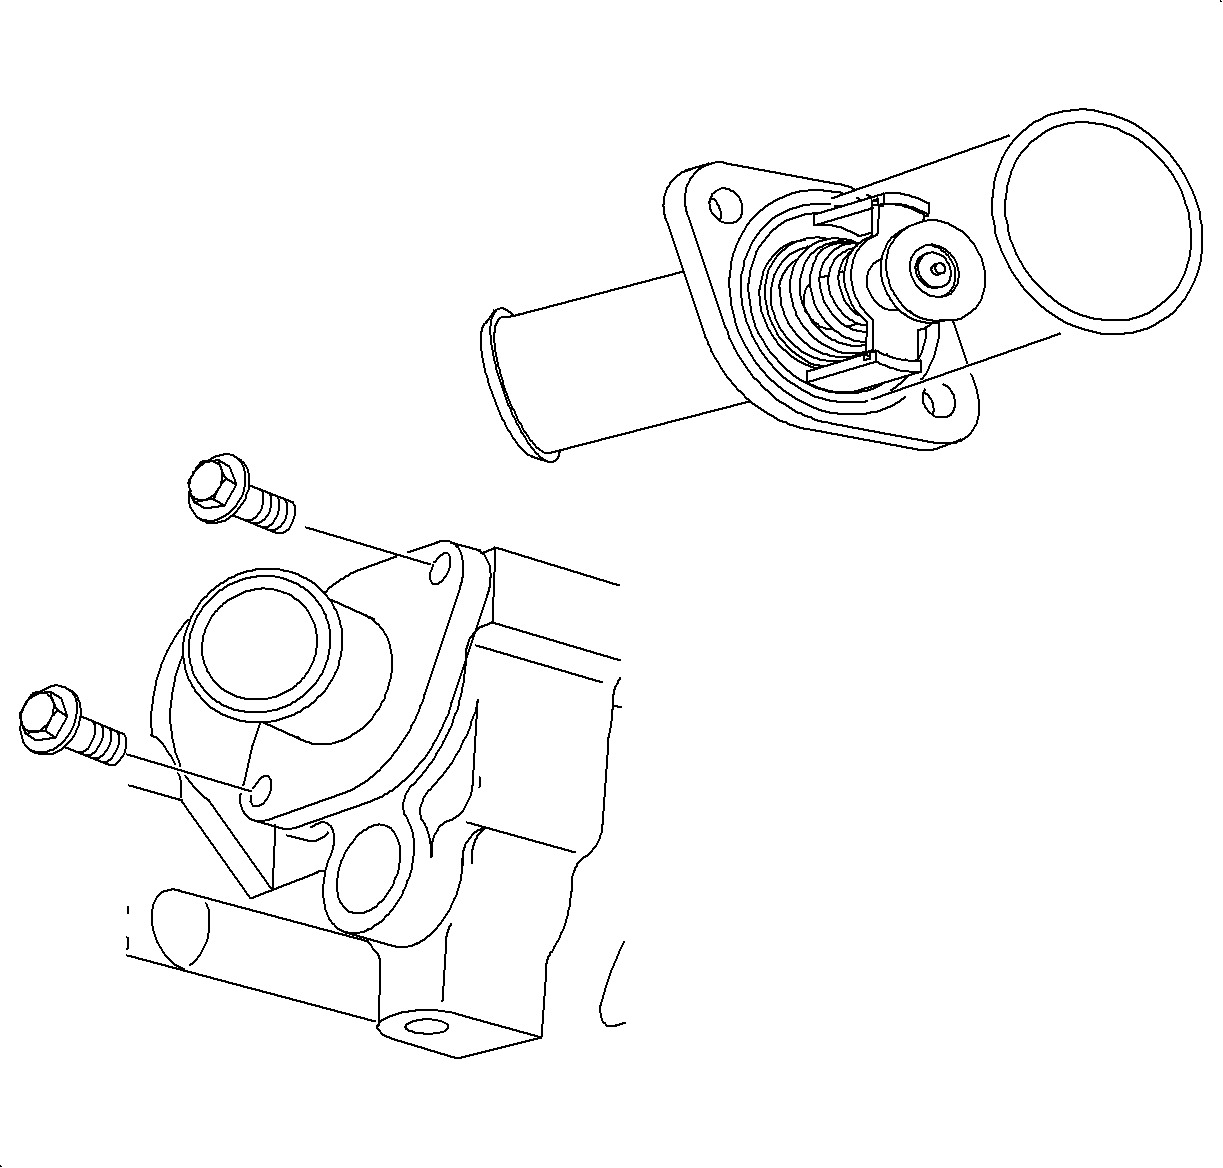
- Disconnect the radiator hose at the thermostat housing. Use Snap-on® Tool HCP 10 or 20 or equivalent to remove the hose clamp.
- Remove the thermostat housing bolts.
- Remove the thermostat housing and thermostat element.
- Discard the O-ring.
- Inspect the thermostat components for damage, seat deterioration, etc.
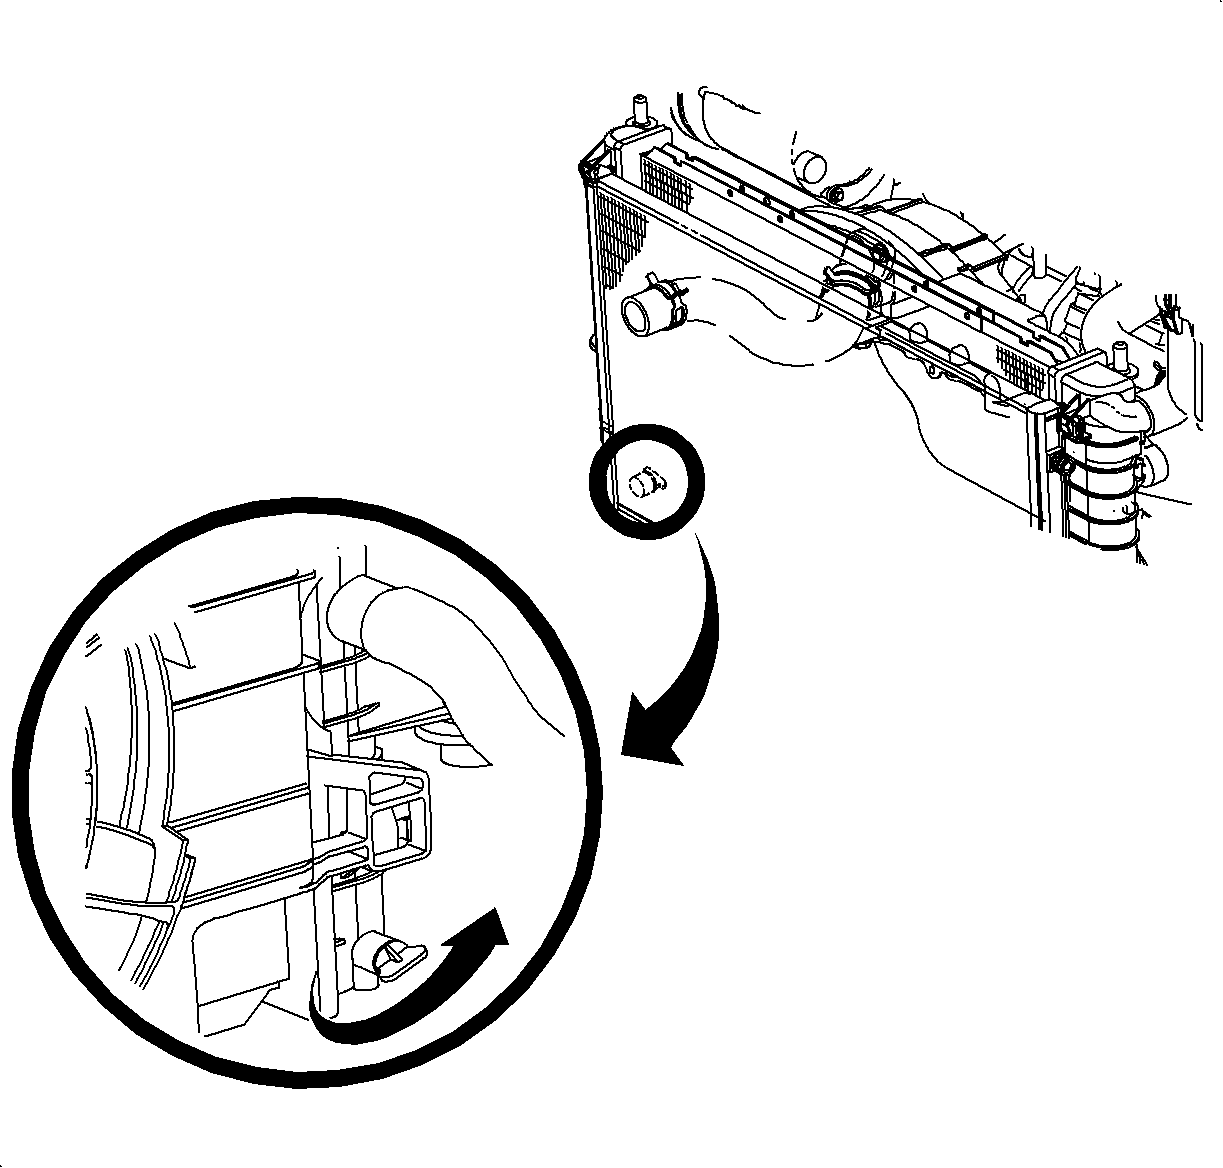
Notice: The thermostat will not function correctly once it is contacted by oil. If oil is found in the cooling system, it must be flushed and the thermostat's cartridge replaced.
Installation Procedure
- Install a new O-ring on the inlet housing.
- Fill the cooling system to the FULL COLD line with coolant. Use a 50/50 mixture of DEX-COOL® antifreeze and clean water. Refer to Cooling System Draining and Filling .
- Run the engine until the upper radiator hose is hot, then add additional coolant, if needed, to bring the level to the FULL COLD line.
- Install the pressure cap and check for leaks.
Notice: Refer to Fastener Notice in the Preface section.

| 1.1. | Install the thermostat and inlet housing into the thermostat inlet housing. |
| 1.2. | Install the retaining bolts. |
Tighten
Tighten the thermostat housing to block bolts to 10 N·m (89 lb in).
| 1.3. | Close the radiator drain plug. |
Important: The vehicle must be level when filling with coolant.
