SMU for 2000, 2001 and 2002 L-Series (L61) and (L81) Engine Service Manuals Regarding New Positive and Negative Battery Cable Replacement Procedures

| Subject: | Service Manual Update for 2000, 2001 and 2002 L-Series (L61) and (L81) Engine Service Manuals Regarding New Positive and Negative Battery Cable Replacement Procedures |
| Models: | 2000-2002 Saturn L-Series vehicles |
Purpose
The purpose of this bulletin is to provide new positive and negative battery cable replacement procedures and to update all 2000, 2001 and 2002 L-Series (L61) and (L81) Engine Service Manuals at your location
Please obtain all 2000, 2001 and 2002 L-Series (L61) and (L81) Engine Service Manuals and update as indicated below:
- Make photocopies of pages 3 - 5 of this bulletin.
- Insert a photocopy of pages 3 - 5 into each service manual:
| • | In the 2000 (L61) Engine Service Manual, insert photocopy of pages 3 - 5 between pages 826 and 827. |
| • | In the 2001 (L61) Engine Service Manual, insert photocopy of pages 3 - 5 between pages 836 and 837. |
| • | In the 2002 (L61) Engine Service Manual, insert photocopy of pages 3 - 5 between pages 844 and 845. |
| • | In the 2000 and 2001 (L81) Engine Service Manual, insert photocopy of pages 3 - 5 between pages 856 and 857. |
| • | In the 2002 (L81) Engine Service Manual, insert photocopy of pages 3 - 5 between pages 988 and 989 |
Service Manual update for 2000, 2001 and 2002 L-Series (L61) and (L81) Engine Service Manuals. Refer to Technical Information Bulletin 02-T-26. April, 2002.
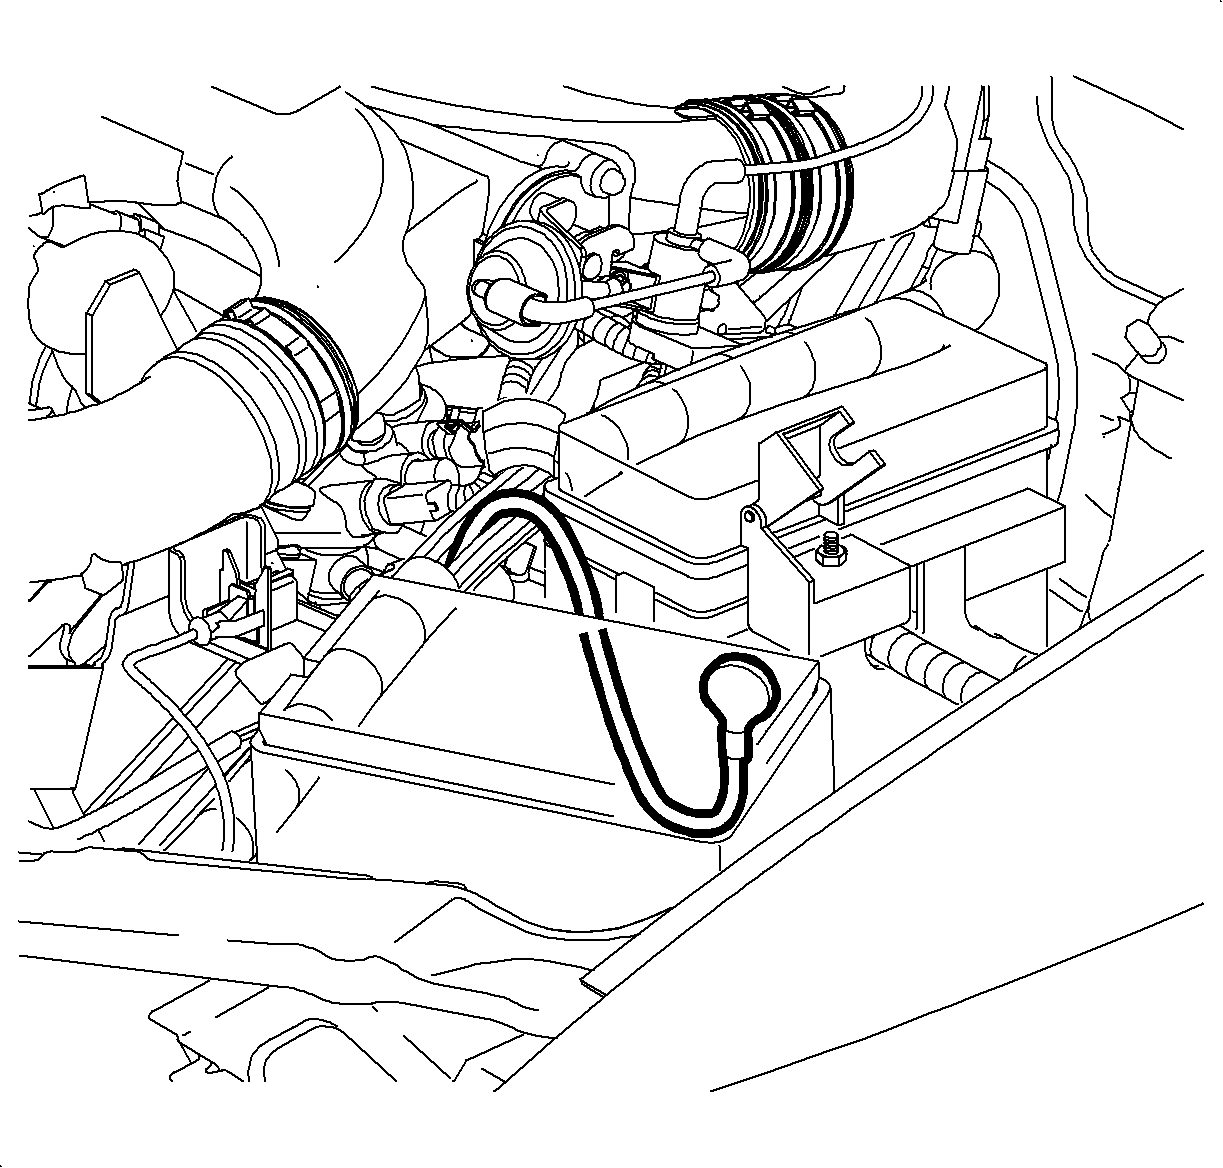
Battery Positive Cable Replacement
Notice: Due to the integral design of battery cable with the engine harness, this battery cable service procedure allows the ends of the existing cable to be cut off and the conductor to remain inside the conduit while the new cable is routed on the exterior of the main bundle.
- Remove battery, refer to Battery Removal procedure in this section.
- Pull conduit back 3 inches from junction where positive battery cable goes into the conduit on top of transaxle housing.
- Cut off positive battery cable where conduit was pulled back and tape cut end of the cable with electrical tape.
- Replace conduit over remaining cables and tape conduit back in place.
- Before installing new positive battery cable, route bare cable in conduit P/N 21023494, approximately 122 cm. (48 in.) to ensure proper protection from sharp edges of vehicle.
- Route new positive battery cable with conduit along old cable and harness outside of existing conduit and secure with plastic tie straps every 15-20 cm. (6-8 in.) along wiring harness.
- Raise vehicle.
- Step 8 is for V-6 (L81) vehicles only.
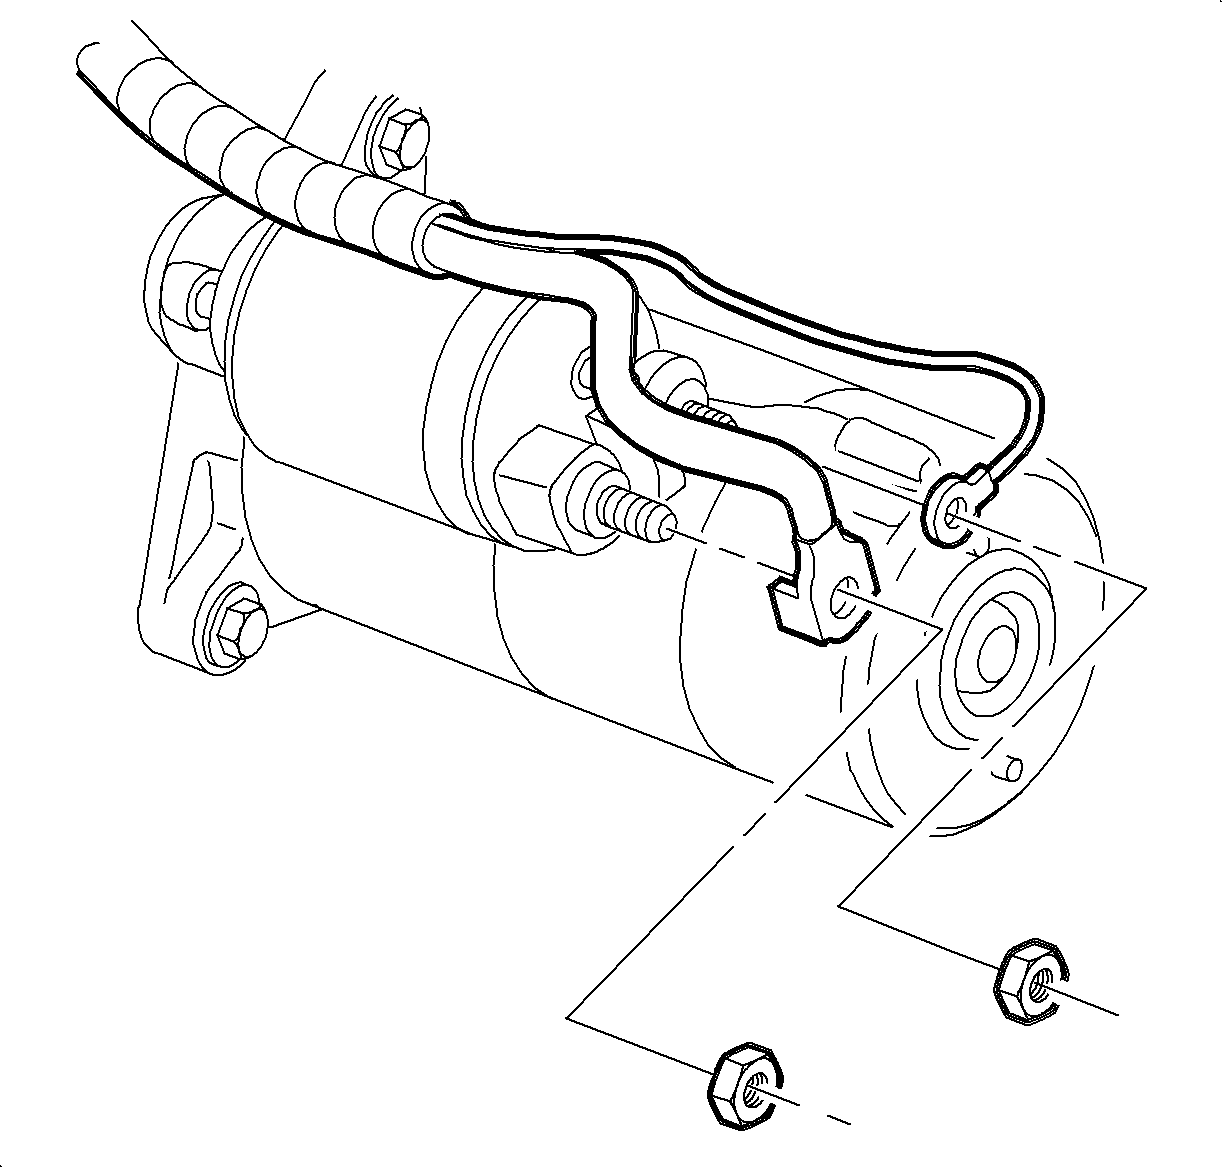
- Disconnect positive battery cable-to-starter solenoid electrical connection.
- Disconnect positive battery cable-to-generator.
- Pull larger diameter conduit (located just below the starter on the 6 cyl and just below the intake manifold for the 4 cyl) back 3 inches from positive battery cable terminal end and cut cable. Tape cut cable end with electrical tape.
- Replace conduit over remaining cables.
- Continue routing new positive battery cable along the outside of the harness and secure with plastic tie straps every 6 to 8 inches along wiring harness
- Connect positive battery cable-to-generator.
- Connect positive battery cable to starter solenoid electrical connection.
- Step 5 is for V-6 (L81) vehicles only.
- Lower vehicle.
- Install battery, refer to Battery Installation procedure in this section.

Important: When routing new cable ensure enough cable is left near battery to make connections at the end of this procedure.
Caution: Make sure vehicle is properly supported and squarely positioned on the hoist. To help avoid personal injury when a vehicle is on a hoist, provide additional support for the vehicle on the opposite end from which components are being removed.
Remove right front wheel assembly, refer to Removal and Installation Wheel section in the appropriate L-Series Chassis Service Manual.

Caution: Exhaust system remains hot for extended periods of time.
Notice: Ensure positive battery cable does not come in contact with the exhaust system or anything else that could cut or chafe the cable.
Tighten
Tighten the positive battery cable-to-generator nut 16 N·m (12 lb ft).
Tighten
Tighten the positive battery cable-to-starterr nut 9 N·m (80 lb in).
Install right front wheel assembly, refer to Removal and Installation Wheel section in the appropriate L-Series Chassis Service Manual.
BATTERY NEGATIVE CABLE REPLACEMENT
REMOVAL
- Remove battery, refer to Battery Removal procedure in this section
- Disconnect negative battery cable from vehicle ground location at left upper frame rail
- On vehicles equipped with an L61 engine, and manual transaxle:
- On vehicles equipped with an L61 engine and automatic transaxle, and all L81 engines, remove battery ground cable from location at front of transaxle case.
- Remove negative battery cable by pulling away conduit and untaping cable from harness.
| 3.1. | Remove two fasteners from bracket supporting lower radiator hose and wiring harness. |
| 3.2. | Remove fastener retaining negative battery cable to transaxle case, and remove negative battery cable. |
INSTALLATION
- Route new negative battery cable inside conduit and retape cable and conduit.
- Connect negative battery cable-to-vehicle ground location at left upper frame rail.
- On vehicles equipped with an L61 engine, and manual transaxle:
- On vehicles equipped with an L61 engine and automatic transaxle, and all L81 engines, install battery ground cable to location at front of transaxle case.
- Install battery, refer to Battery Installation procedure in this section.
Important: When routing new cable, ensure enough cable is left near battery to make connections at end of this procedure.
Tighten
Tighten the negative battery cable-to-left upper frame rail 12.5 N·m
(9.5 lb ft).
| 3.1. | Install ground wire to stud on transaxle case, install fastener and tighten. |
Tighten
Tighten the negative battery cable-to-left upper frame rail 12.5 N·m
(9.5 lb ft).
| 3.2. | Install bracket holding lower radiator hose and wire harness and tighten fasteners. |
Tighten
Tighten the engine wiring harness fastener 10 N·m (89 lb in).
Tighten
Tighten the negative cable-to-transaxle stud nut 25 N·m (18 lb ft).
