Exhaust Manifold Pipe Replacement Automatic Transmission - L61
Tools Required
J 43628 Frame Alignment Fixture
Removal Procedure
- Raise the vehicle on a hoist.
- Remove the heated oxygen sensor from the heat shield.
- Disconnect the heated oxygen sensor electrical connector.
- Remove the heated oxygen sensor.
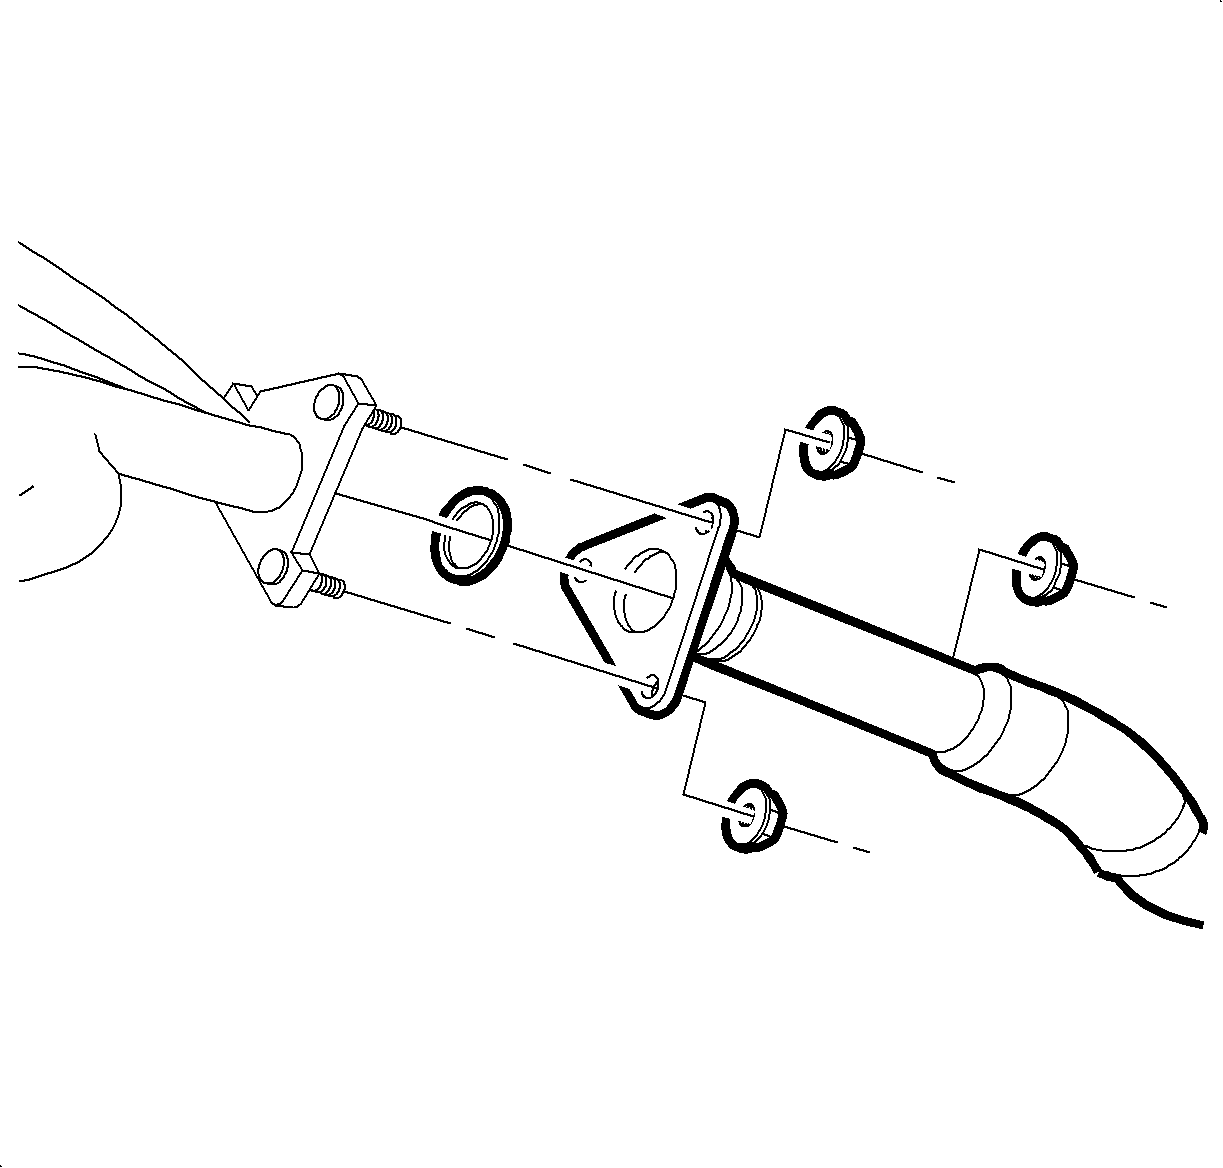
- Remove the exhaust manifold pipe to exhaust manifold fasteners.
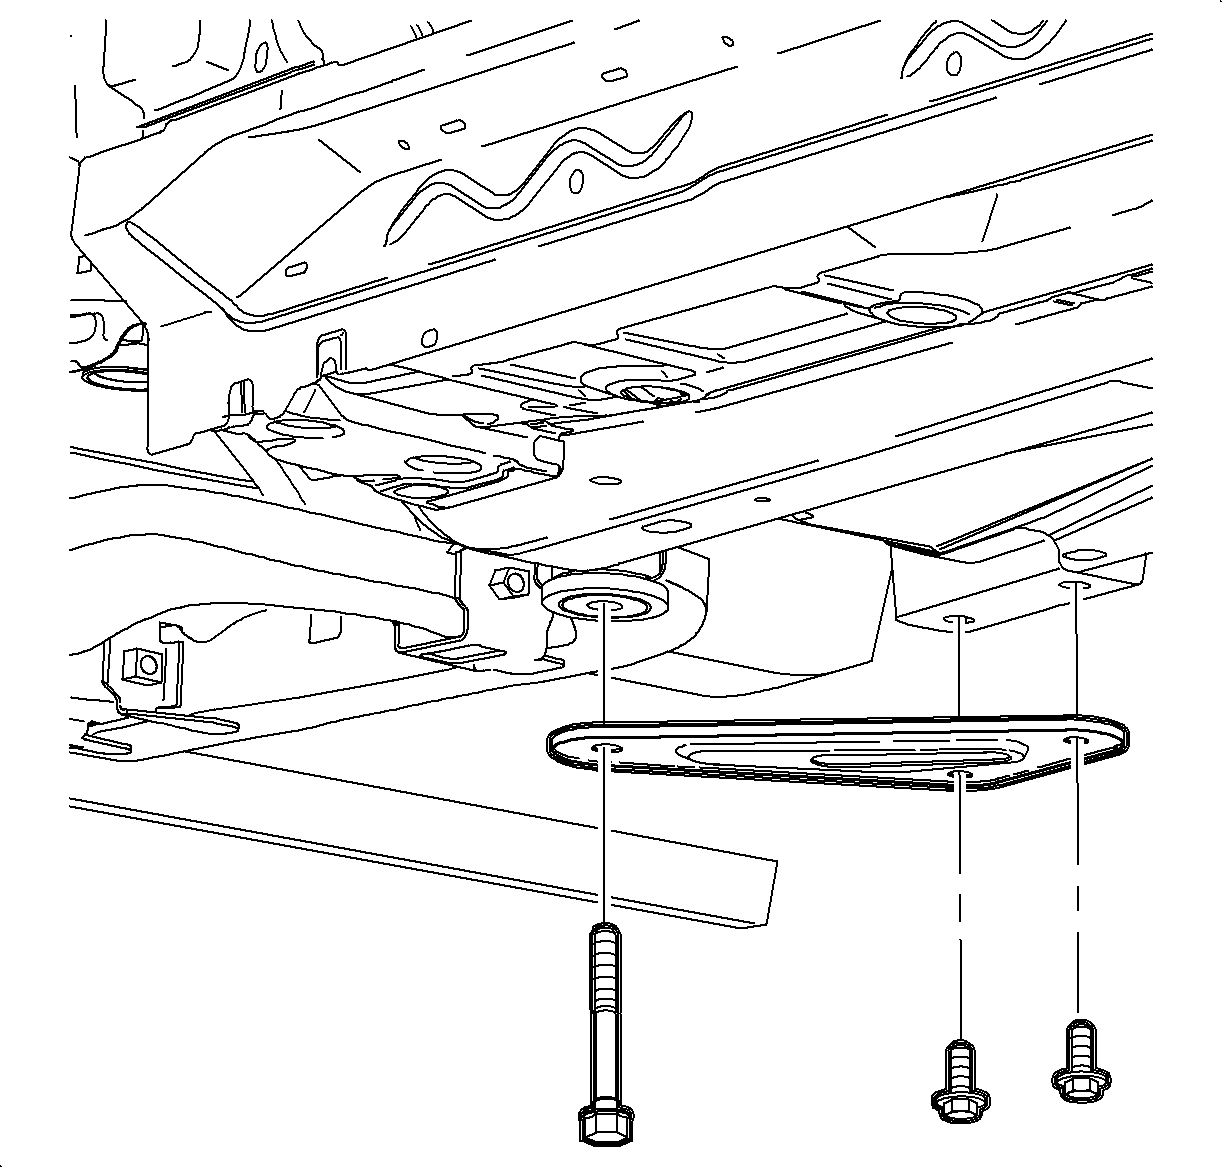
- Remove the suspension support assemblies and discard the bolts.
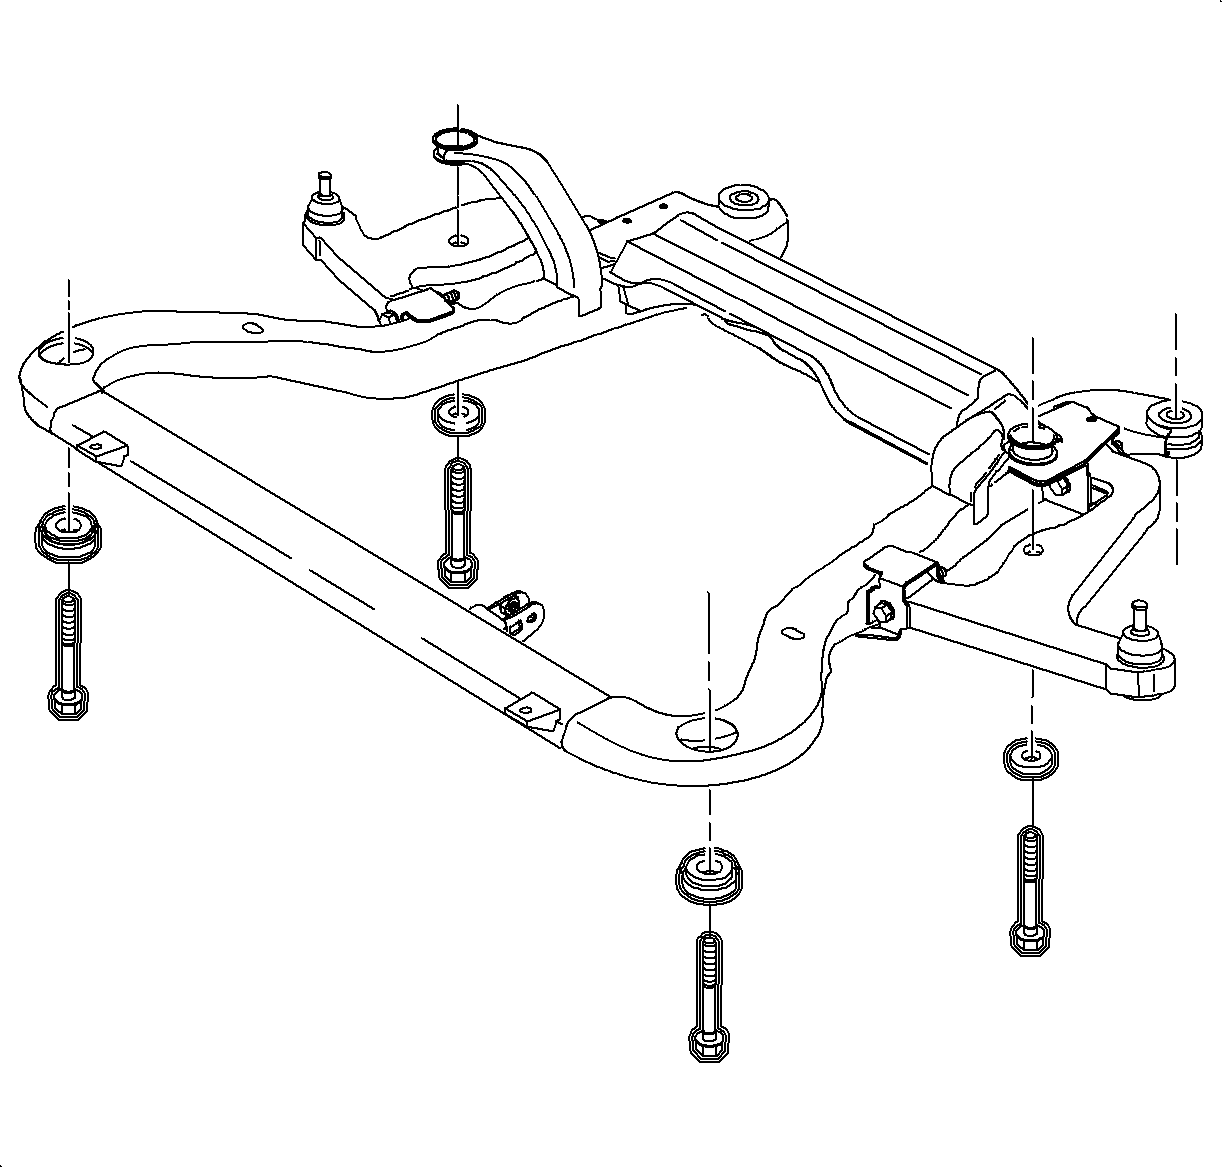
- Loosen the remaining frame attachment fasteners to allow clearance for the exhaust manifold pipe flange to pass by the frame.
- Remove the exhaust manifold pipe to exhaust/resonator fasteners.
- Remove the exhaust manifold pipe.
Caution: Refer to Vehicle Lifting Caution in the Preface section.
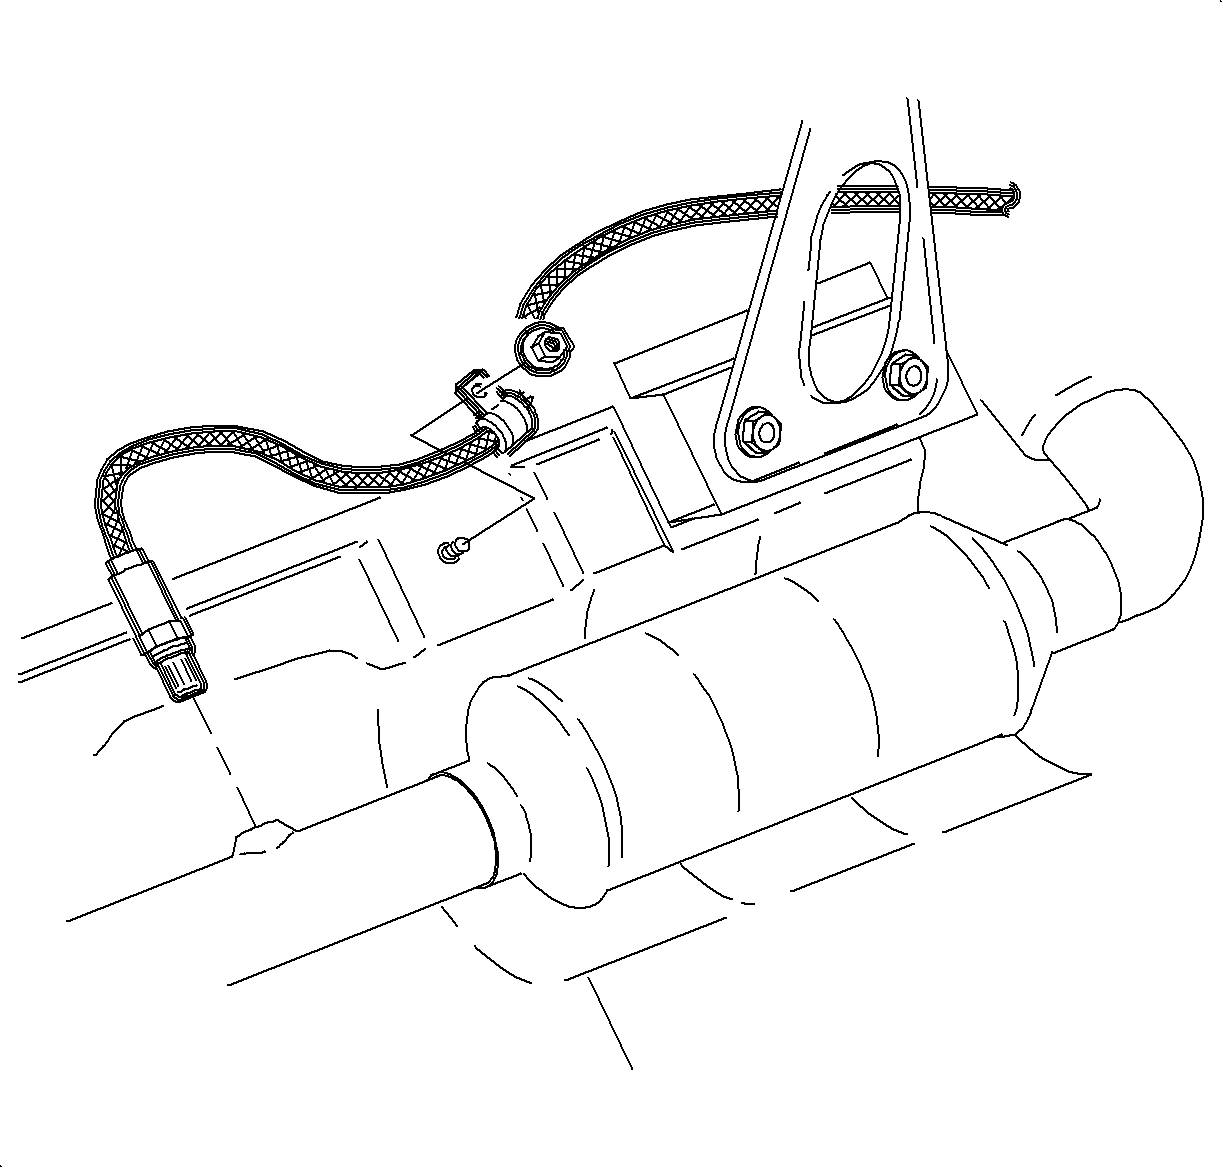
Important: Do not apply grease or silicon products to the heated oxygen sensor (H02S-2). Do not alter the wiring in any way. The wires carry air reference to the sensor.
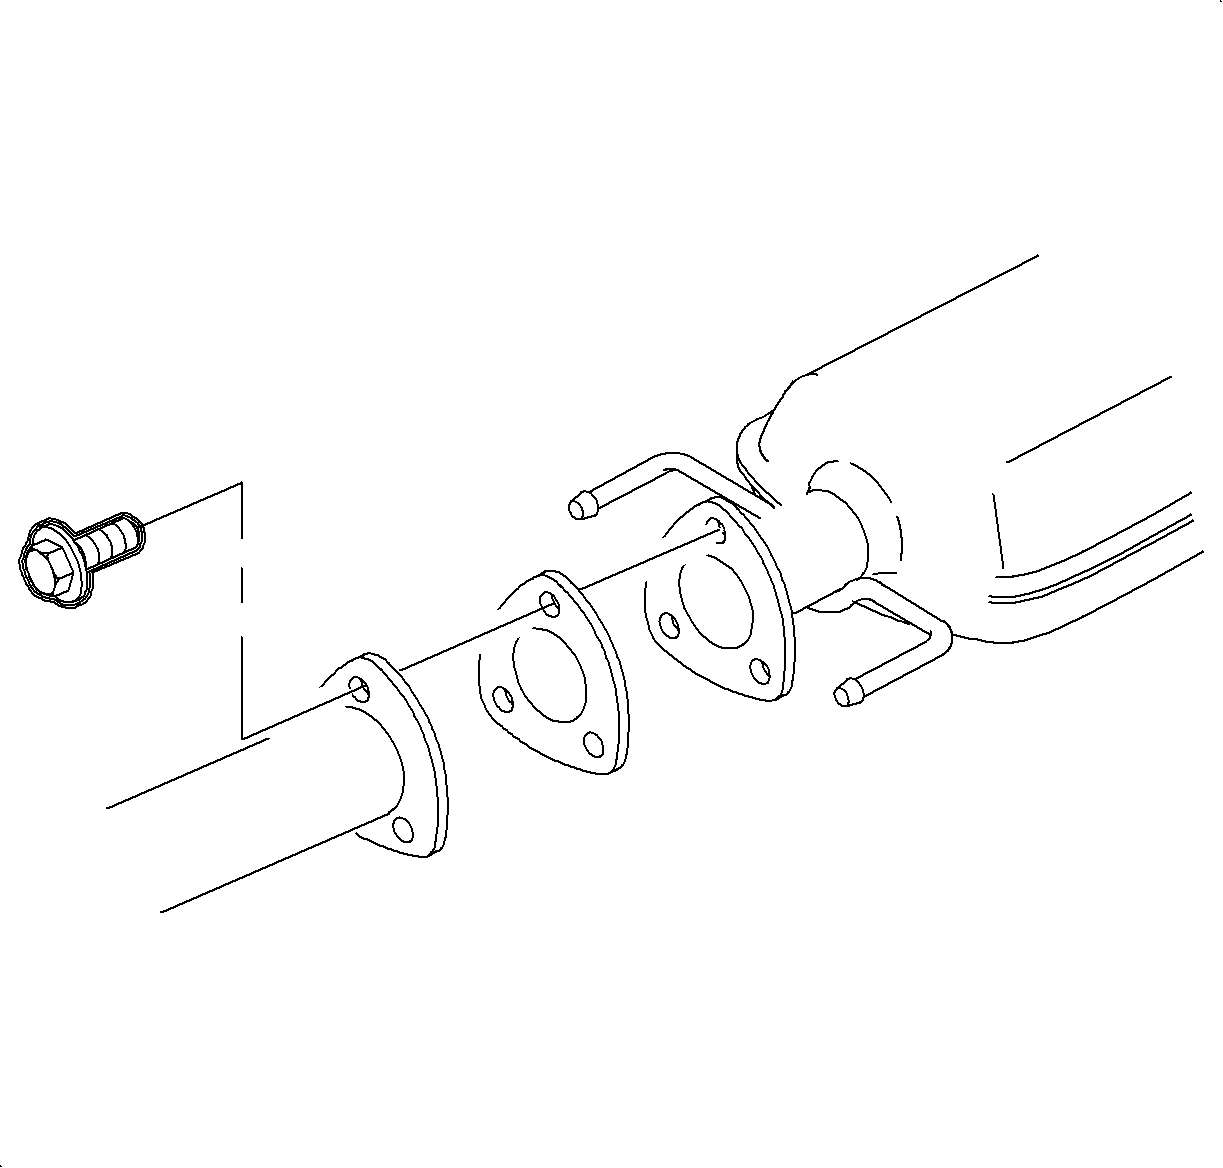
Installation Procedure
- Position the gasket on the manifold pipe.
- Position the manifold pipe into the vehicle.
- Install the exhaust manifold pipe to exhaust manifold nuts.
- Position the gasket between the manifold pipe and resonator.
- Install the exhaust manifold pipe to resonator bolts and tighten.
- Tighten the exhaust manifold pipe to exhaust manifold nuts.
- Install the J 43628 , or equivalent, and raise the fame to the vehicle.
- Remove the remaining frame bolts and replace with new bolts and tighten.
- Install the new cage nuts into the body for the suspension supports, as torque retention of old nuts may not be sufficient.
- Install the suspension supports using new bolts and tighten.
- Install the heated oxygen sensor.
- Connect the heated oxygen sensor harness connector.
- Connect the heated oxygen sensor harness to heat shield.
- Lower the vehicle from the hoist.
- Start the engine and check for exhaust leaks.

Important: Do not tighten the fasteners.

Tighten
Tighten the exhaust manifold pipe-to-resonator bolts
to 20 N·m (15 lb ft).
Tighten
Tighten the exhaust manifold pipe-to-exhaust manifold
nuts to 30 N·m (22 lb ft).
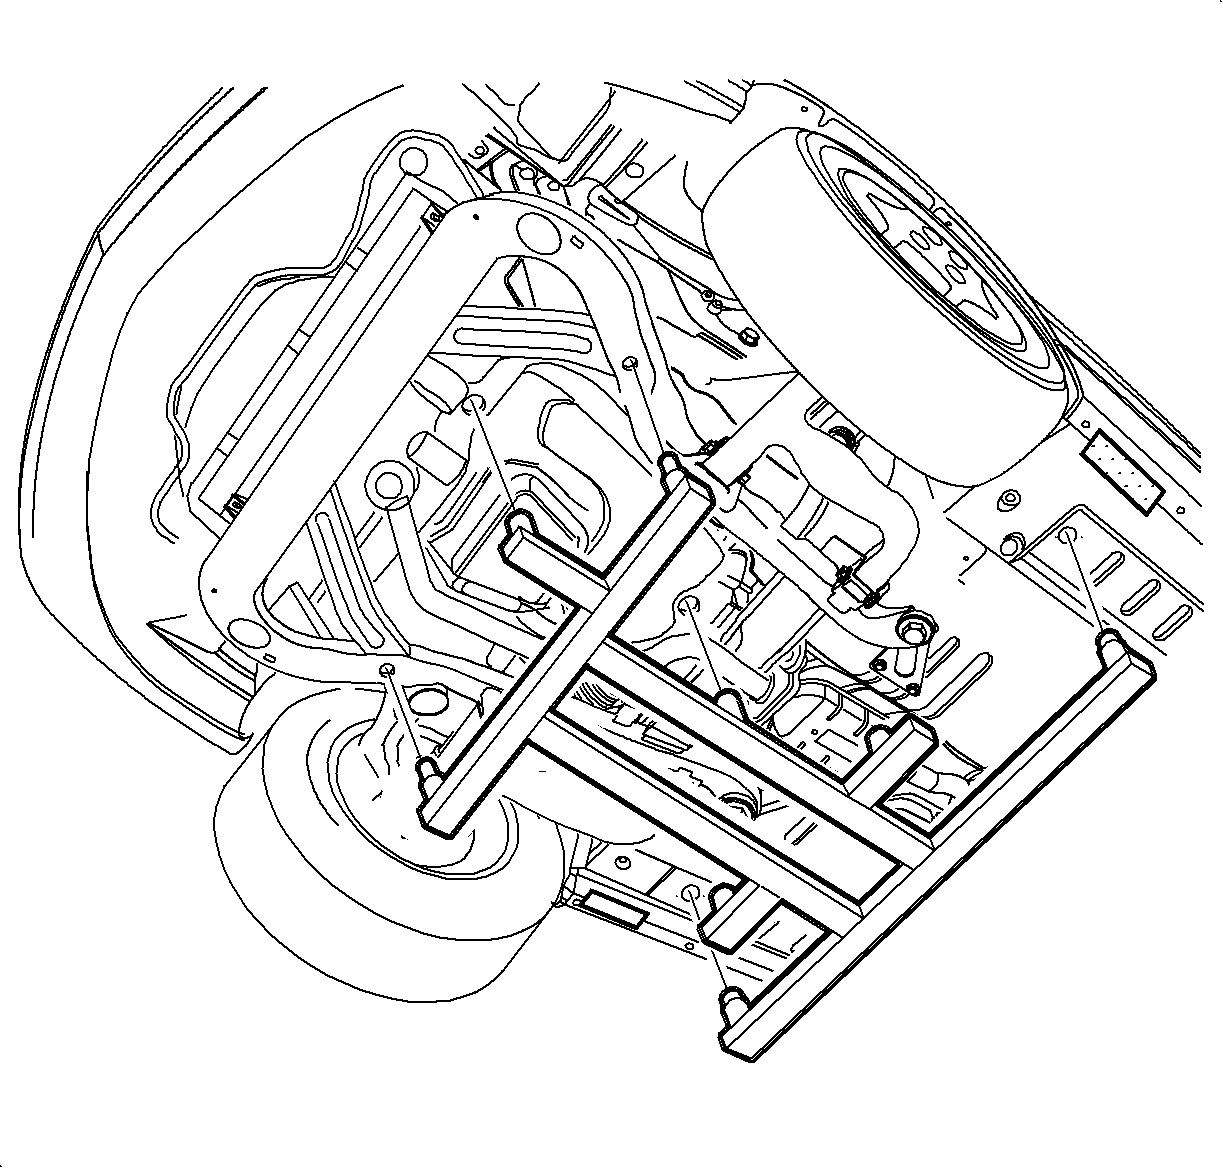

Tighten
Tighten the frame-to-body bolts to 100 N·m
(74 lb ft) + 45° + 60°.

Tighten
Tighten the suspension support-to-body bolts to
90 N·m (60 lb ft) + 45° + 60°.
Notice: Refer to Heated Oxygen Sensor Damage Notice in the Preface section.
Tighten
Tighten the HO2S-2 sensor-to-exhaust pipe to 45 N·m
(33 lb ft).
Tighten
Tighten the HO2S-2 harness clip-to-heat shield bolt
to 4 N·m (35 lb in).
Exhaust Manifold Pipe Replacement Manual Transmission - L61
Removal Procedure
- Raise the vehicle on a hoist.
- Remove the heated oxygen sensor electrical connector.
- Remove the heated oxygen sensor from the heat shield.
- Remove the heated oxygen sensor.
- Remove the nuts that hold the exhaust manifold pipe to the exhaust manifold.
- Remove the bolts that hold the exhaust manifold pipe to exhaust resonator.
- Remove the exhaust manifold pipe from the vehicle.
Caution: Refer to Vehicle Lifting Caution in the Preface section.

Important: Do not apply grease or silicon products to the heated oxygen sensor (H02S-2). Do not alter the wiring in any way. The wires carry air reference to the sensor.


Installation Procedure
- Position the gasket on the exhaust manifold pipe.
- Position the exhaust manifold pipe into the vehicle.
- Install the nuts that hold the exhaust manifold pipe to exhaust manifold.
- Position the gasket between the exhaust manifold pipe and exhaust resonator.
- Install the bolts that hold the exhaust manifold pipe to exhaust resonator.
- Tighten the nuts that hold the manifold pipe to exhaust manifold.
- Install the heated oxygen sensor.
- Connect the heated oxygen sensor harness connector.
- Connect the heated oxygen sensor harness to the heat shield.
- Lower the vehicle from the hoist.
- Start the engine and check for exhaust leaks.

Important: Do not tighten the fasteners.

Tighten
Tighten the exhaust manifold pipe-to-resonator bolts
to 20 N·m (15 lb ft).
Tighten
Tighten the exhaust manifold pipe-to-exhaust manifold
nuts to 30 N·m (22 lb ft).
Notice: Refer to Heated Oxygen Sensor Damage Notice in the Preface section.

