For 1990-2009 cars only
Tools Required
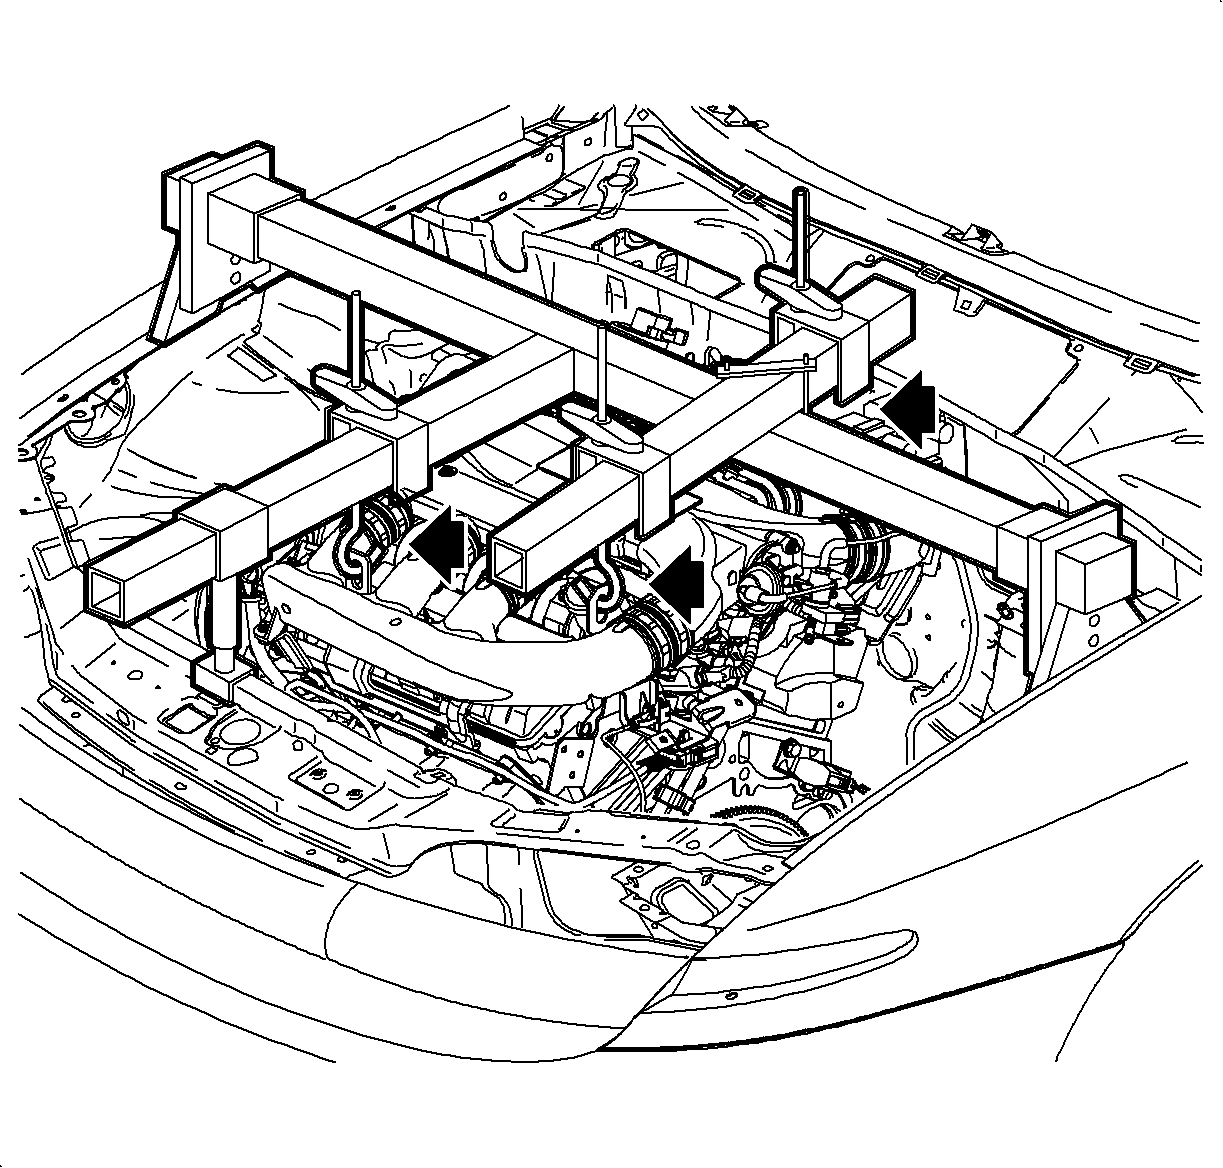
SA9105E Engine Support Fixture (3 Bar)
Removal Procedure
- Remove the air cleaner assembly.
- Unsnap the EVAP purge valve assembly and secure out of the way of the air cleaner assembly.
- Remove the air cleaner lid:
- Remove the air cleaner from the air box.
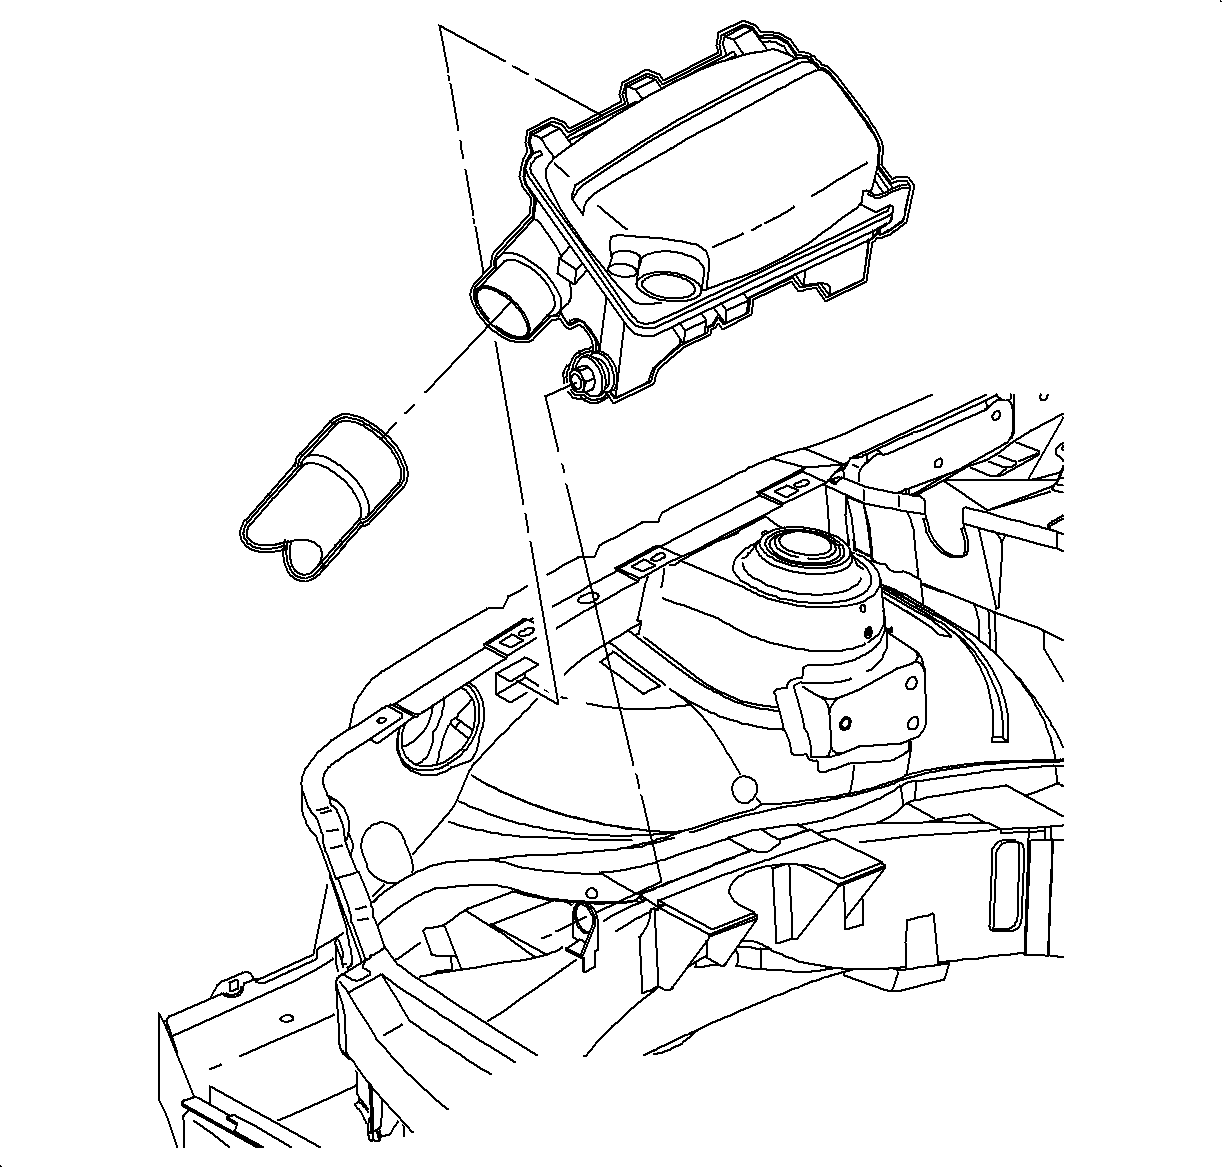
- Remove the air box mount bolt.
- Remove the air box.
- Install SA9105E and J43405, or equivalent.
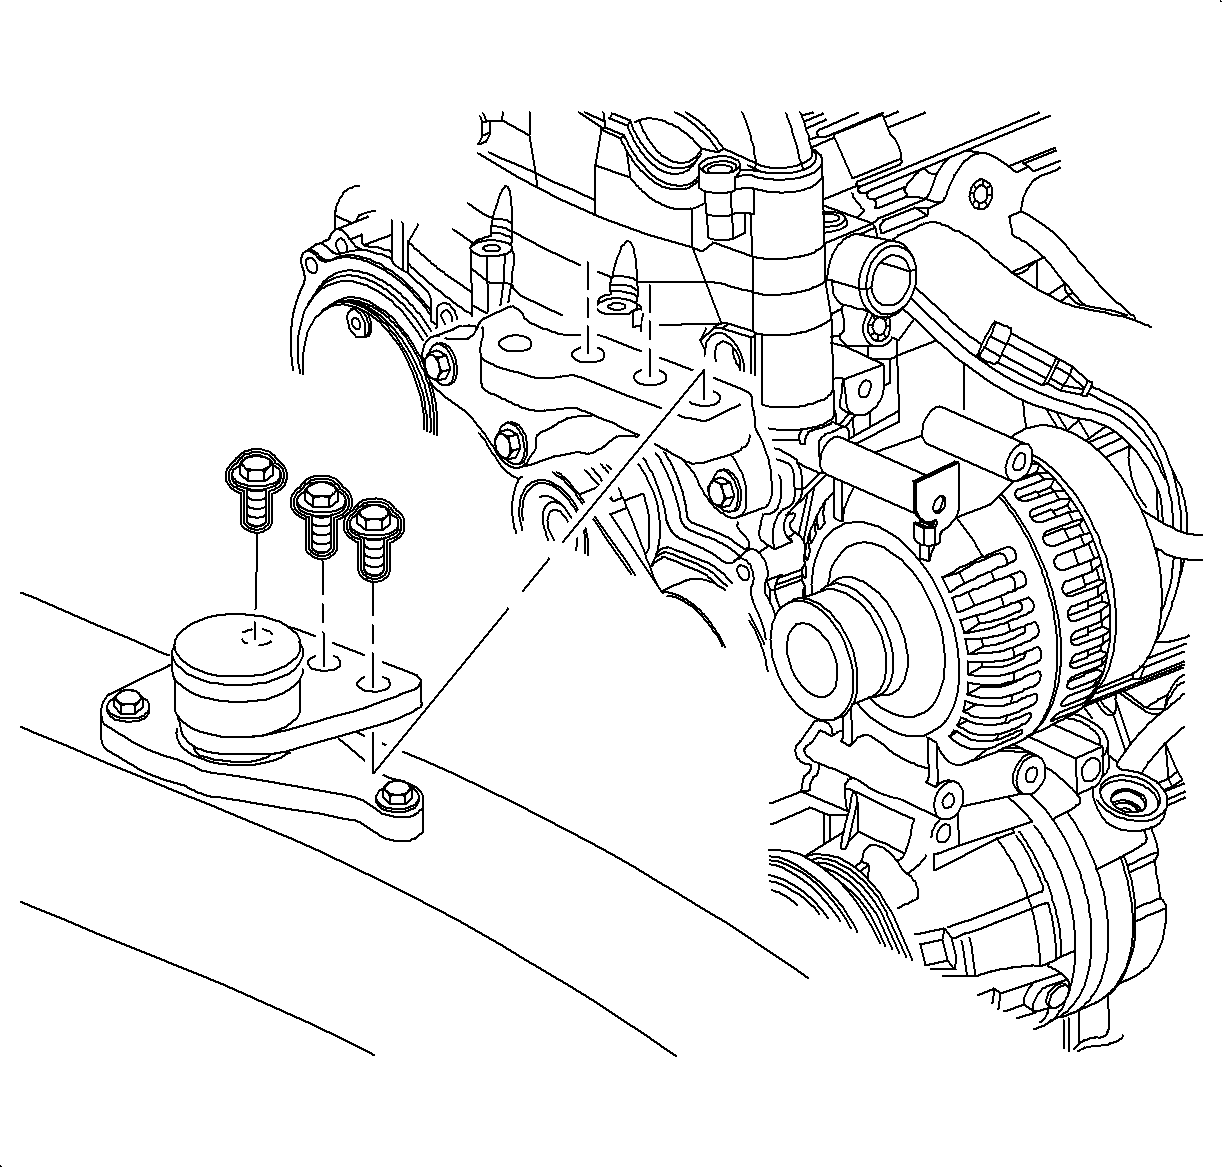
- Remove the engine mount to the bracket fasteners.
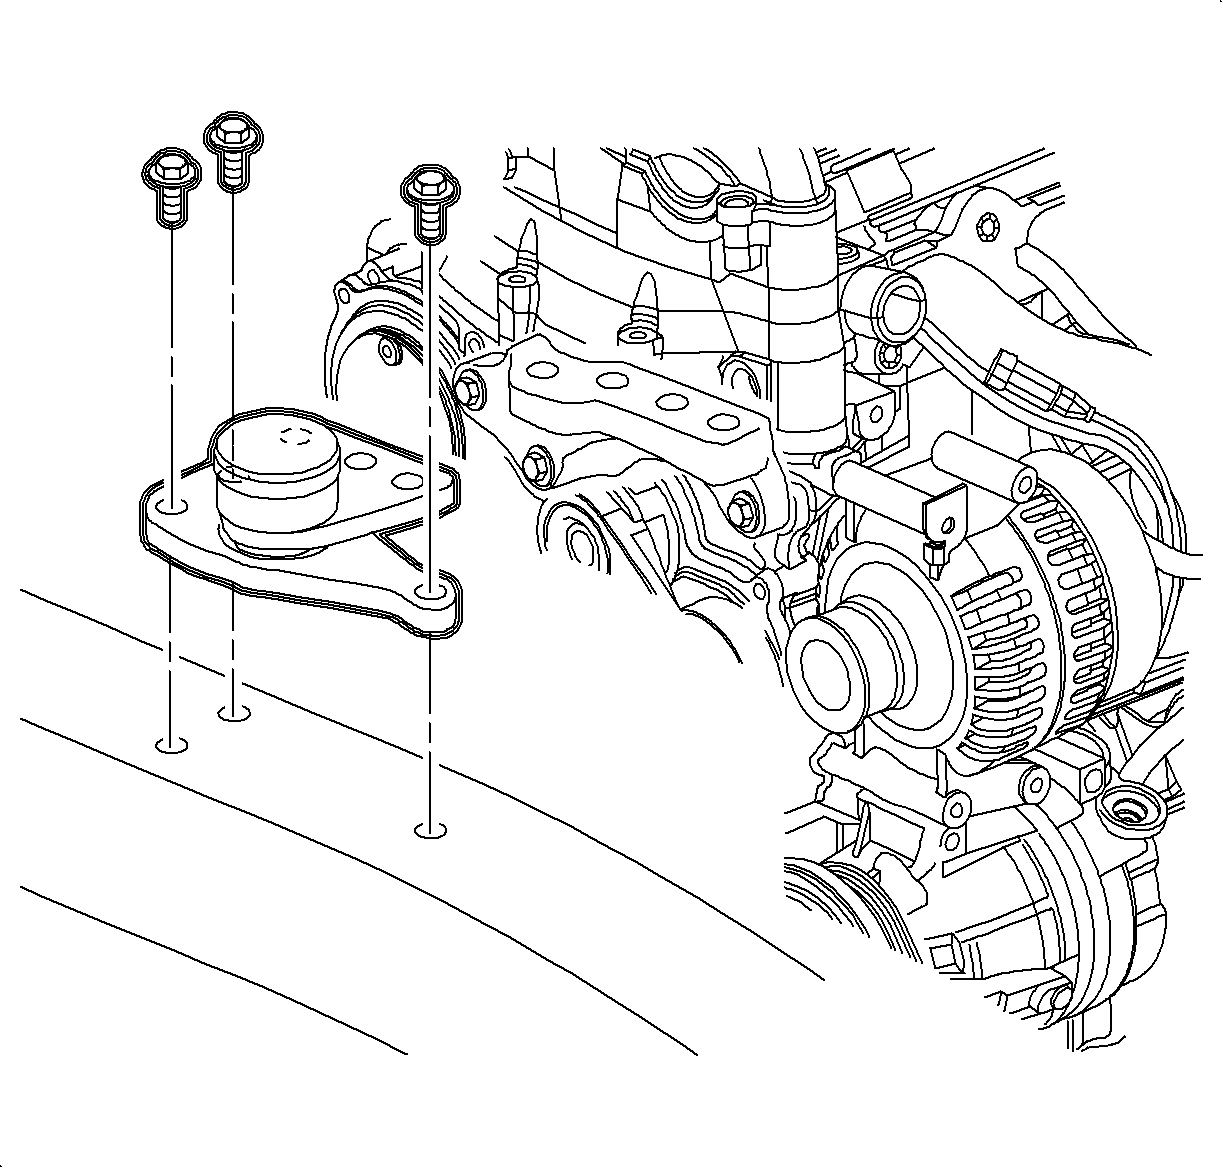
- Remove the engine mount to the body fasteners.
- Remove the engine mount from the vehicle.
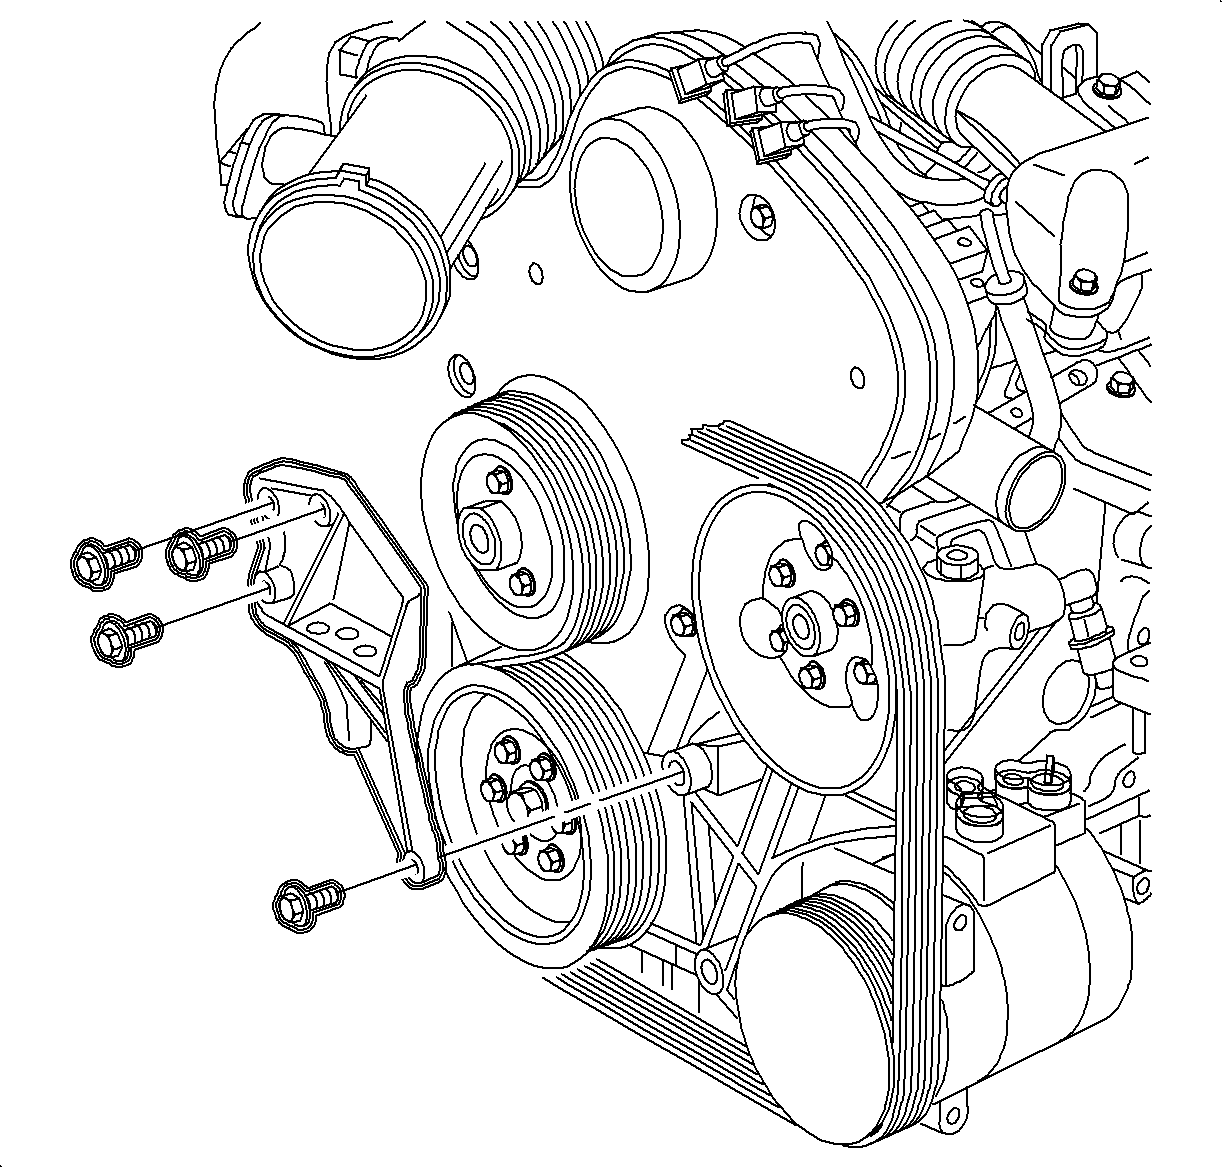
- Remove the engine mount brackets to the engine fasteners.
- Remove the engine mount bracket from the vehicle.
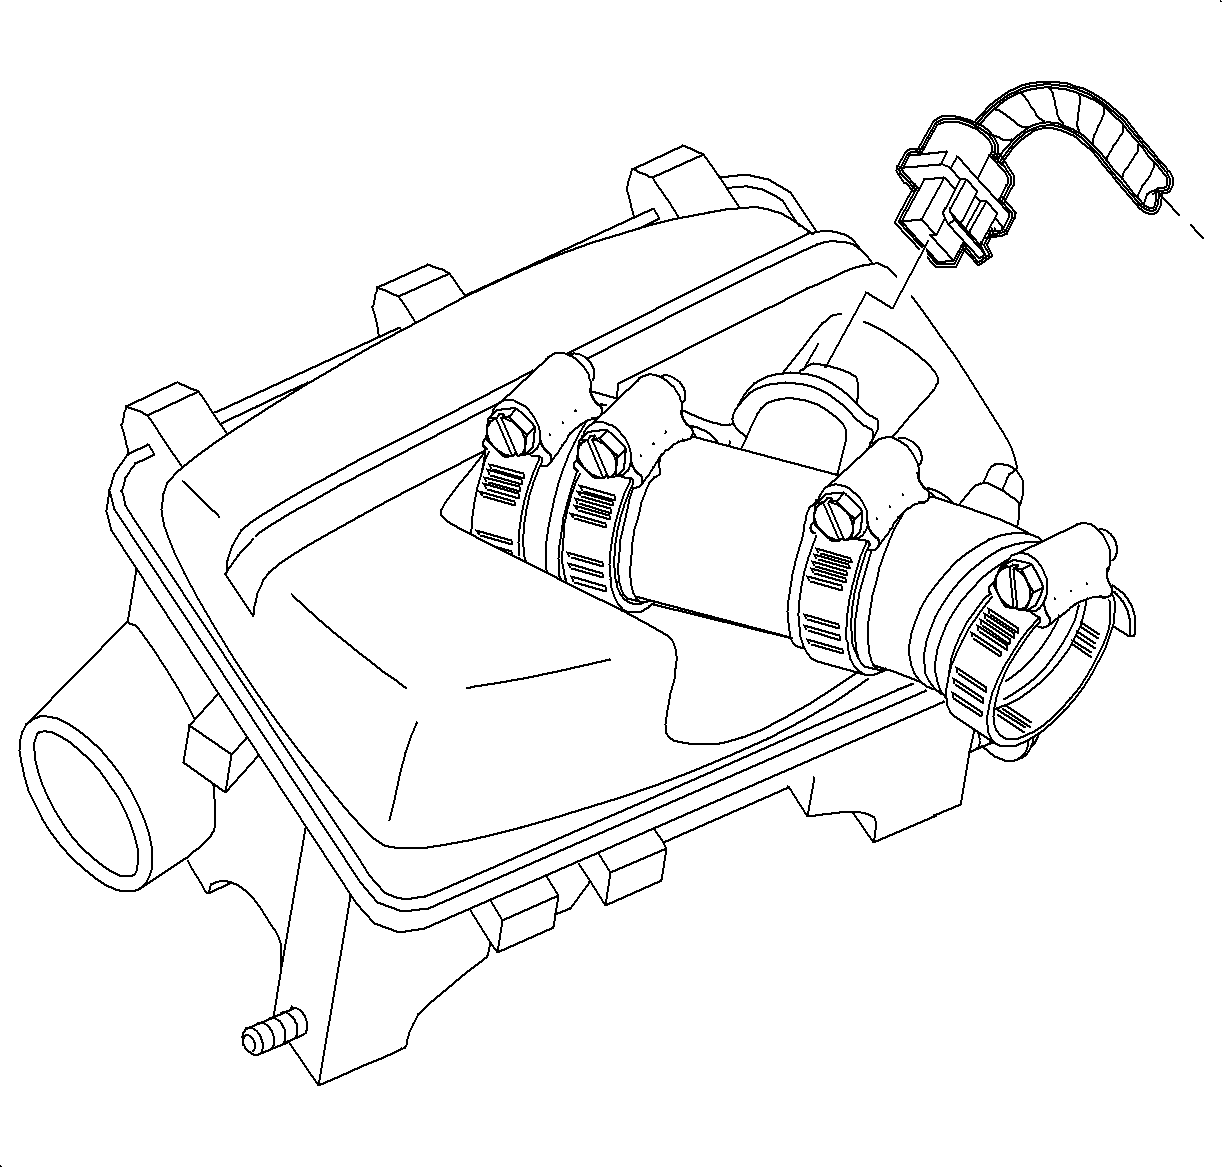
Disconnect the mass air flow (MAF) electrical connector.
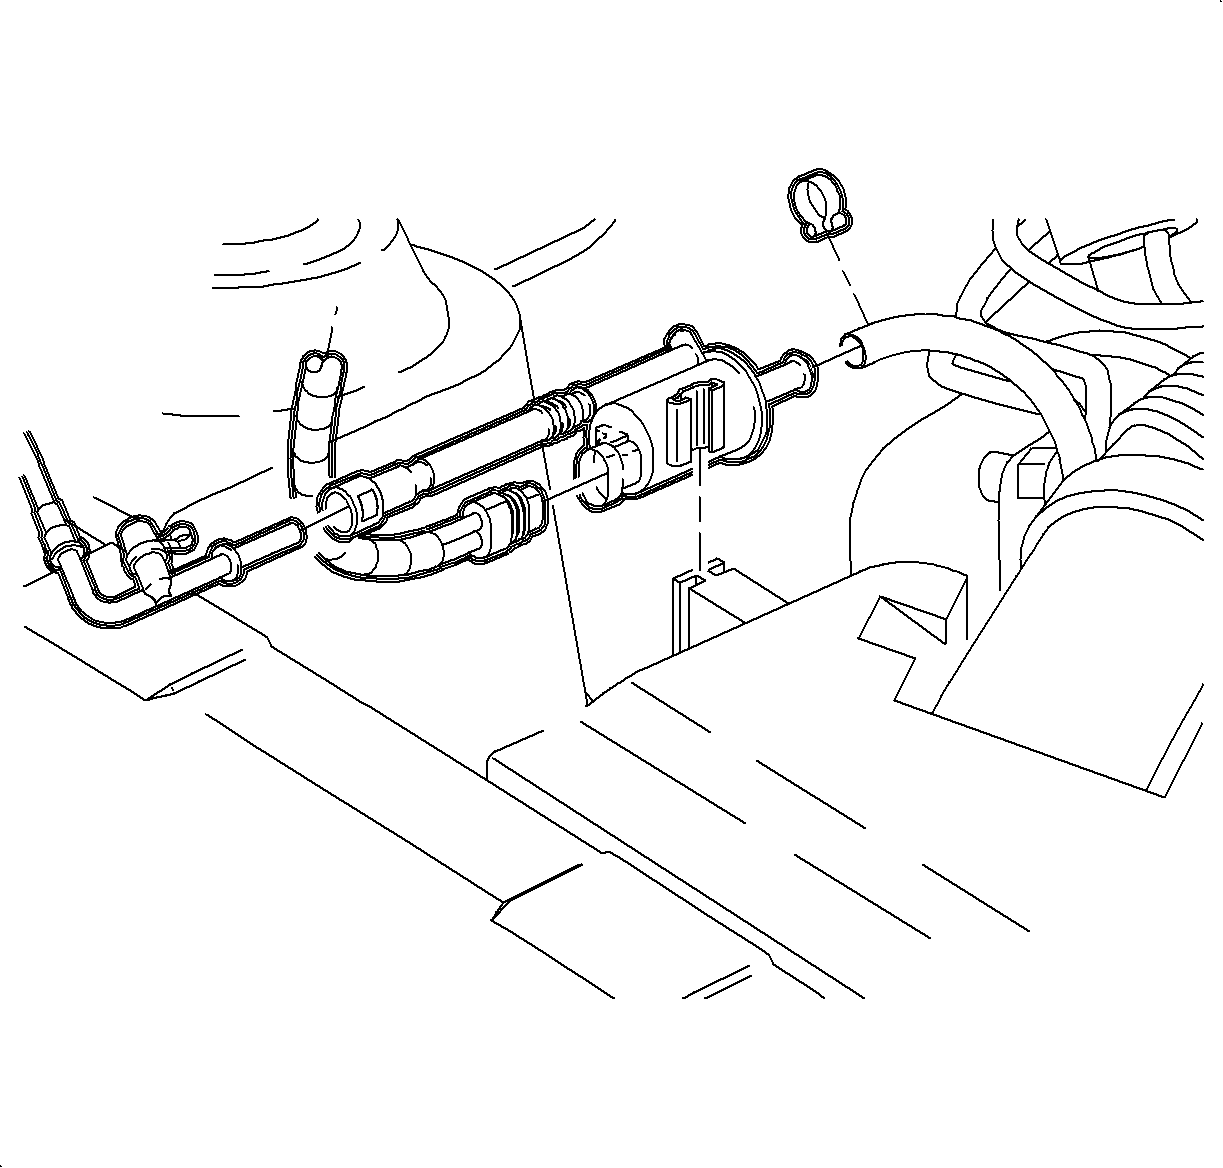
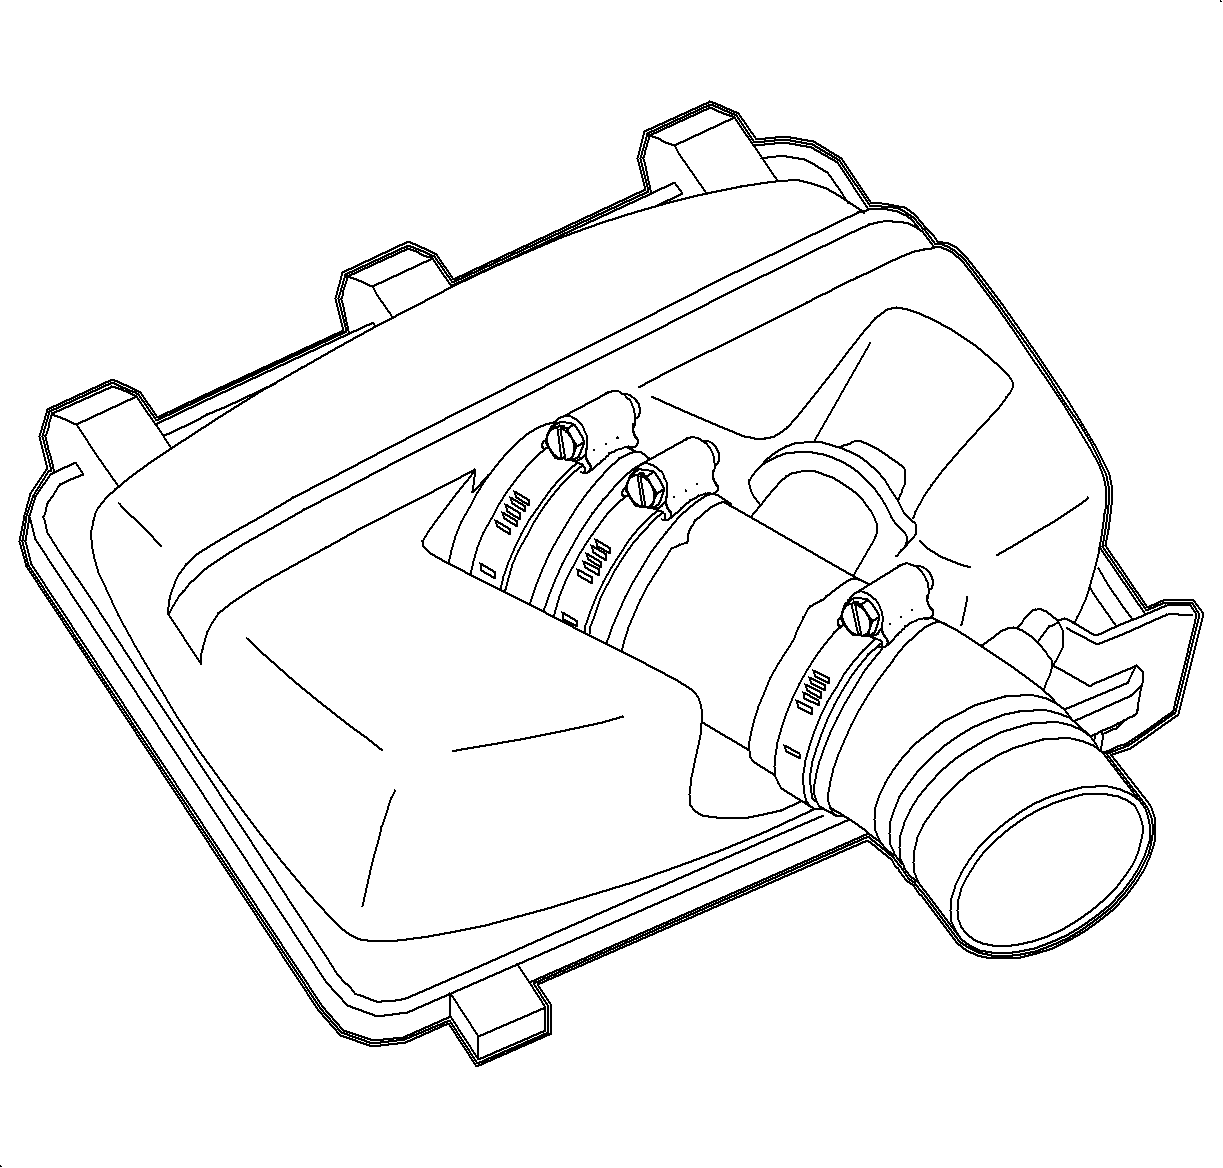
| 3.1. | Loosen the hose clamp at the throttle body. |
| 3.2. | Slide off the flexible MAF hose to the throttle body hose. |
| 3.3. | Unclamp the air cleaner lid. |
| 3.4. | Remove the air cleaner lid, MAF sensor, and the hose as an assembly. |
Installation Procedure
- Install the engine mount bracket onto the engine and tighten the fasteners.
- Install the engine mount onto the vehicle and tighten the fasteners.
- Install the engine mount to the bracket bolts.
- Install the air cleaner assembly.

Tighten
Tighten the engine mount bracket bolt to 55 N·m (41 lb ft).

Tighten
Tighten the engine mount-to-frame bolt to 55 N·m (41 lb ft).

Tighten
Tighten the engine mount-to-bracket bolt to 55 N·m (41 lb ft).
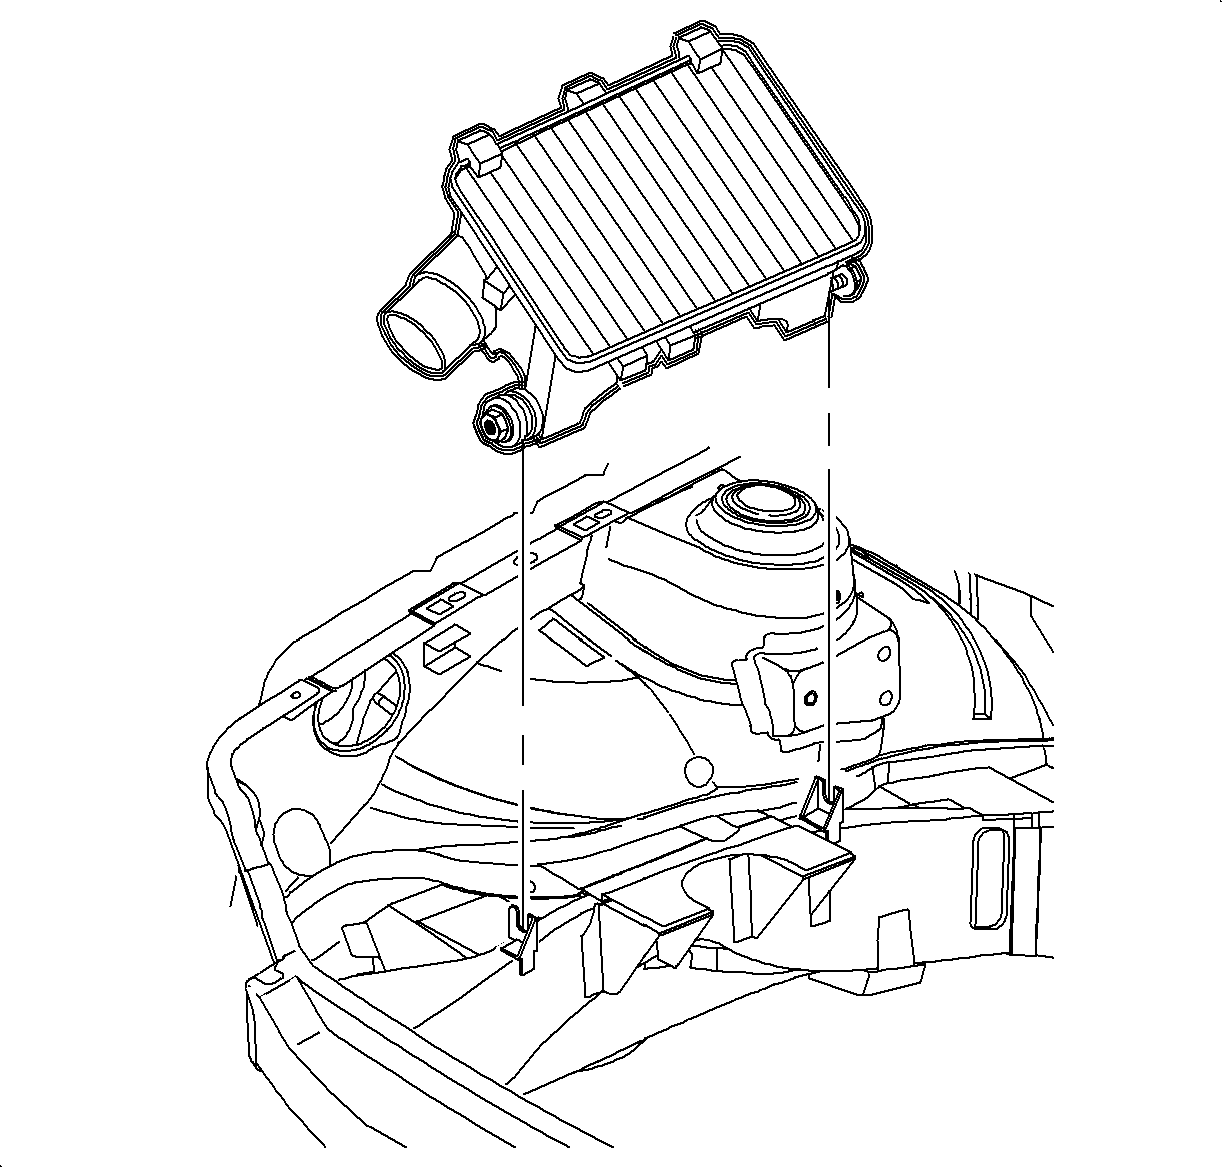
| 4.1. | Install the air box. Ensure that the lower pin engages into the rubber mount grommet and that the lower duct fits into the resonator outlet. |
| 4.2. | Install the air box mount bolt. |
Tighten
Tighten the air box mount bolt to 6 N·m (53 lb in).
| 4.3. | Install the air cleaner. |

| 4.4. | Install the air cleaner lid. Ensure that the lid hinge is fully engaged in the air box slots or the lid may not seal properly. |
| 4.4.1. | Install the air cleaner lid, MAF sensor, and hose as an assembly. |
| 4.4.2. | Clamp the air cleaner lid. |
| 4.4.3. | Slide the flexible MAF hose and the hose clamp on the throttle body. |
| 4.4.4. | Tighten the hose clamp. |

| 4.5. | Install the EVAP purge valve assembly. |

| 4.6. | Connect the MAF electrical connection. |
