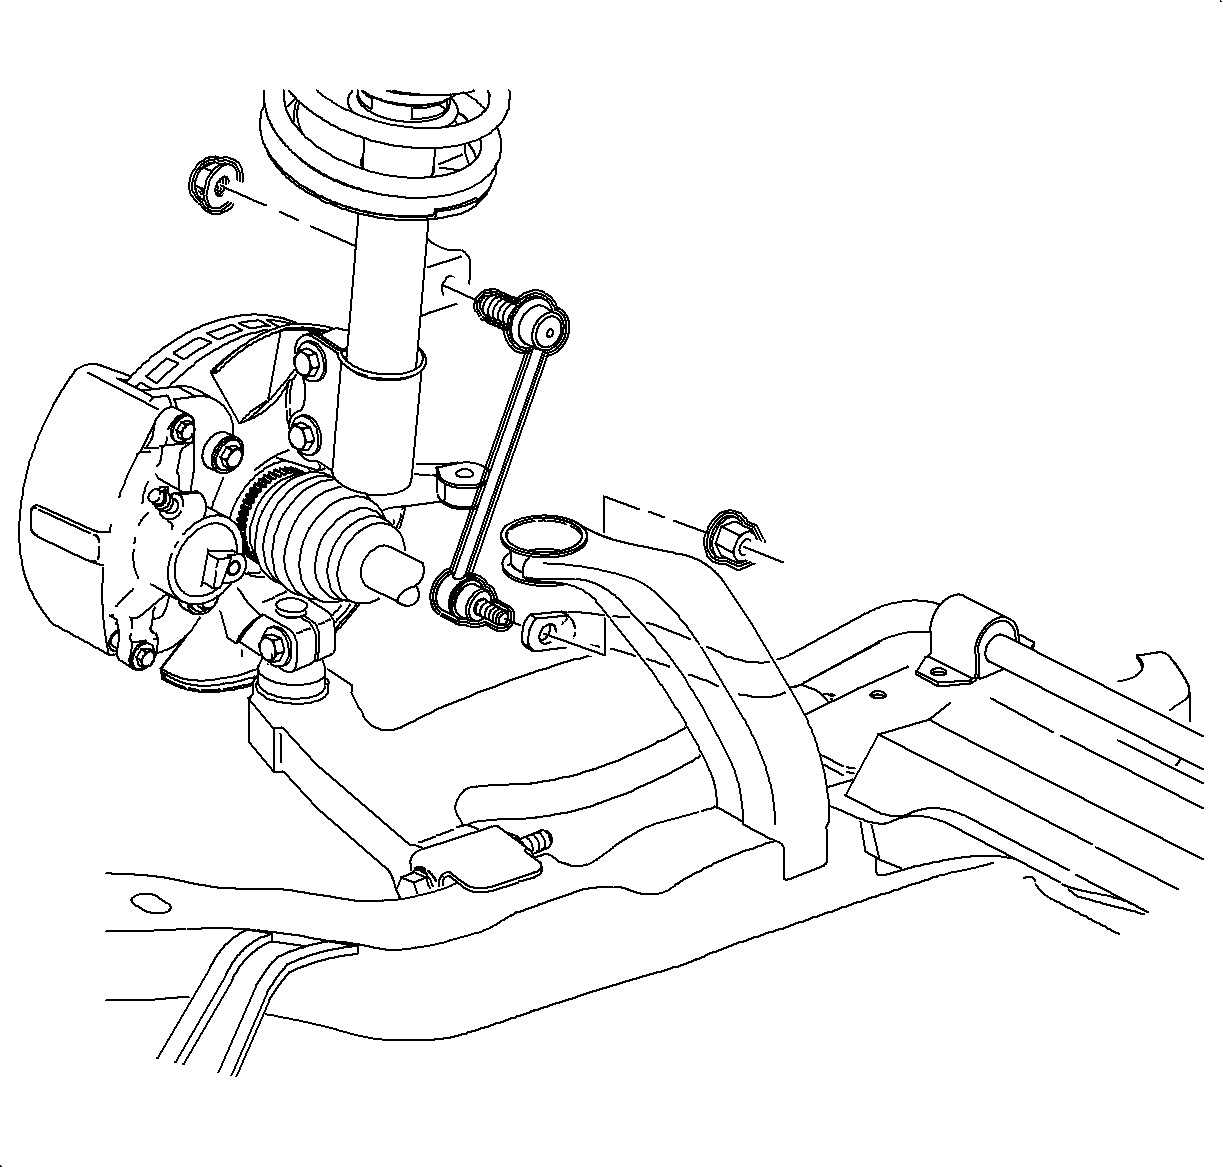
For 1990-2009 cars only
Removal Procedure
- Raise the vehicle on a hoist.
- Remove the wheel and tire assembly.
- Remove the stabilizer bar link to strut assembly nut.
- Remove the stabilizer bar link to stabilizer bar nut.
Caution: Refer to Vehicle Lifting Caution in the Preface section.

Installation Procedure
- Install the stabilizer link into the vehicle.
- Install the stabilizer link to the stabilizer bar nut.
- Tighten the stabilizer to strut assembly bolt.
- Inspect the boots for damage and replace the part if damaged.
- Position the wheel onto the hub.
- Install the wheel bolts and tighten in a crisscross pattern.
- Lower the vehicle form the hoist.
Notice: Refer to Ball Stud Turning Notice in the Preface section.
Tighten
Tighten the stabilizer bar-to-stabilizer bar link to 65 N·m (48 lb ft).
Tighten
Tighten the stabilizer bar link-to-strut to 65 N·m (48 lb ft).
Notice: Refer to Wheel Installation Caution in the Preface section.
| 6.1. | Hand tighten all fie wheel bolts. |
| 6.2. | Use a torque wrench to tighten the wheel bolts using a crisscross pattern. |
Tighten
Tighten the wheel bolts first pass to 63 N·m (46 lb ft).
| 6.3. | Use a torque wrench to final tighten the wheel bolts using a crisscross pattern. |
Tighten
Tighten the wheel bolts final pass to 125 N·m (92 lb ft).
