Tools Required
| • | J 42069 Timing Belt Alignment Kit |
| • | J 42098 Crank Hub TORX Socket |
- Check the cold start counter (also called a heavy duty register) with a scan tool. If there are any cold starts below -28°C (-20°F) visually inspect the timing belt for cracks. If cracks are noted, do not reuse the belt. Replace the belt and clear the cold start counter.
- Rotate the crankshaft clockwise to 60 degrees Before Top Dead Center (BTDC).
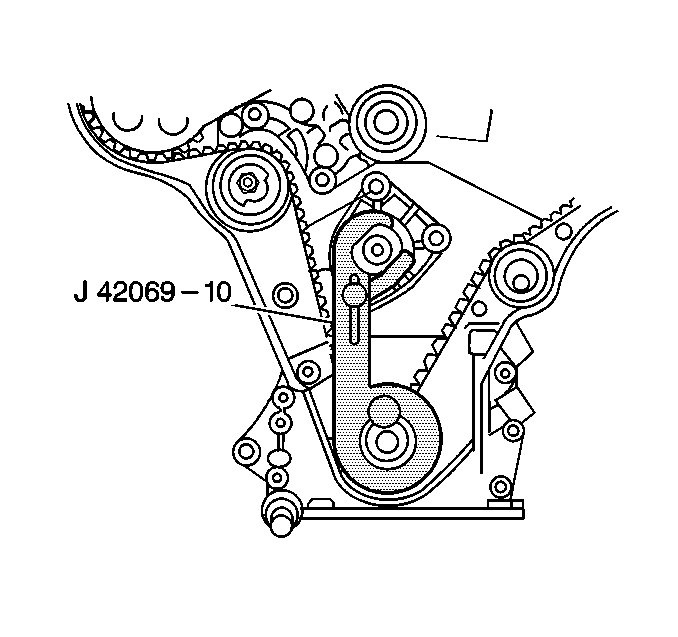
- Install the J 42069-10 to the crankshaft drive gear with the knurled bolt.
- Use the J 42098 to carefully turn the crankshaft in the engine rotational direction (clockwise) until the lever of the J 42069-10 firmly contacts the water pump pulley flange.
- Secure the moveable lever of the tool to the water pump pulley flange.
- Install the J 42069-1 and the J 42069-2 to the camshaft gears. If the J 42069-1 or the J 42069-2 do not fit into the teeth of the camshaft gears, it may be necessary to loosen the relevant timing belt idler pulley and turn the eccentric until the J 42069-1 or the J 42069-2 can be inserted.
- Loosen the timing belt tensioner and idler pulleys.
- Remove the timing belt.
- Remove the J 42069-10, J 42069-1 and the J 42069-2 from the engine.
- Rotate the crankshaft clockwise to 60 degrees (BTDC) to prevent valve-to-piston contact.
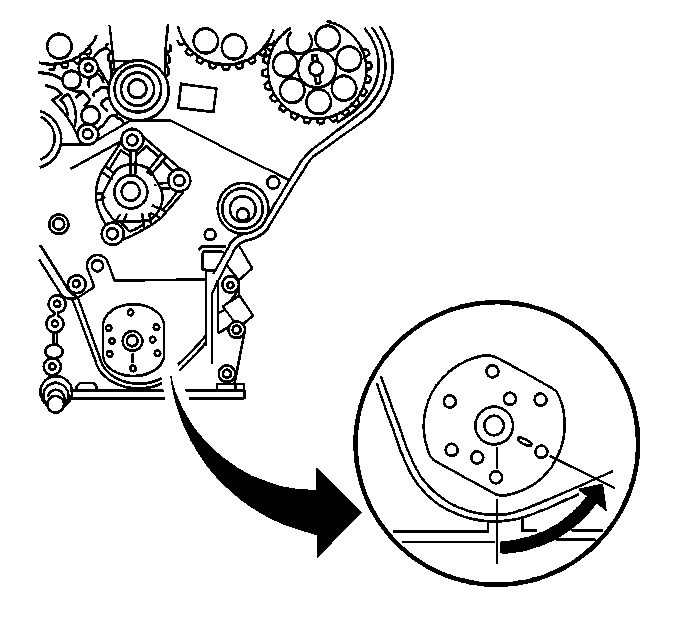
Notice: Failure to follow the described timing belt inspection and maintenance may result in a broken timing belt and cause severe engine damage.
If the belt is okay, and is reused, do not clear the cold start counter.
Important: Ensure that the crankshaft is not 180 degrees off TDC.
The reference marks on the camshaft gears should be aligned with the corresponding notches on the rear timing belt cover at this point. If they are not aligned, the engine is 180 degrees off.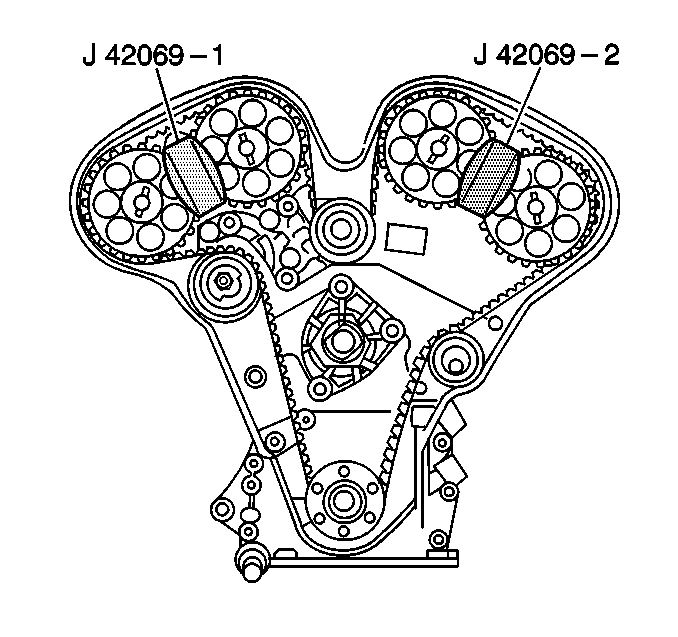
Important: Do not move the crankshaft while the timing belt is removed.
Do not remove the J 42069-1 and J42069-2 while the belt is removed.Removal Procedure
Tools Required
| • | J 42069 Timing Belt Alignment Kit |
| • | J 42098 Crank Hub Torx Socket |
- Rotate the crankshaft using J 42098 until the #1 cylinder is at 60 degrees before top dead center (BTDC).
- Install the crankshaft locking kit tool J42069-10 within the J 42069 .
- Rotate the crankshaft in the engine in a rotational direction (clockwise) using the J 42098 until the #1 cylinder is at the TDC and tighten the lever arm to the water pump pulley flange.
- Install camshaft locks 1-2 and 3-4 using kit tools J42069-1 and J42069-2 within the J 42069 .
- Remove the upper and the lower idler pulleys.
- Remove the timing belt.
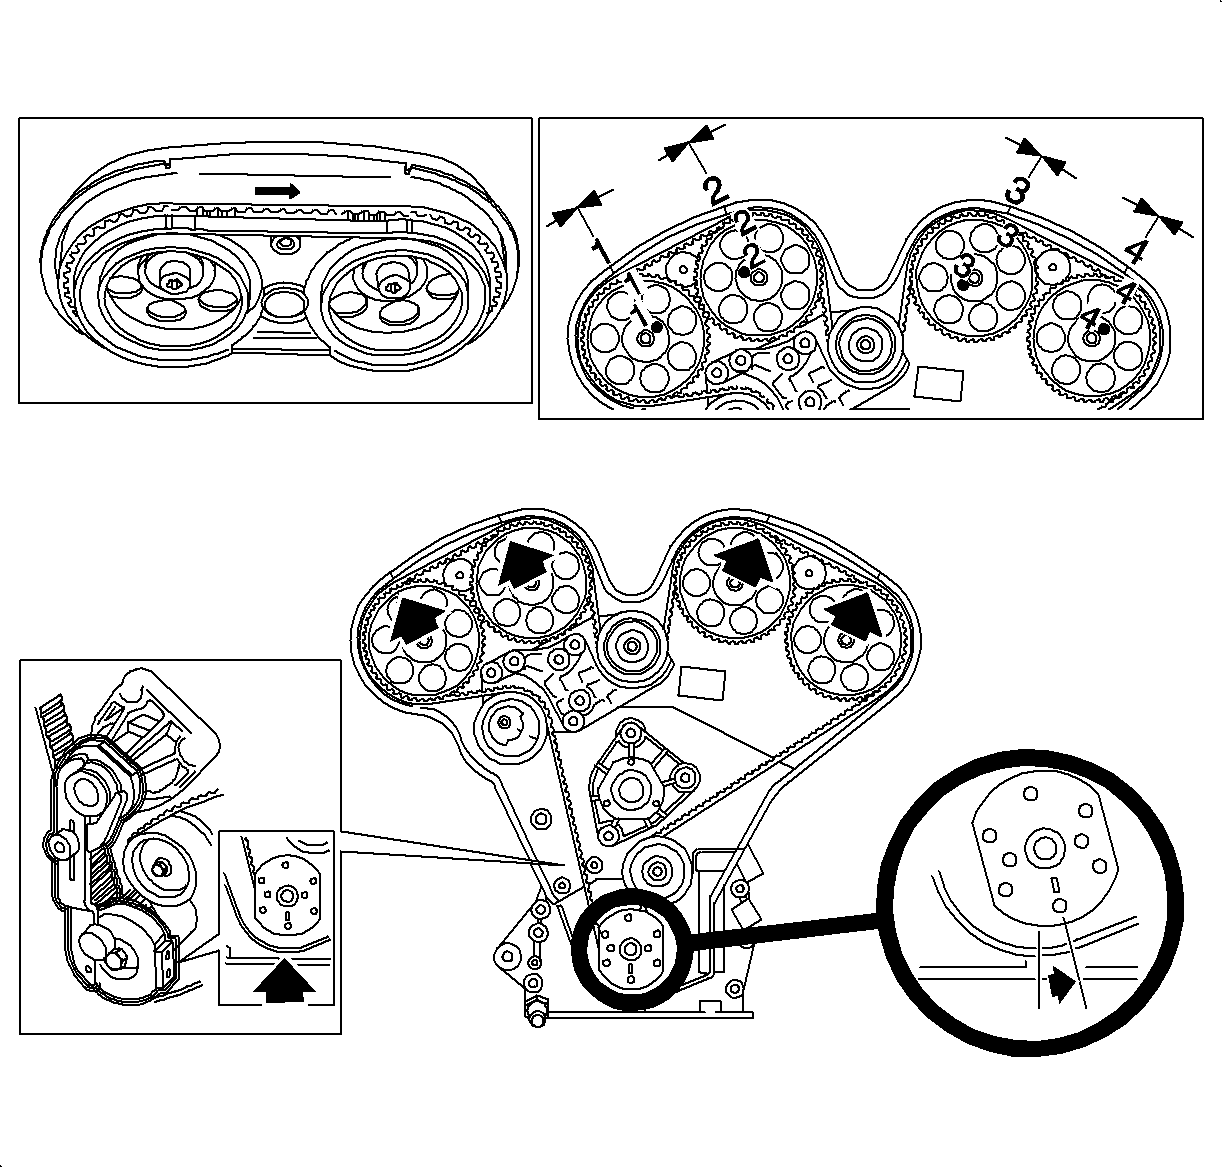
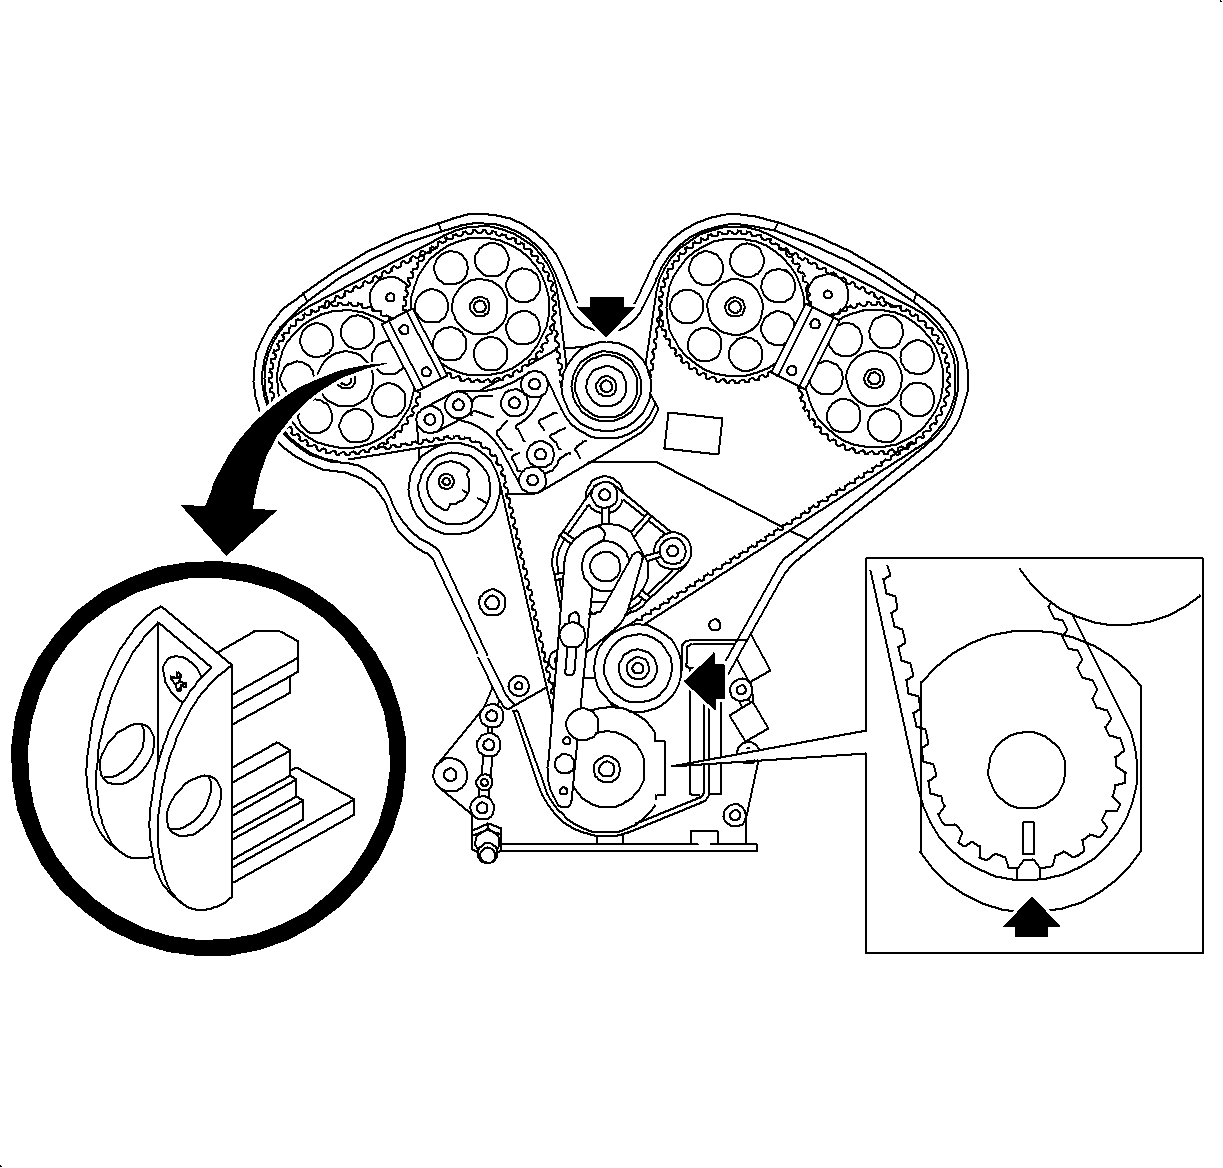
Important: Ensure that the alignment of crankshaft is not 180 degrees off. The alignment mark must align with the corresponding notches on the rear timing belt cover.
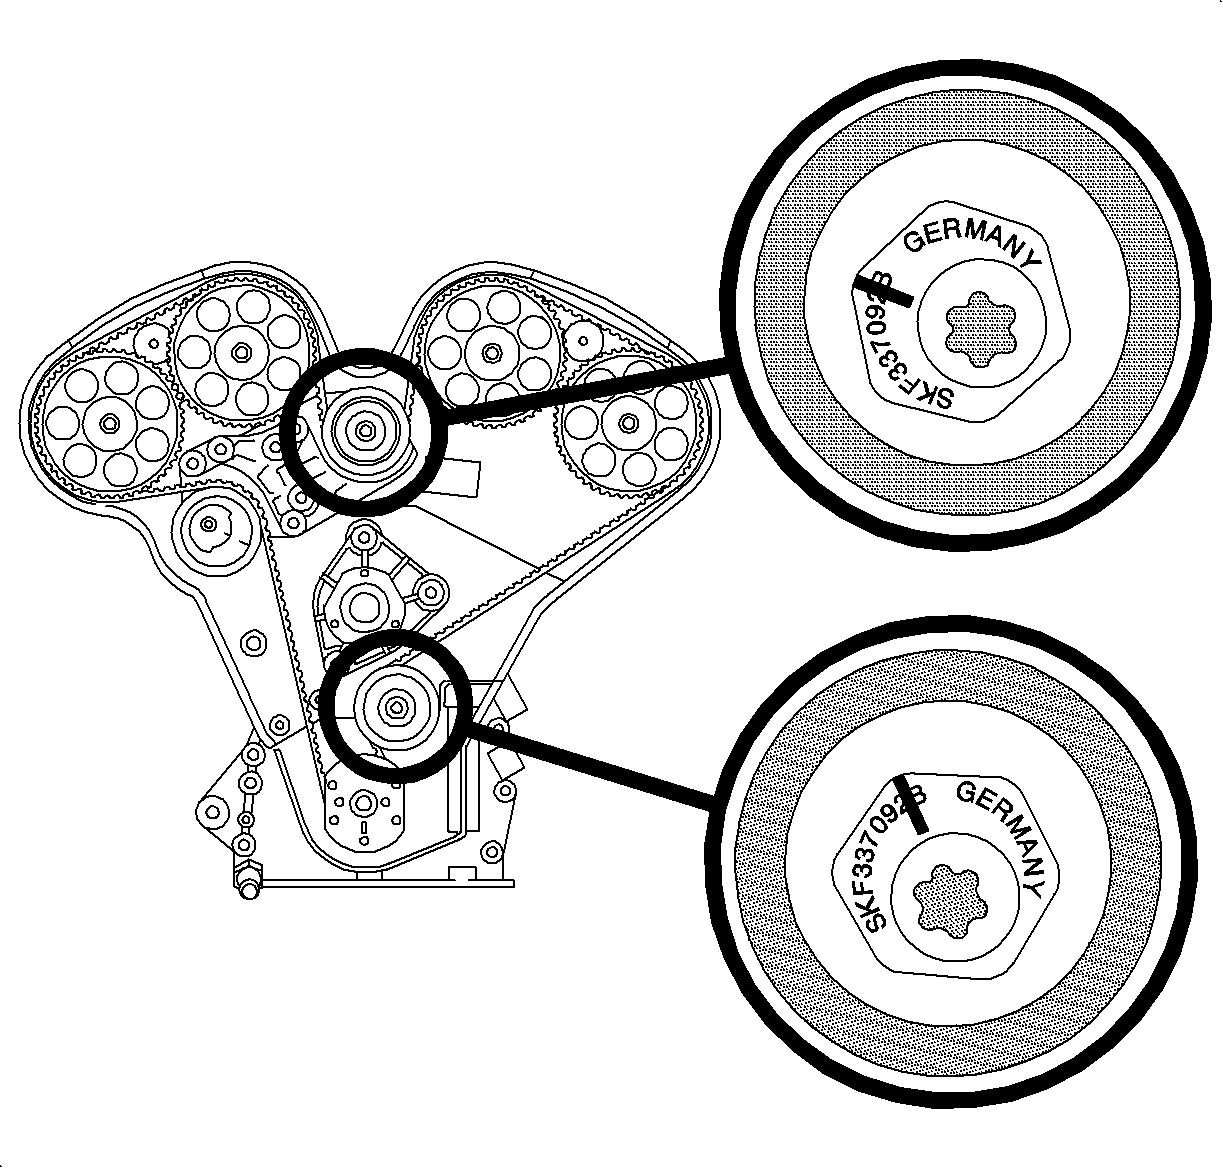
Important: Do not rotate the crankshaft if camshafts are not locked in place with 1-2 and 3-4 camshaft locks, J 42069-1 and J 42069-2 .
Important: Do not rotate the camshafts unless the crankshaft is at 60 degrees BTDC or the valves may contact the crankshaft.
