2001 Saturn L-Series Vehicles (All Models Equipped with Side Head Curtain Air Bags)

| Subject: | INFLATABLE RESTRAINT SENSING AND DIAGNOSTIC MODULE (SDM) REPLACEMENT |
| Models: | 2001 SATURN L-SERIES VEHICLES (ALL MODELS EQUIPPED WITH SIDE HEAD CURTAIN AIR BAGS) |
All Saturn Retailers and Authorized Service Providers
Saturn has decided that a defect which relates to motor vehicle safety exists in some 2001 model year Saturn L-Series vehicles. Some vehicles equipped with a Side Impact Airbag System option have been identifies as having a lower side impact safing sensor threshold than specified. Because of the reduced threshold, there is a potential for an inadvertent deployment of the side head curtain airbag with severe slamming of a door. An occupant could receive minor injuries.
To prevent the possibility of this condition occurring, Retailers are to replace the SDM in involved vehicles.
Vehicles Involved
Only selected 2001 model year L-Series Saturn vehicles within the following VIN range will require this campaign:
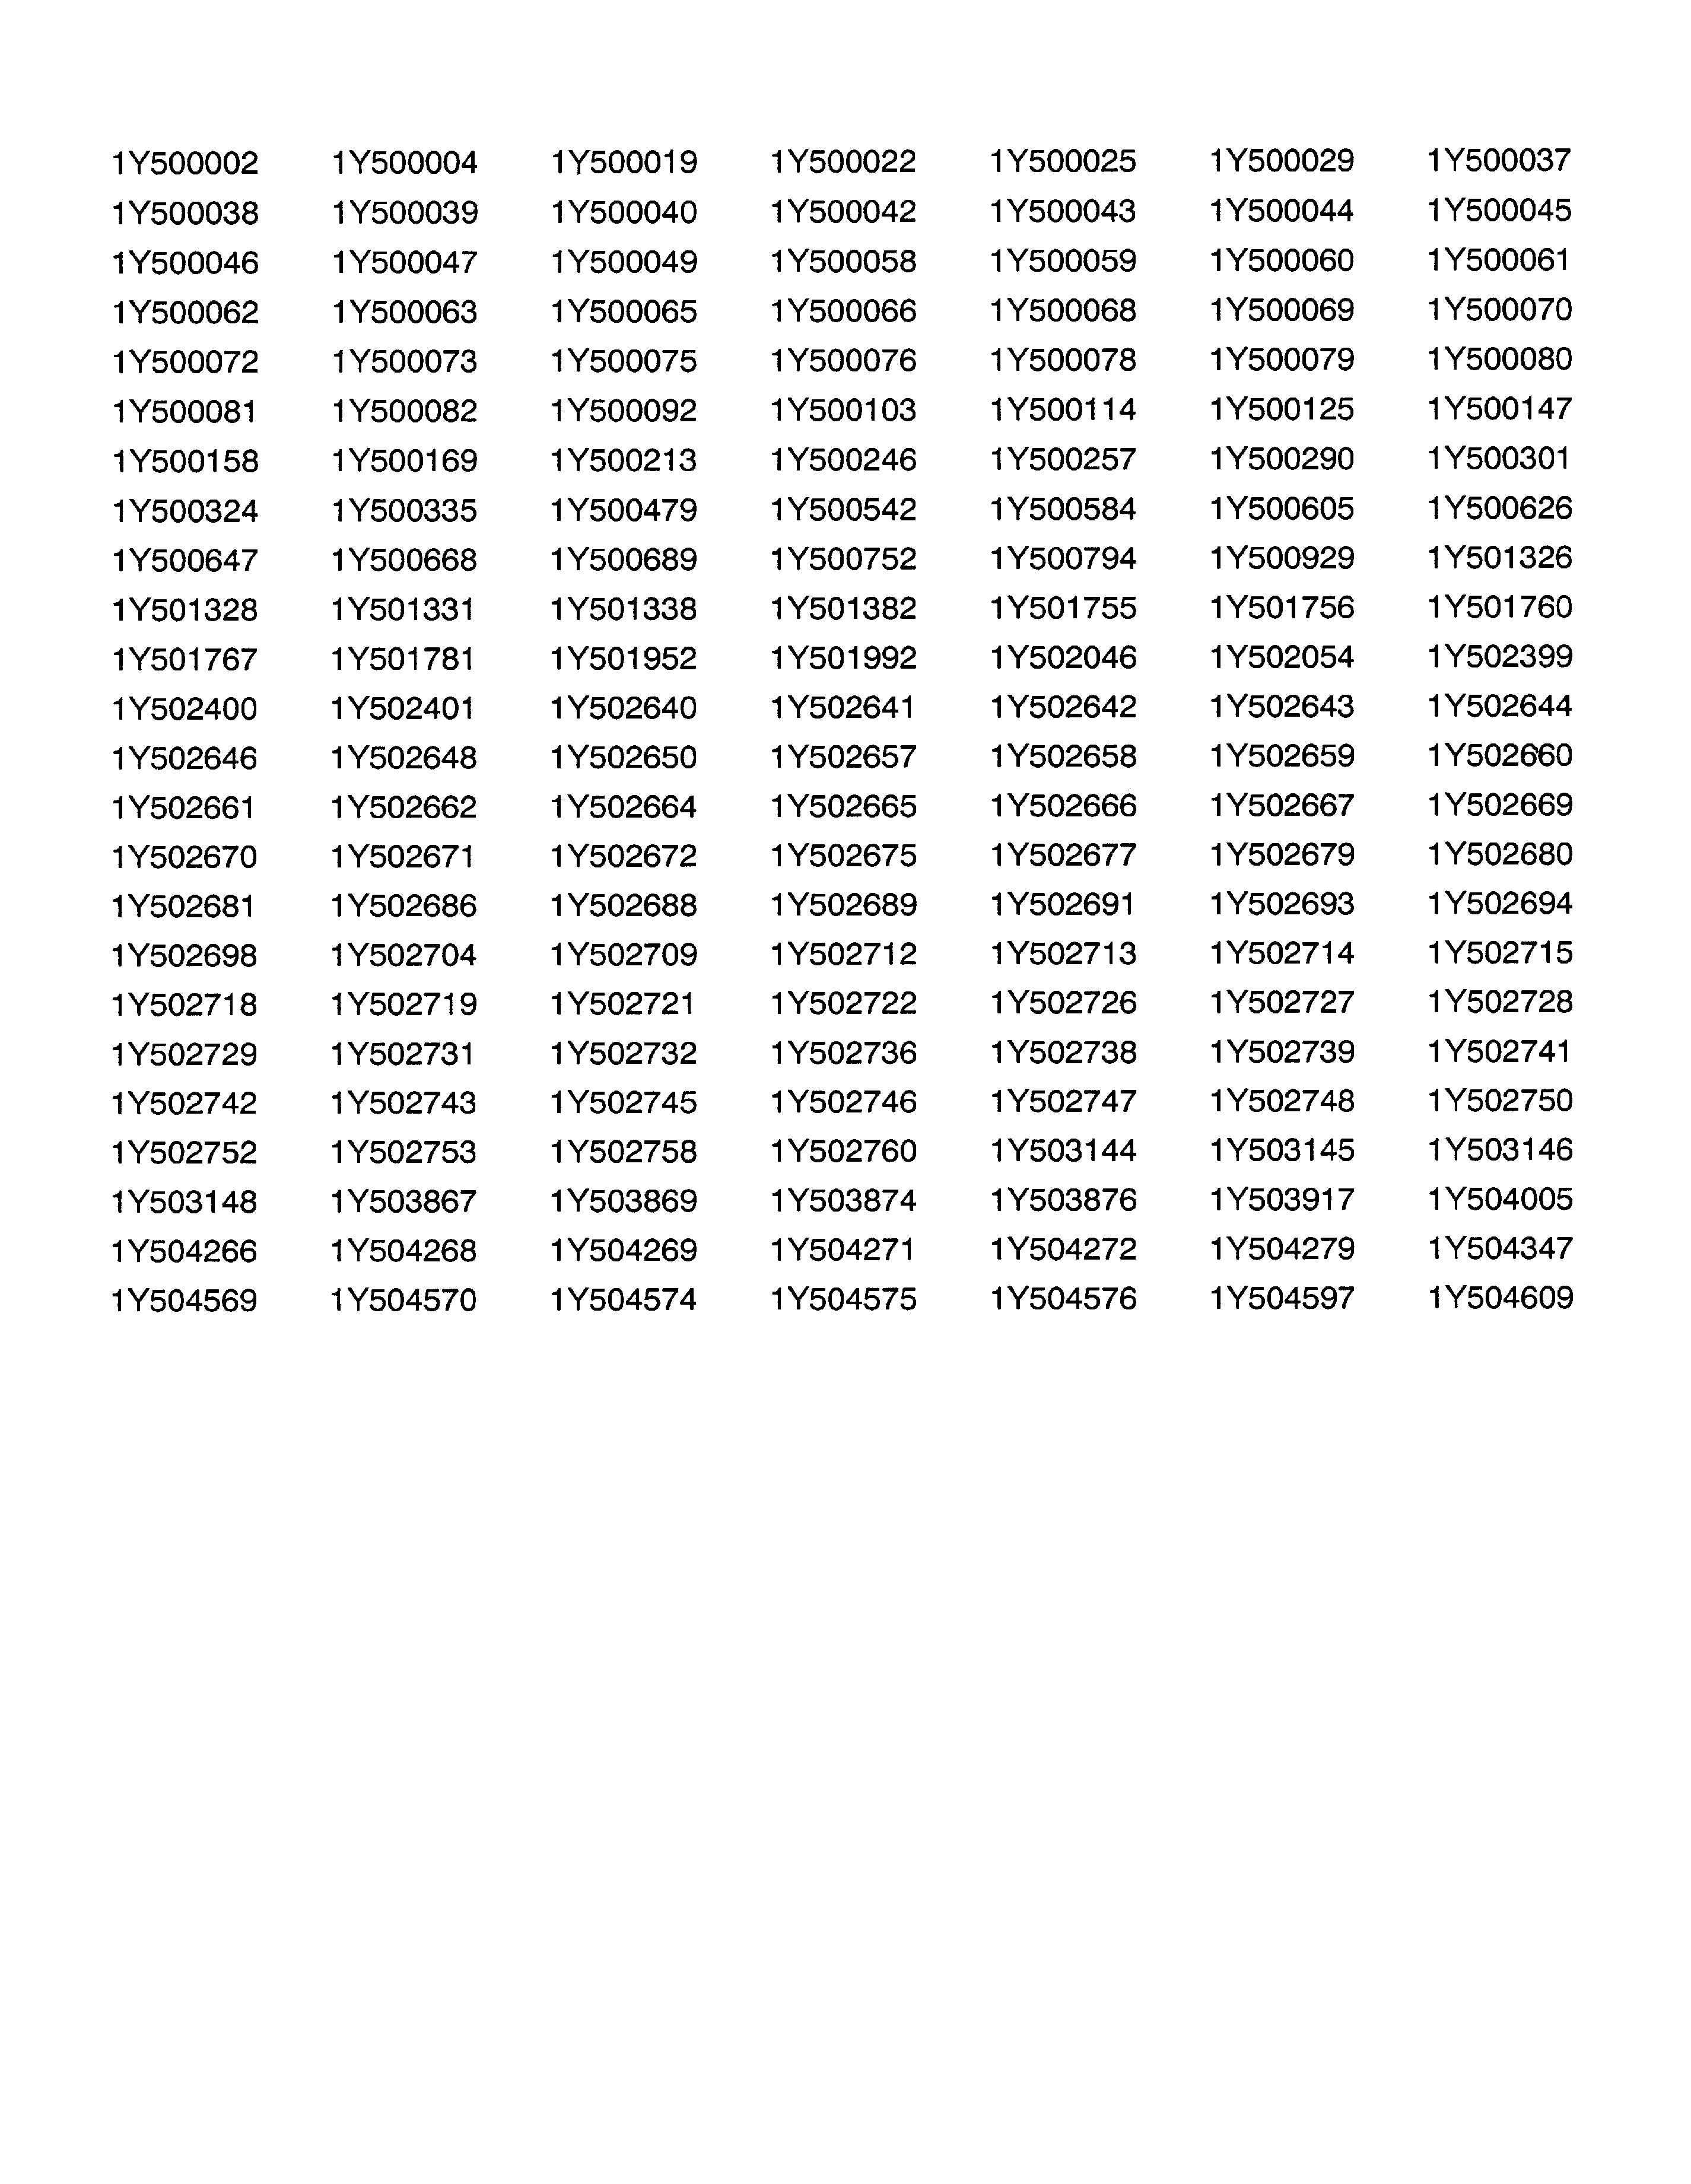
1Y500002 - 1Y504609
A VIN listing of the vehicles is included in this bulletin for your reference.
You must verify campaign involvement through your AS400 system, or with the listing attached to this bulletin. It is important to note that campaign claims will only be paid on involved vehicles.
Owner Notification
No owner vehicles are involved in this activity. Only vehicles in Retailer inventory are involved.
Facility VIN Listing
A list of vehicles assigned to you (Facility VIN Listing), which our records indicate were sold by or shipped to you, (or are located in close proximity to your facility) is enclosed.
This listing contains:
| • | Complete vehicle identification number (VIN); and |
| • | VINs of vehicles which according to Saturn records are in retail stock. |
The Facility VIN Listing is furnished to involved Retailers with the Product Campaign Bulletin.
Those Retailers not involved initially in this campaign will receive a message at the top of a blank Facility VIN Listing that states: NO VEHICLES ASSIGNED AT THIS TIME FOR CAMPAIGN 01-C-01.
Retailer Responsibility
All unsold vehicles in Retailers' possession and subject to this campaign must be held at the retail facility and repaired per the service procedure of this campaign bulletin before owners take possession of these vehicles.
In summary, whenever a vehicle subject to this campaign enters your vehicle inventory, or is in your retail facility for service in the future, please take the steps necessary to be sure the campaign correction has been made before selling or releasing the vehicle.
Transfer of Campaign Responsibility
Saturn vehicles that have been sold by you, which may be closer in proximity to another Saturn Retailer, may still appear on your Facility VIN Listing. If either you or the vehicle owner determines that it is more desirable for a vehicle on your Facility VIN Listing to be serviced by another Saturn Retailer, or if the customer's address has recently changed, campaign responsibility may be transferred by completing the following:
| • | Submit a Campaign Vehicle Action Report to your Customer Assistance Manager (CAM) at the Saturn Customer Assistance Center; OR |
| • | Submit an update in owner information to the Saturn Owner of Record system, via SERVICELINE XL, for Saturn Customer Assistance Center review and approval. |
A copy of the Campaign Vehicle Action Report is included for your reference. Additional copies can be ordered from Saturn Publications (1-800-828-2112, prompt 3, Item # S0397050). All changes to campaign responsibility will be reflected in your next Unfixed VIN Report.
All other changes in vehicle status (e.g., scrapped, stolen, etc.) are to be made in accordance with section 4.4.3 of the Retailer Service Reference Guide, "Notifying Saturn of Vehicle Status Change."
Parts Information
- A 100% pre-shipment of module assemblies required to perform this campaign has been automatically sent by Saturn to affected Retailers. These initial shipments are to aid Retailers in campaign preparation
- Should additional parts be required, please order from Saturn Service Parts Operations (SSPO) as needed.
- Required Parts:
Part Number | Description | Quantity Required Per Vehicle |
|---|---|---|
22672809 | Module Asm - Infl Rst Sen & Diagn | 1 |
Disposition of Replaced Parts
Retailers will scrap all replaced parts in a manner that ensures that they cannot be reused, remanufactured, or otherwise entered into the stream of commerce in the future.
Service Procedure
Disabling Frontal Inflators (All)
- Turn the steering wheel so that the vehicle's wheels are pointing straight ahead.
- Turn the ignition switch to the OFF position and remove the key.
- Remove the IGN 1 mini-fuse from the underhood fuse block.
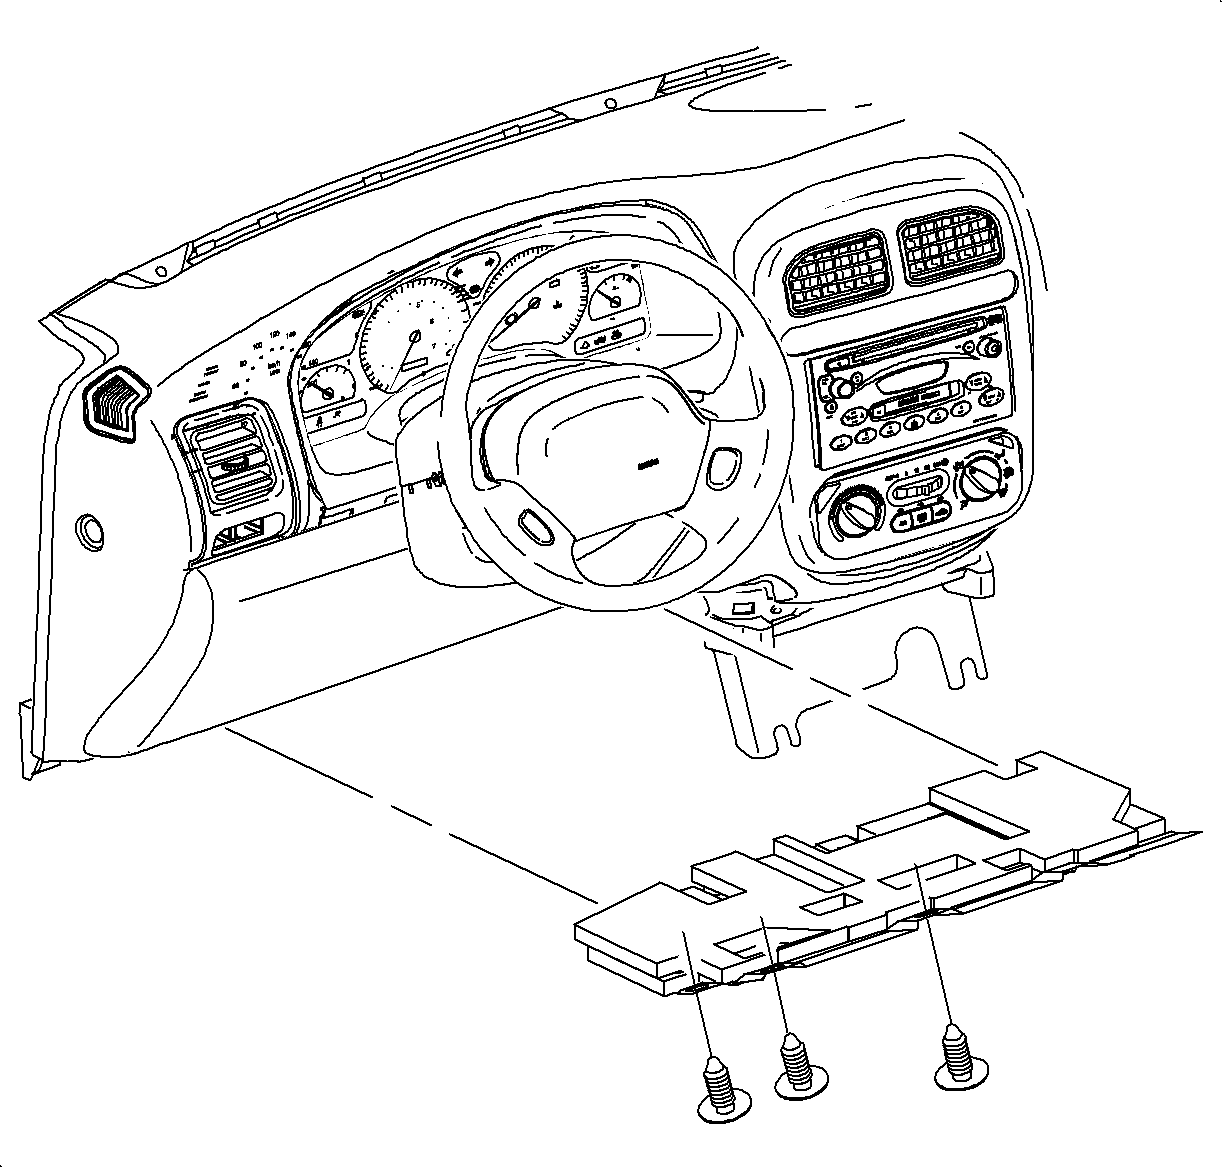
- Remove the lower left I/P closeout panel.
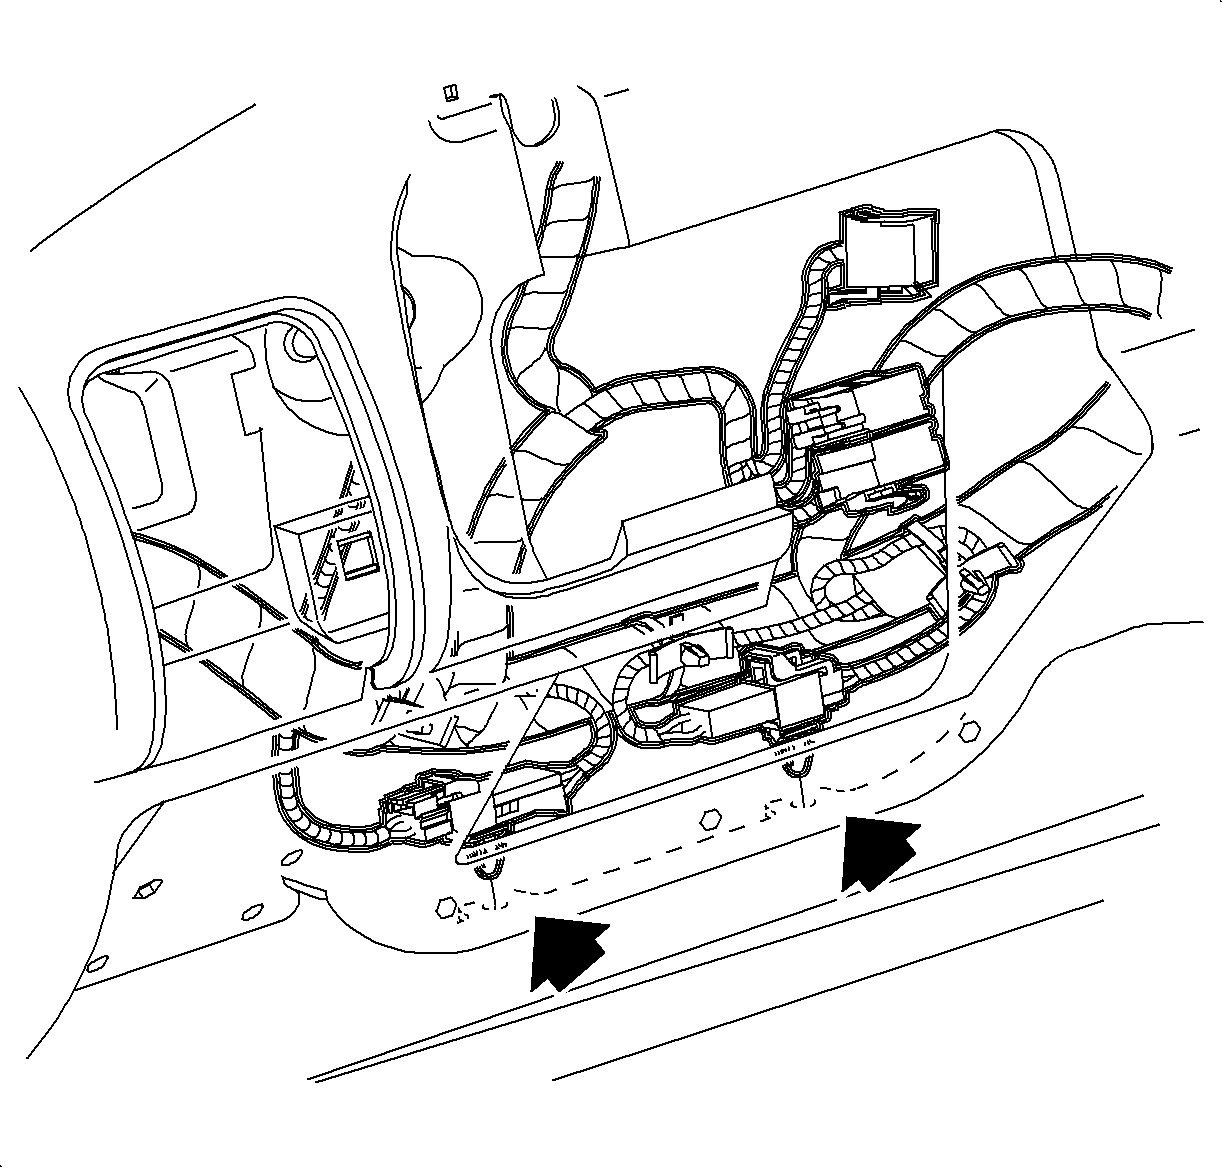
- Push out the clips that secure the driver and passenger inflator module (YEL 2-way) connectors to the I/P panel brace.
- Remove the CPA retainers and disconnect both (YEL 2-way) connectors.
Disabling Curtain Inflators (Sedan)
- Remove the C-pillar trim on both the left and right side of the vehicle.
- Remove the CPA retainers and disconnect the left and right curtain inflator module (YEL 2-way) connectors.
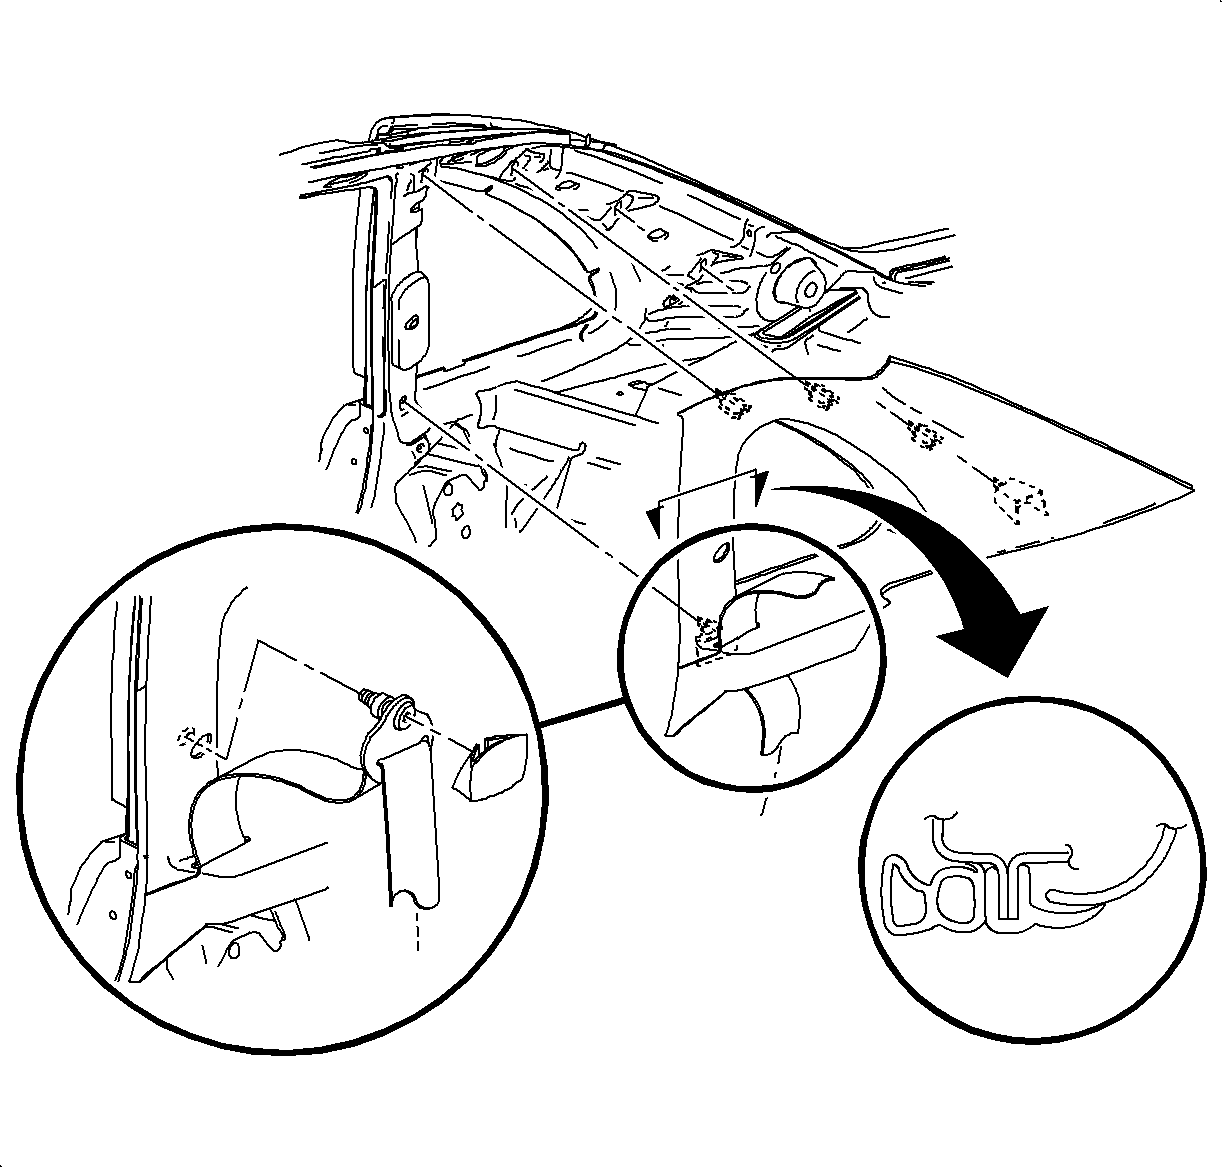
| 1.1. | Remove the rear seat shoulder belt cover to expose the shoulder belt fastener. |
| 1.2. | Remove the shoulder belt fastener and the shoulder belt. |
| 1.3. | Remove the C-pillar trim assembly by pulling gently at the C-pillar clip locations. |
| 1.4. | Route the shoulder belt out of the C-pillar trim access slot. |
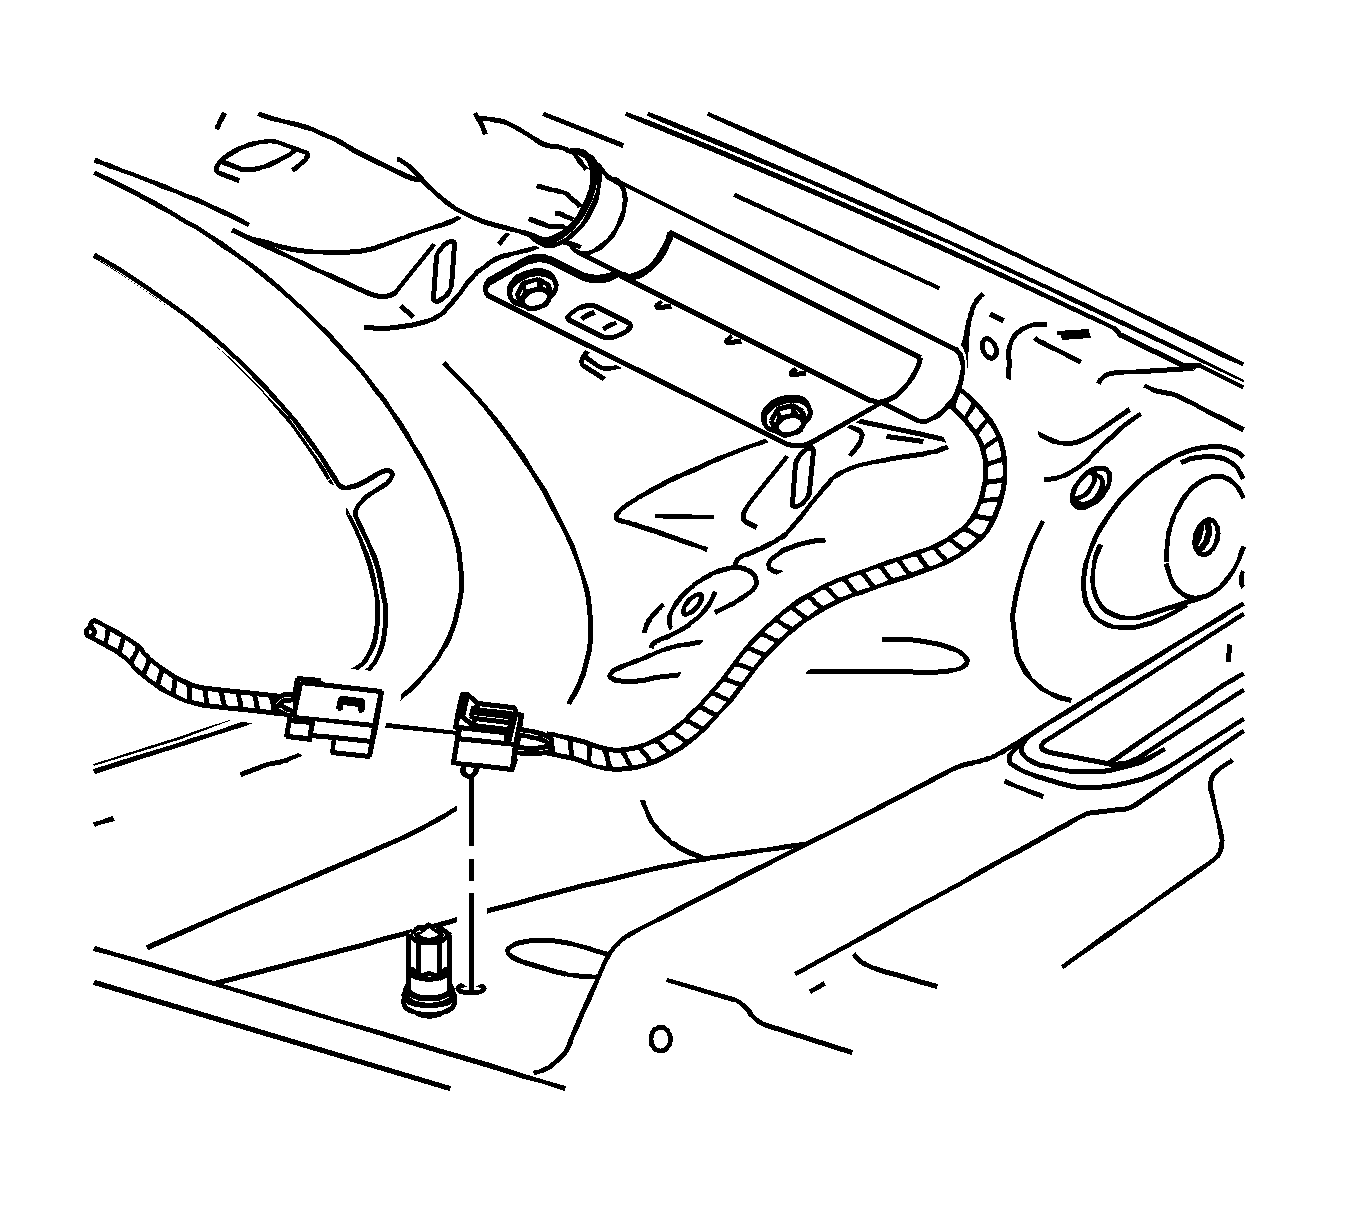
Disabling Curtain Inflators (Wagon)
- Remove the tail lamp access hole cover on both sides of the vehicle.
- Remove the CPA retainers and disconnect the left and right curtain inflator module (YEL 2-way) connectors.
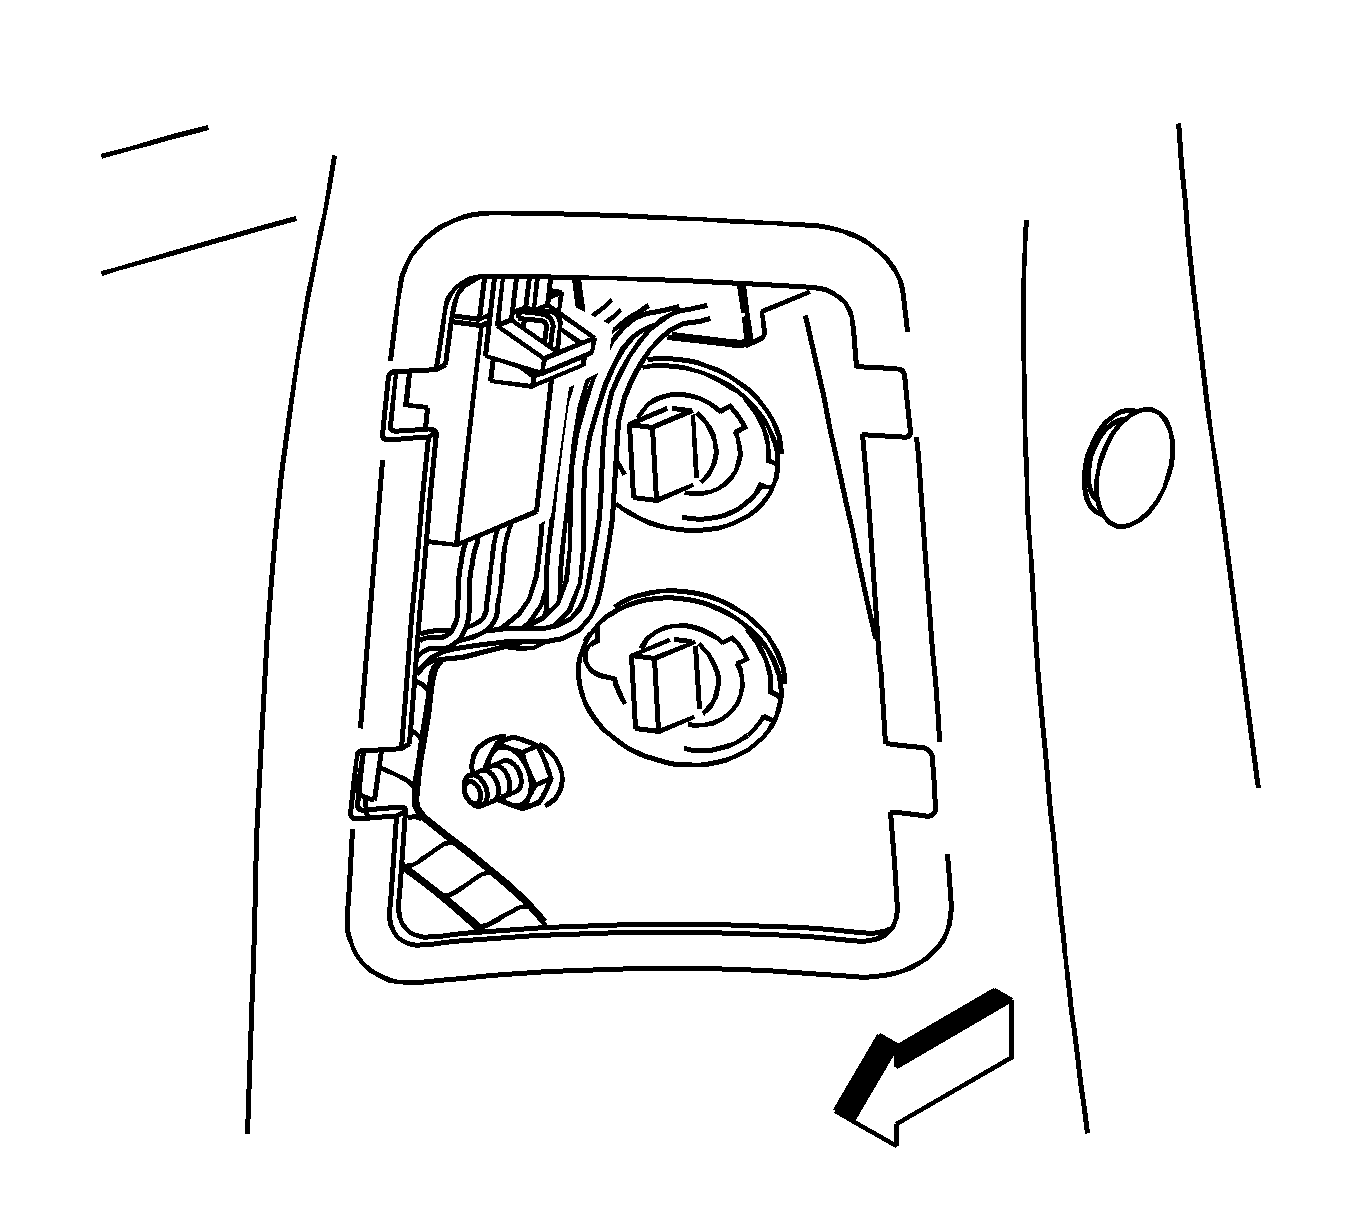
SDM Replacement (All)
- Remove the console rear screws.
- Remove the console front screws.
- Lift the rear of the console.
- Remove the connector position assurance (CPA) retainers from the SDM connectors.
- Disconnect the SDM connectors.
- Remove the nuts and remove the SDM.
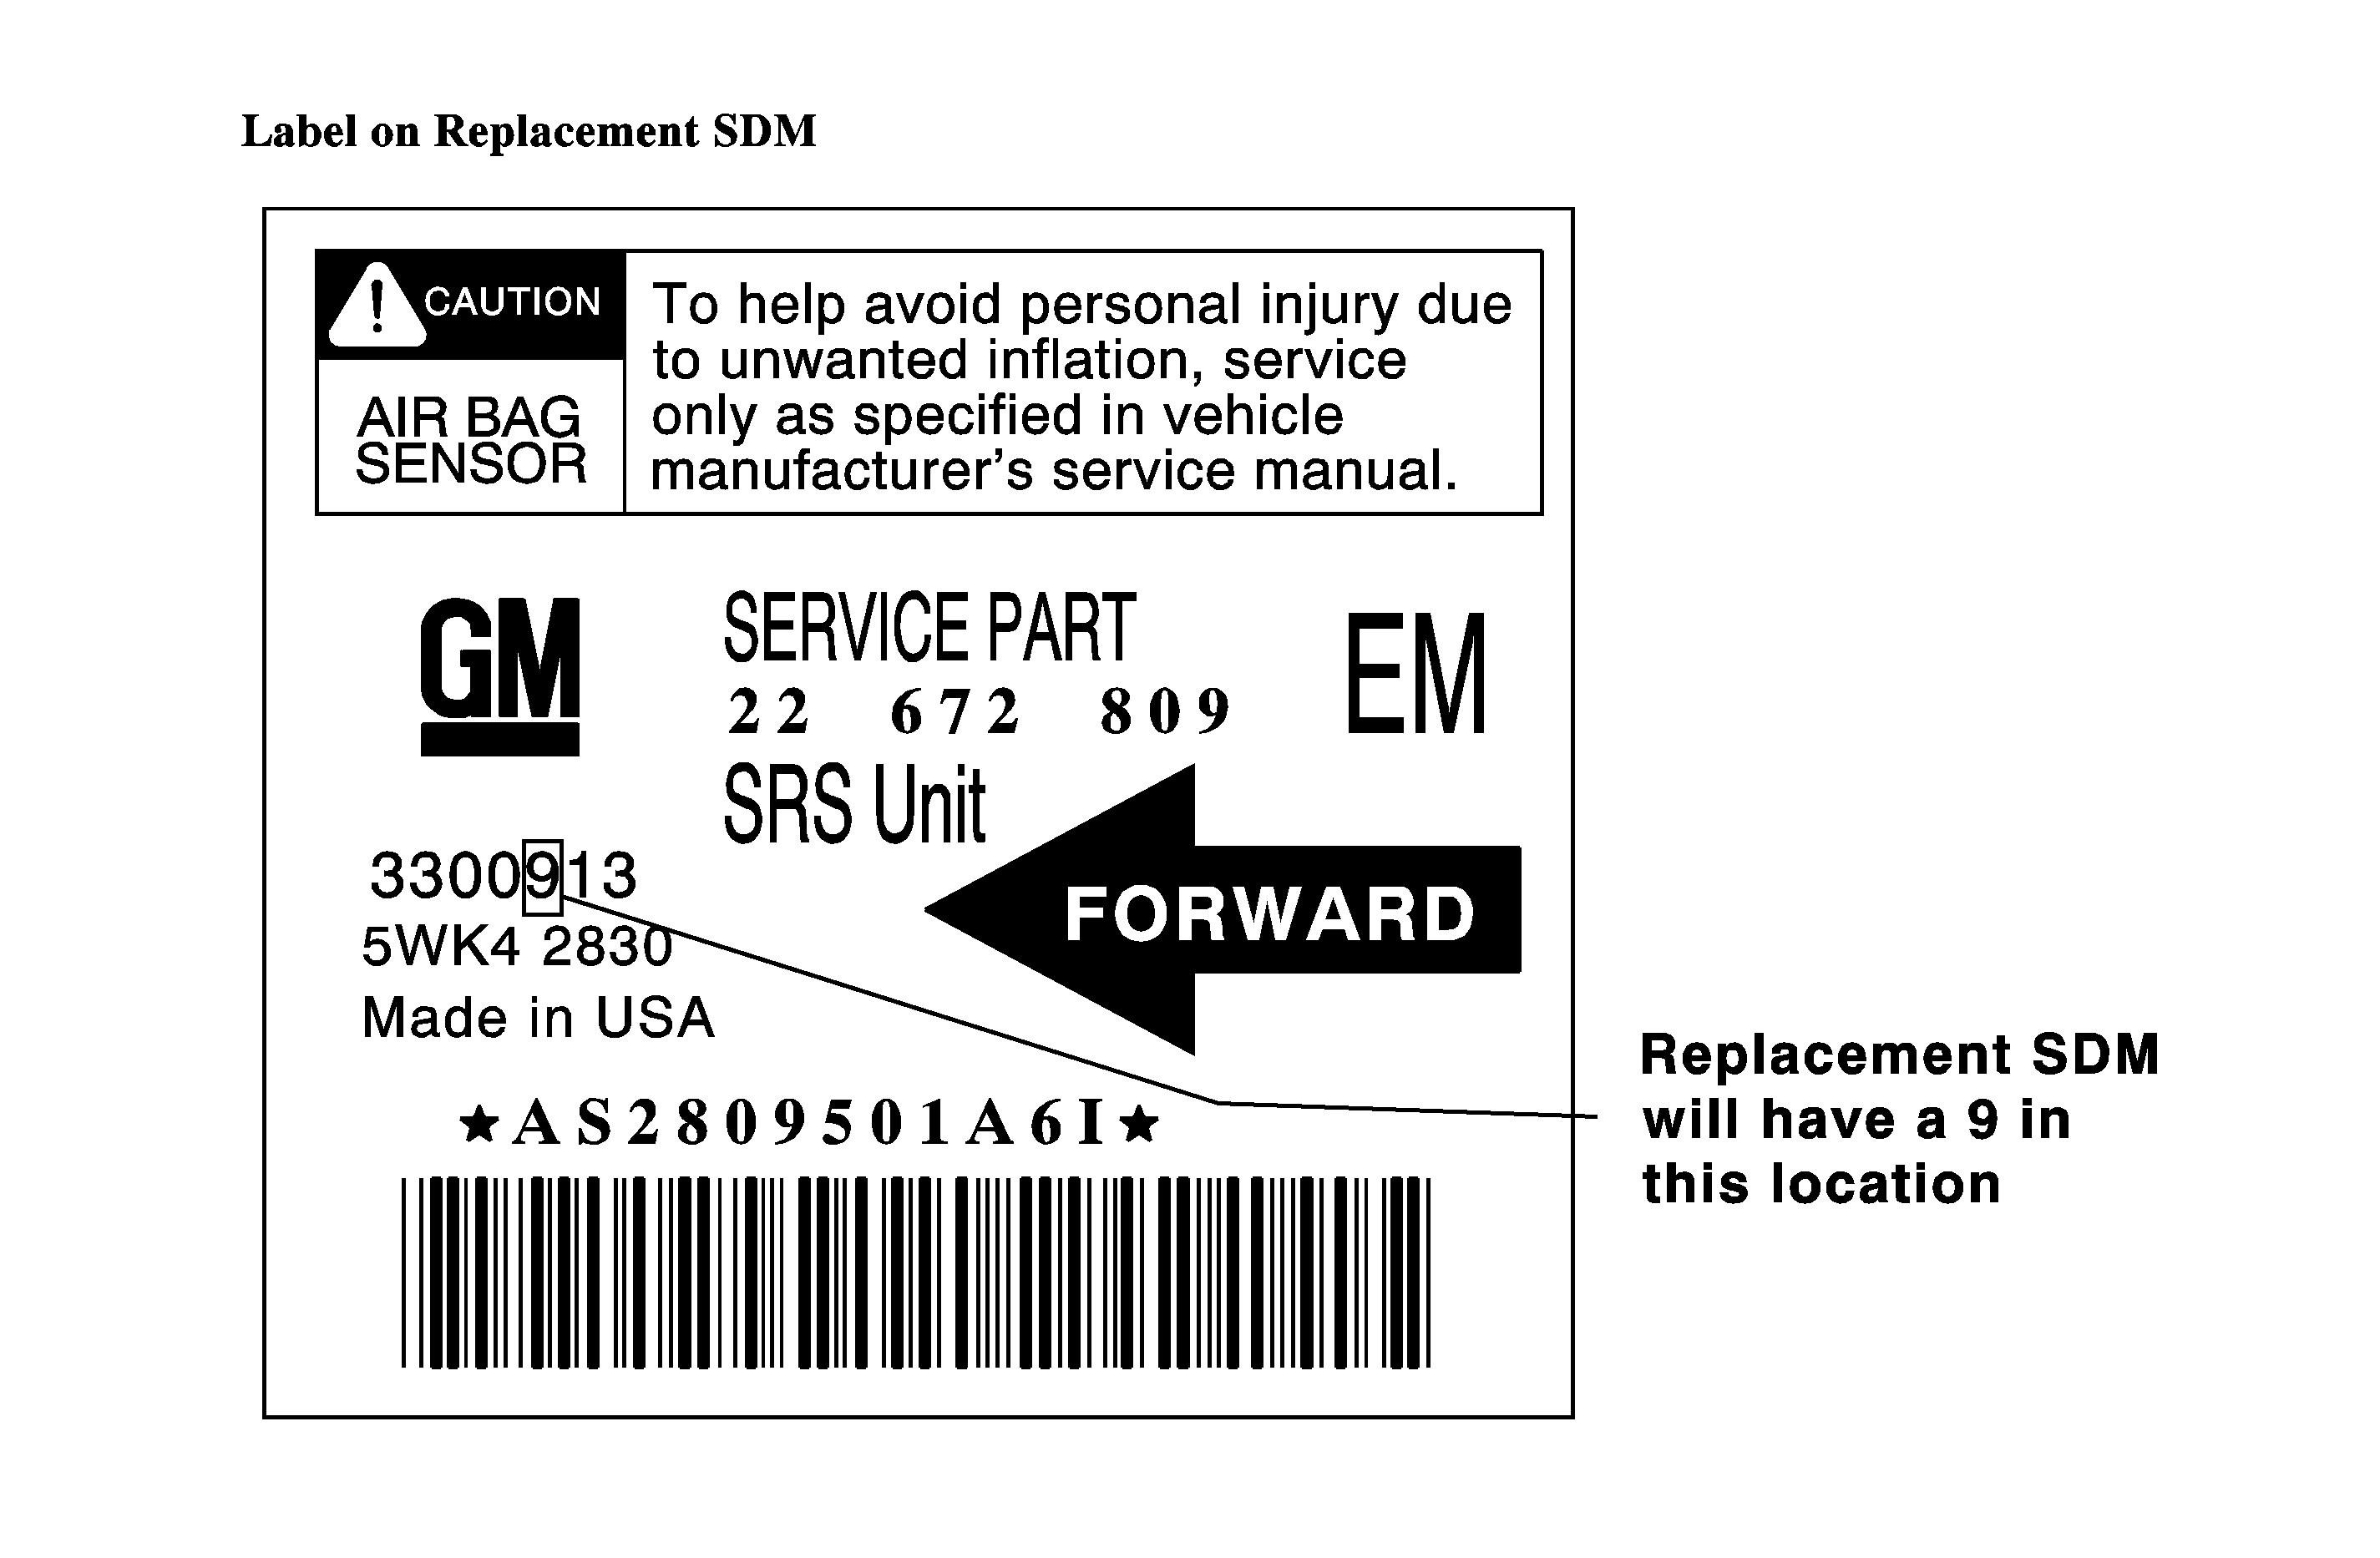
- Obtain replacement SDM P/N 22672809. Refer to the number detailed in the illustration. The number on the replacement SDM will contain the digit "9" as indicated and is the only SDM to be installed on the vehicle.
- Install the SDM to the vehicle.
- Connect the SDM connectors and install the CPA retainers.
- Install the console and the screws.
Caution: Be careful when you handle an inflatable
restraint sensing and diagnostic module (SDM). Do NOT strike or jolt the SDM. Before
applying power to the SDM:
• Remove any dirt, grease, or other impurities from the mounting surface. • Position the SDM horizontally on the mounting surface. • Tighten all of the SDM fasteners and the SDM bracket fasteners to the
specified torque value.
Notice: If the inflatable restraint sensing and diagnostic module (SDM) is dropped or shows any sign of damage, replace the module.
Notice: Prior to removing the inflatable restraint sensing and diagnostic module (SDM), place the ignition key in the OFF position.
Notice: Do NOT open the inflatable restraint sensing and diagnostic module (SDM) case for any reason. Touching the connector pins or the soldered components may cause electrostatic discharge damage. Repair of a faulty SDM is by replacement only.
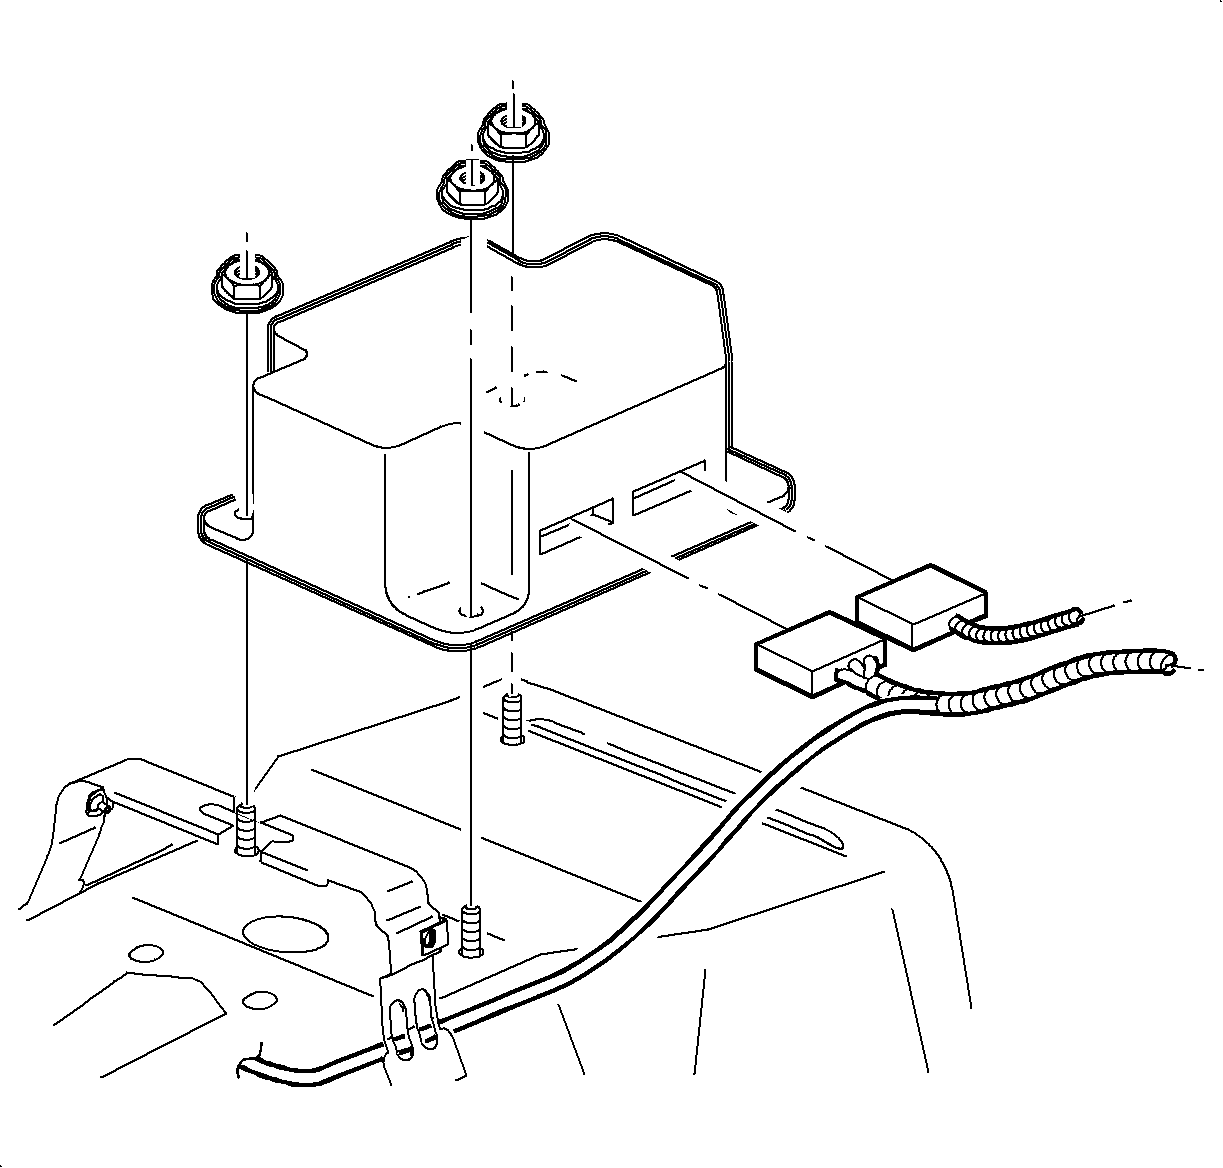
Tighten
Tighten the nuts to 10 N·m (89 lb in).
Tighten
Tighten the screws to 1.2 N·m (11 lb in).
Enabling Curtain Inflators (Sedan)
- Connect the left and the right curtain inflator module (YEL 2-way) connectors and install the CPA retainers.
- Install the C-pillar trim on both the lift and the right sides of the vehicle.


| 2.1. | Position the C-pillar trim to the vehicle. |
| 2.2. | Route the shoulder belt into the C-pillar trim at the access slot. |
| 2.3. | Install the C-pillar trim by pushing gently at the clip location. |
| Important: Apply Loctite 242® or equivalent on all restraint fasteners prior to installation. |
| 2.4. | Install the rear shoulder belt to the C-pillar. |
Tighten
Tighten the shoulder belt fastener to 35 N·m
(26 lb ft).
| 2.5. | Install the rear shoulder belt fastener cover. |
| 2.6. | Verify proper operation of the rear shoulder belt. |
Enabling Curtain Inflators (Wagon)
- Connect the left and the right curtain inflator module (YEL 2-way) connectors and install the CPA retainers.
- Install the tail lamp access hole cover on both sides of the vehicle.

Enabling Frontal Inflators (All)
- Turn the steering wheel so that the vehicle's wheels are pointed straight ahead.
- Turn the ignition switch to the OFF position and remove the key.
- Connect the left and the right curtain inflator module (YEL 2-way) connectors and install the CPA retainers.
- Fasten the clips on the yellow 2-way connectors to the I/P panel brace.
- Install the IGN1 mini-fuse in the underhood fuse block.
- Turn the ignition ON and verify that the AIR BAG telltale flashes 7 times and then goes OFF. If the telltale does not go OFF, refer to the "SIR Diagnostic System Check" procedure in the SIR section of the 2000/2001 L-Series Restraints Service Manual.
- Install the lower left I/P closeout panel.
- Affix the Campaign Completion Label on a clean and dry surface of the radiator core support, in an area clearly visible when the hood is raised. For more information, refer to "Campaign Completion Label" in this bulletin.


Important: Do not cover any existing underhood labels when affixing Campaign Completion Label.
Campaign Completion Label
Upon completion of the campaign, a Campaign Identification Label and a Clear Protective Cover should be affixed on a clean, dry surface of the radiator core support in an area clearly visible when the hood is raised. Each label provides a space to print in ink (or type) the campaign number (01C01) and the five (5) digit facility code of the Retailer performing the campaign service.
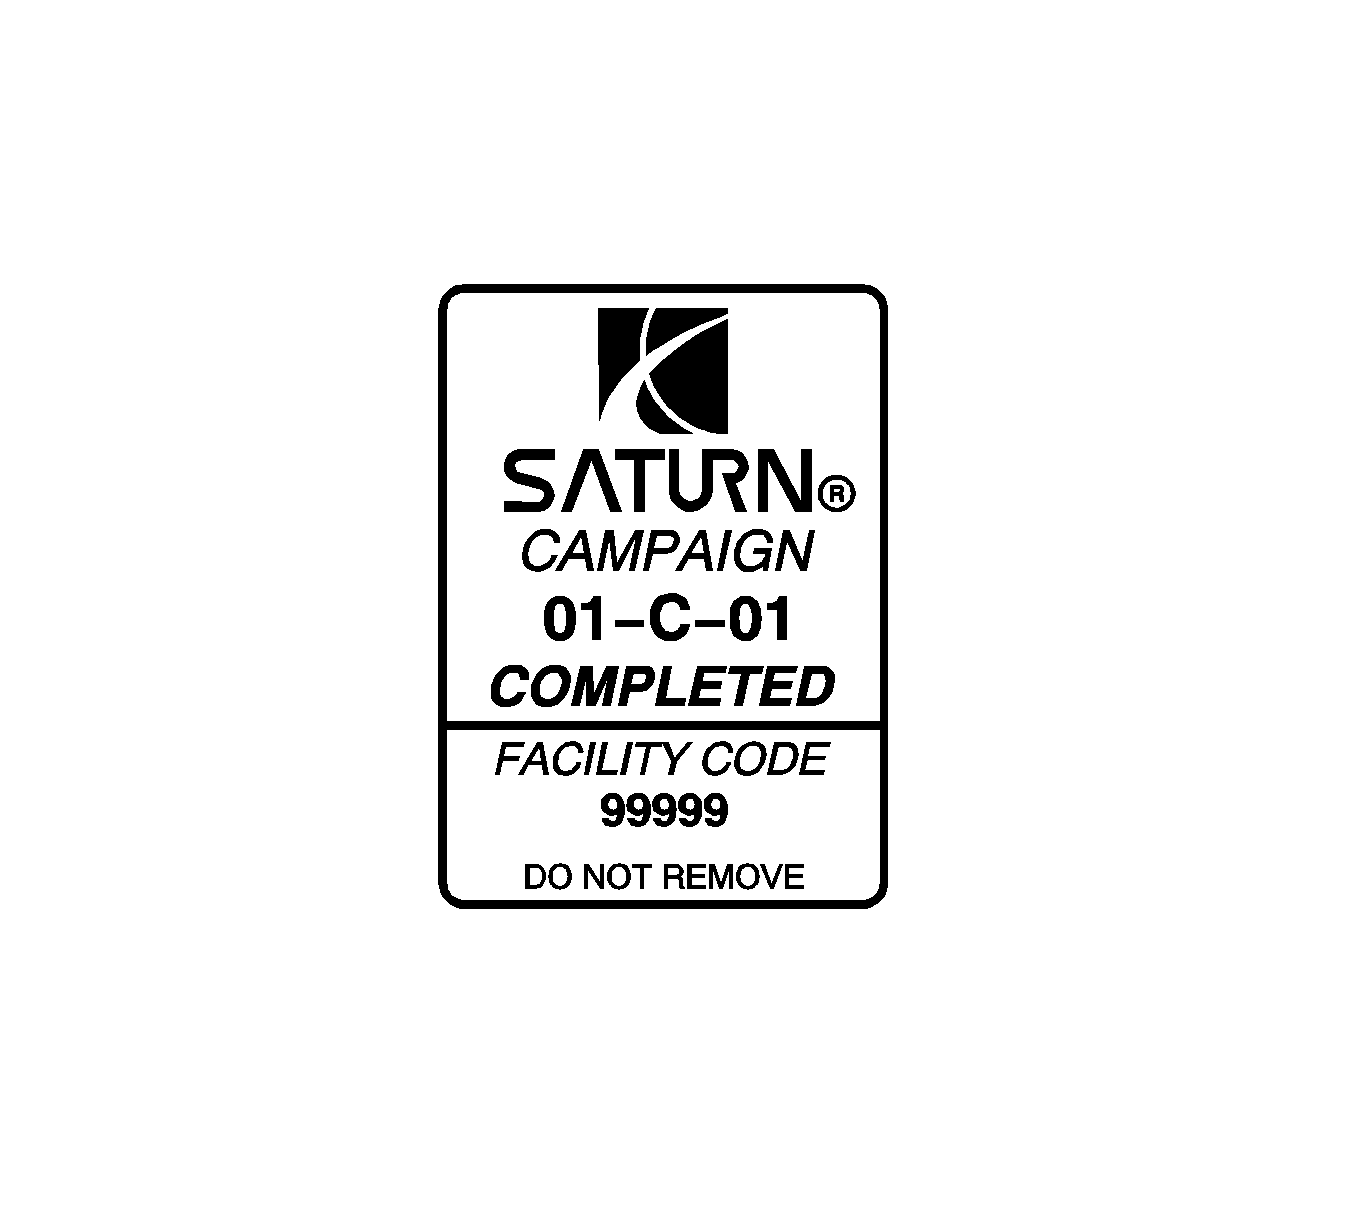
As a reminder, additional labels may be ordered from Saturn publications (1-800-828-2112, prompt 3, Item # S03 00013A for the Campaign Completion Label and Item # S03 00013B for the Clear Protective Cover ).
Credit
1. To receive credit, submit a claim with the information below:
Repair Information | Parts Allow. | Sale Type | Case Type | Labor Op | Labor Hours | Admin. Hours** | |
|---|---|---|---|---|---|---|---|
To Replace Inflatable Restraint Sensing and Diagnostic Module | * | WC | VC | V0575 | -- | 0.1 | |
| -- | -- | -- | -- | 0.9 | -- | |
| -- | -- | -- | -- | 0.8 | -- | |
2. Check your Saturn SERVICELINE.XL Claim Memorandum daily. Remember to code the claim as a WC sale type and VC case type. Contact your field representative if you need assistance.
3. All labor operations claimed in this bulletin must be submitted on individual (unrelated) CSO lines. Refer to the Customer Service Order Preparation Manual for details on Product Campaign Claim Submission.
* The parts allowance should be the sum total of the current SSPO Retailer net price plus 30% of all parts required for the repair.
** Campaign administrative allowance.
List of Involved Vehicles Within VIN Range
