For 1990-2009 cars only
Removal Procedure
- Select the following settings:
- Disconnect the negative battery cable. Refer to Battery Negative Cable Disconnection and Connection in Engine Electrical.
- Remove the wiper arm assemblies. Refer to Windshield Wiper Arm Replacement in Wipers/Washer Systems.
- Remove the weatherstrip at rear of the engine compartment.
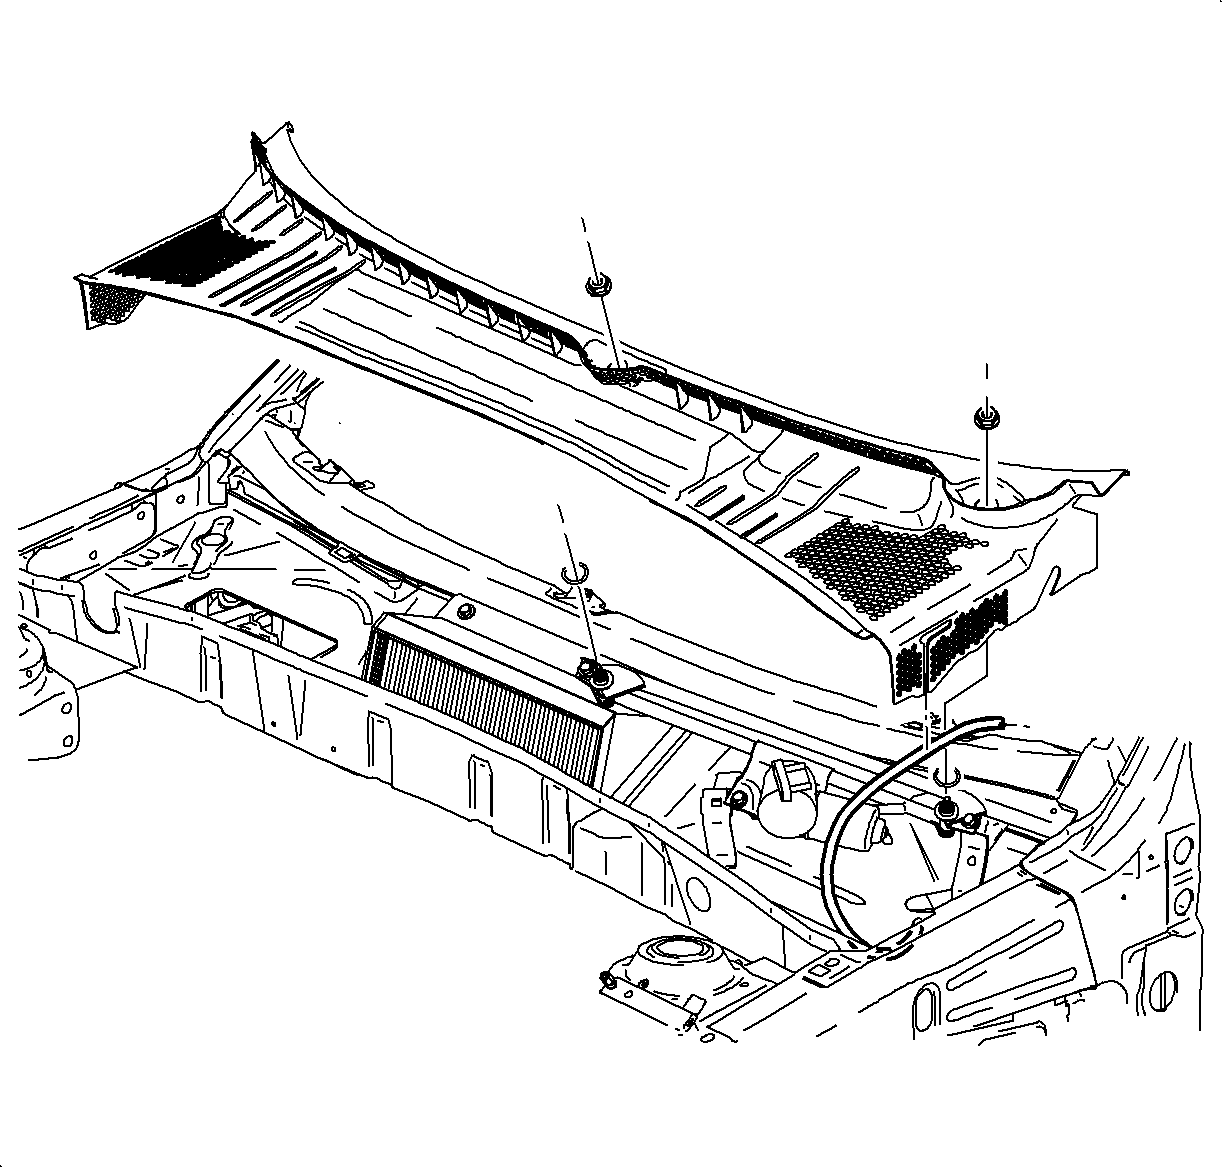
- Remove the cowl retaining nuts.
- Remove the cowl screen assembly.
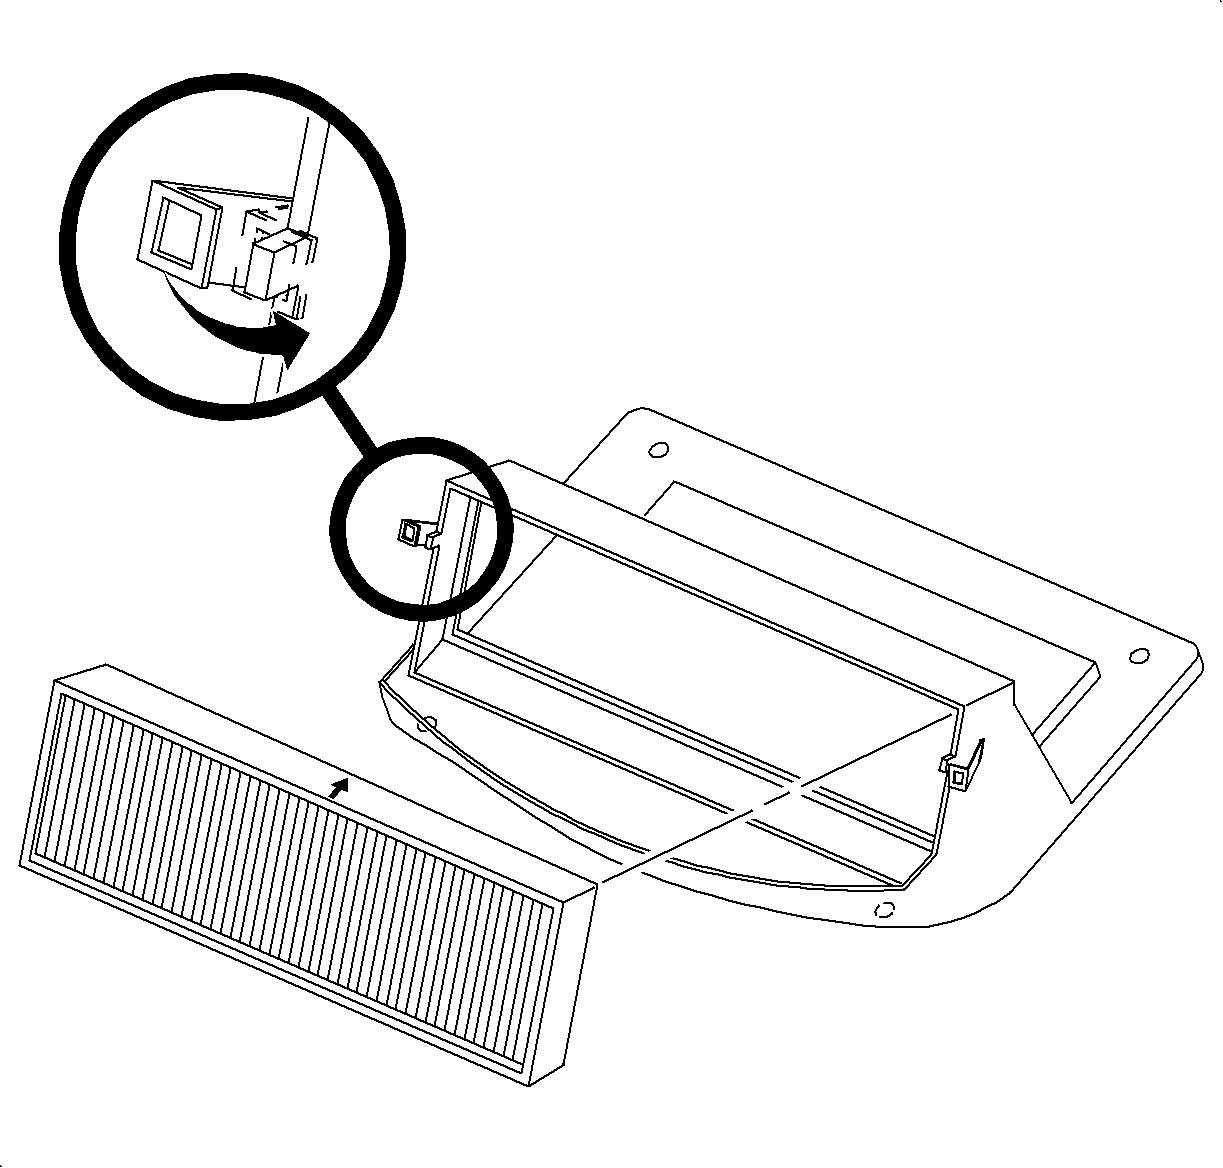
- Rotate the locking tabs outward to release the filter assembly.
- Remove the filter by lifting straight up.
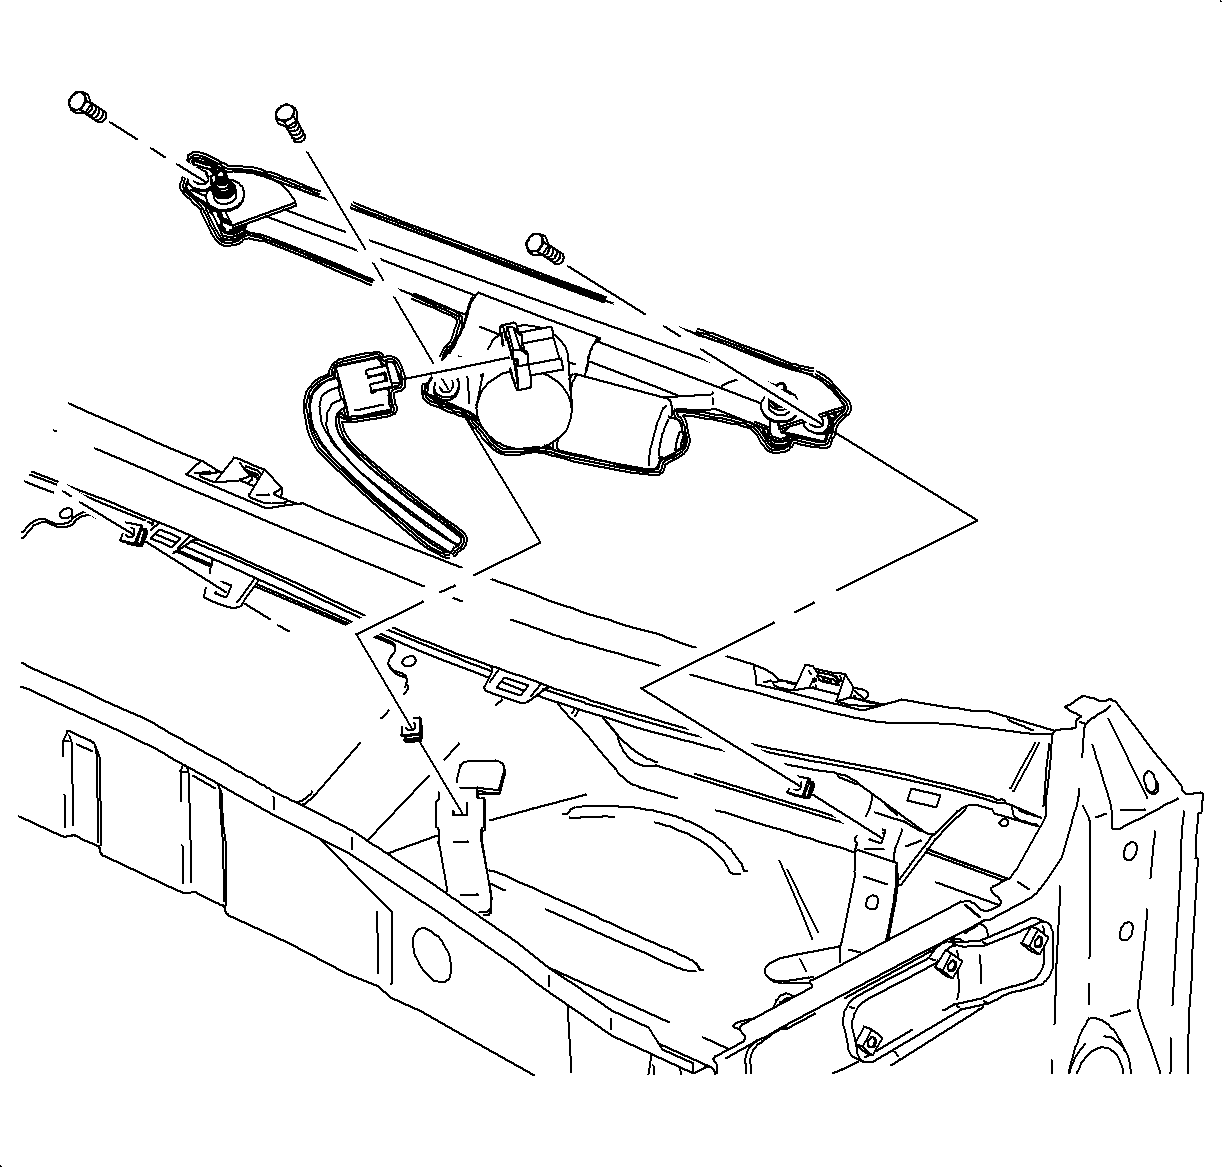
- Remove the wiper module retaining bolts.
- Reposition the wiper module to the right.
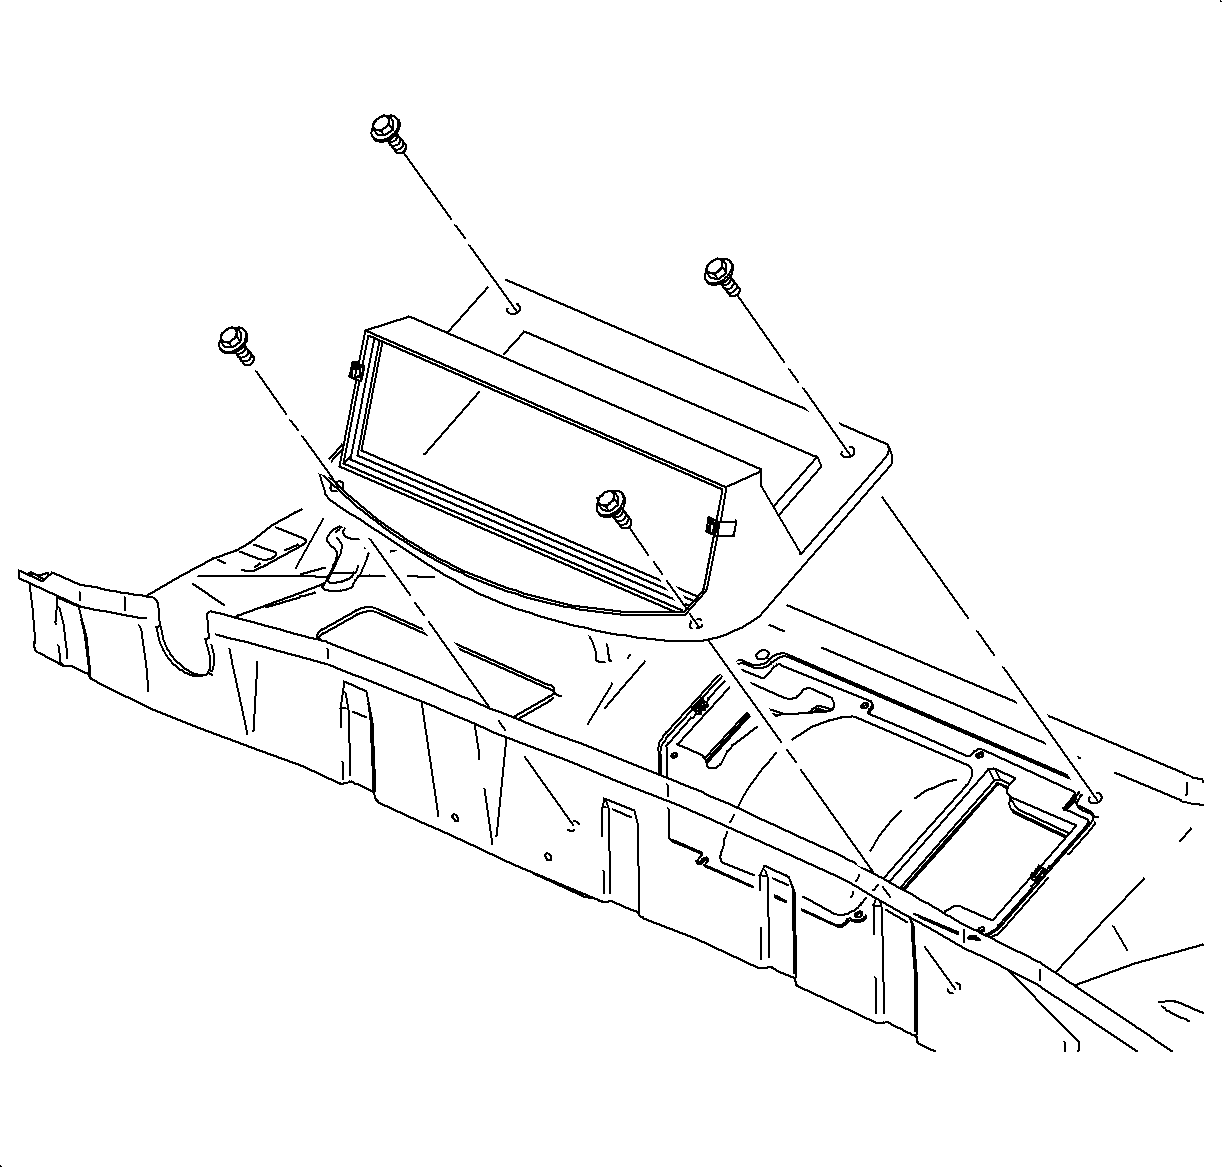
- Remove the filter housing attachment bolts.
- Remove the filter housing.
- Remove the blower motor housing:
- Disconnect the blower motor electrical connector.
- Squeeze the bottom of the connector and pull downward.
- Remove the blower motor assembly by lifting straight out.
| 1.1. | Turn the ignition ON |
| 1.2. | Select Recirc in the OFF setting |
| 1.3. | Turn the ignition OFF |
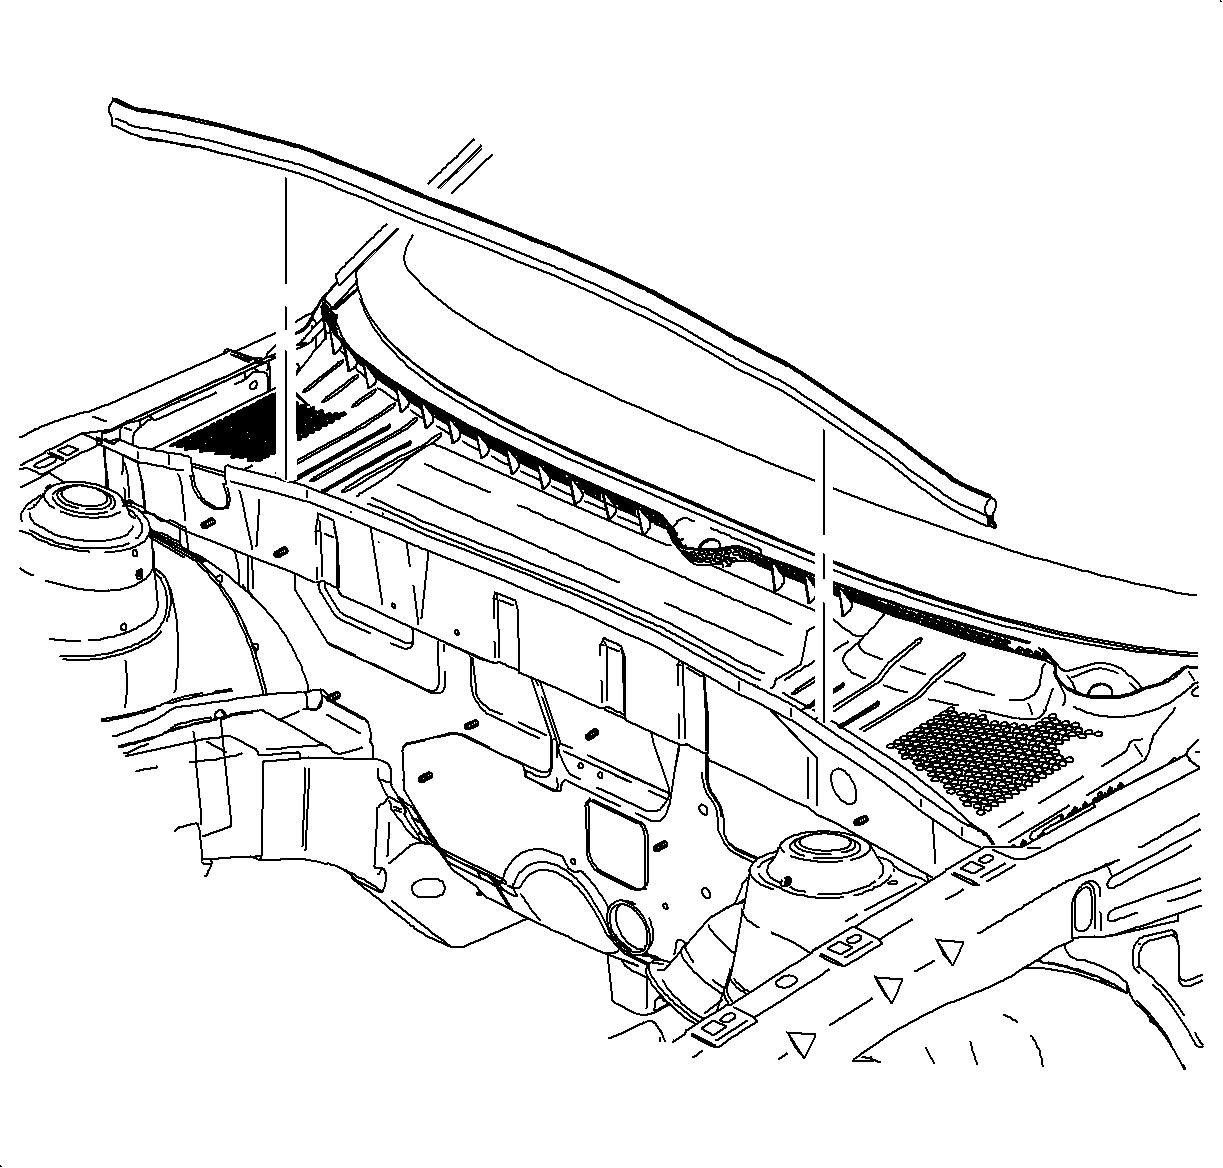
Caution: A sharp edge is revealed once the weatherstrip is removed.
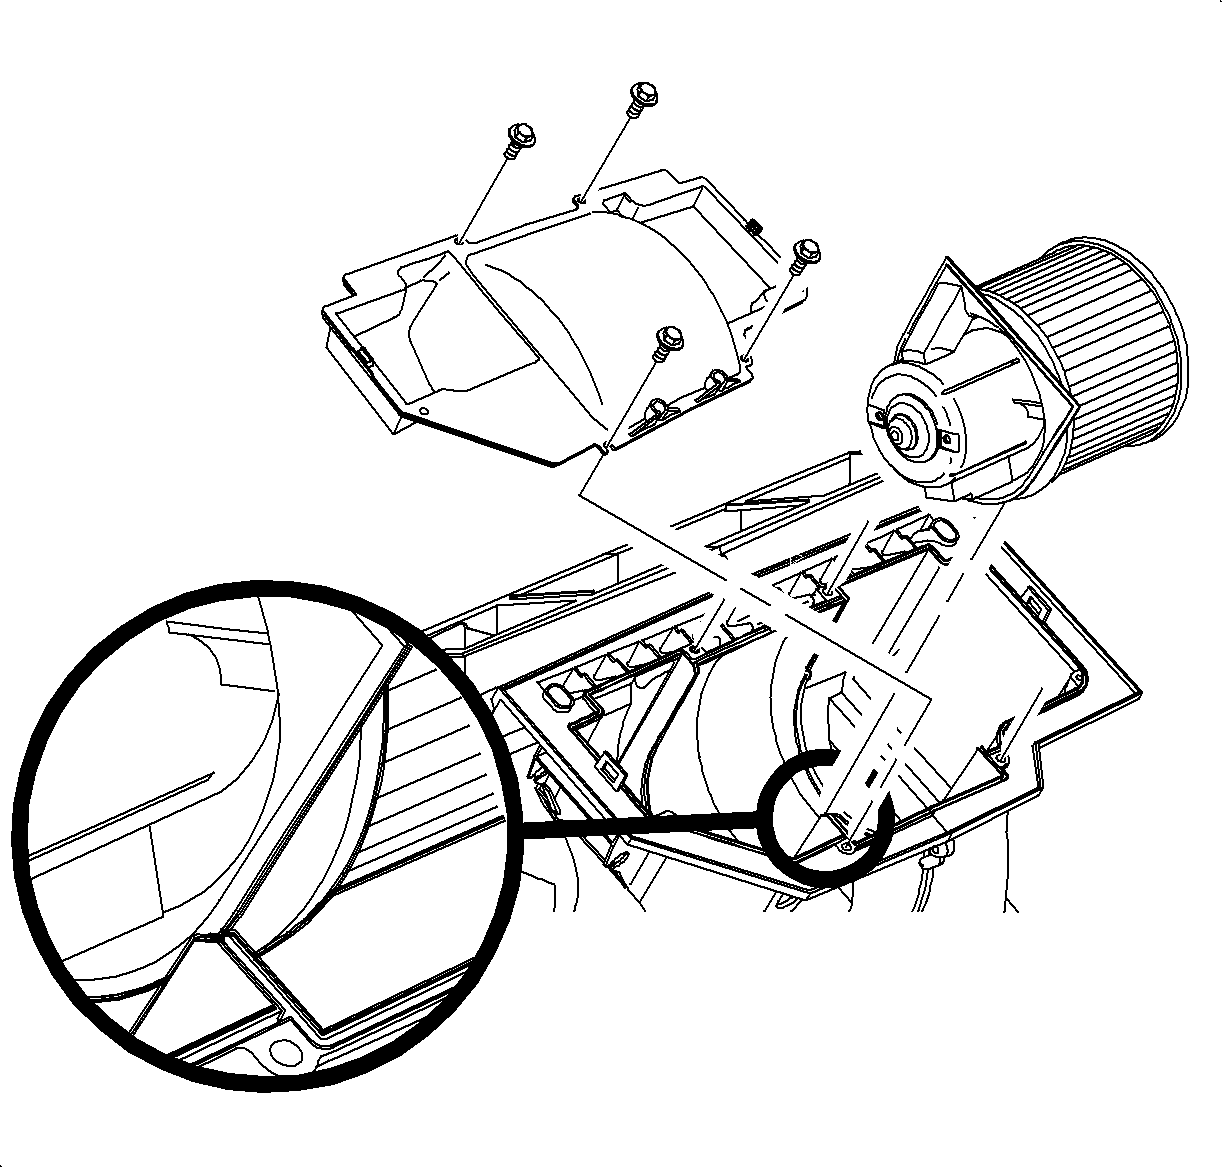
| 13.1. | Remove the blower motor housing screws |
| 13.2. | Release the locking tabs and remove the fan housing |
Installation Procedure
- Install the blower motor assembly into the module housing.
- Connect the blower motor electrical connector.
- Install the blower motor housing.
- Tighten the fan housing to blower motor housing screws.
- Remove the filter housing seal using a small flat-blade screwdriver.
- Install a new filter housing seal.
- Install the filter housing.
- Install the filter housing screws.
- Position the wiper module.
- Install the wiper module bolts.
- Install the passenger compartment air filter.
- Rotate the locking tabs on the filter housing inward to secure the air filter in place.
- Install the cowl screen.
- Install the cowl screen nuts.
- Close filter access door.
- Install the weatherstrip at rear of the engine compartment.
- Install the wiper arm assemblies. Refer to Windshield Wiper Arm Replacement in Wipers/Washer Systems.
- Connect the negative battery cable. Refer to Battery Negative Cable Disconnection and Connection in Engine Electrical.
Important: The fan motor assembly rib must be located into the channel in the module housing.

Important: The housing rib must fit into the slot in the HVAC module case.
Snap the left and right clip into place
Notice: Refer to Fastener Notice in the Preface section.
Tighten
Tighten the screws to 1 N·m (9 lb in).
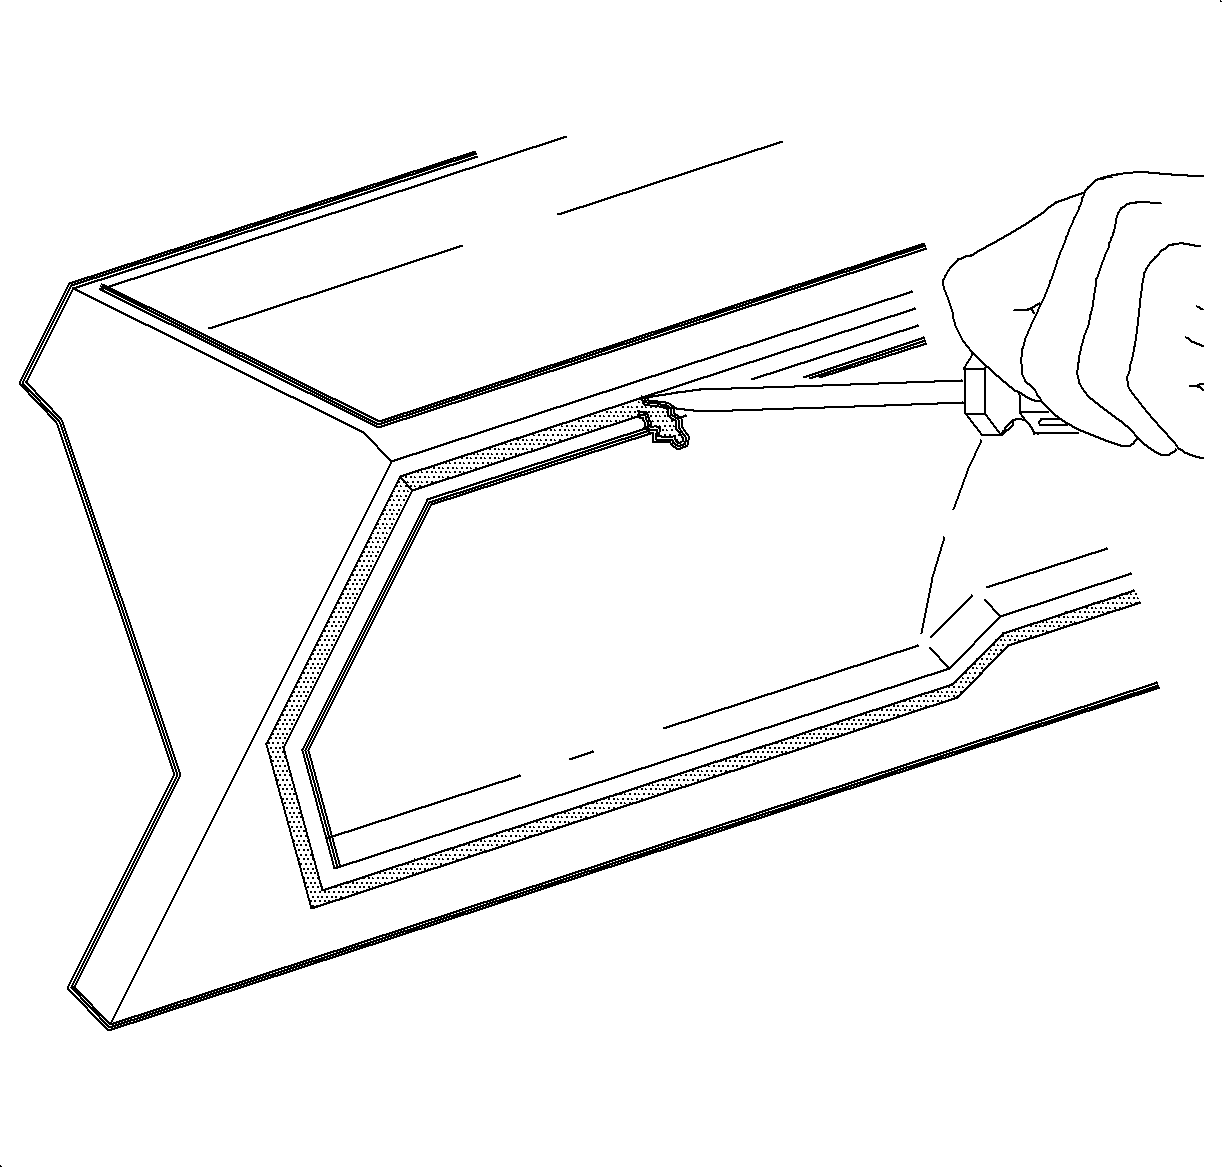
Notice: A new filter housing seal must be used whenever the filter housing is removed to prevent water from leaking into module.

Tighten
Tighten the screws to 3.5 N·m (31 lb in).

Tighten
Tighten the bolts to 5 N·m (44 lb in).

Notice the air flow direction indicator printed on side of the filter.

Tighten
Tighten the nuts to 1 N·m (9 lb in).

