For 1990-2009 cars only
Removal Procedure
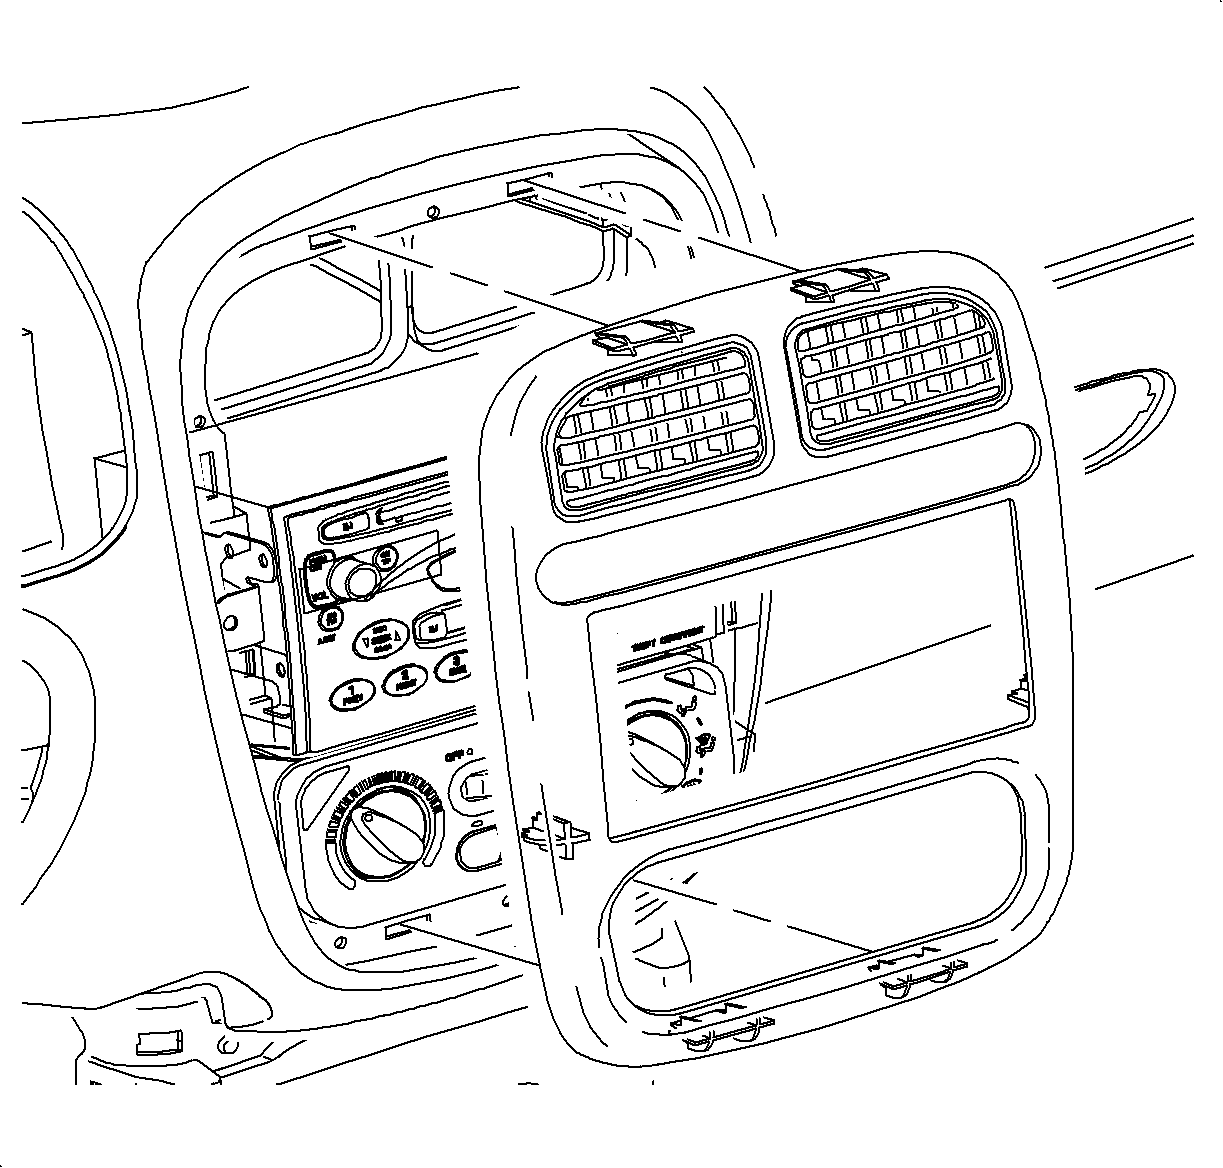
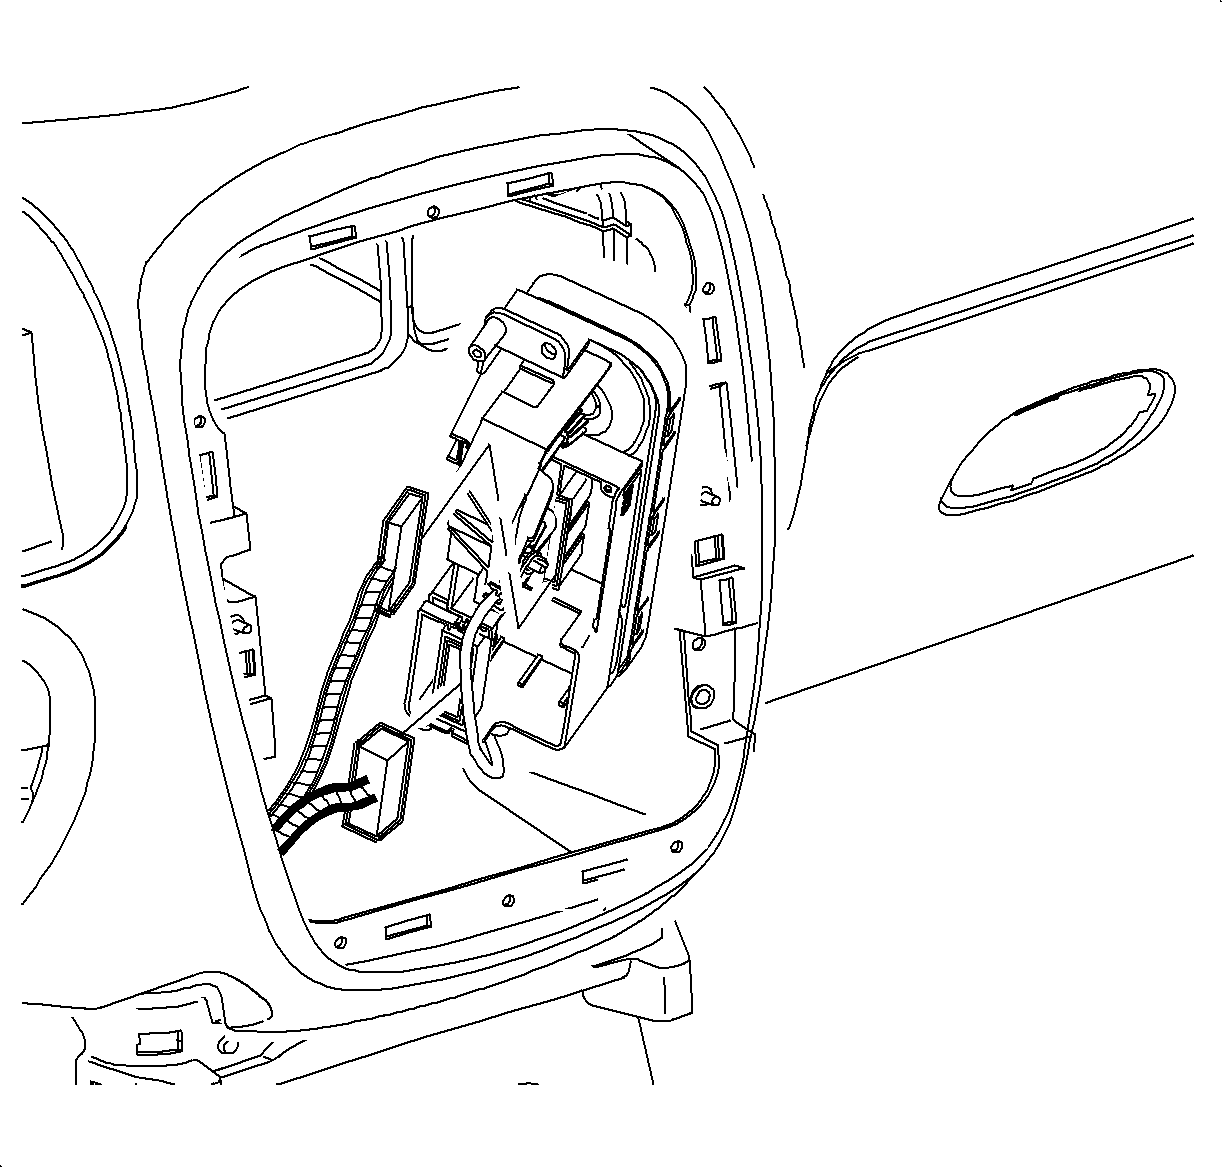
- Remove the radio bezel trim plate.
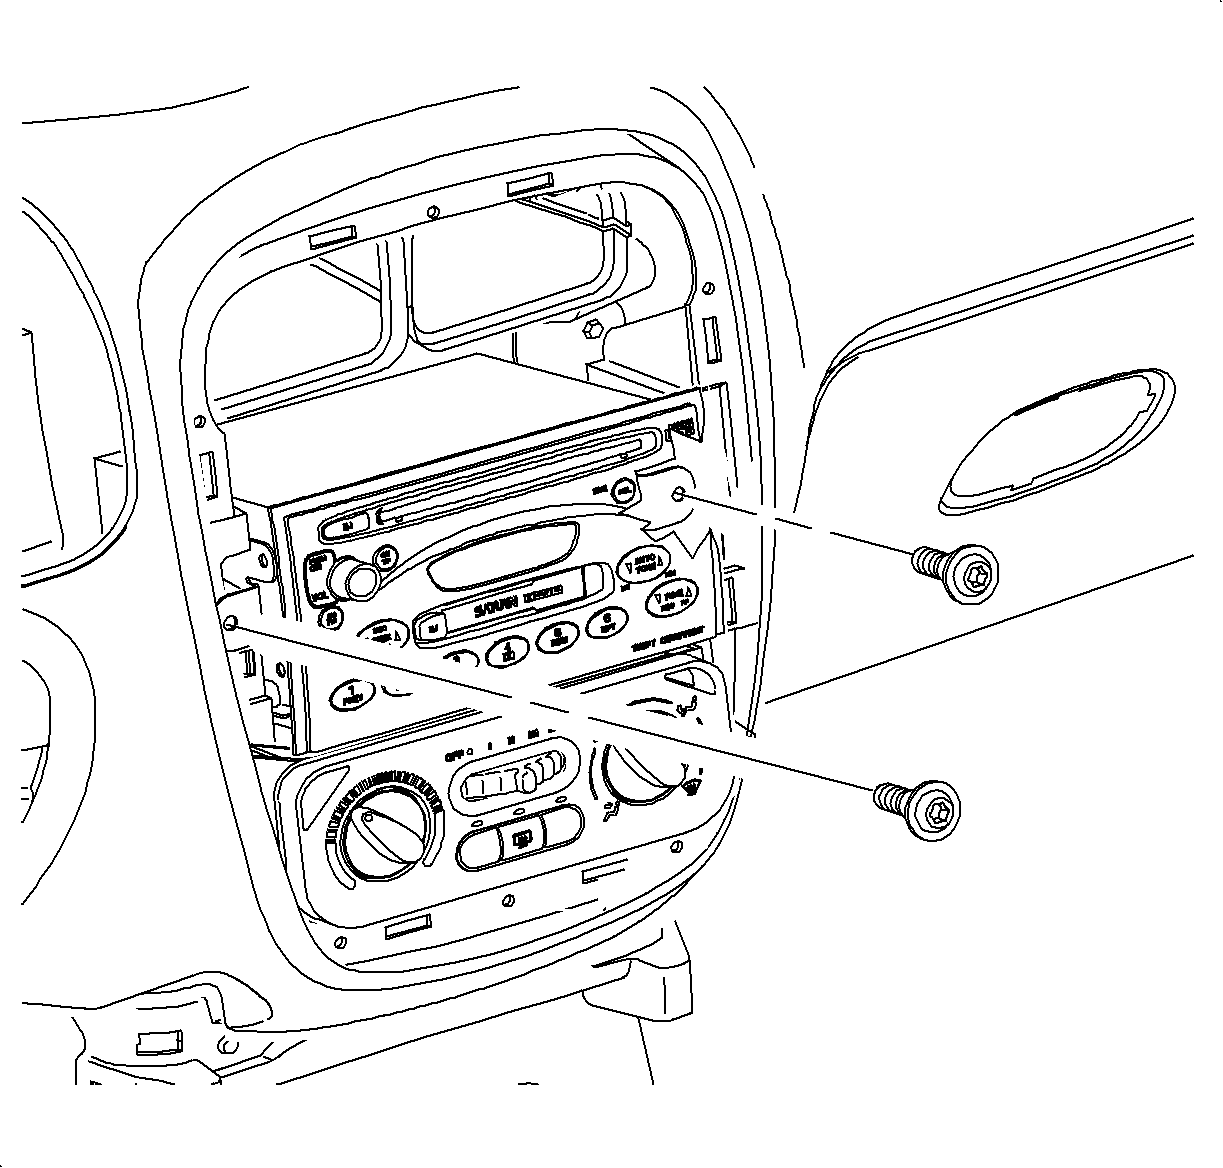
- Remove the radio mounting screws.
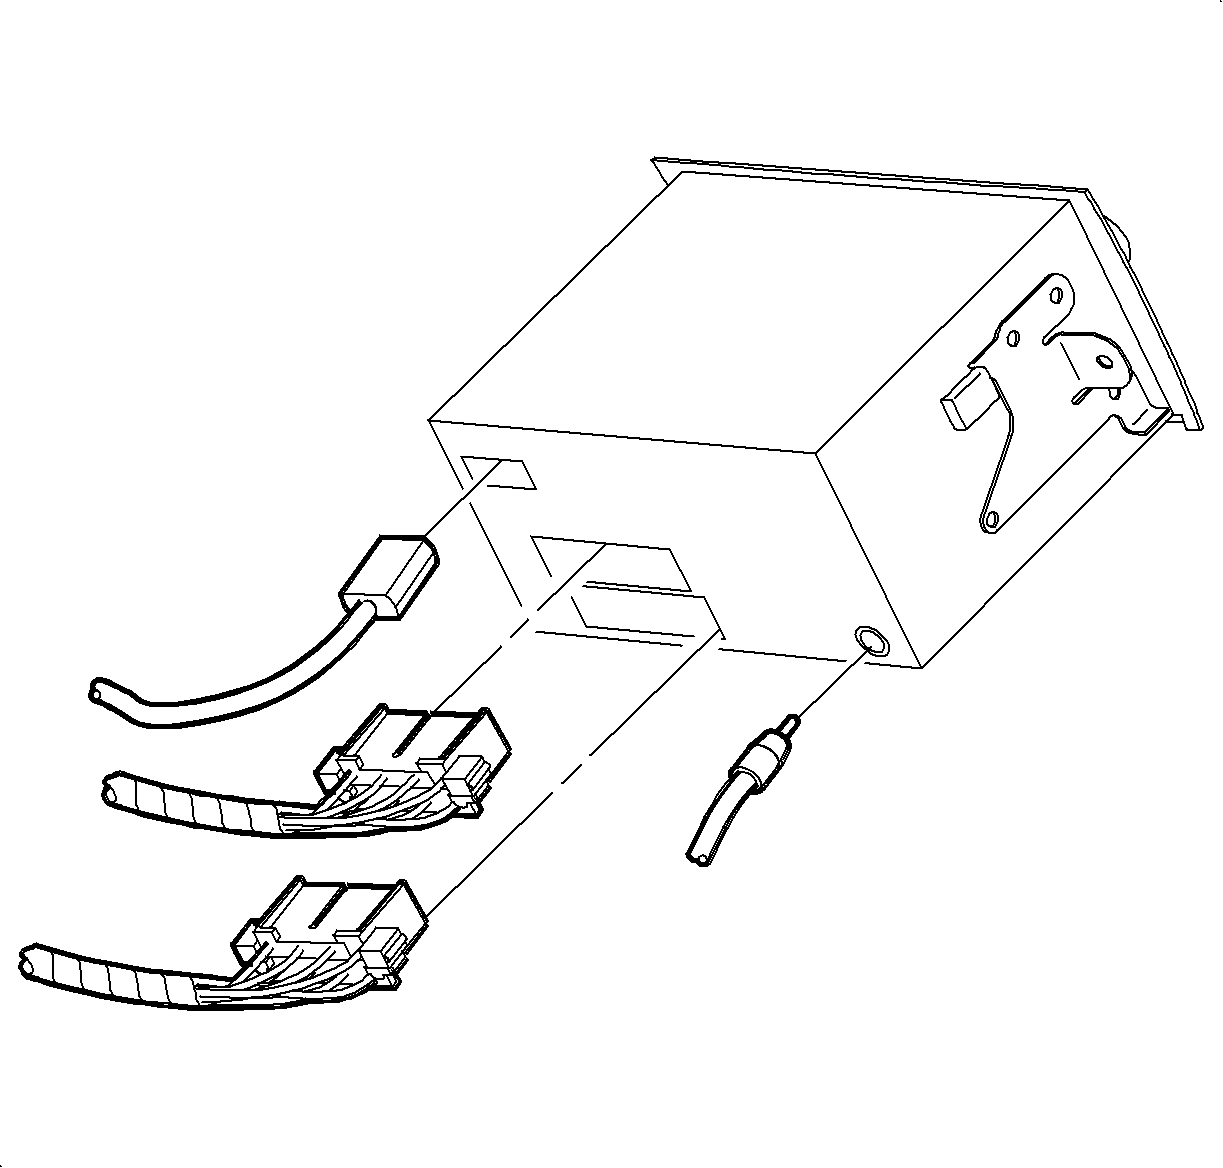
- Disconnect the radio electrical and antenna connectors.
- Remove the radio.
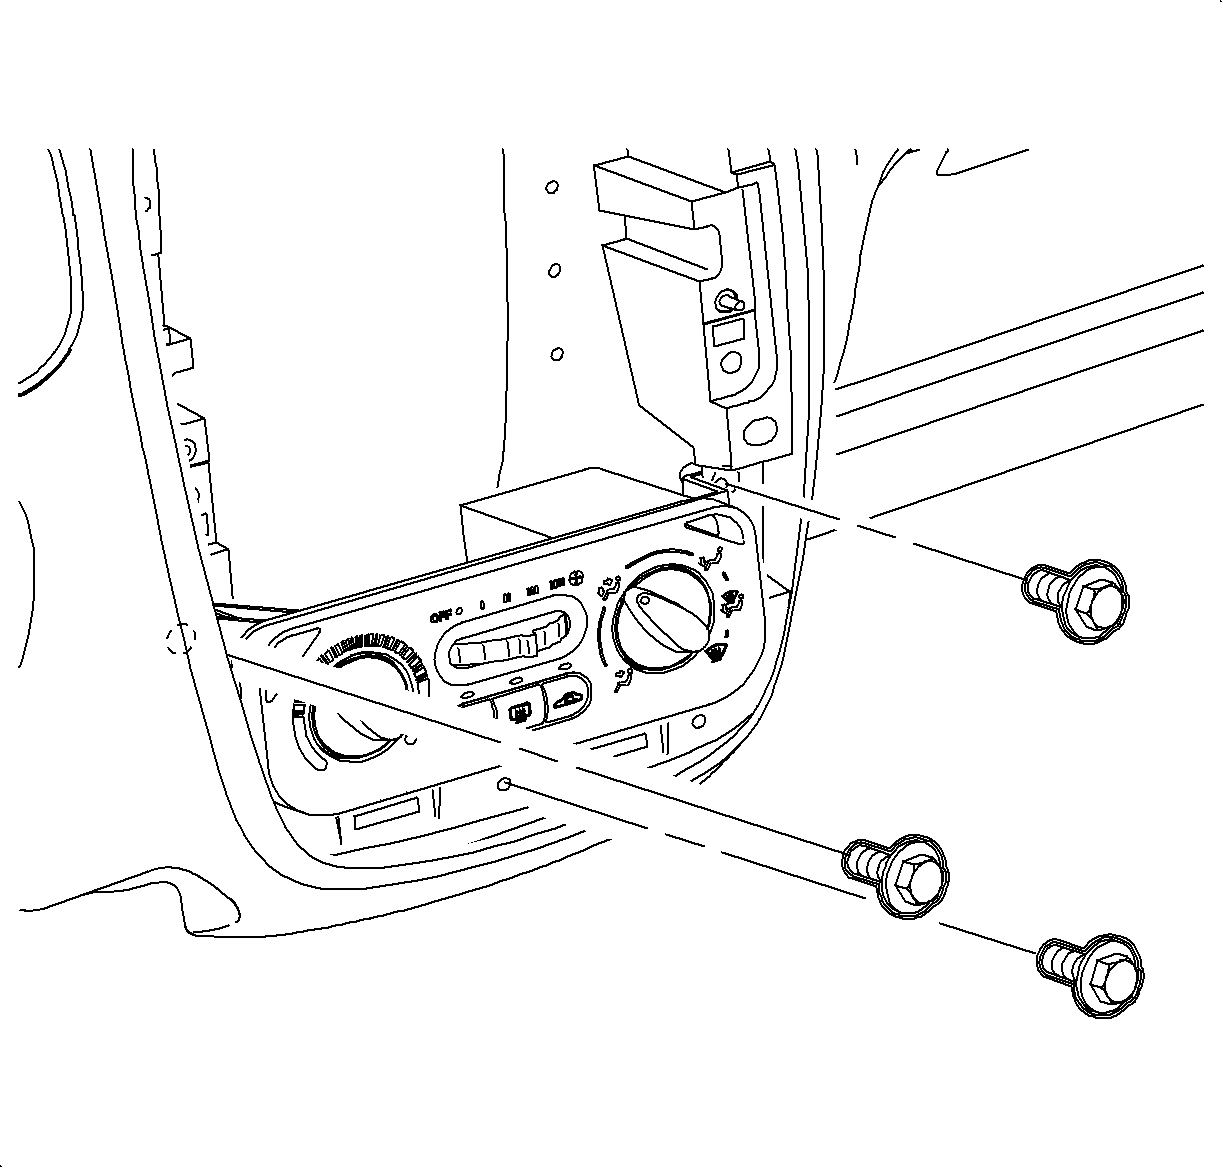
- Remove the HVAC control assembly to I/P screws.
- Rotate the front of the HVAC control assembly upward and toward the front of vehicle to gain access to the bottom of the HVAC control assembly.
- Disconnect the electrical connectors from the HVAC control assembly.
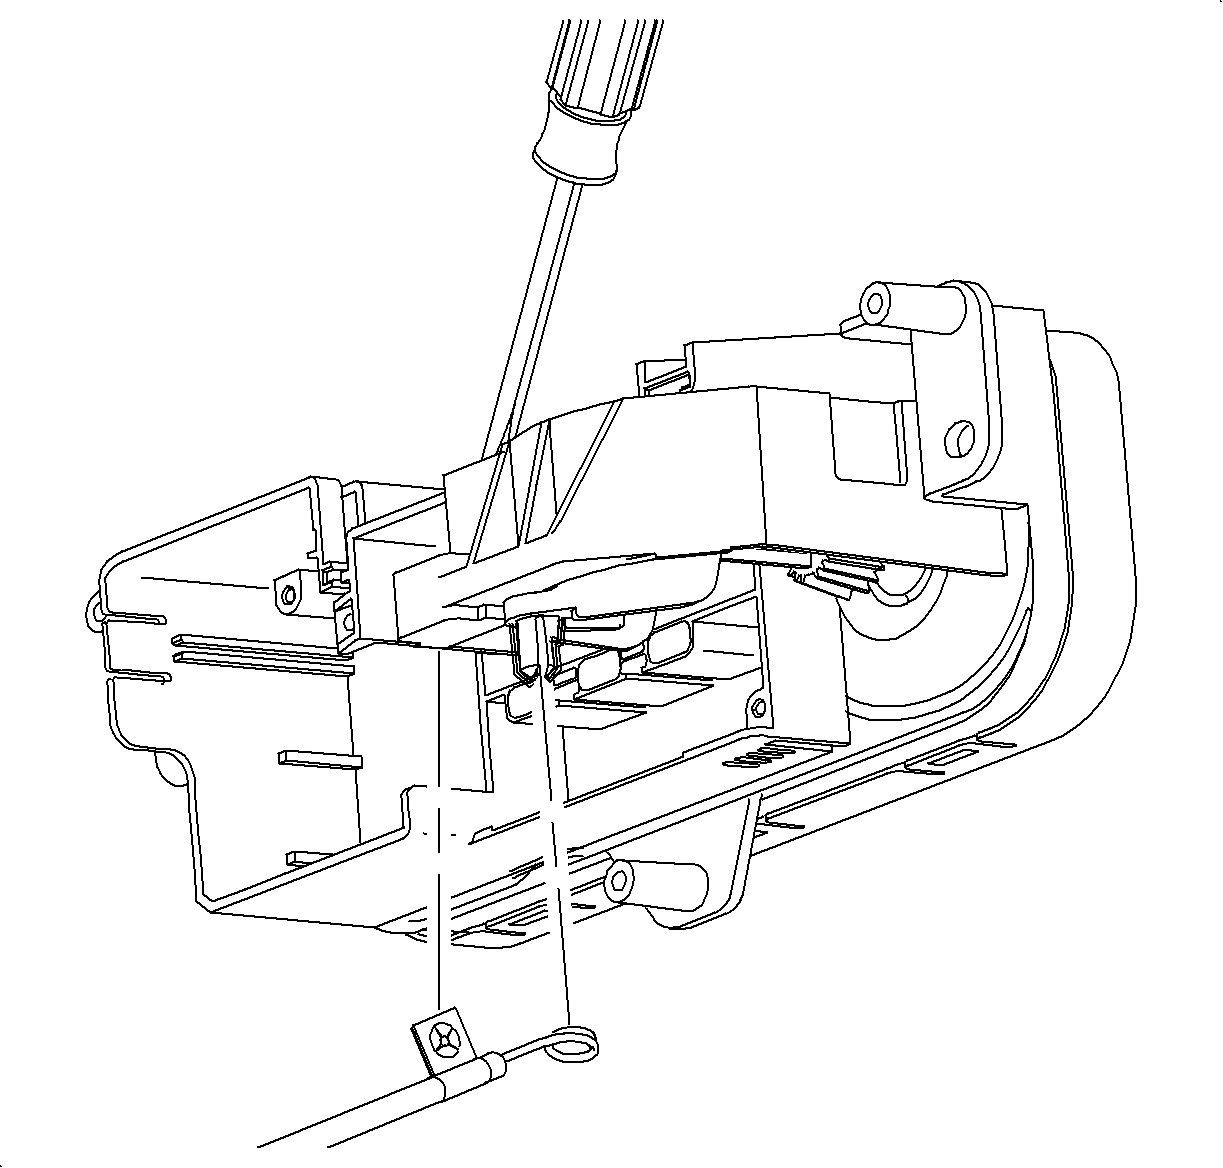
- Rotate the temperature knob to the full hot position.
- Rotate the HVAC control assembly downward and release the temperature cable flag by pushing the tab forward and pushing down on the cable at the same time.
- Remove the temperature cable eyelet from the drive pin by squeezing the drive pin together.
Installation Procedure
- Rotate the temperature knob to the full hot position.
- Install the cable eyelet onto the HVAC control assembly pin and install the cable housing flag into the slot in the HVAC control assembly until it engages the locking tab.
- Connect the electrical connectors to the HVAC control assembly.
- Install the screws that secure the HVAC control assembly to the I/P.
- Connect the radio electrical and antenna connectors.
- Install the radio mounting screws.
- Install the radio trim bezel.


Notice: Refer to Fastener Notice in the Preface section.

Tighten
Tighten the screws to 2.5 N·m (22 lb in).


Tighten
Tighten the screws to 2.5 N·m (22 lb in).

