Roof Side Rail Inflatable Restraint Module Replacement Sedan
Removal Procedure
- Disable the SIR system. Refer to SIR Disabling and Enabling or to SIR Disabling and Enabling .
- Remove the headliner from the vehicle. Refer to Headlining Trim Panel Replacement in Interior Trim.
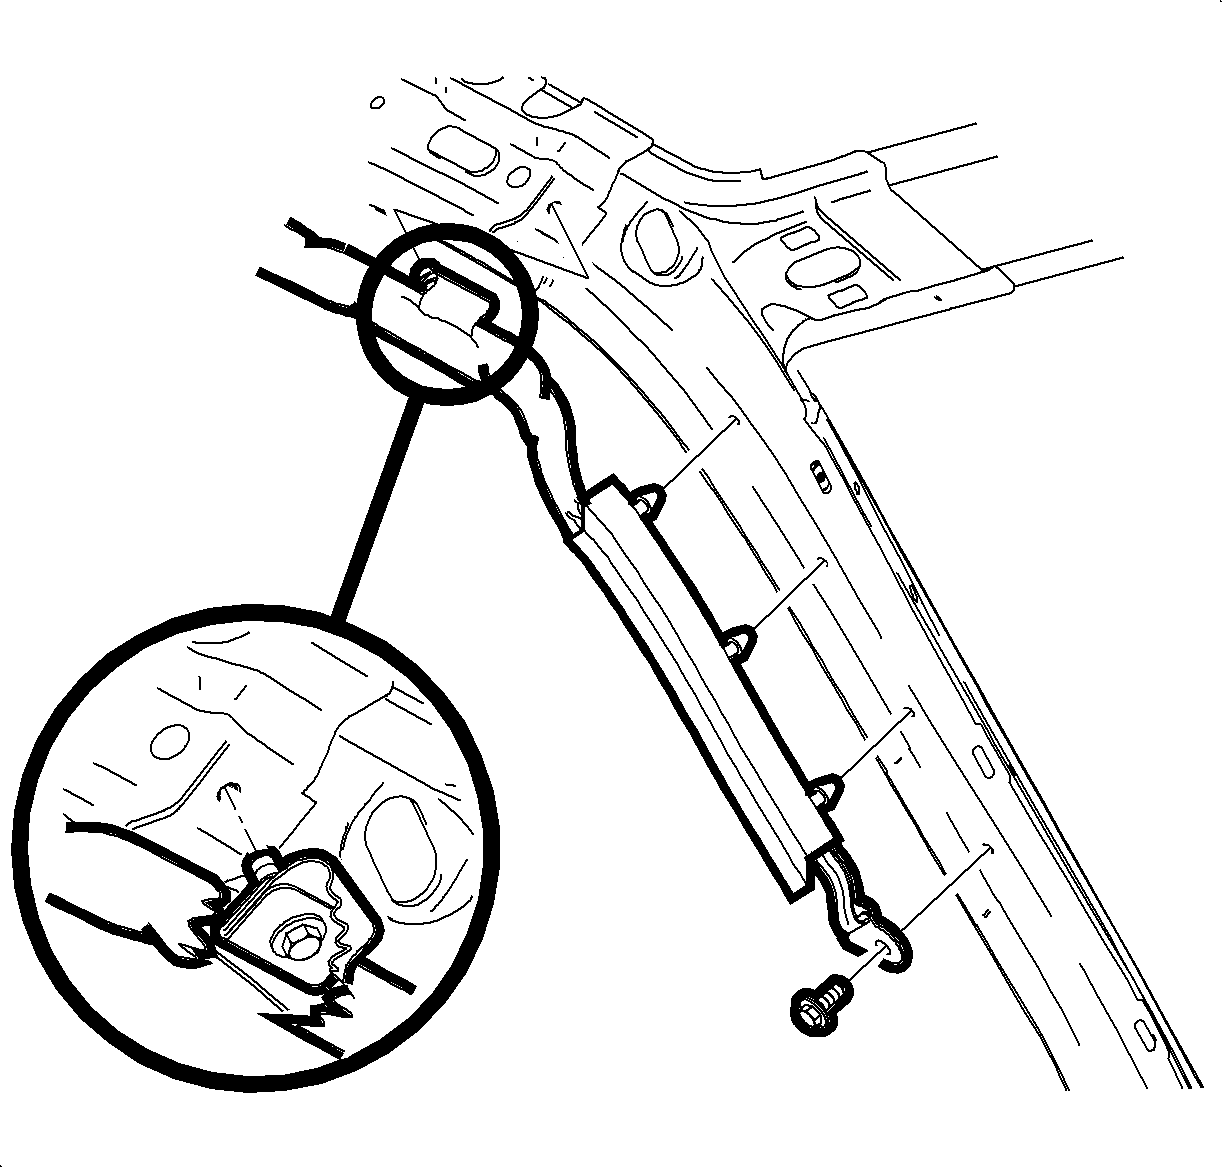
- Remove the fasteners from the inflator retention tabs and the spaceframe clips.
Caution: The SIR system should be disabled before removal of the inflator. The inflator must be disposed of properly. All interior garnish molding snap-in clips must be replaced when the trim is removed from the vehicle. Twisting of the inflator must not be allowed.

Notice: Care must be taken when removing the spaceframe clips as not to damage the roof rail sheet metal.
Important: Spaceframe clips and plastic guides must be removed from the structure. Spaceframe clips are designed for one use only. The new inflator assembly will contain the new spaceframe clips and plastic guides attached to the assembly.
Use the following procedure to remove the spaceframe clips:
| 3.1. | Bend and break off one side of the clip as shown in the illustration. |
| 3.2. | Push the clip into the body mounting hole. |
| 3.3. | To aid in removal of broken spaceframe clips, remove the assist handle bracket bolts and the bracket from the roof rail. |
| 3.4. | Slide a magnetic tool through the inside of the roof rail and pull out the broken clip. |
Installation Procedure
- Install the assist handle bracket and the retaining bolts to the roof rail.
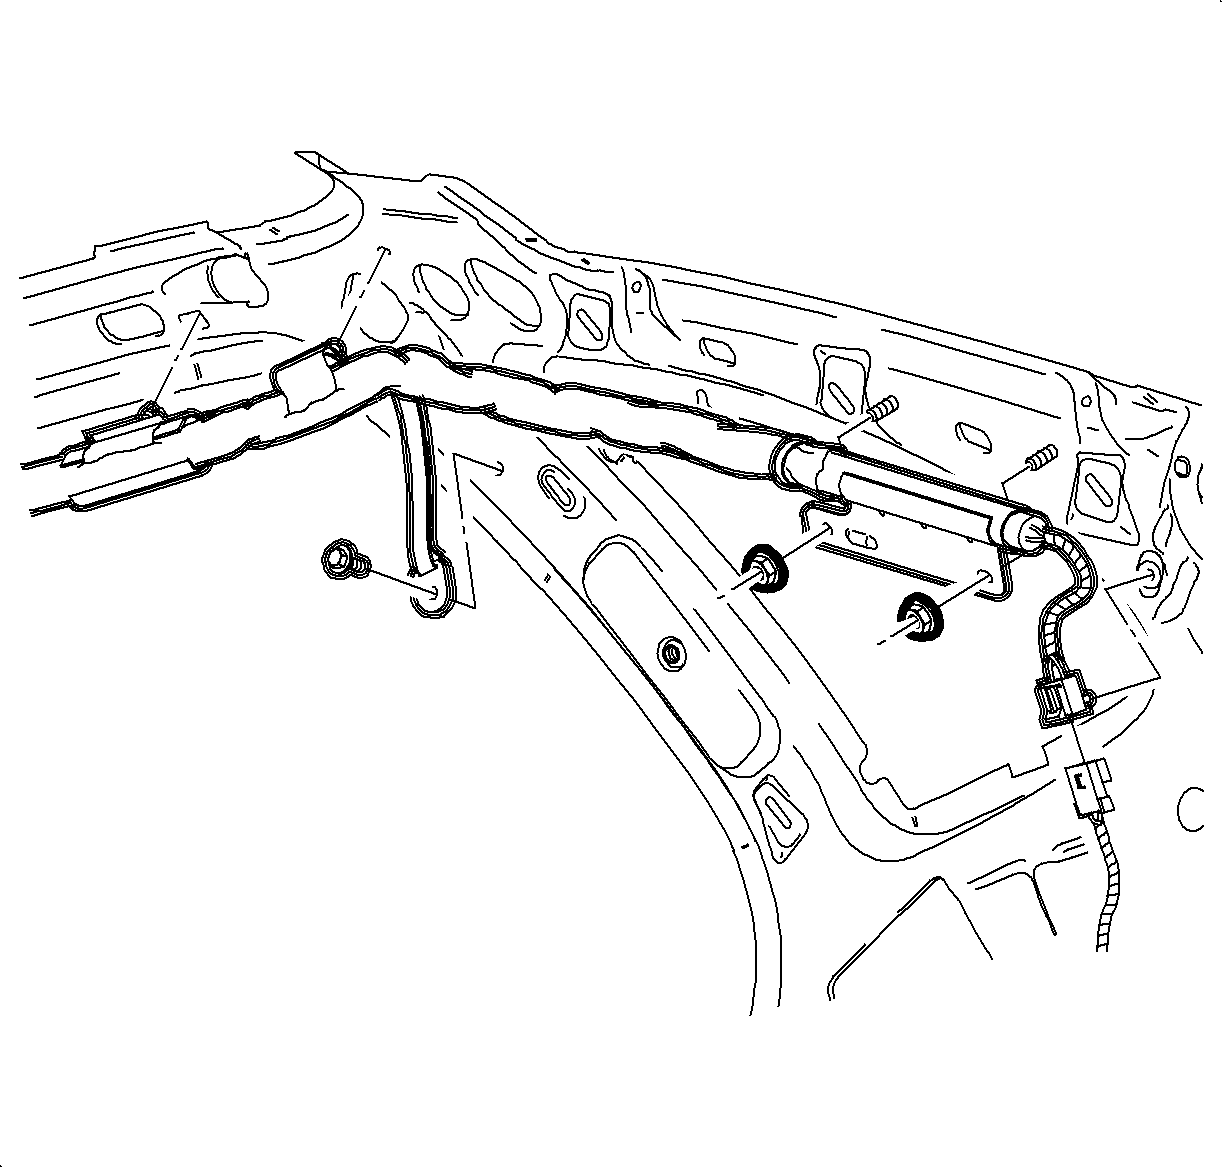
- Start at rear of the vehicle and install the mounting studs that secure the inflator head to the structure.
- Hand start the nuts onto the studs.
- Working from the rear of the vehicle forward, install the retaining tabs to the structure to hold the inflator assembly to the vehicle. The stripe on the inflator module should be used as a guide to ensure that the inflator is not twisted.
- Install the inflator fasteners
- Install the headliner assembly. Refer to Headlining Trim Panel Replacement in Interior Trim.
- Enable the SIR system. Refer to SIR Disabling and Enabling or to SIR Disabling and Enabling .
Notice: Refer to Fastener Notice in the Preface section.

Caution: If the original bag is being installed, care must be taken to observe the following
points:
• Roof rail must be undamaged and straight. • Screw hole in curtain inflator fabric must not be frayed. • Washer on the retaining screws must firmly clamp the bag flat when torqued.
Notice: If the curtain inflator is being replaced due to deployment, the spaceframe snap clips must be replaced. The new curtain inflator assembly is shipped with plastic guides and new spaceframe clips that are pre-torqued.
Tighten
Tighten the bolts to 16 N·m (12 lb ft).


Tighten
| • | Tighten the retaining bolt (10 mm hex head) to 10 N·m (89 lb in). |
| • | Tighten the retaining nut (10 mm hex head) to 10 N·m (89 lb in). |
| • | Tighten the retaining screw (7 mm hex head) to 2.5 N·m (22 lb in). |
Roof Side Rail Inflatable Restraint Module Replacement Wagon
Removal Procedure
- Disable the SIR system. Refer to SIR Disabling and Enabling or to SIR Disabling and Enabling .
- Remove the headliner from the vehicle. Refer to Headlining Trim Panel Replacement in Interior Trim.
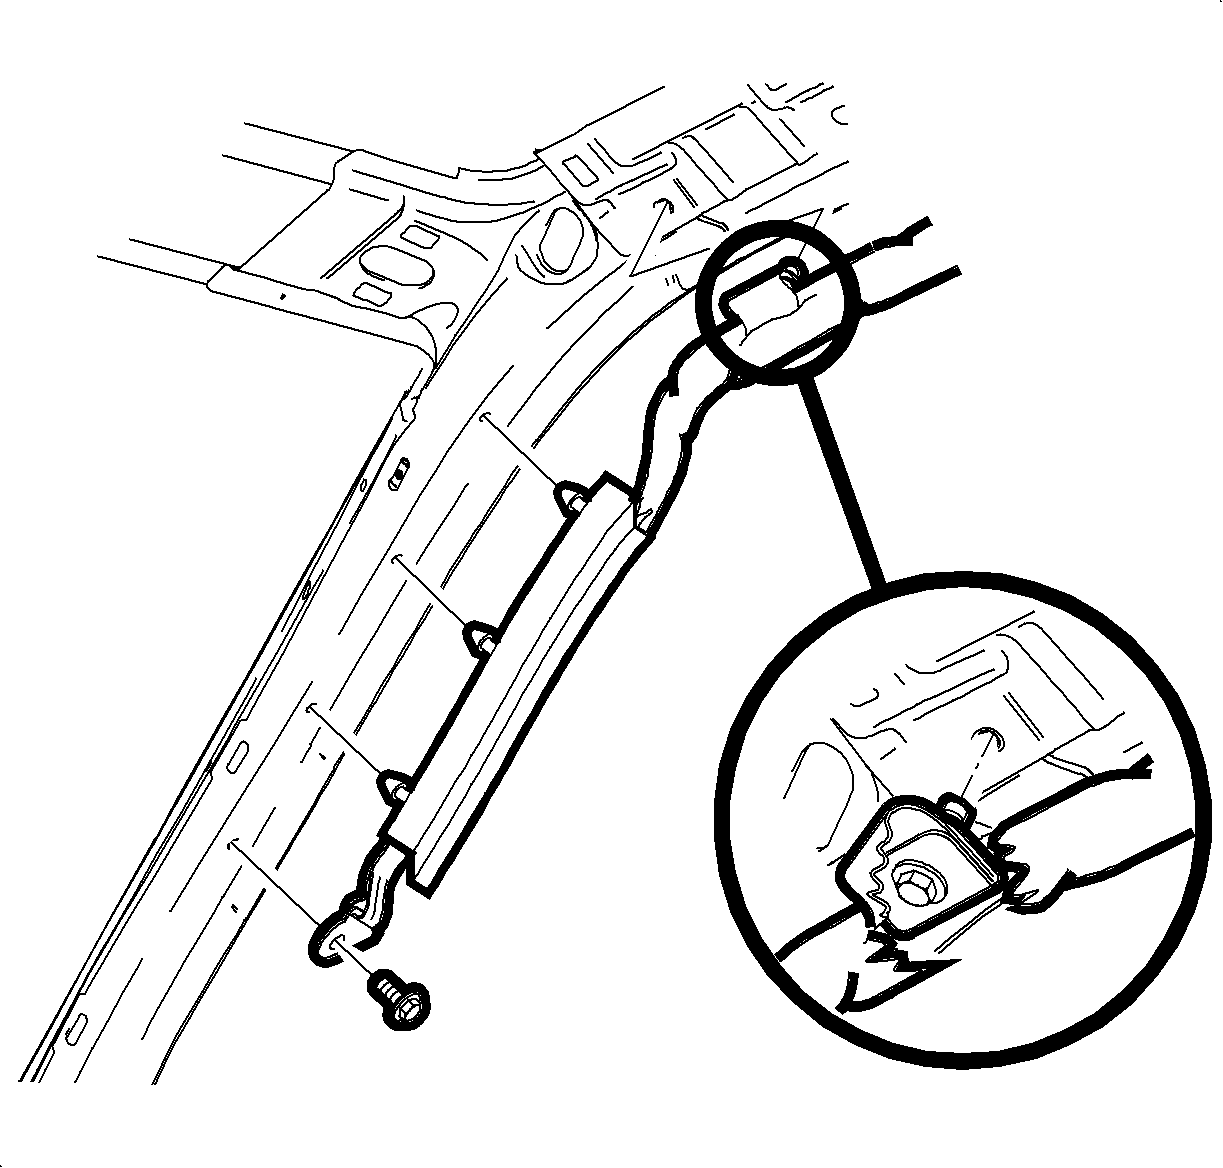
- Remove the fasteners from the inflator retention tabs and the spaceframe clips.
Caution: The SIR system should be disabled before removal of the inflator. The inflator must be disposed of properly. All interior garnish molding snap-in clips must be replaced when the trim is removed from the vehicle. Twisting of the inflator must not be allowed.

Notice: Care must be taken when removing the spaceframe clips as not to damage the roof rail sheet metal.
Important: Spaceframe clips and plastic guides must be removed from the structure. Spaceframe clips are designed for one use only. The new inflator assembly will contain new spaceframe clips and plastic guides attached to the assembly.
Use the following procedure to remove the spaceframe clips:
| 3.1. | Bend and break off one side of clip as shown in the illustration. |
| 3.2. | Push the clip into the body mounting hole. |
| 3.3. | To aid in removal of broken spaceframe clips, remove the assist handle bracket bolts and the bracket from the roof rail. |
| 3.4. | Slide a magnetic tool through the inside of the roof rail and pull out the broken clip. |
Installation Procedure
- Install the assist handle bracket and the retaining bolts to the roof rail.
- Start at the rear of the vehicle and install the mounting studs that secure the inflator head to the structure.
- Hand start the nuts onto the studs.
- Working from the rear of the vehicle forward, install the retaining tabs to the structure to hold the inflator assembly to the vehicle. The stripe on the inflator module should be used as a guide to insure the inflator is not twisted.
- Install the inflator fasteners.
- Install the headliner. Refer to Headlining Trim Panel Replacement .
- Enable the SIR system. Refer to SIR Disabling and Enabling or to SIR Disabling and Enabling .
Notice: Refer to Fastener Notice in the Preface section.

Caution: If the original bag is being installed, care must be taken to observe the following
points:
• Roof rail must be undamaged and straight. • Screw hole in curtain inflator fabric must not be frayed. • Washer on the retaining screws must firmly clamp the bag flat when torqued.
Notice: If the curtain inflator is being replaced due to deployment, the spaceframe snap clips must be replaced. The new curtain inflator assembly is shipped with plastic guides and new spaceframe clips that are pre-torqued.
Tighten
Tighten the bolts to 16 N·m (12 lb ft).


Tighten
| • | Tighten the retaining bolt (10 mm hex head) to 10 N·m (89 lb in). |
| • | Tighten the retaining nut (10 mm hex head) to 10 N·m (89 lb in). |
| • | Tighten the retaining screw (7 mm hex head) to 2.5 N·m (22 lb in). |
