Circuit Description
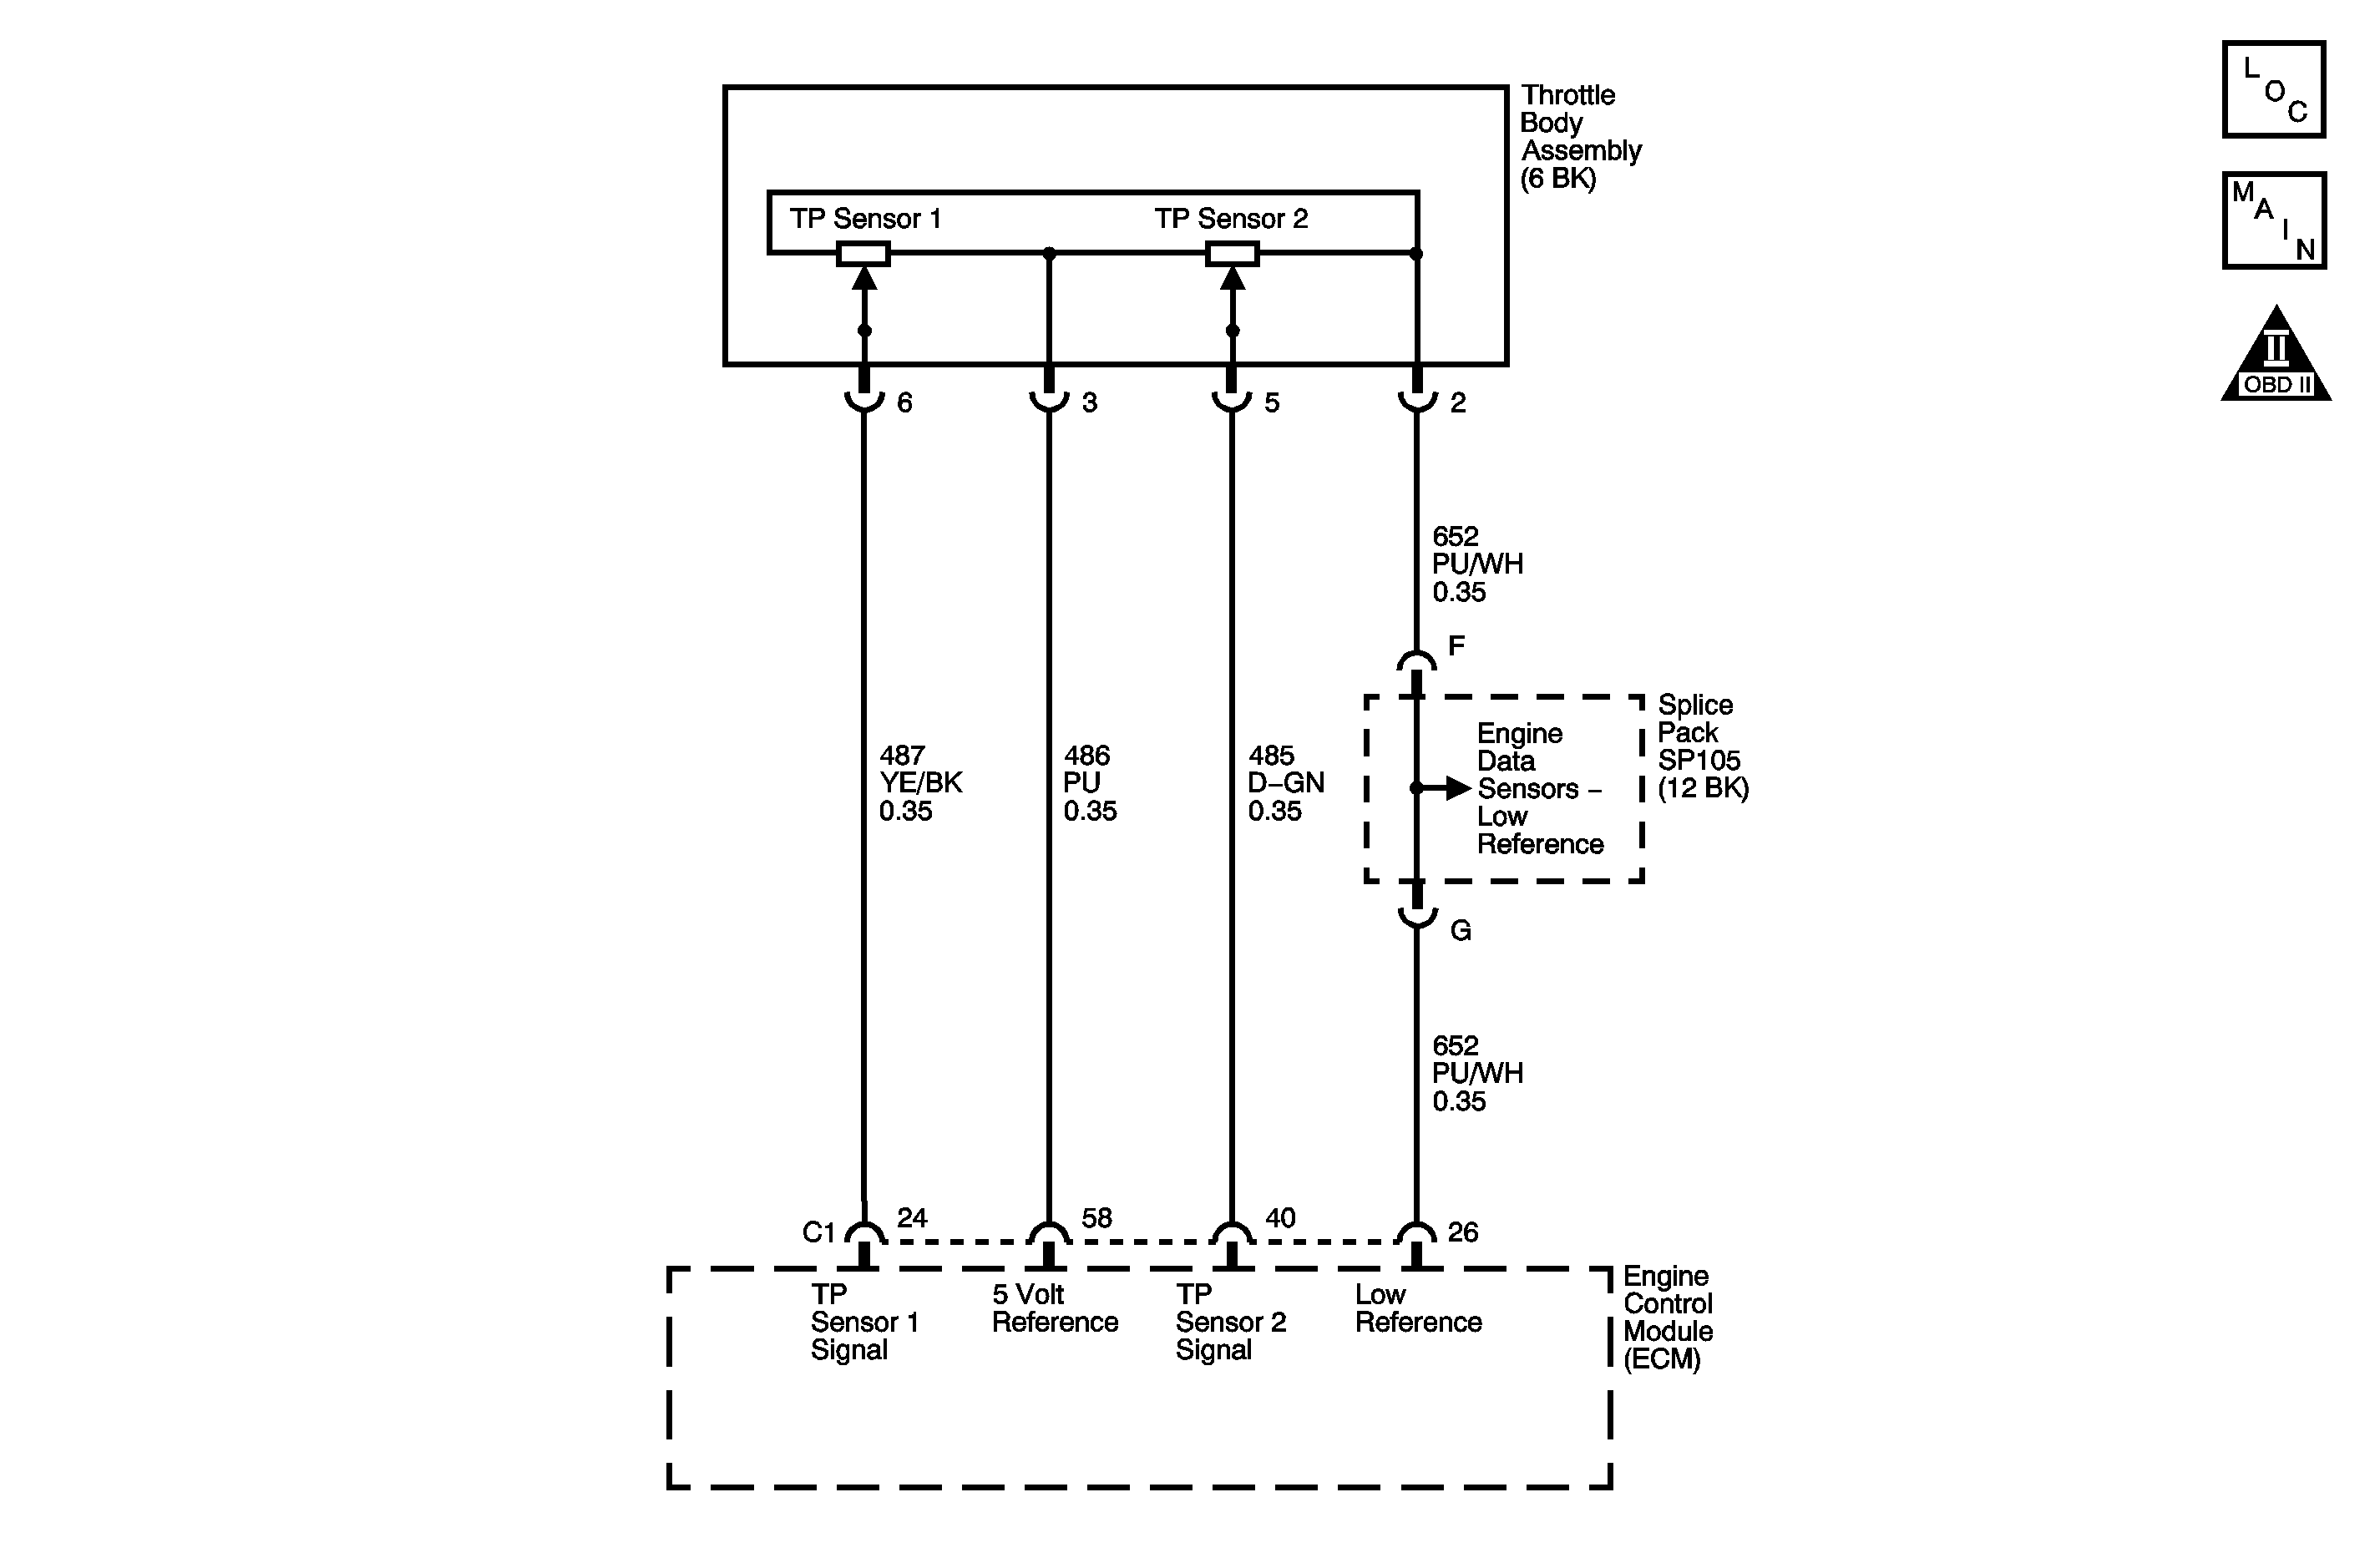
The throttle position (TP) sensors 1 and 2 are located within the throttle body assembly. The TP sensors share a common 5-volt reference circuit and a common low reference circuit. The 5-volt reference circuit is also shared with accelerator pedal position (APP) sensor 2. The 5-volt reference voltage is supplied on two separate engine control module (ECM) terminals, but the terminals are connected internally to the same voltage supply. Each TP sensor has an individual signal circuit, which provides the ECM with a signal voltage proportional to throttle the plate movement. When the throttle plate is in the closed position, the TP sensor 1 signal voltage is near the low reference and increases as the throttle plate is opened. The TP sensor 2 signal voltage at closed throttle is near the 5-volt reference and decreases as the throttle plate is opened. If the ECM detects the TP sensor 2 signal voltage is more than 4.88 volts, DTC P0223 sets.
Conditions for Running the DTC
| • | The battery voltage is more than 8 volts. |
| • | The engine speed is more than 1,320 RPM. |
Conditions for Setting the DTC
The TP sensor 2 voltage is more than 4.88 volts for more than 140 milliseconds.
Action Taken When the DTC Sets
| • | The control module illuminates the malfunction indicator lamp (MIL) on the second consecutive ignition cycle that the diagnostic runs and fails. |
| • | The control module records the operating conditions at the time the diagnostic fails. The first time the diagnostic fails, the control module stores this information in the Failure Records. If the diagnostic reports a failure on the second consecutive ignition cycle, the control module records the operating conditions at the time of the failure. The control module writes the operating conditions to the Freeze Frame and updates the Failure Records. |
Conditions for Clearing the MIL/DTC
| • | The control module turns OFF the malfunction indicator lamp (MIL) after 3 consecutive ignition cycles that the diagnostic runs and does not fail. |
| • | A current DTC, Last Test Failed, clears when the diagnostic runs and passes. |
| • | A history DTC clears after 40 consecutive warm-up cycles, if no failures are reported by this or any other emission related diagnostic. |
| • | Clear the MIL and the DTC with a scan tool. |
Step | Action | Values | Yes | No |
|---|---|---|---|---|
Schematic Reference: Engine Controls Schematics Connector End View Reference: Engine Control Module Connector End Views or Engine Controls Connector End Views | ||||
1 | Did you perform the Diagnostic System Check-Engine Controls? | -- | Go to Step 2 | |
2 |
Is the TP sensor 2 voltage more than the specified value? | 4.8 V | Go to Step 3 | Go to Step 4 |
3 |
Is the TP sensor 2 voltage less than the specified value? | 0.02 V | Go to Step 6 | Go to Step 13 |
4 |
Does the DTC fail this ignition? | -- | Go to Step 6 | Go to Step 5 |
5 |
Does the DTC fail this ignition? | -- | Go to Step 19 | Go to Intermittent Conditions |
6 |
Is the voltage within the specified range? | 4.8-5.2 V | Go to Step 7 | Go to Step 11 |
7 |
Is the voltage within the specified range? | 4.8-5.2 V | Go to Step 8 | Go to Step 13 |
8 |
Is the resistance less than the specified value? | 5ohms | Go to Step 15 | Go to Step 9 |
9 |
Did you find and correct the condition? | -- | Go to Step 21 | Go to Step 10 |
10 | Measure the resistance from the case of the ECM to battery ground. Is the resistance less than the specified value? | 5ohms | Go to Step 17 | Go to Step 15 |
11 |
Is the voltage within the specified range? | 4.8-5.2 V | Go to Step 18 | Go to Step 12 |
12 | Test the 5-volt reference circuit of the TP sensor for a short to voltage. Refer to Circuit Testing and Wiring Repairs in Wiring Systems. Did you find and correct the condition? | -- | Go to Step 21 | Go to Step 14 |
13 | Test the signal circuit of the TP sensor for a short to voltage. Refer to Circuit Testing and Wiring Repairs in Wiring Systems. Did you find and correct the condition? | -- | Go to Step 21 | Go to Step 17 |
14 | Test the 5-volt reference circuit of the APP sensor for a short to voltage. Refer to Circuit Testing and Wiring Repairs in Wiring Systems. Did you find and correct the condition? | -- | Go to Step 21 | Go to Step 17 |
15 | Repair the open or high resistance in the ECM ground circuit. Refer to Wiring Repairs in Wiring Systems. Did you complete the repair? | -- | Go to Step 21 | -- |
16 | Test for an intermittent and for a poor connection at the TP sensor. Refer to Testing for Intermittent Conditions and Poor Connections and Connector Repairs in Wiring Systems. Did you find and correct the condition? | -- | Go to Step 21 | Go to Step 19 |
17 | Test for an intermittent and for a poor connection at the ECM. Refer to Testing for Intermittent Conditions and Poor Connections and Connector Repairs in Wiring Systems. Did you find and correct the condition? | -- | Go to Step 21 | Go to Step 20 |
18 | Test the signal circuit of APP sensor 2 for a short to voltage. Refer to Circuit Testing and Wiring Repairs in Wiring Systems. Did you find and correct the condition? | -- | Go to Step 21 | -- |
19 | Replace the throttle body assembly. Refer to Throttle Body Assembly Replacement . Did you complete the replacement? | -- | Go to Step 21 | -- |
20 | Replace the ECM. Refer to Engine Control Module Replacement . Did you complete the replacement? | -- | Go to Step 21 | -- |
21 |
Did the DTC fail this ignition? | -- | Go to Step 2 | Go to Step 22 |
22 | Observe the Capture Info with a scan tool. Are there any DTCs that have not been diagnosed? | -- | System OK | |
