For 1990-2009 cars only
Removal Procedure
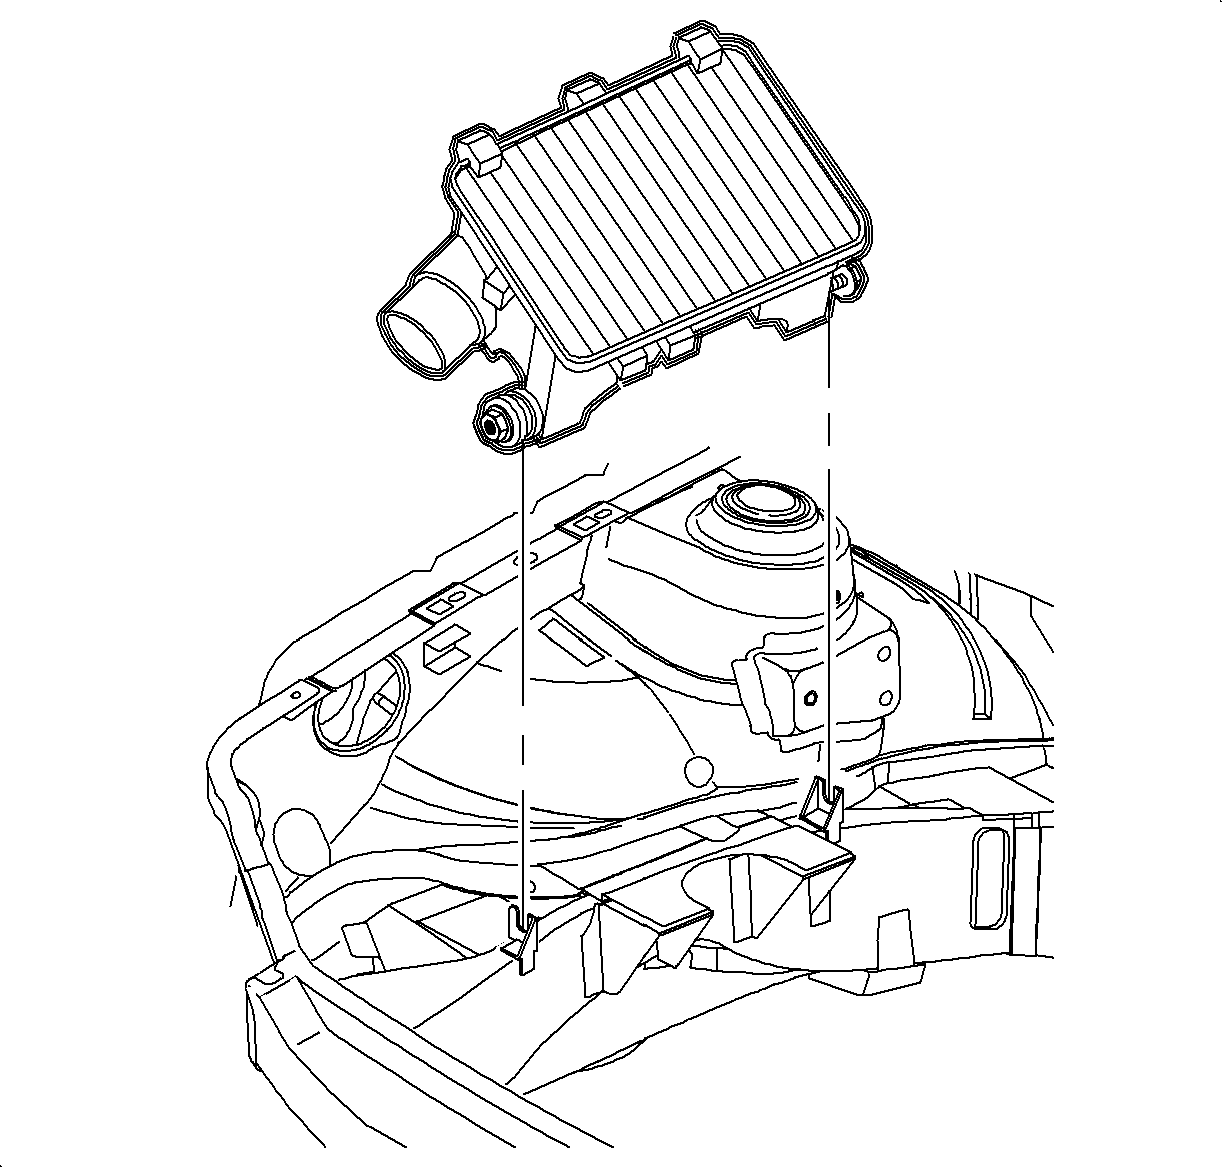
- Remove the air cleaner assembly. Refer to Air Cleaner Assembly Replacement in Engine Controls - 3.0L (L81).
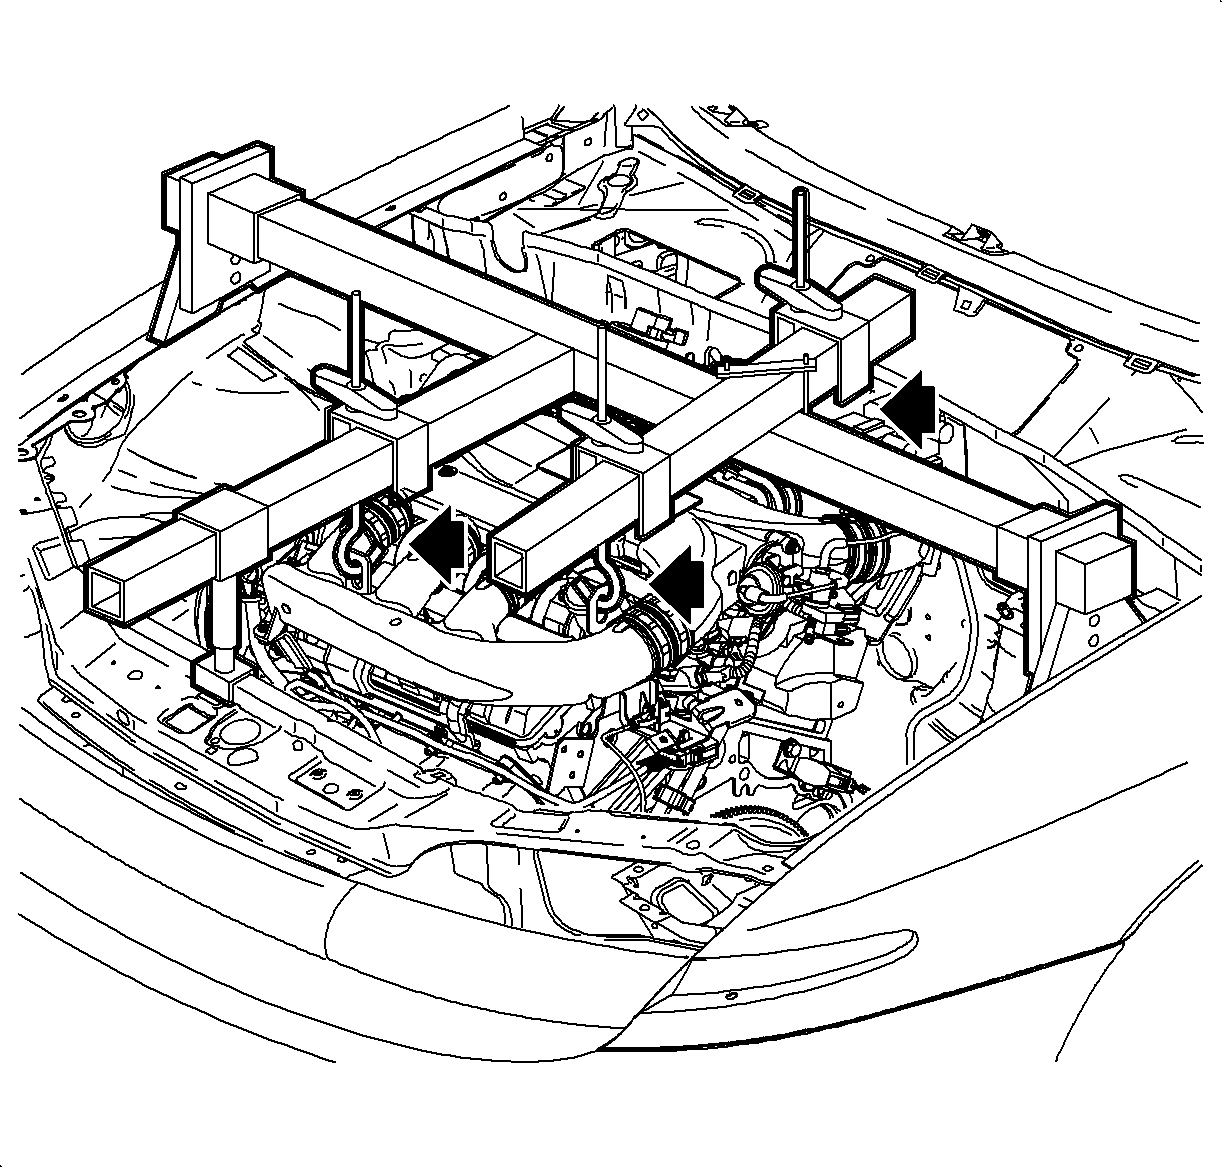
- Support the engine.
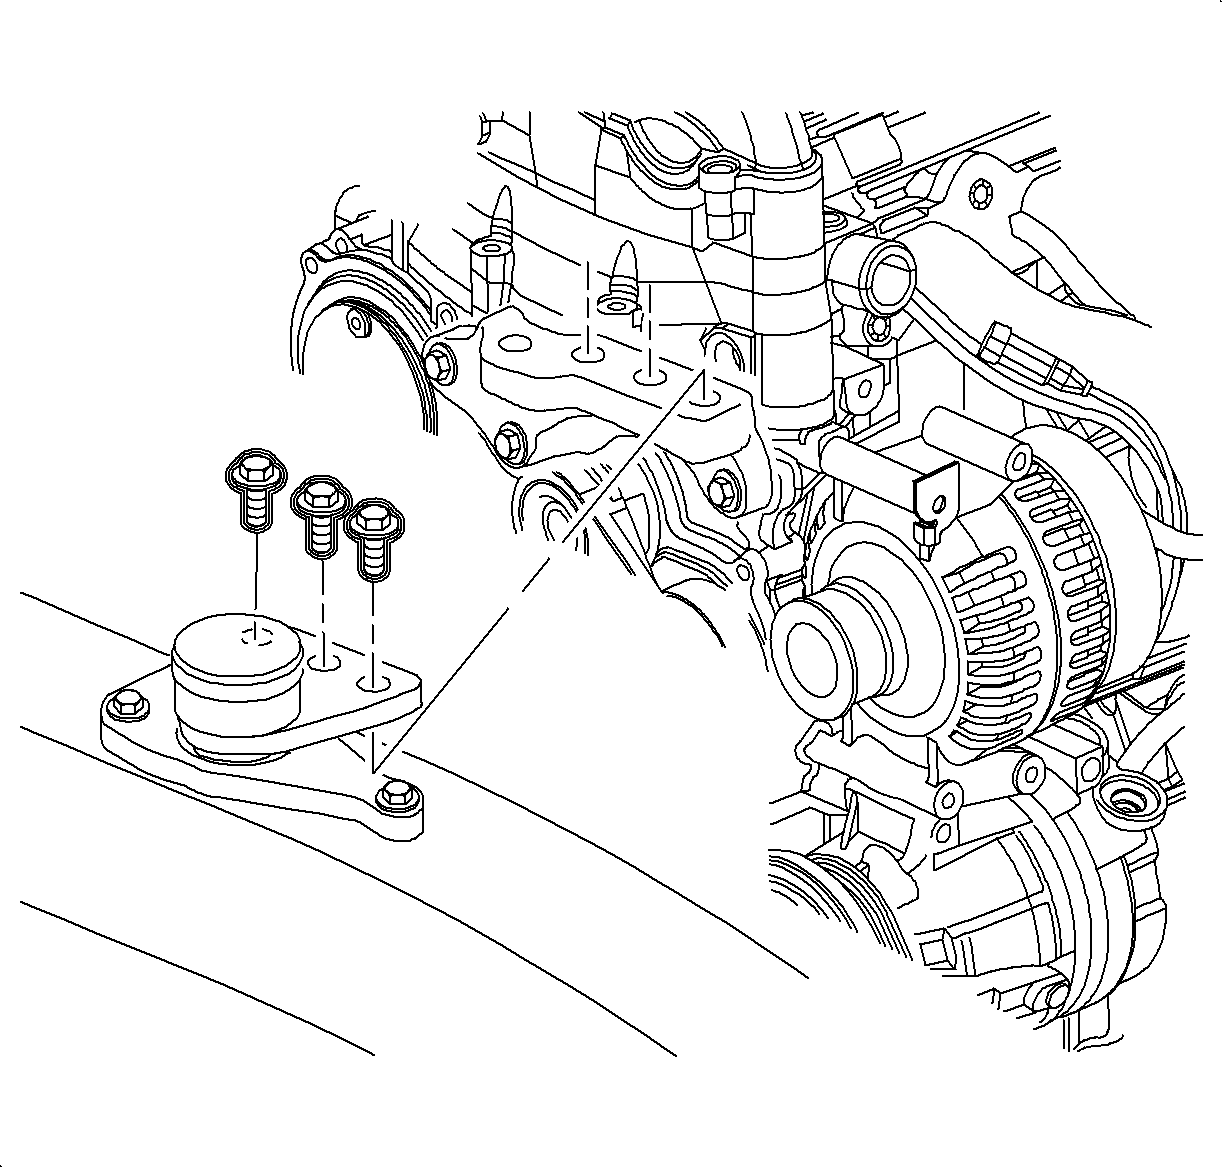
- Remove the engine mount to bracket bolts.
- Remove the engine mount to body bolts.
- Remove the engine mount from the vehicle.
- Remove the bolt that retains the mount to the engine mount body bracket.
- Remove the mount from the mount bracket and isolation pad.
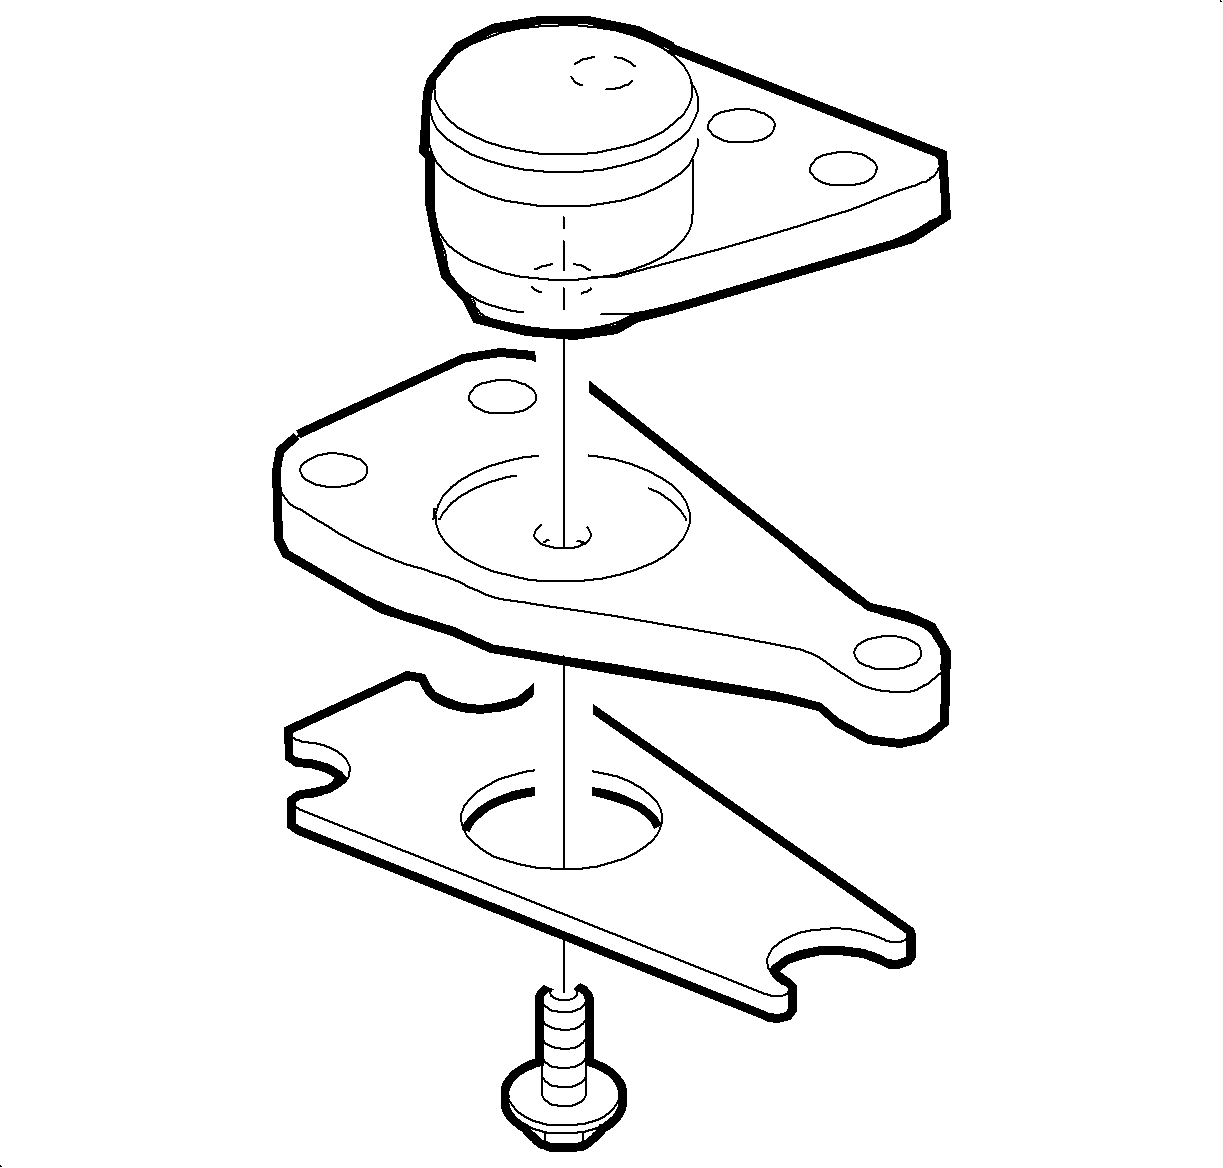
Important: Retain the isolation pad for assembly.
Installation Procedure
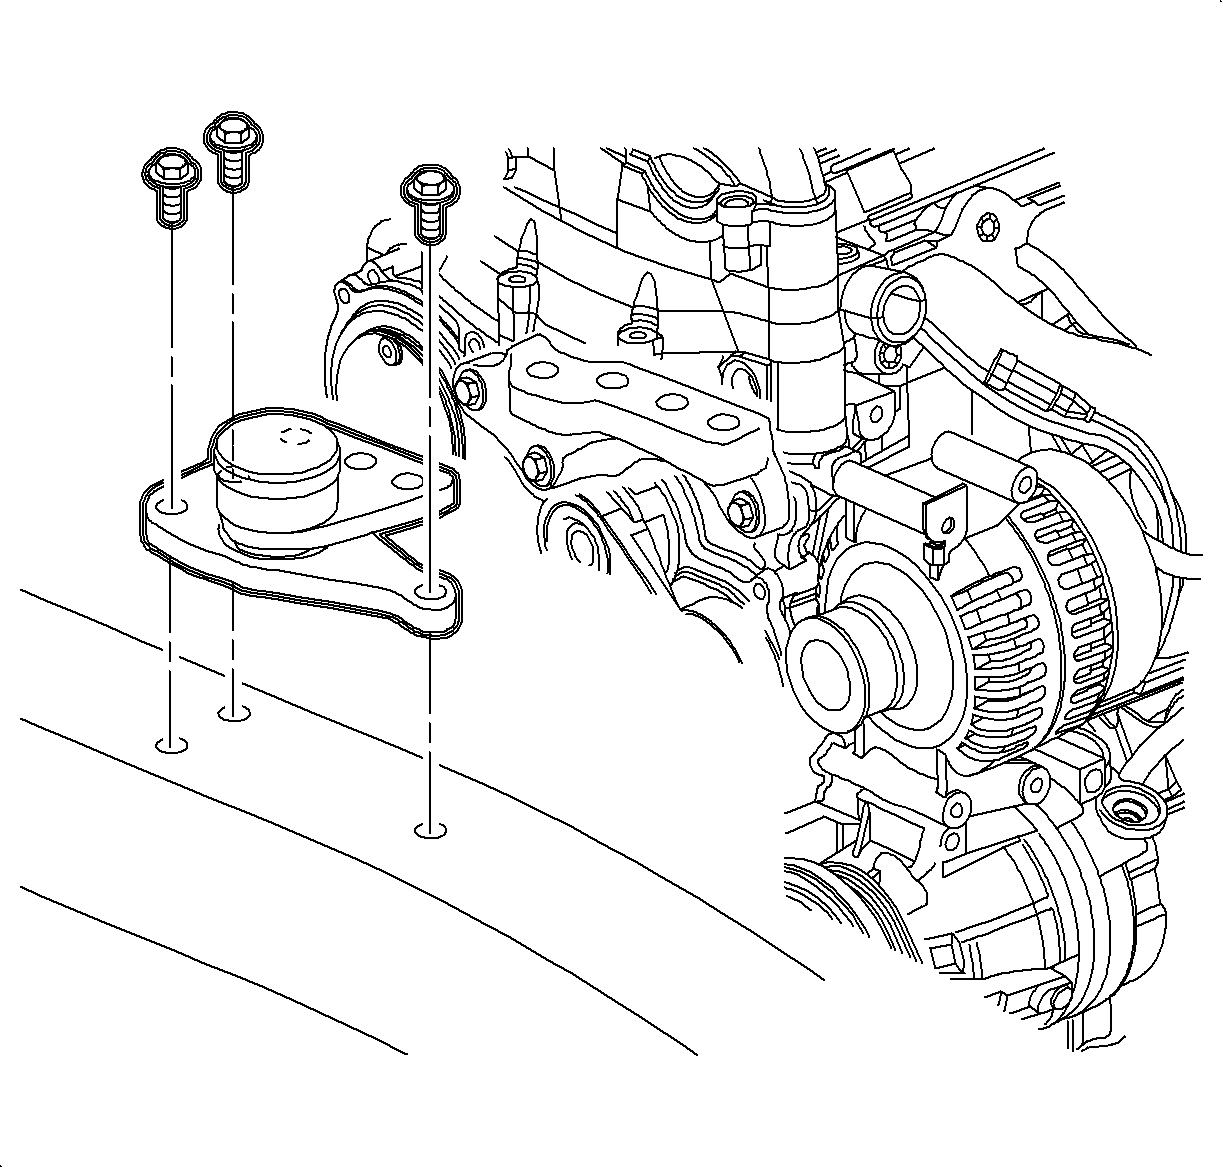
- Assemble the engine mount , engine mount bracket and isolation pad.
- Install the engine mount to the vehicle. Hand tighten the bolts at this time.
- Install the engine mount to engine bracket bolts.
- Remove the engine support fixture.
- Balance the engine mounts.
- Install the air cleaner assembly. Refer to Air Cleaner Assembly Replacement in Engine Controls - 3.0L (L81).
Notice: Refer to Fastener Notice in the Preface section.
Important: The isolation must be attached to the engine mount. Replace the isolation pad if necessary.
Tighten
Tighten the engine mount to bracket bolt to 90 N·m
(66 lb ft).
Tighten
| • | Tighten the engine mount to bracket bolts to 55 N·m (41 lb ft). |
| • | Tighten the engine mount to vehicle bolts to 55 N·m (41 lb ft). |
