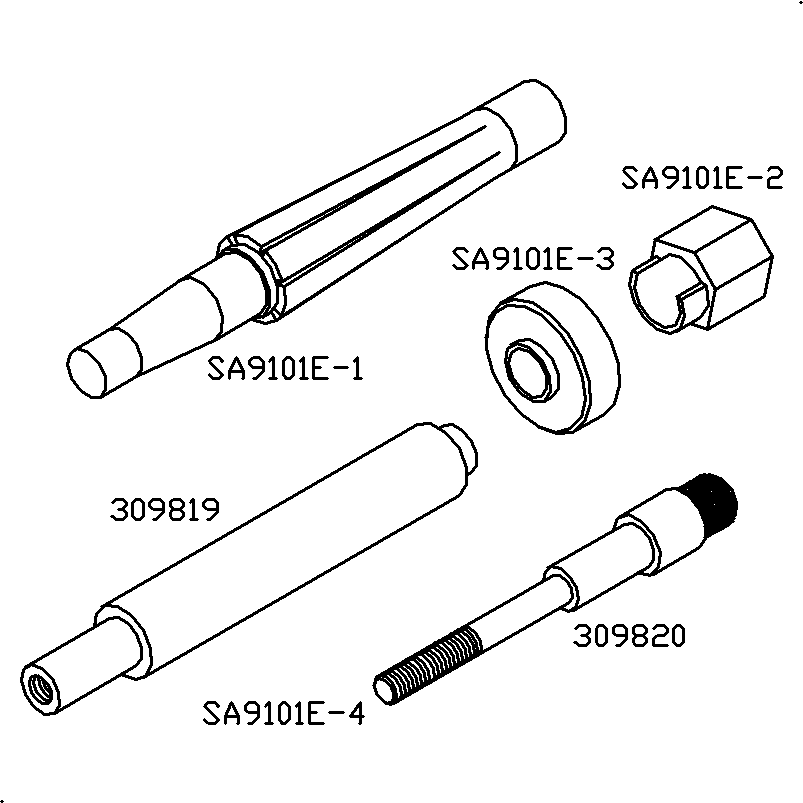
Tools Required
SA9101E Piston Pin Remover/Installer
- Perform the following steps to assemble the piston
assembly to the connecting rod.
- Install the oil ring expander and the 2 side rails by hand.
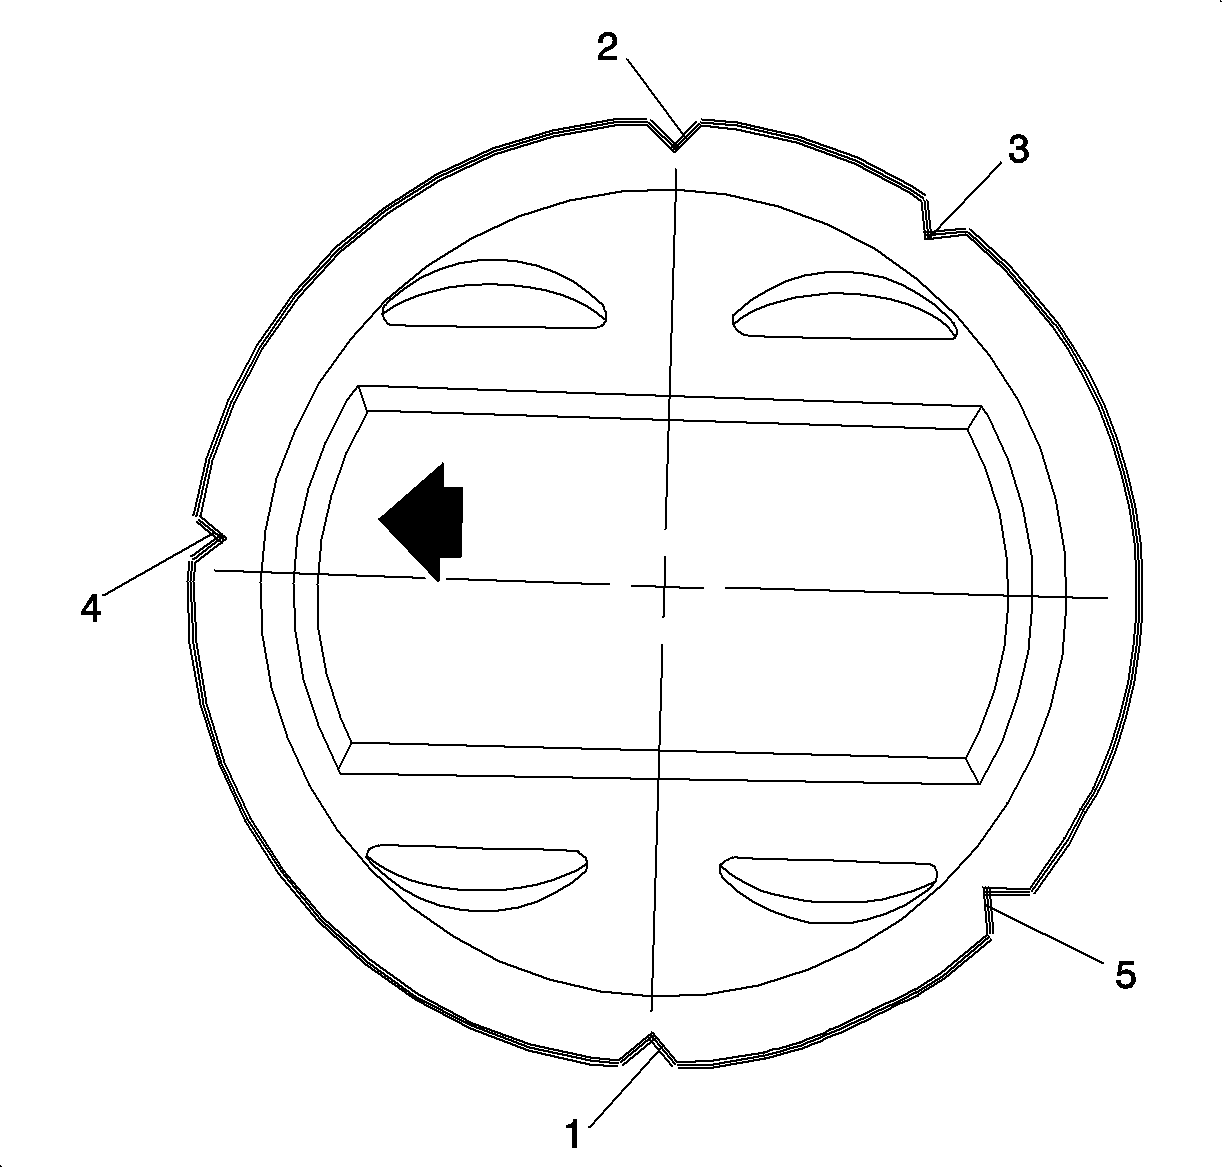
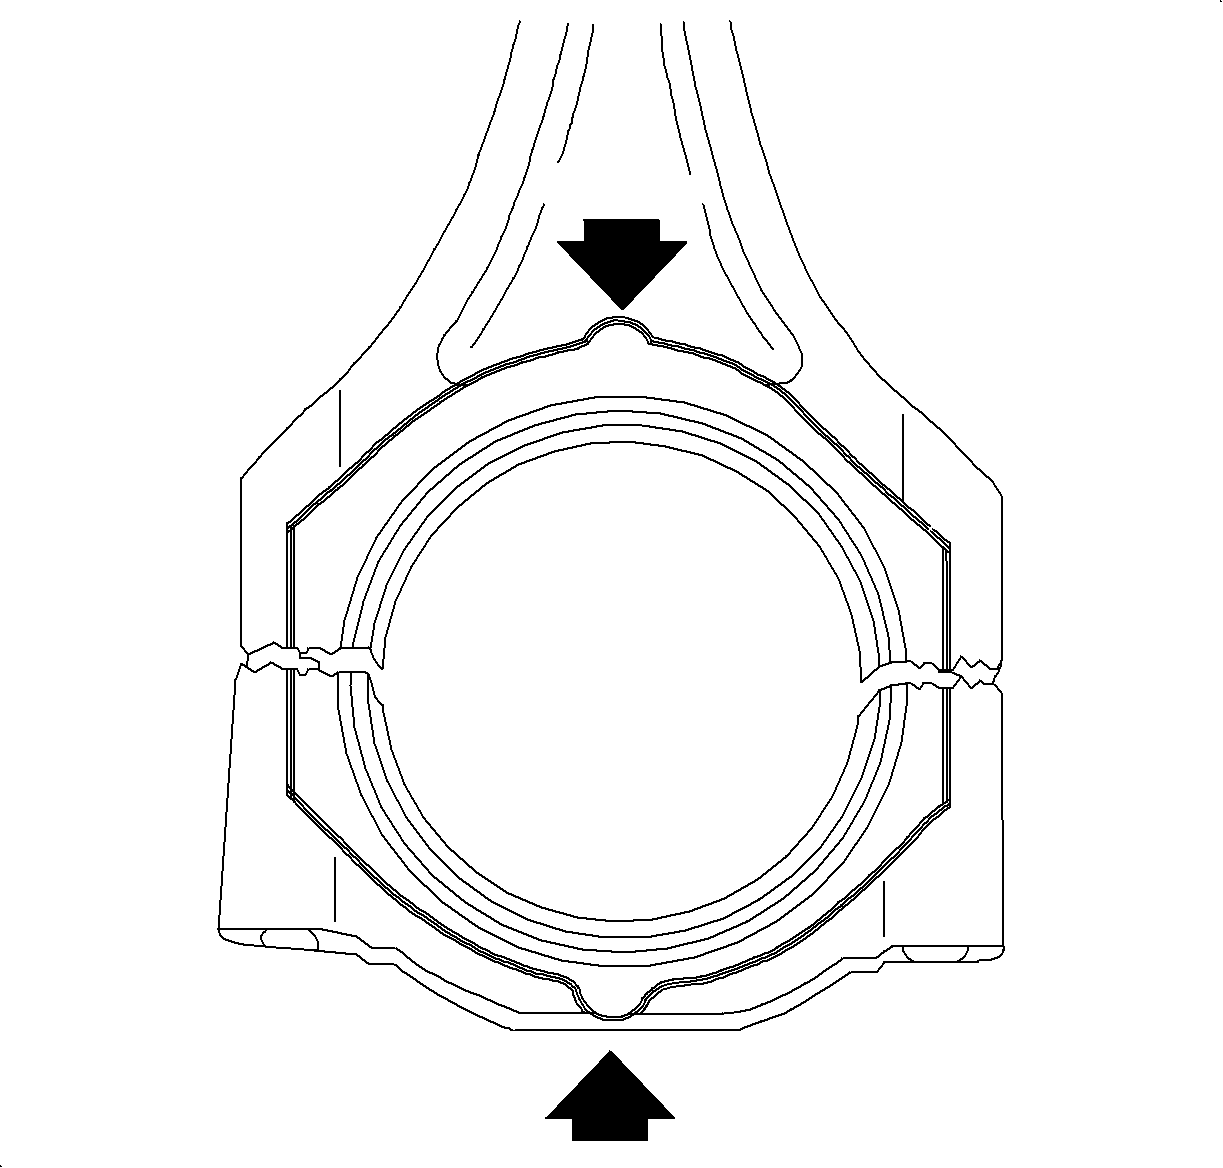
| | Important: The arrow on the top of the piston must point toward the front of the engine.
|
| • | Align the number 1 compression ring gap at 6 o'clock (1). |
| • | Align number 2 compression ring gap at 12 o'clock (2). |
| • | Align the upper oil control side rail gap at 1 o'clock (3). |
| • | Align the oil ring spacer expander at 9 o'clock (4). |
| • | Align the lower oil control side rail gap at 5 o'clock (5). |
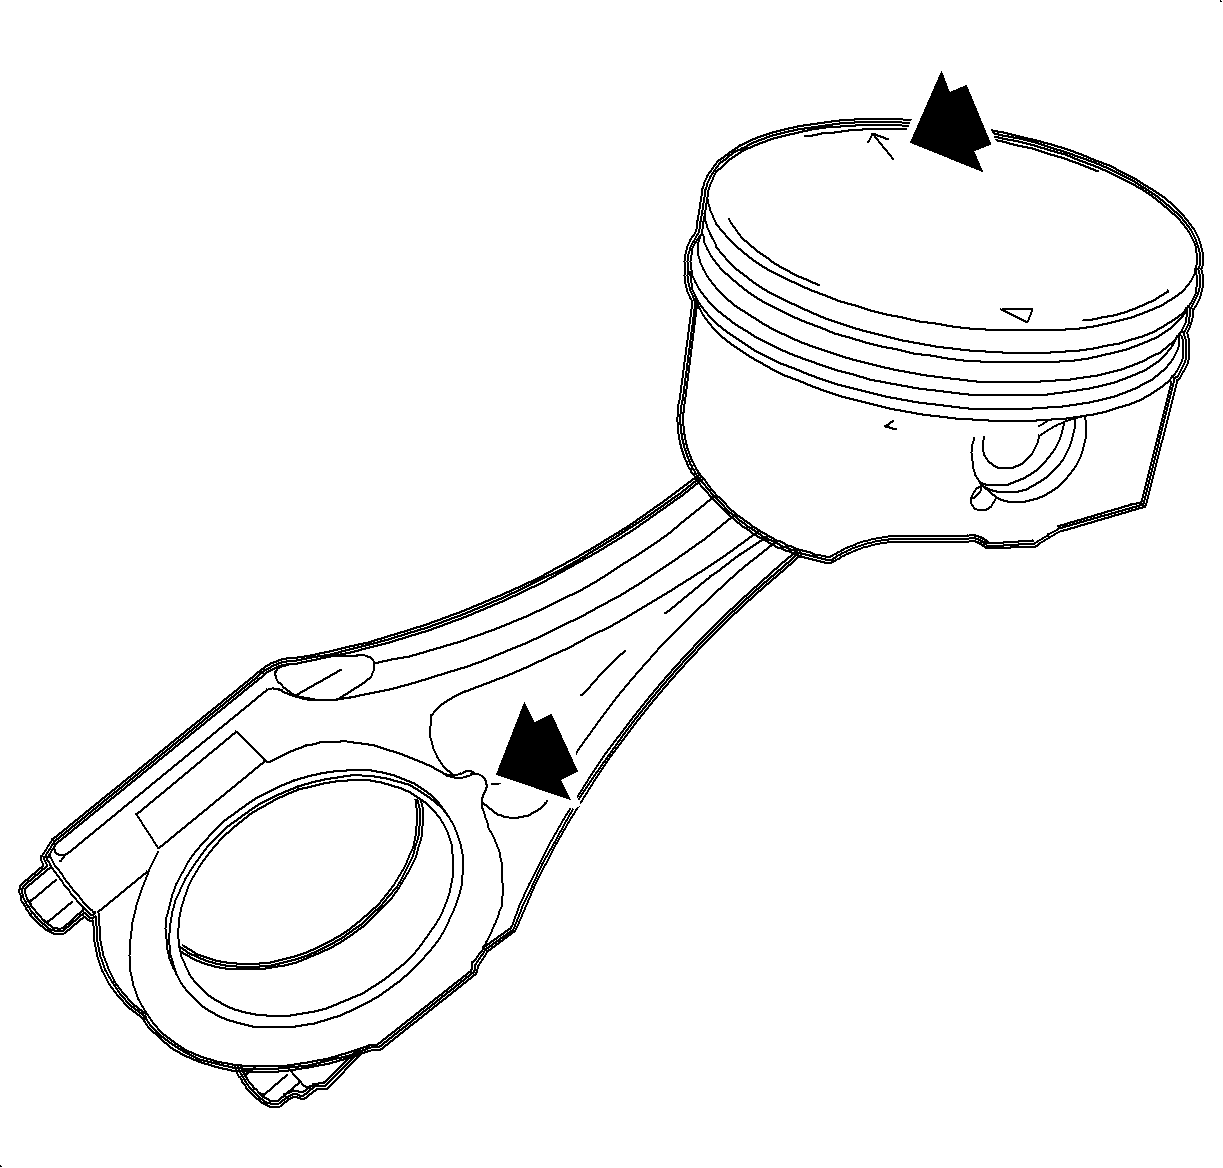
Important: The bumps on the connecting rod must face toward the flex plate.
- Assemble the piston to the connecting rod.
Important: The arrow on the piston points toward the front of the engine and the bump on
the connecting rod faces toward the rear of the engine.
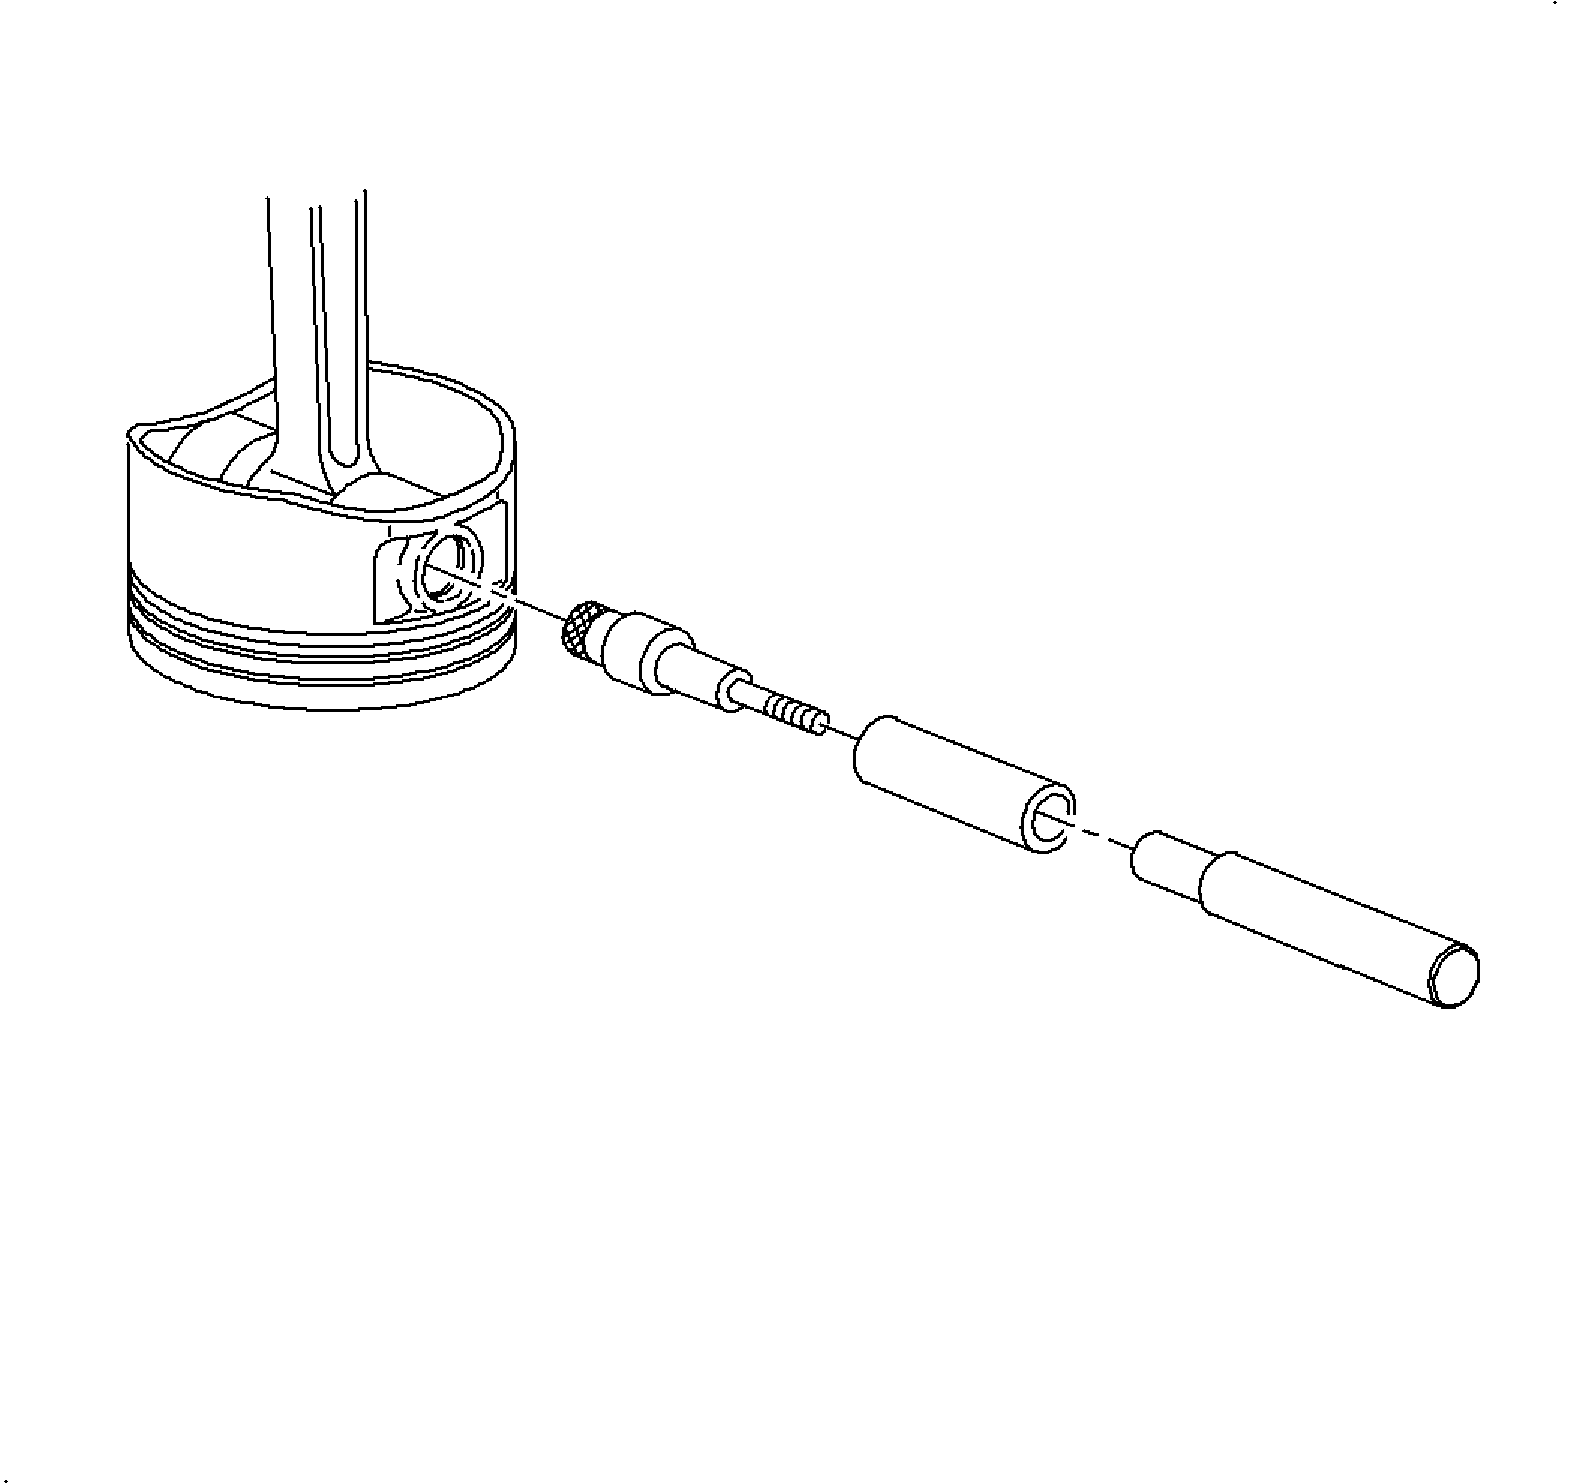
- Use the SA9101E
to assemble the piston
pin to the connecting rod and the piston, if necessary.
- Install the piston pin clips in the piston.
