Removal Procedure
- Record the preset radio stations.
- Turn the ignition OFF.
- Disconnect the negative battery cable.
- Disconnect the knock sensor 1 harness connector.
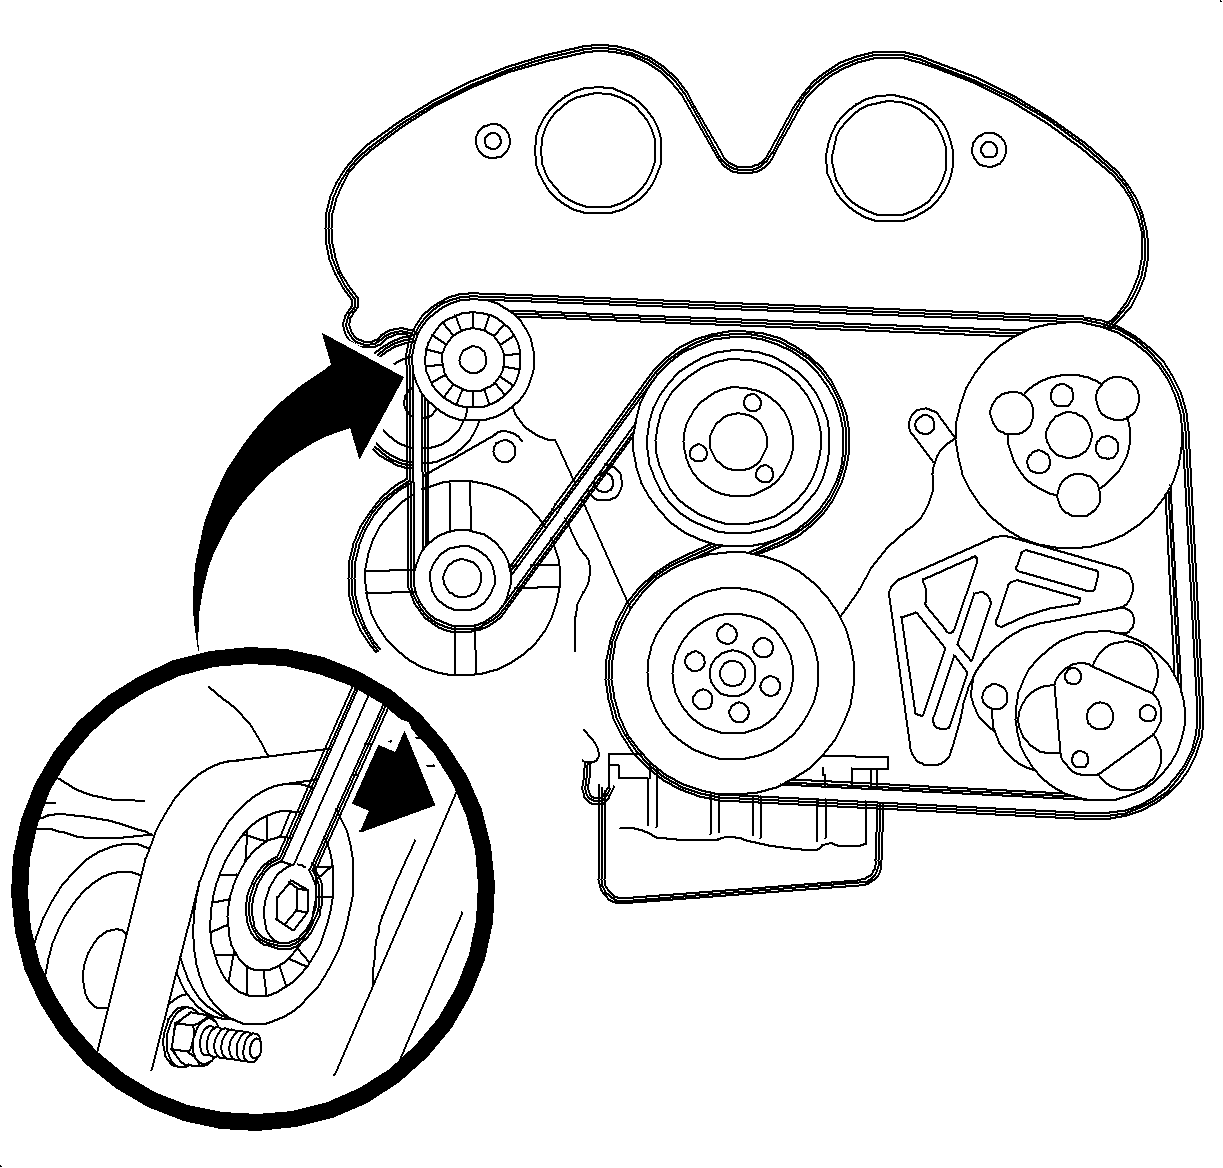
- Release the accessory drive belt from the generator pulley and belt tensioner pulley.
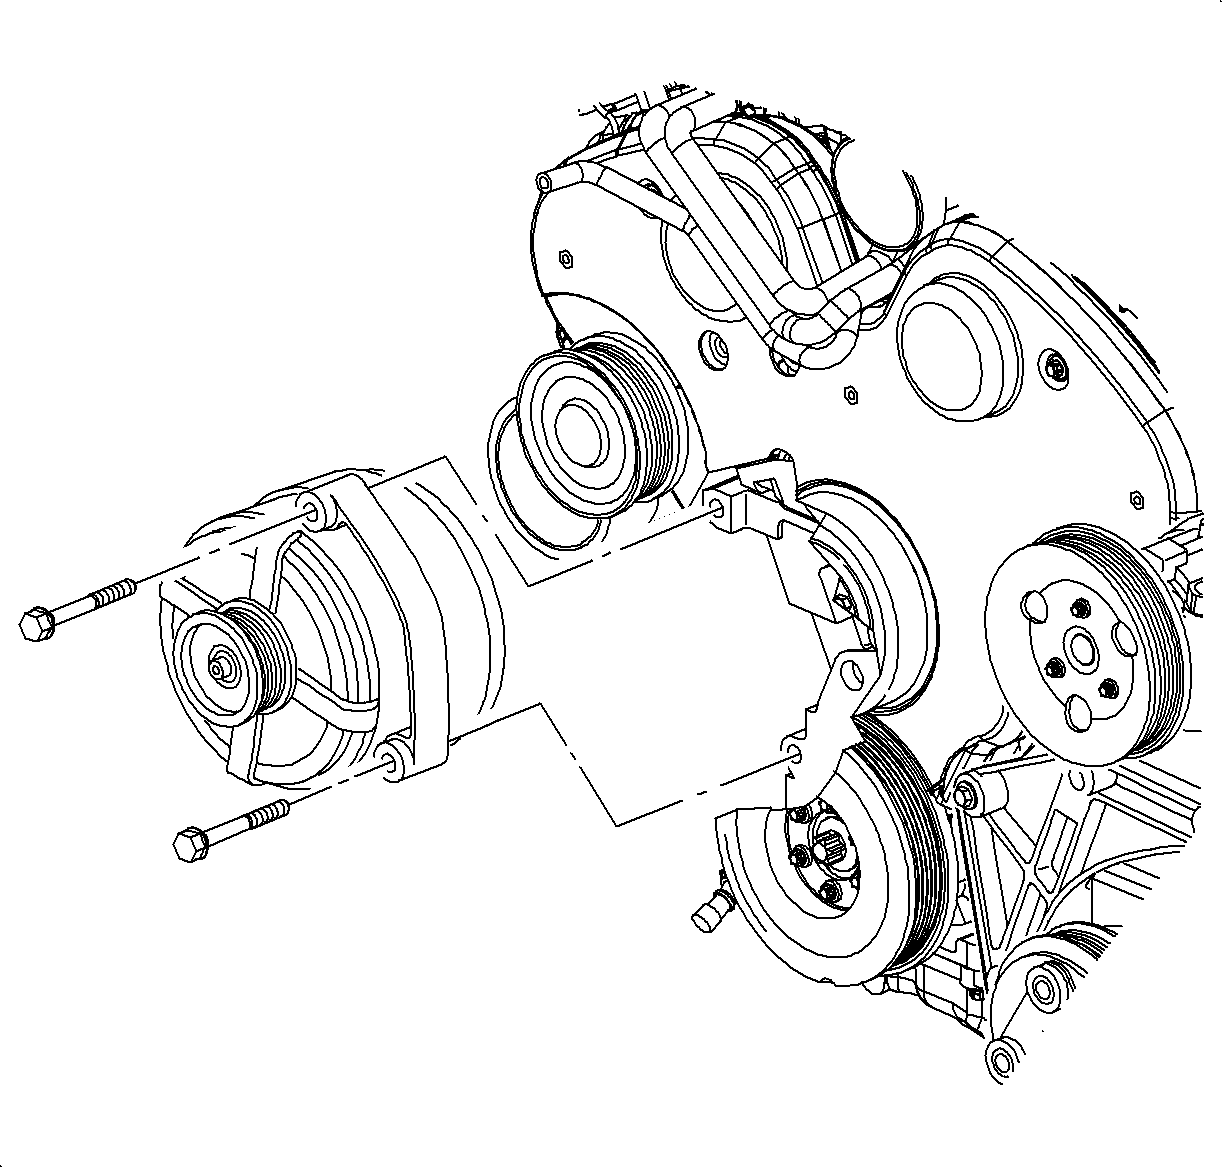
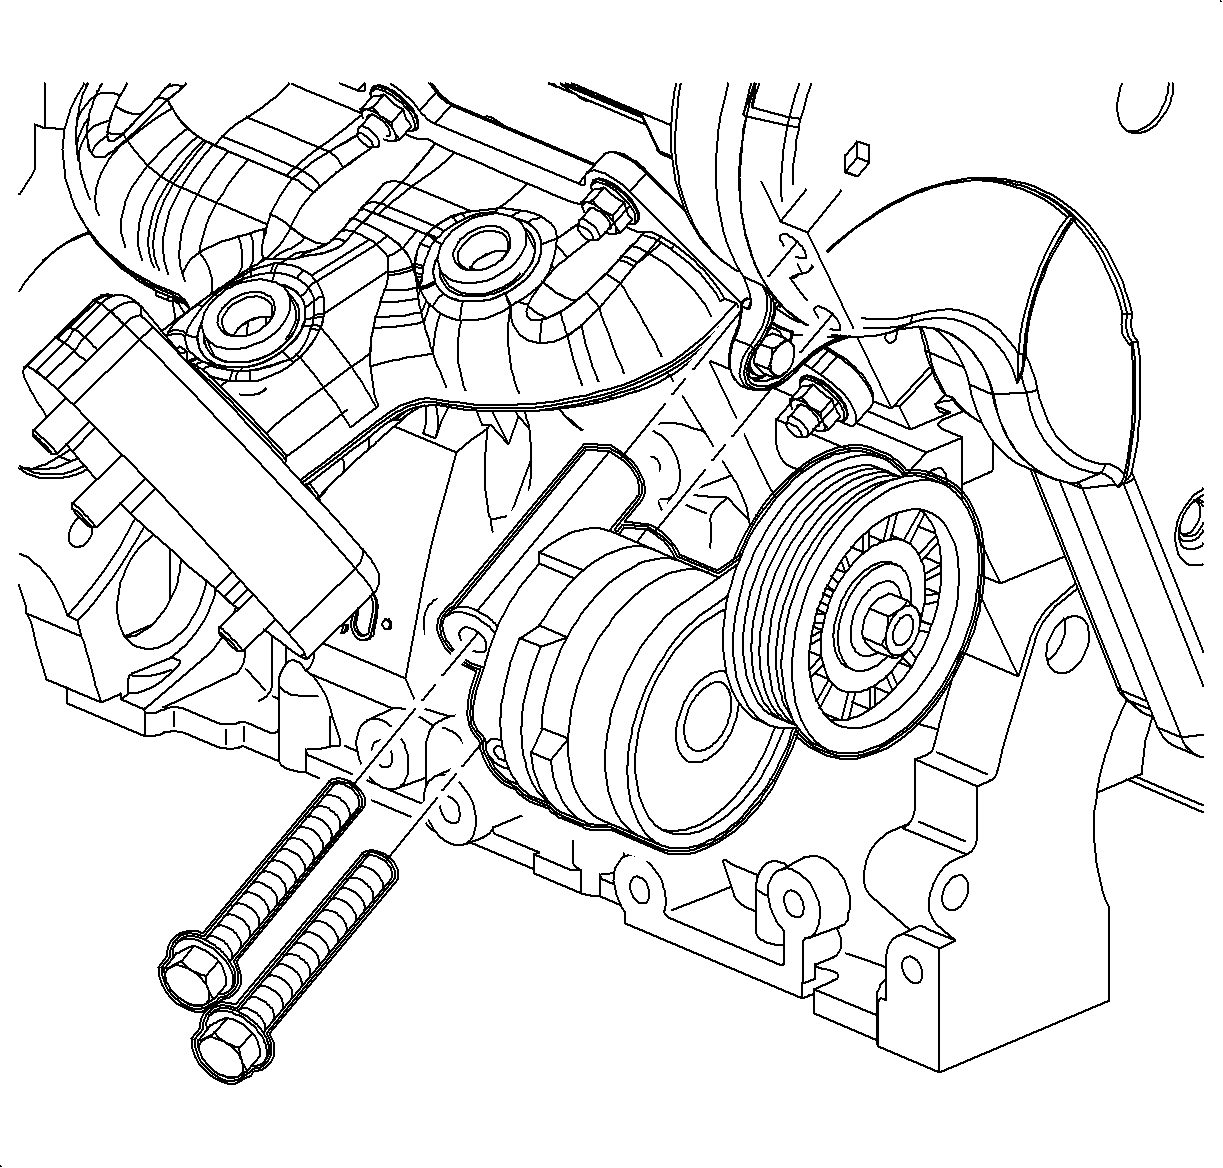
- Remove the upper generator to the engine block bolt.
- Raise the vehicle.
- Remove the right side front splash shield pushpins and screws to remove the splash shield.
- Remove the belt tensioner bolts and remove the belt tensioner.
- Remove the generator L-terminal connector nut (ring terminal nut), then remove the connector from the generator.
- Remove the generator charging terminal wire (ORN wire).
- Remove the lower generator to the engine block bolt and move the generator enough to access the knock sensor 1 wire.
- Remove the knock sensor 1 bolt and the knock sensor 1 from the attachment clips, and then remove the knock sensor 1.
Caution: Ensure that the vehicle is properly supported and squarely positioned. To help avoid personal injury when a vehicle is on a hoist, provide additional support for the vehicle on the opposite end from which the components are being removed.
Important: Note the knock sensor 1 wire routing before removing the sensor.
Installation Procedure
- Route the knock sensor by placing the harness behind the generator bracket and attach the knock sensor 1 wire to the attachment clips.
- Install the knock sensor between the 2 and 3 o'clock position and install the attachment bolt.
- Install the generator and the attachment bolts.
- Install the generator charging post terminal (ORN wire) and the attachment nut.
- Install the generator L-terminal connector (ring terminal) and hold down the nut.
- Install the belt tensioner and the attachment bolts.
- Install the front splash shield, pushpins, and screws.
- Lower the vehicle.
- Tighten the upper generator to the engine block bolt, if not already tightened.
- Connect the knock sensor 1 harness connector. Push the connector in until the lock position is felt, the pull back to confirm engagement.
- Install the drive belt.
- Connect the negative battery cable to the battery.
- Reprogram the preset radio stations and set the clock to the correct time.

Notice: Refer to Fastener Notice in the Preface section.
Tighten
Tighten the knock sensor bolt to 20 N·m
(15 lb ft).
Important: It may be easier to tighten the upper generator bolt when the vehicle is brought back to the ground.
Tighten
Tighten the generator mounting bolts to 40 N·m
(30 lb ft).
Tighten
Tighten the B+ cable to the generator nut to 16 N·m
(12 lb ft).
Tighten
Tighten the generator L-terminal nut to 16 N·m
(12 lb ft).
Tighten
Tighten the belt tensioner bolts to 40 N·m
(30 lb ft).
Tighten
Tighten the generator mounting bolts to 40 N·m
(30 lb ft).
Tighten
Tighten the battery terminal bolts to 17 N·m
(13 lb ft).
