Rear Split Folding Seat Back Replacement Sedan
Removal Procedure
- Remove the rear seat cushion. Refer to Rear Seat Cushion Replacement .
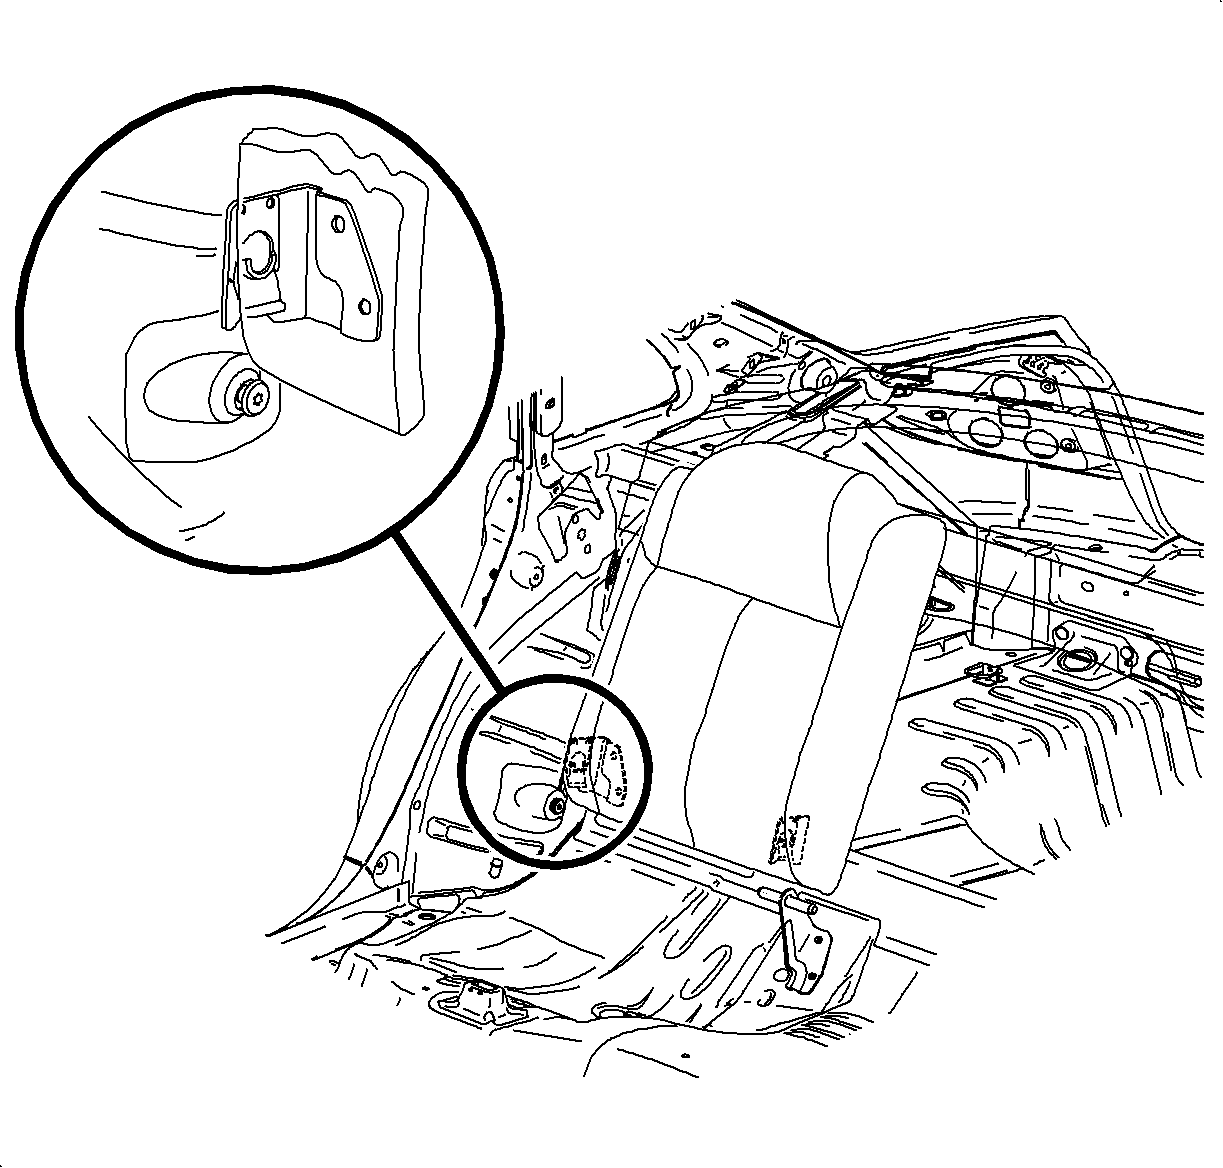
- With your hand, push on the seat back foam to expose the seat bracket outer retainer.
- Unlatch the seat back. Leave the seat in the upward position.
- Using a flat-bladed tool gently pry the outer seat bracket retainer inward while pulling upward on the seat back to disengage the outer bracket from the pivot pin.
- Remove the seat back.
Important: The rear seat back attachments have an Easyload™ outer bracket that allows the rear seat back to snap into position upon installation. It is necessary to gently pry the Easyload bracket outward to remove the rear seat back. It is important not use excessive force to pry on the bracket or the bracket may become damaged. Move the bracket only enough to lift the seat back from the vehicle. If the bracket has been moved outward too much, gently reposition the bracket to ensure proper retention of the rear seat back to the bracket.
Installation Procedure
- Guide the seat back assembly onto the center pivot pin. Ensure that the seat back locates into the inner pivot tabs.
- Align the outer pivot pin with the lead in the ramp on the Easyload bracket.
- Push downward on the seat back to engage the Easyload bracket.
- Raise the seat backs and secure the seat back latch.
- Install the seat cushion. Refer to Rear Seat Cushion Replacement .
Rear Split Folding Seat Back Replacement Wagon
Removal Procedure
- Remove the rear seat cushion. Refer to Rear Seat Cushion Replacement .
- Remove the seat back latch bracket. Refer to Rear Seat Back Cushion Latch Bracket Replacement .
- With your hand, push on the seat back foam to expose the seat bracket outer retainer.
- Unlatch the seat back. Leave the seat in the upward position.
- Using a flat-bladed tool, gently pry the outer seat bracket retainer inward while pulling upward on the seat back to disengage the outer bracket from the pivot pin.
- Remove the seat back.
Important: The rear seat back attachments have an Easyload™ outer bracket that allows the rear seat back to snap into position upon installation. It is necessary to gently pry the Easyload bracket outward to remove the rear seat back. It is important not to use excessive force to pry on the bracket or the bracket may become damaged. Move the bracket only enough to lift the seat back from the vehicle. If the bracket has been moved outward too much, gently reposition the bracket to ensure proper retention of the rear seat back to the bracket.
Installation Procedure
- Guide the seat back assembly onto the center pivot pin. Ensure that the seat back locates into the inner pivot tabs.
- Align the outer pivot pin with the lead in the ramp on the Easyload bracket.
- Push downward on the seat back to engage the Easyload bracket.
- Install the seat back latch bracket. Refer to Rear Seat Back Cushion Latch Bracket Replacement .
- Raise the seat backs and secure the seat back latch.
- Install the seat cushion. Refer to Rear Seat Cushion Replacement .
