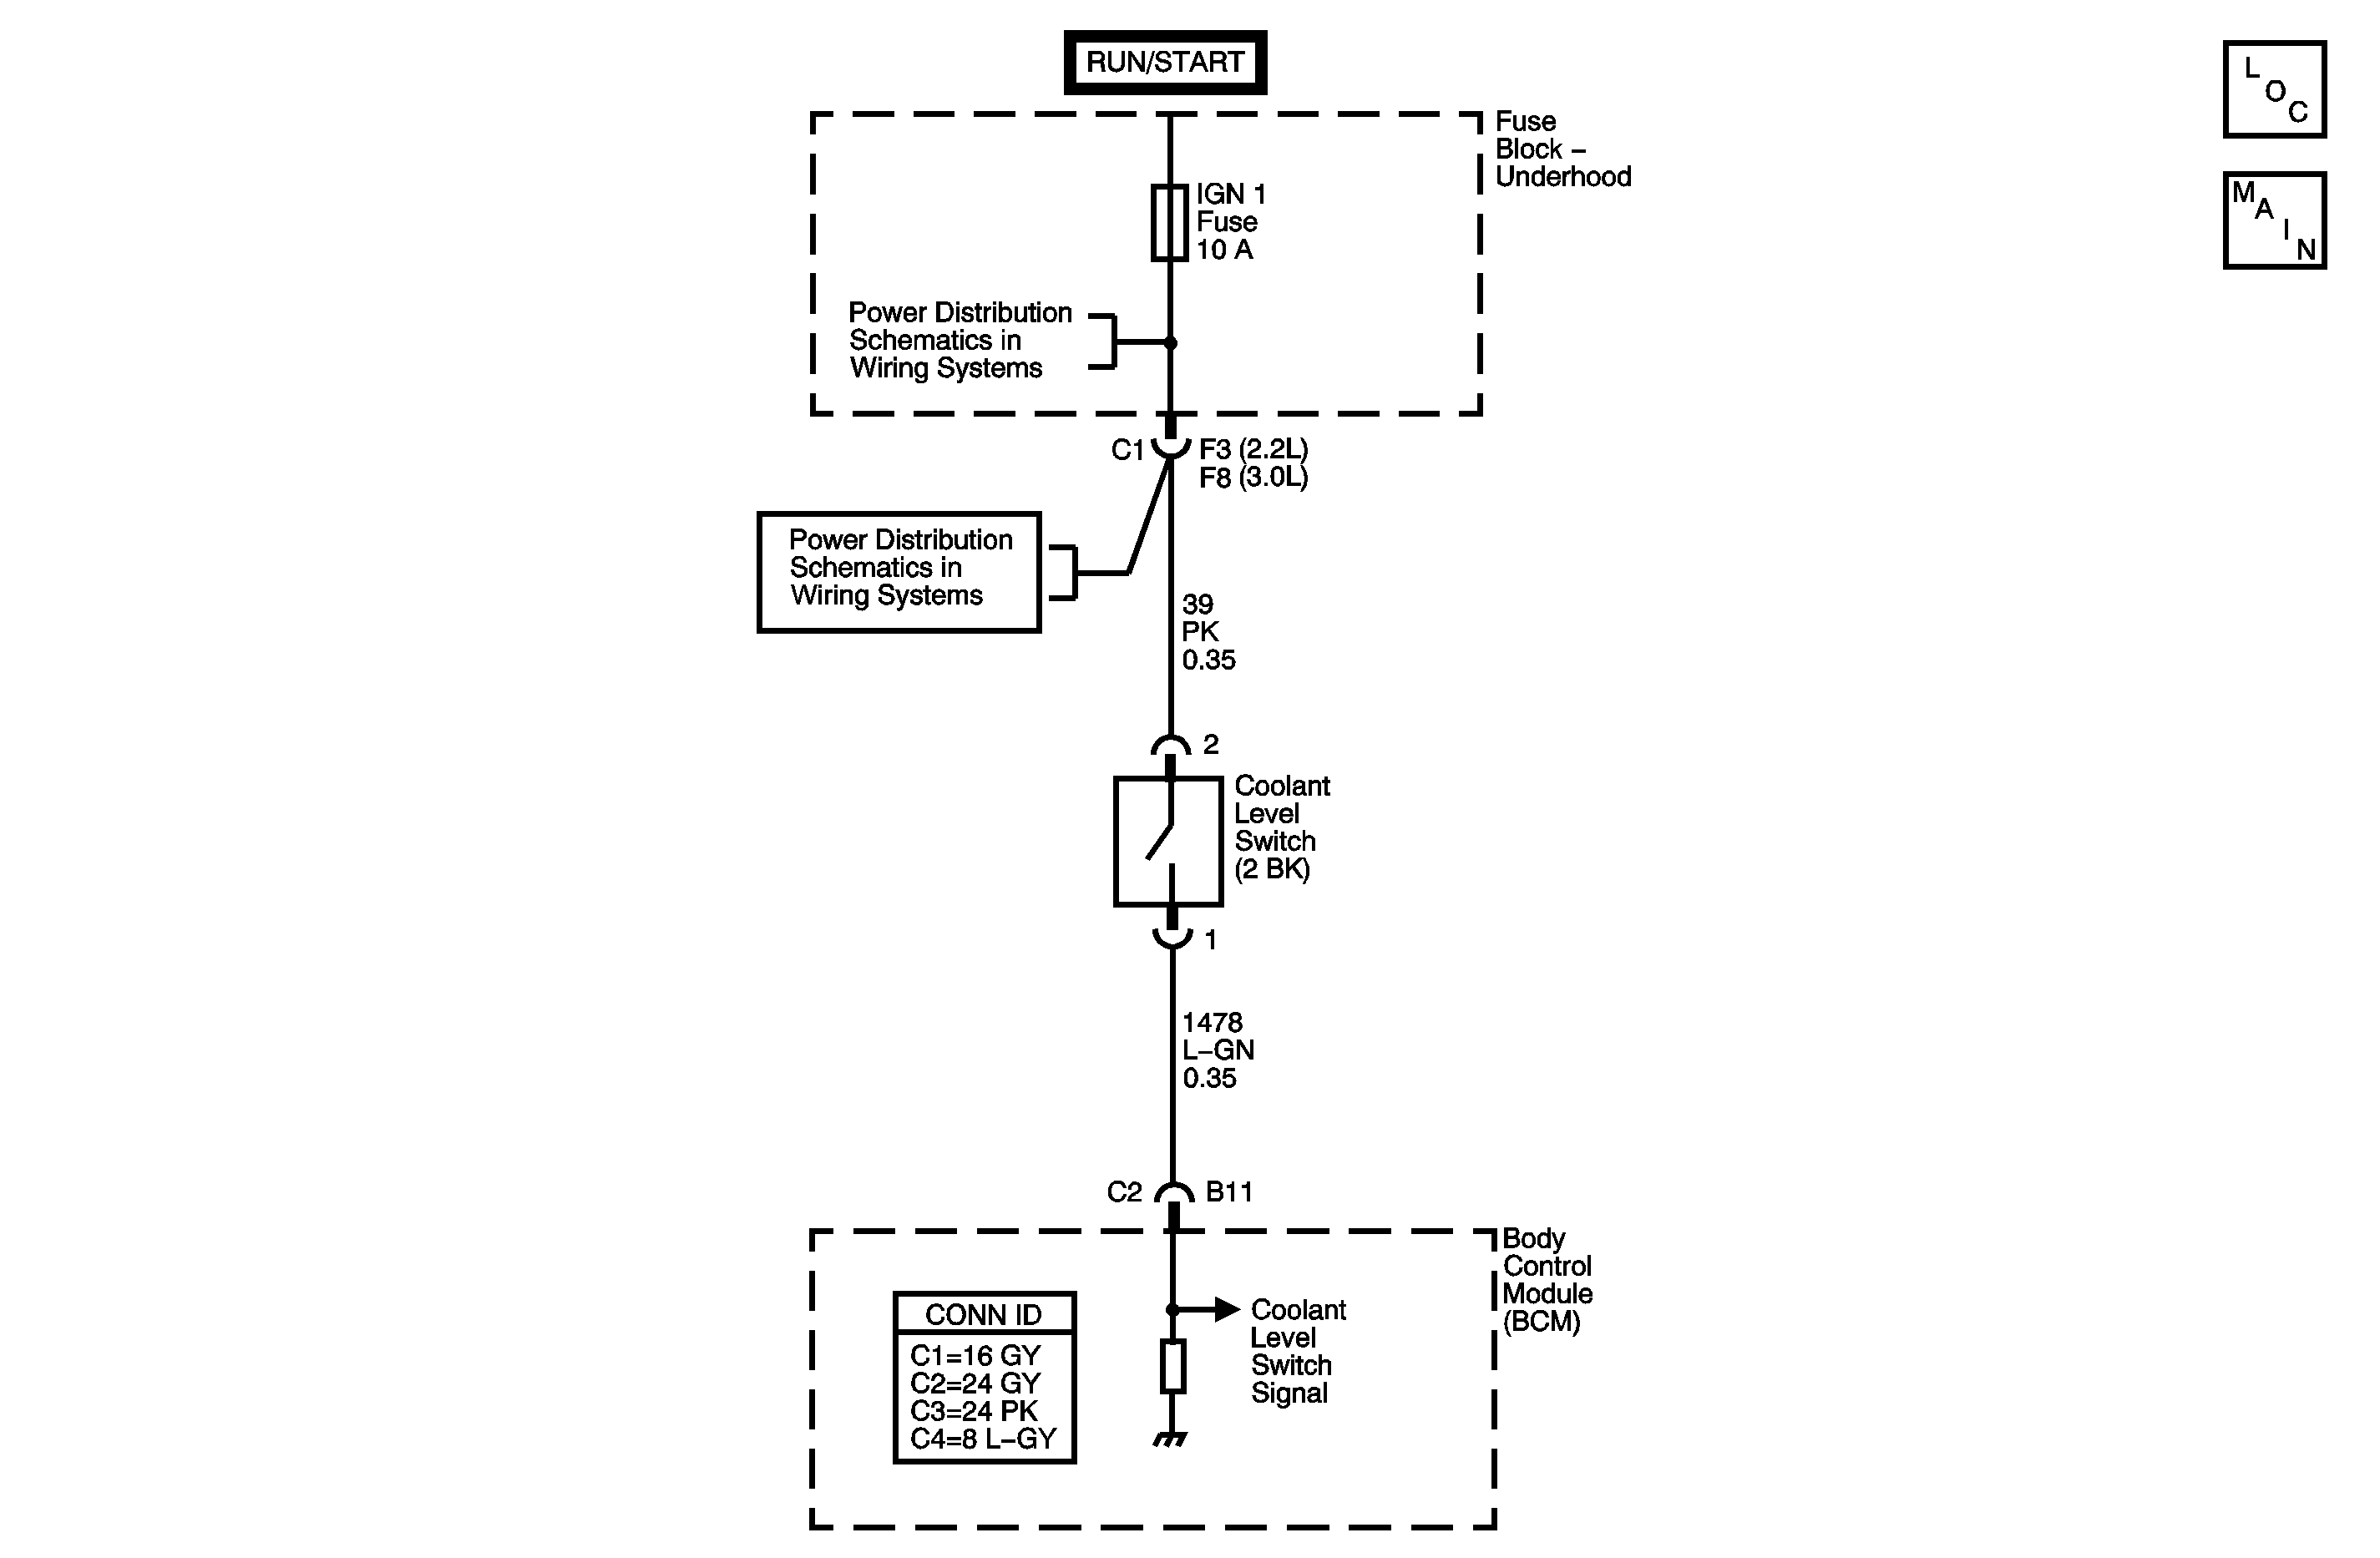
Circuit Description
When the engine coolant is at the proper level in the surge tank, the low coolant level switch is closed. When in this condition, battery voltage is applied to the low coolant level signal circuit of the body control module (BCM). When coolant is below the proper level, the low coolant level switch opens. Because no voltage is applied to the low coolant level signal circuit, the BCM responds by sending a serial data message to the instrument panel cluster to turn on the low coolant level light. The BCM has an internal timer, which will not turn on the low coolant level light unless the coolant level is low for longer than 30 seconds. The timer avoids falsely turning on the light due to the movement of coolant within the surge tank.
DTC Descriptor
This diagnostic procedure supports the following DTC:
DTC B0936 Coolant Level Sensor Circuit
Conditions for Running the DTC
| • | Ignition switch in RUN or Crank position. |
| • | Low coolant warning light always On with the ignition in Start. |
| • | IGN 1 fuse in underhood fuse block is open. |
Conditions for Setting the DTC
| • | The condition exists for longer then 30 seconds. |
| • | The coolant level switch signal short to voltage or open. |
| • | The coolant level switch signal short to ground. |
Action Taken When the DTC Sets
B0936 - The BCM detects a short to ground or an open on the coolant level signal circuit.
Conditions for Clearing the DTC
| • | The History DTC will clear after 40 consecutive warm-up cycles have occurred without a malfunction. |
| • | Use the scan tool Clear DTC Information function. |
Diagnostic Aids
| • | Check for poor connection at the BCM. |
| • | Check for poor connection at the low coolant level switch. |
| • | If the fault is suspected to be intermittent refer to Testing for Intermittent Conditions and Poor Connections in Wiring Systems. |
Test Description
The numbers below refer to the step numbers on the diagnostic table.
-
This step verifies the normal status of the signal circuit to the BCM.
-
This step tests for voltage at the coolant level switch. The IGN 1 fuse supplies power to the voltage side of the coolant level switch.
-
This step verifies that the BCM is providing ground to the coolant.
Step | Action | Yes | No |
|---|---|---|---|
Connector End View Reference: Cooling System Connector End Views | |||
1 | Did you perform the Diagnostic System Check - Vehicle? | Go to Step 2 | Go to Diagnostic System Check - Vehicle in Vehicle DTC Information |
Does the scan tool display normal state? | Go to Diagnostic Aids | Go to Step 3 | |
Does the test lamp illuminate? | Go to Step 4 | Go to Step 9 | |
Does the scan tool display normal state? | Go to Step 7 | Go to Step 5 | |
5 | Test the switch signal of the coolant level switch for a short to voltage or an open. Refer to Testing for Intermittent Conditions and Poor Connections and Wiring Repairs in Wiring Systems. Did you find and correct the condition? | Go to Step 12 | Go to Step 8 |
6 | Test the switch signal of the coolant level switch for a short to ground. Refer to Testing for Intermittent Conditions and Poor Connections and Wiring Repairs in Wiring Systems. Did you find and correct the condition? | Go to Step 12 | Go to Step 8 |
7 | Inspect for poor connections at the coolant level switch. Refer to Testing for Intermittent Conditions and Poor Connections and Connector Repairs in Wiring Systems. Did you find and correct the condition? | Go to Step 12 | Go to Step 10 |
8 | Inspect for poor connections at the harness connector of the body control module (BCM). Refer to Testing for Intermittent Conditions and Poor Connections and Connector Repairs in Wiring Systems. Did you find and correct the condition? | Go to Step 12 | Go to Step 11 |
9 | Repair the ignition 1 voltage circuit of the coolant level switch . Refer to Wiring Repairs in Wiring Systems. Did you complete the repair? | Go to Step 12 | -- |
10 | Replace the coolant level switch. Refer to Radiator Surge Tank Replacement . Did you complete the replacement? | Go to Step 12 | -- |
11 | Replace the BCM. Refer to Control Module References in Computer/Integrating Systems for replacement, setup, and programming. Did you complete the replacement? | Go to Step 12 | -- |
12 |
Does the DTC reset? | Go to Step 2 | System OK |
