For 1990-2009 cars only
Special Tools
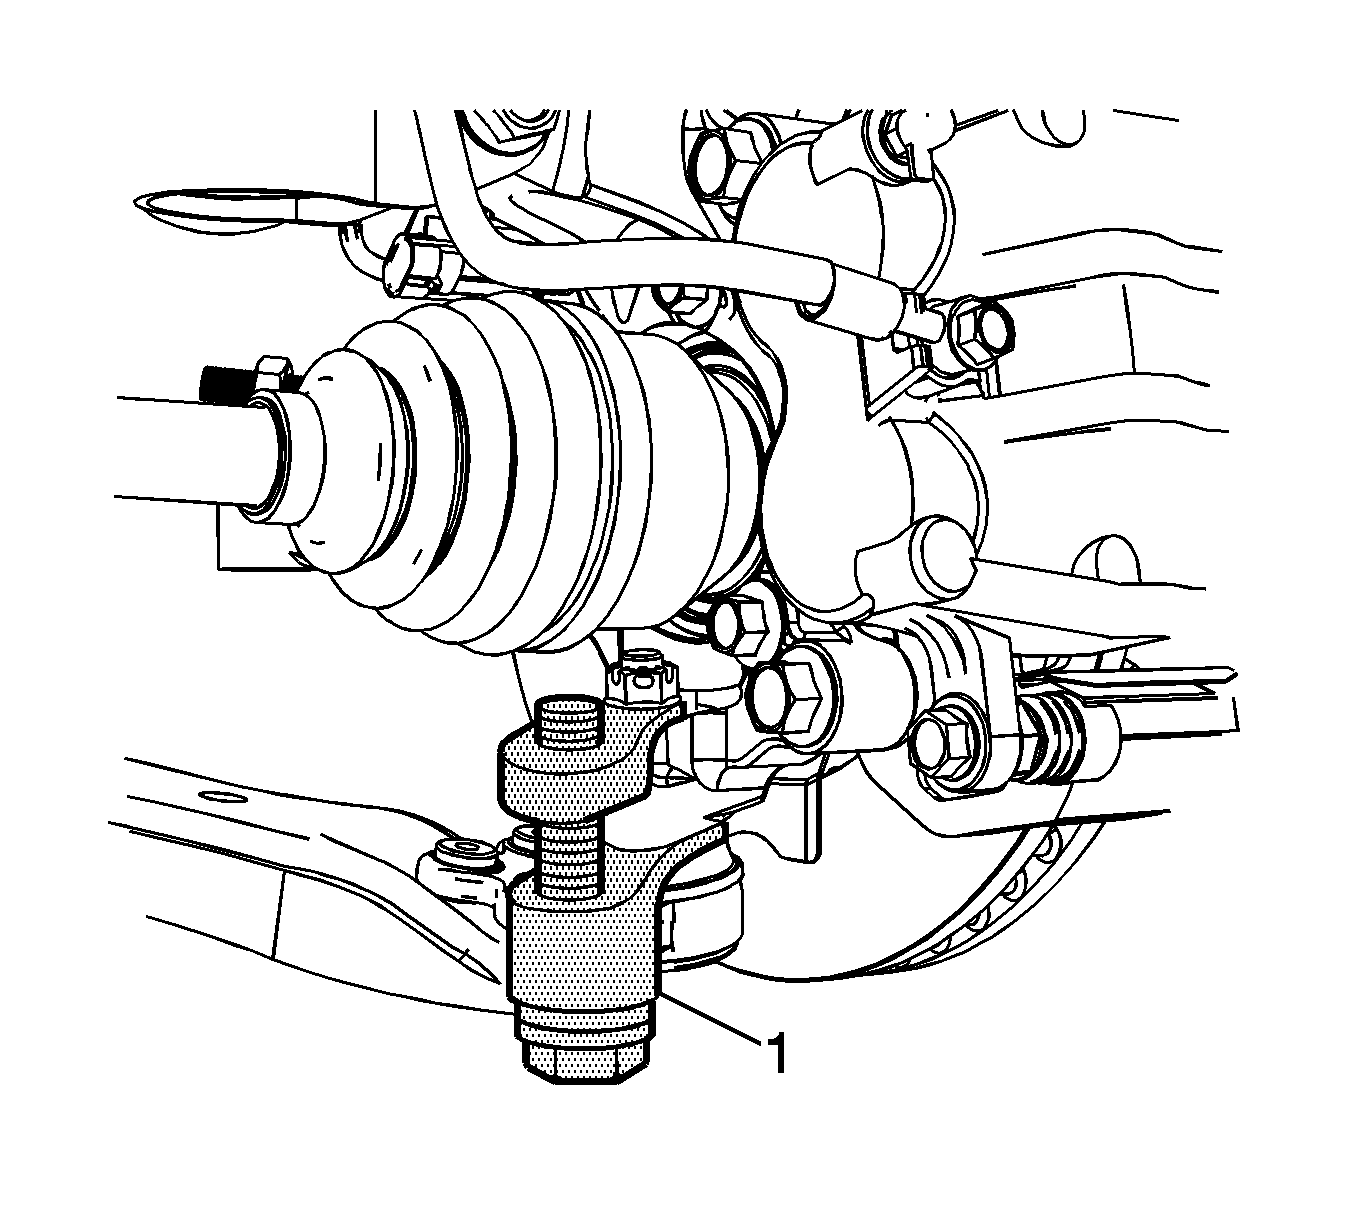
J 42188 Ball Joint Separator
Removal Procedure
- Raise and support the vehicle. Refer to Lifting and Jacking the Vehicle.
- Remove the tire and wheel. Refer to Tire and Wheel Removal and Installation.
- Remove the outer tie rod end from the steering knuckle. Refer to Steering Linkage Outer Tie Rod Replacement.
- Turn the knuckle to the left.
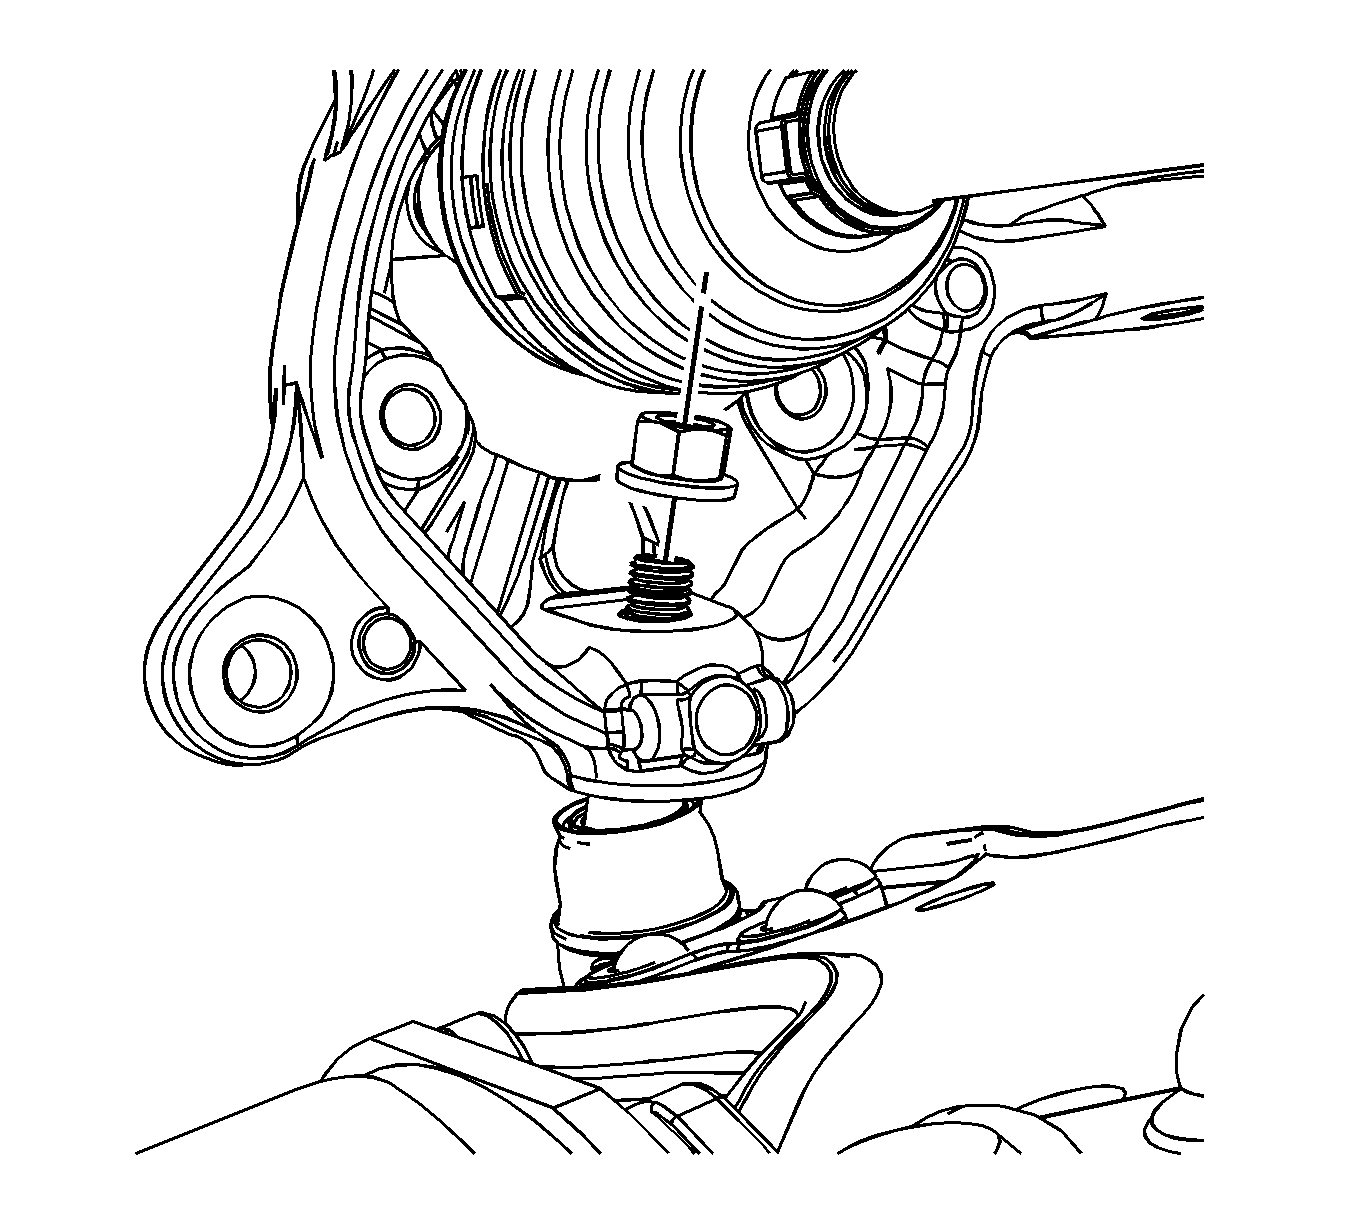
- Using the proper size allen wrench and wrench, loosen the lower ball joint nut.
- Using the J 42188 Ball Joint Separator (1), remove the lower ball joint from the knuckle.
- Remove the lower ball joint nut.
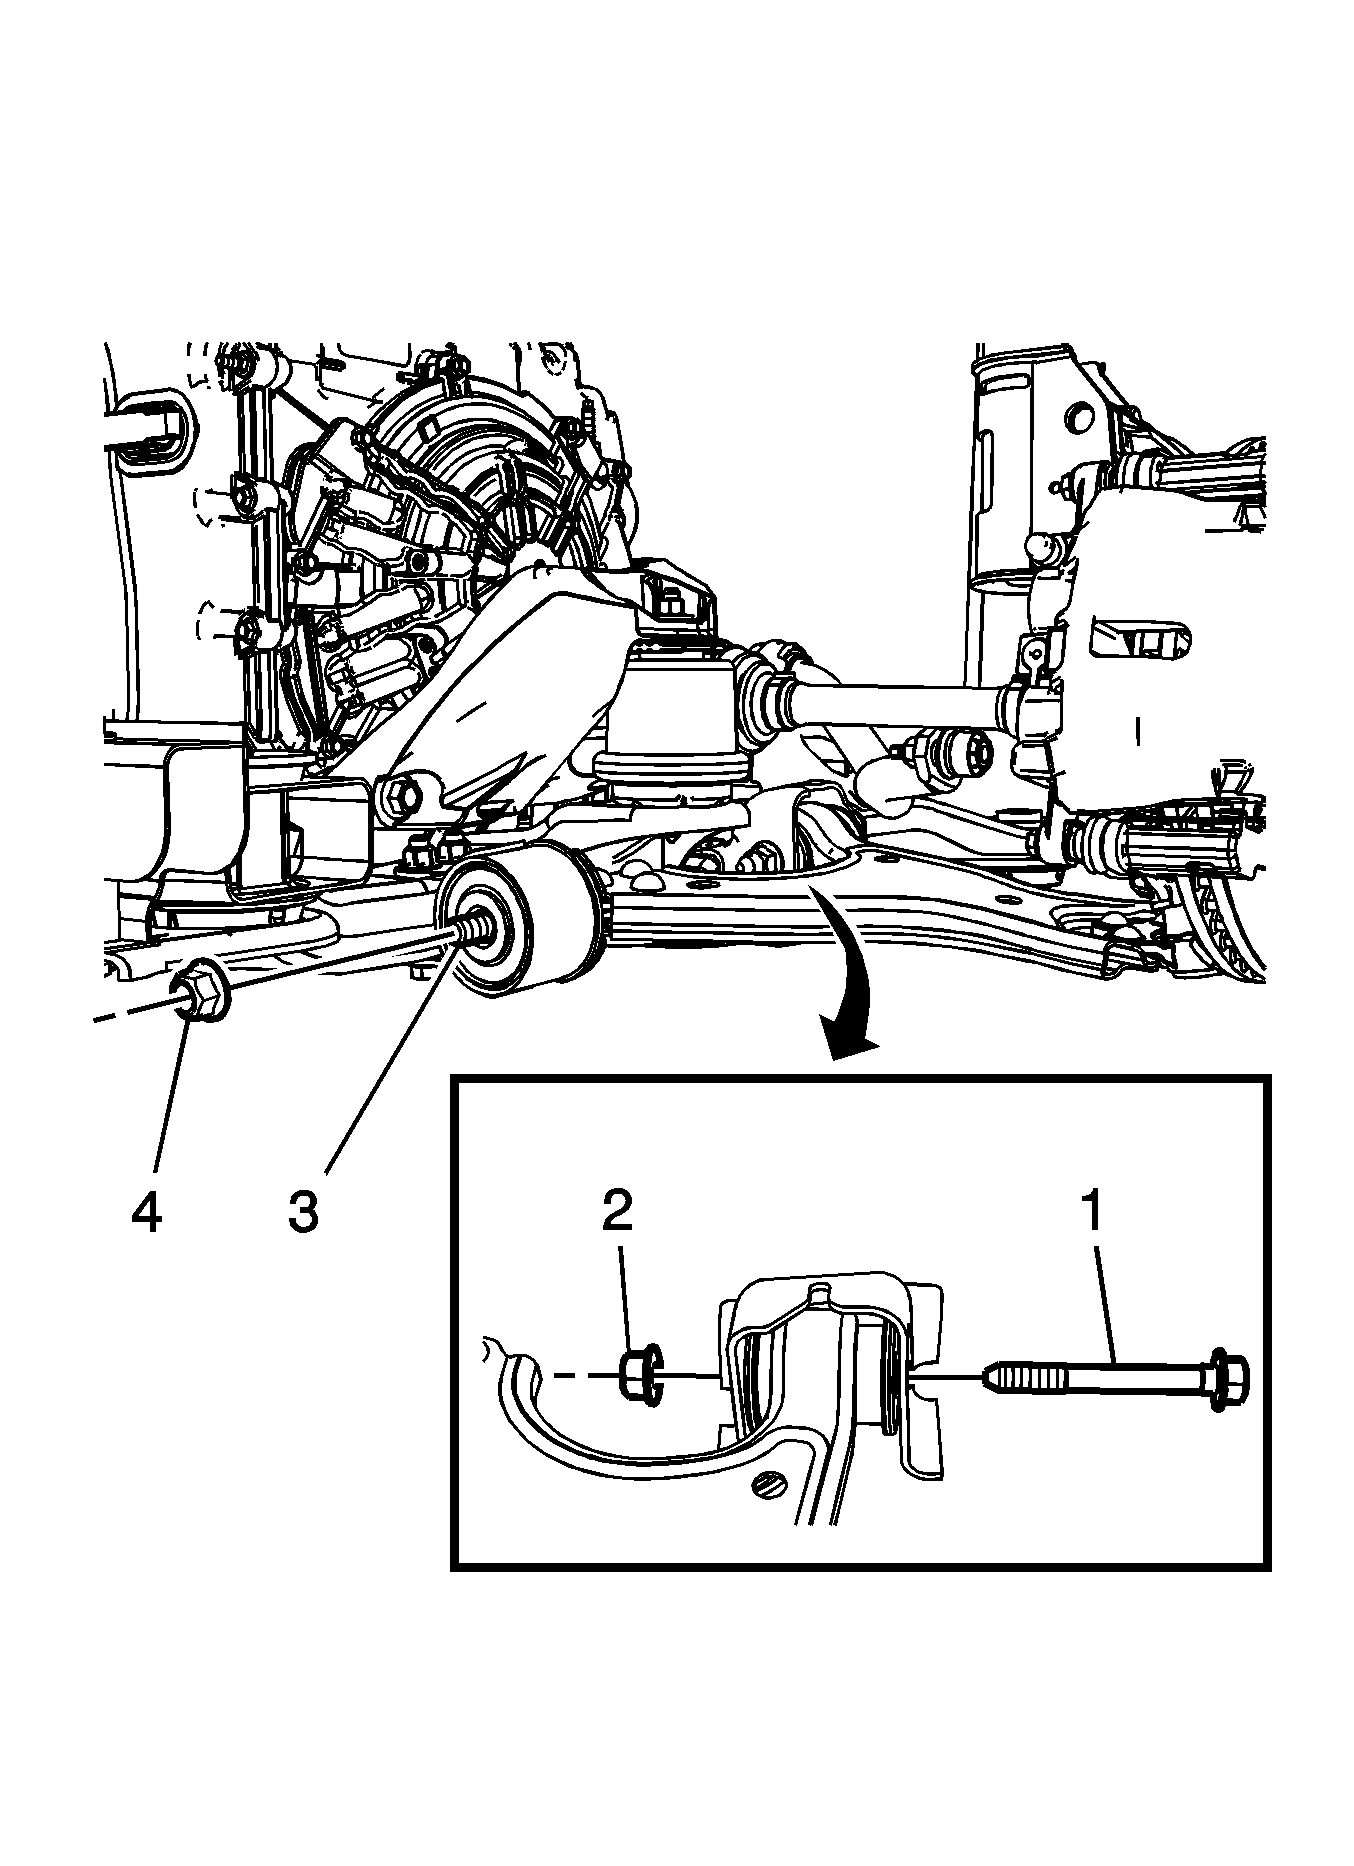
- Remove the front lower control arm front nut (4) from the stud (3).
- Remove the lower control arm rear nut (2) and bolt (1).
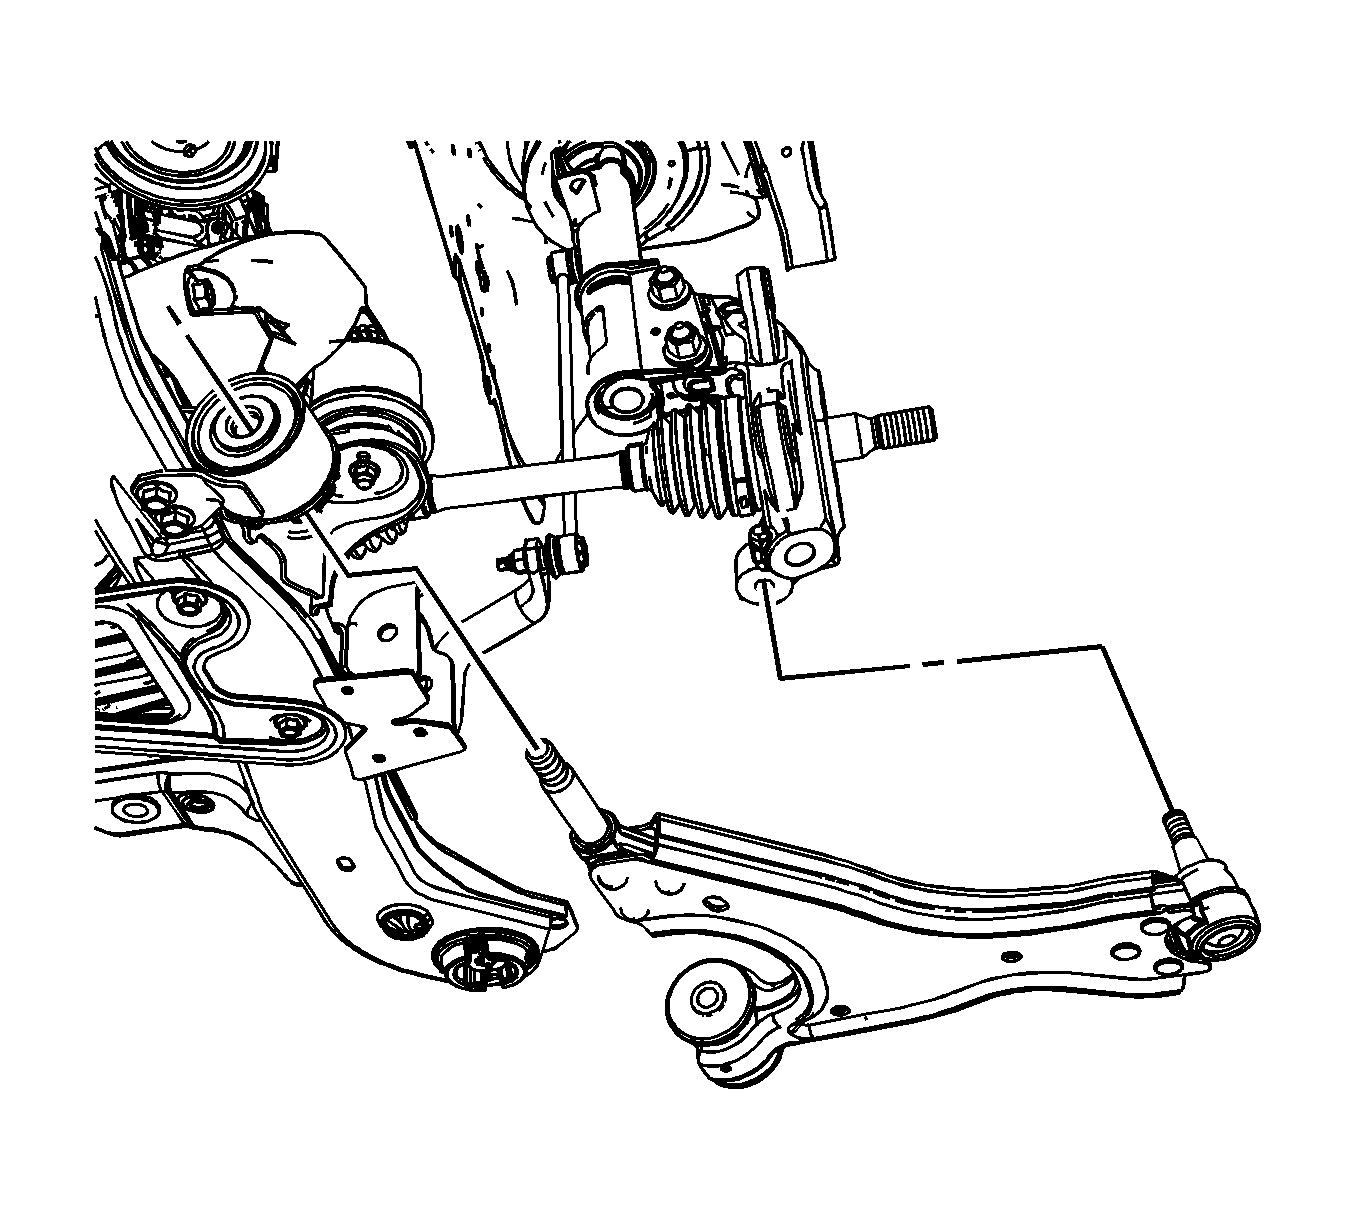
- Remove the front lower control arm from the vehicle.


Installation Procedure
- Position the front lower control arm in the frame.
- Install the front lower control arm rear nut (2) and bolt (1). Hand tighten the rear nut (2).
- Install the front lower control arm front nut (4) and the stud (3) and tighten to 195 N·m (144 lb ft).
- Tighten the front rear lower control arm rear nut (2) to 150 N·m (111 lb ft)..
- Install the lower ball joint in the knuckle.
- Install the ball joint nut and tighten to 40 N·m (30 lb ft) plus 120 degrees.
- Install the outer tie rod end. Refer to Steering Linkage Outer Tie Rod Replacement.
- Install the tire and wheel assembly. Refer to Tire and Wheel Removal and Installation.
- Remove the support and lower the vehicle.


Caution: Refer to Fastener Caution in the Preface section.
Note: Use the appropriate size wrench to hold the bolt while torquing the nut.

