Tail Lamp Replacement Traverse

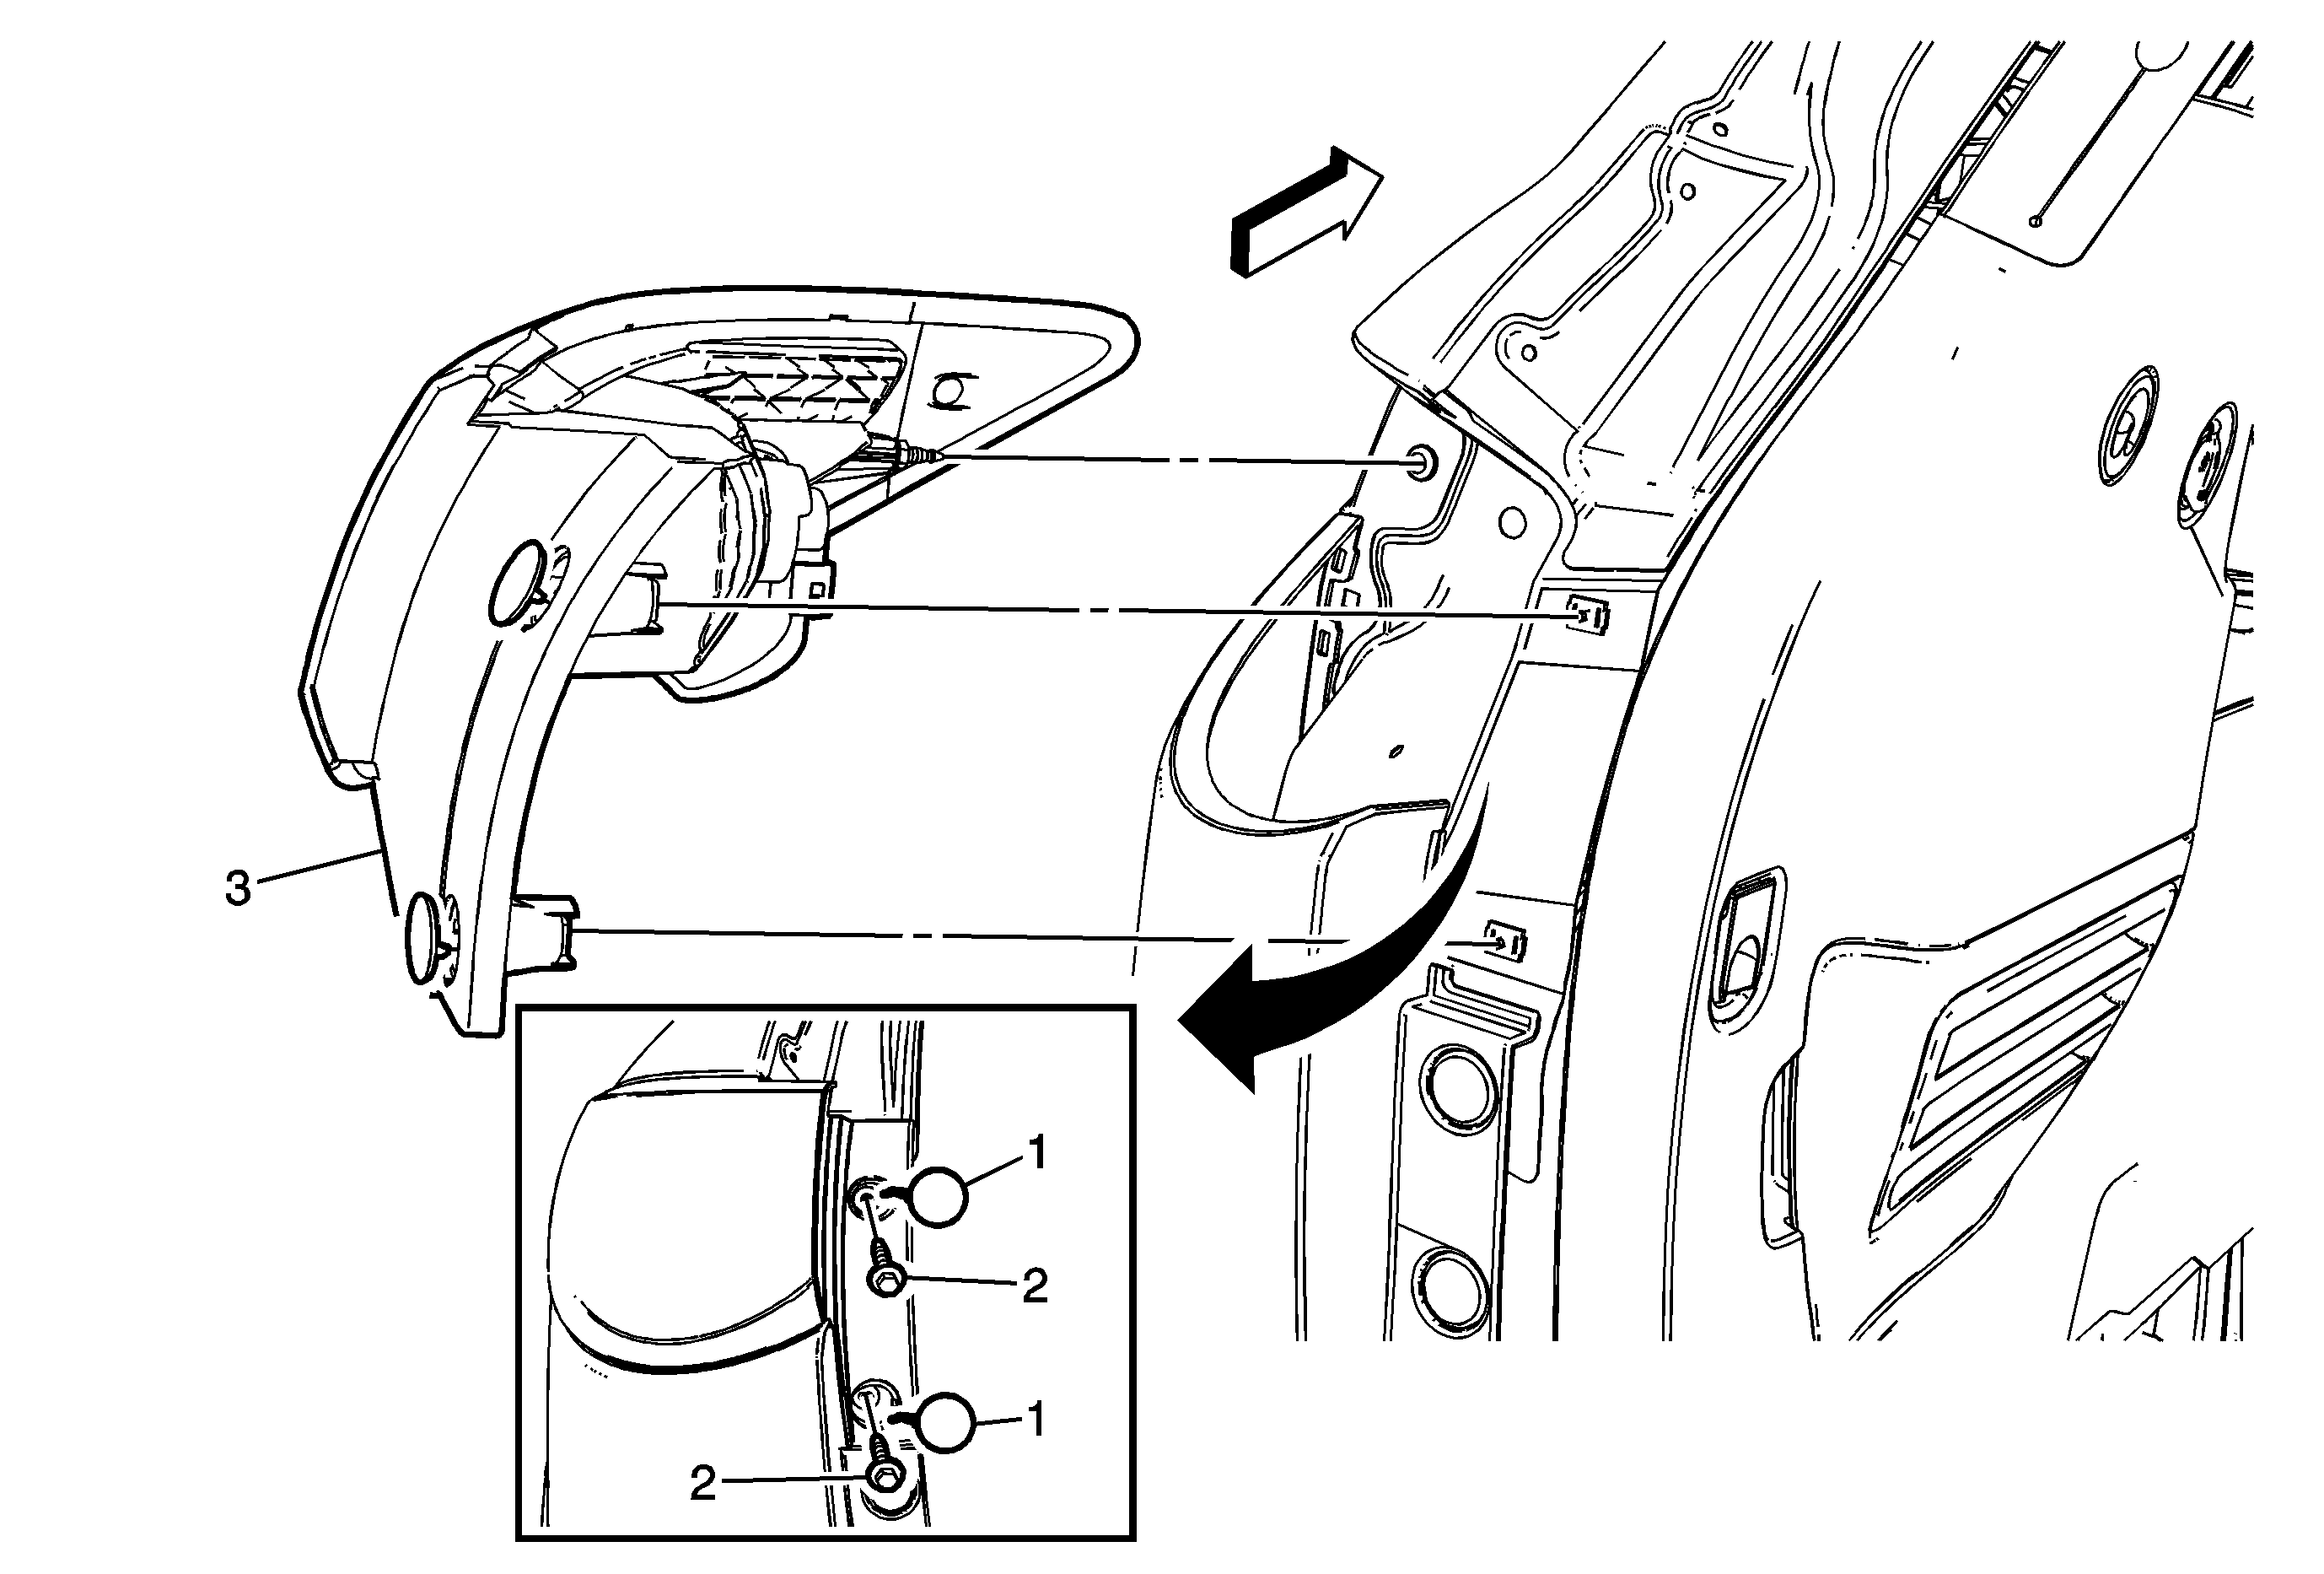
Callout | Component Name |
|---|---|
Preliminary ProcedureOpen the lift gate in order to access the tail lamp access hole covers. | |
1 | Tail Lamp Access Hole Cover (Qty: 2) ProcedureUse a small flat-bladed tool in order to disengage, Do Not Remove the covers. |
2 | Tail Lamp Screw (Qty: 2) Caution: Refer to Fastener Caution in the Preface section. Tighten |
3 | Tail Lamp Assembly Procedure
|
Tail Lamp Replacement Acadia

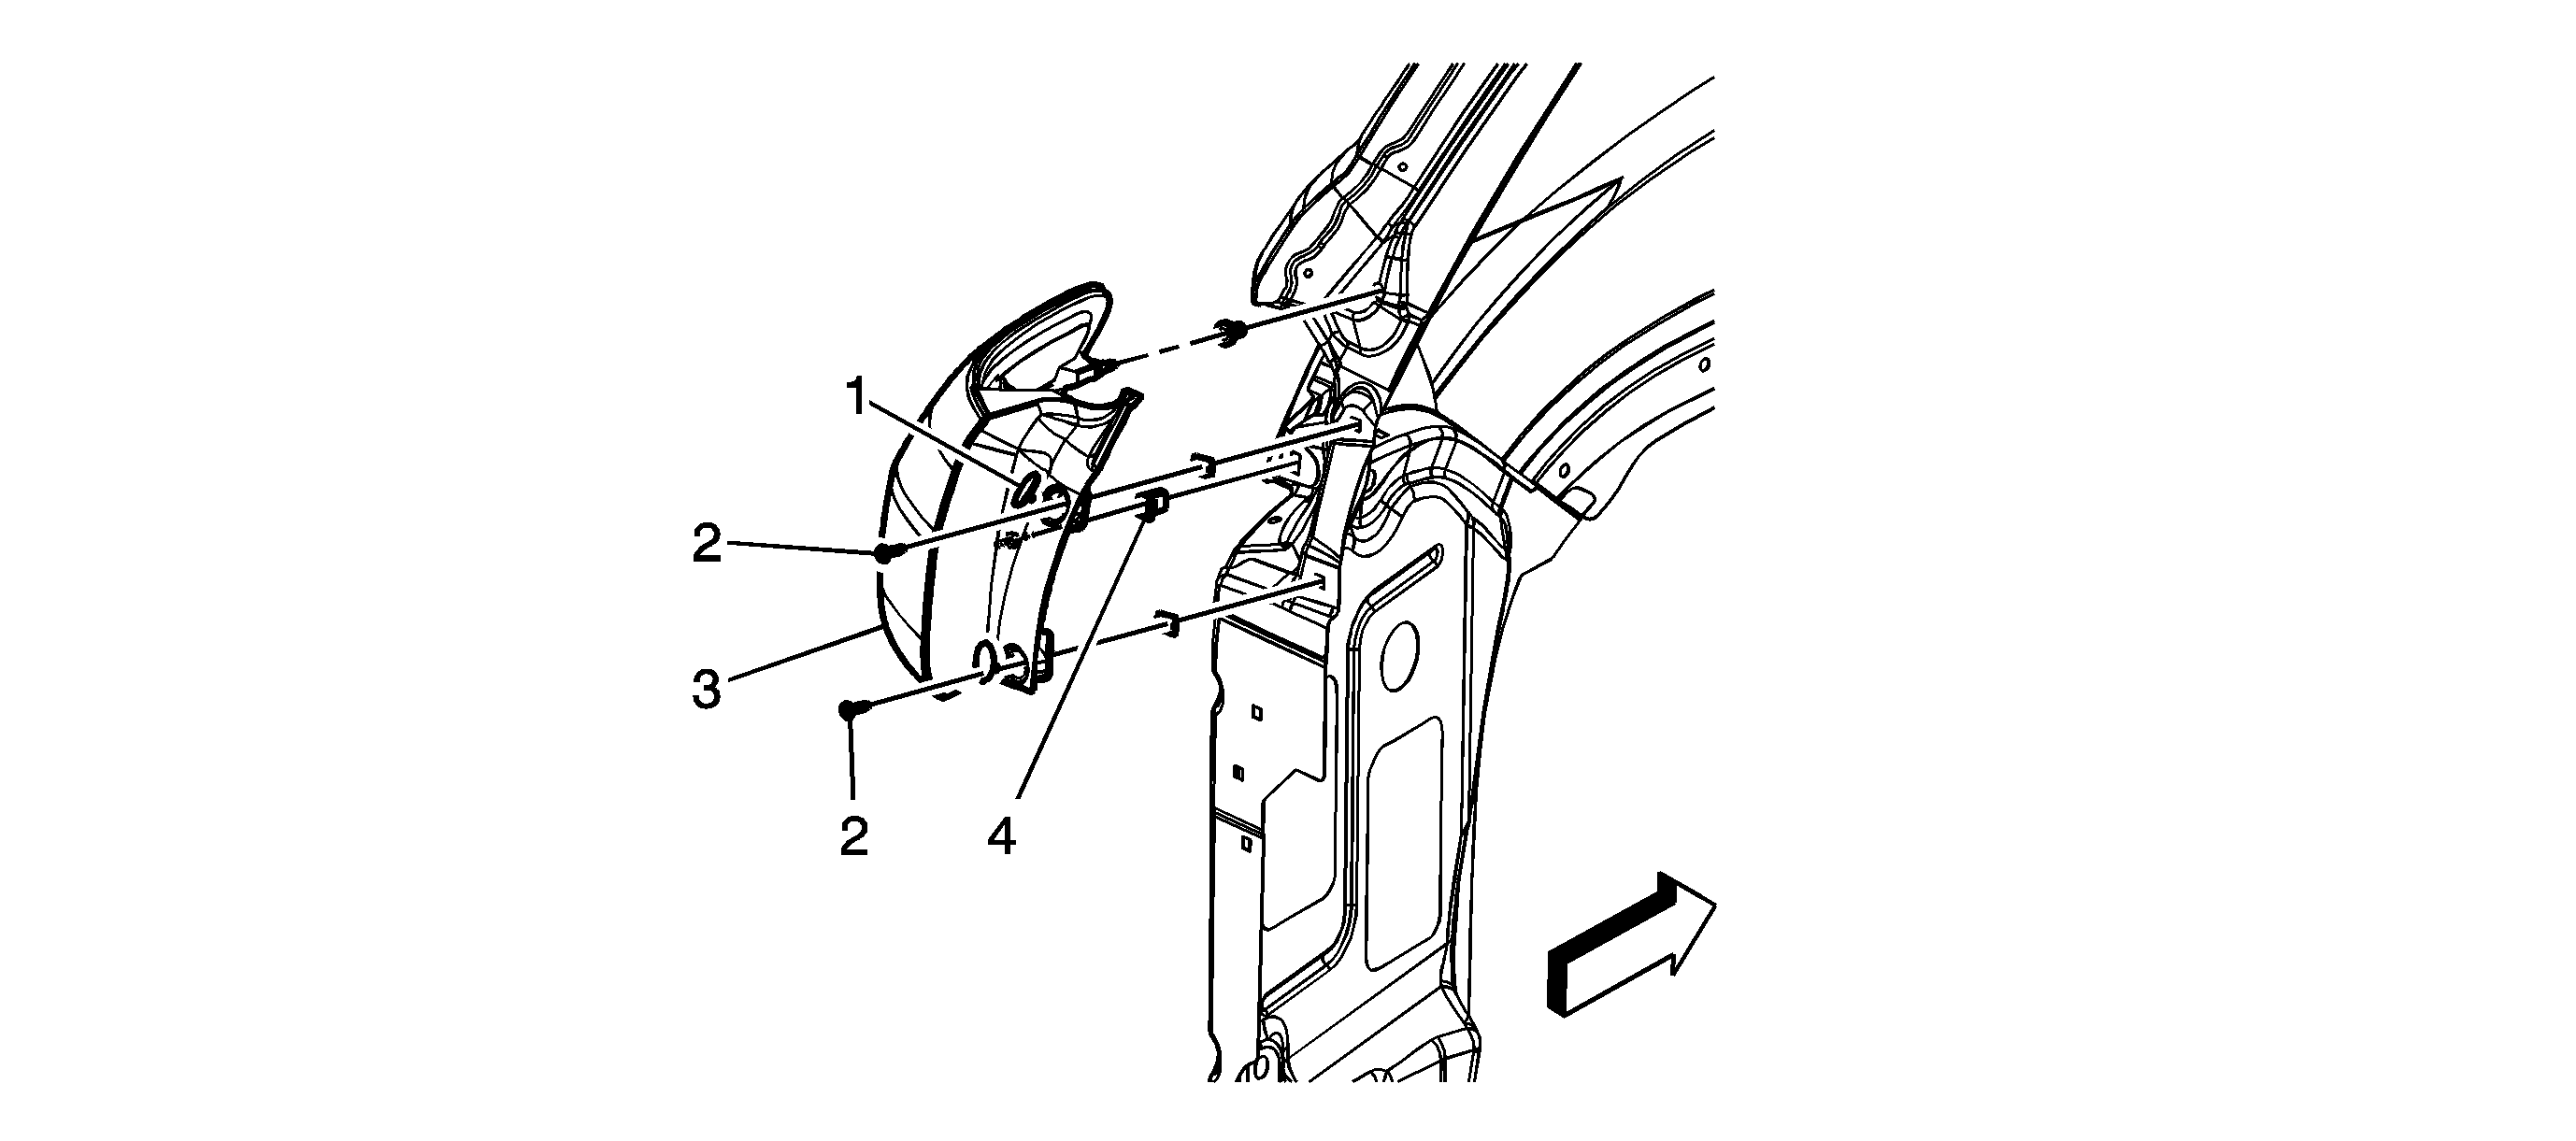
Callout | Component Name |
|---|---|
Preliminary ProcedureOpen the lift gate in order to access the tail lamp access hole covers. | |
1 | Tail Lamp Access Hole Cover (Qty: 2) Tip |
2 | Tail Lamp Screw (Qty: 2) Caution: Refer to Fastener Caution in the Preface section. Tighten |
3 | Tail Lamp Assembly Tip |
4 | Tail Lamp Filler Panel Nut Tip |
Tail Lamp Replacement Enclave

Callout | Component Name |
|---|---|
Preliminary ProcedureOpen the lift gate in order to access the tail lamp access hinged hole covers. | |
1 | Tail Lamp Access Hinged Hole Cover (Qty: 2) ProcedureUse a small flat bladed tool at the topside of the covers in order to release and open the hinged covers. |
2 | Tail Lamp Screw (Qty: 2) Caution: Refer to Fastener Caution in the Preface section. Tighten |
3 | Tail Lamp Assembly Procedure
|
4 | Tail Lamp Filler Panel Nuts Tip |
Tail Lamp Replacement OUTLOOK

Callout | Component Name |
|---|---|
Preliminary ProcedureOpen the lift gate in order to access the tail lamp access hole covers. | |
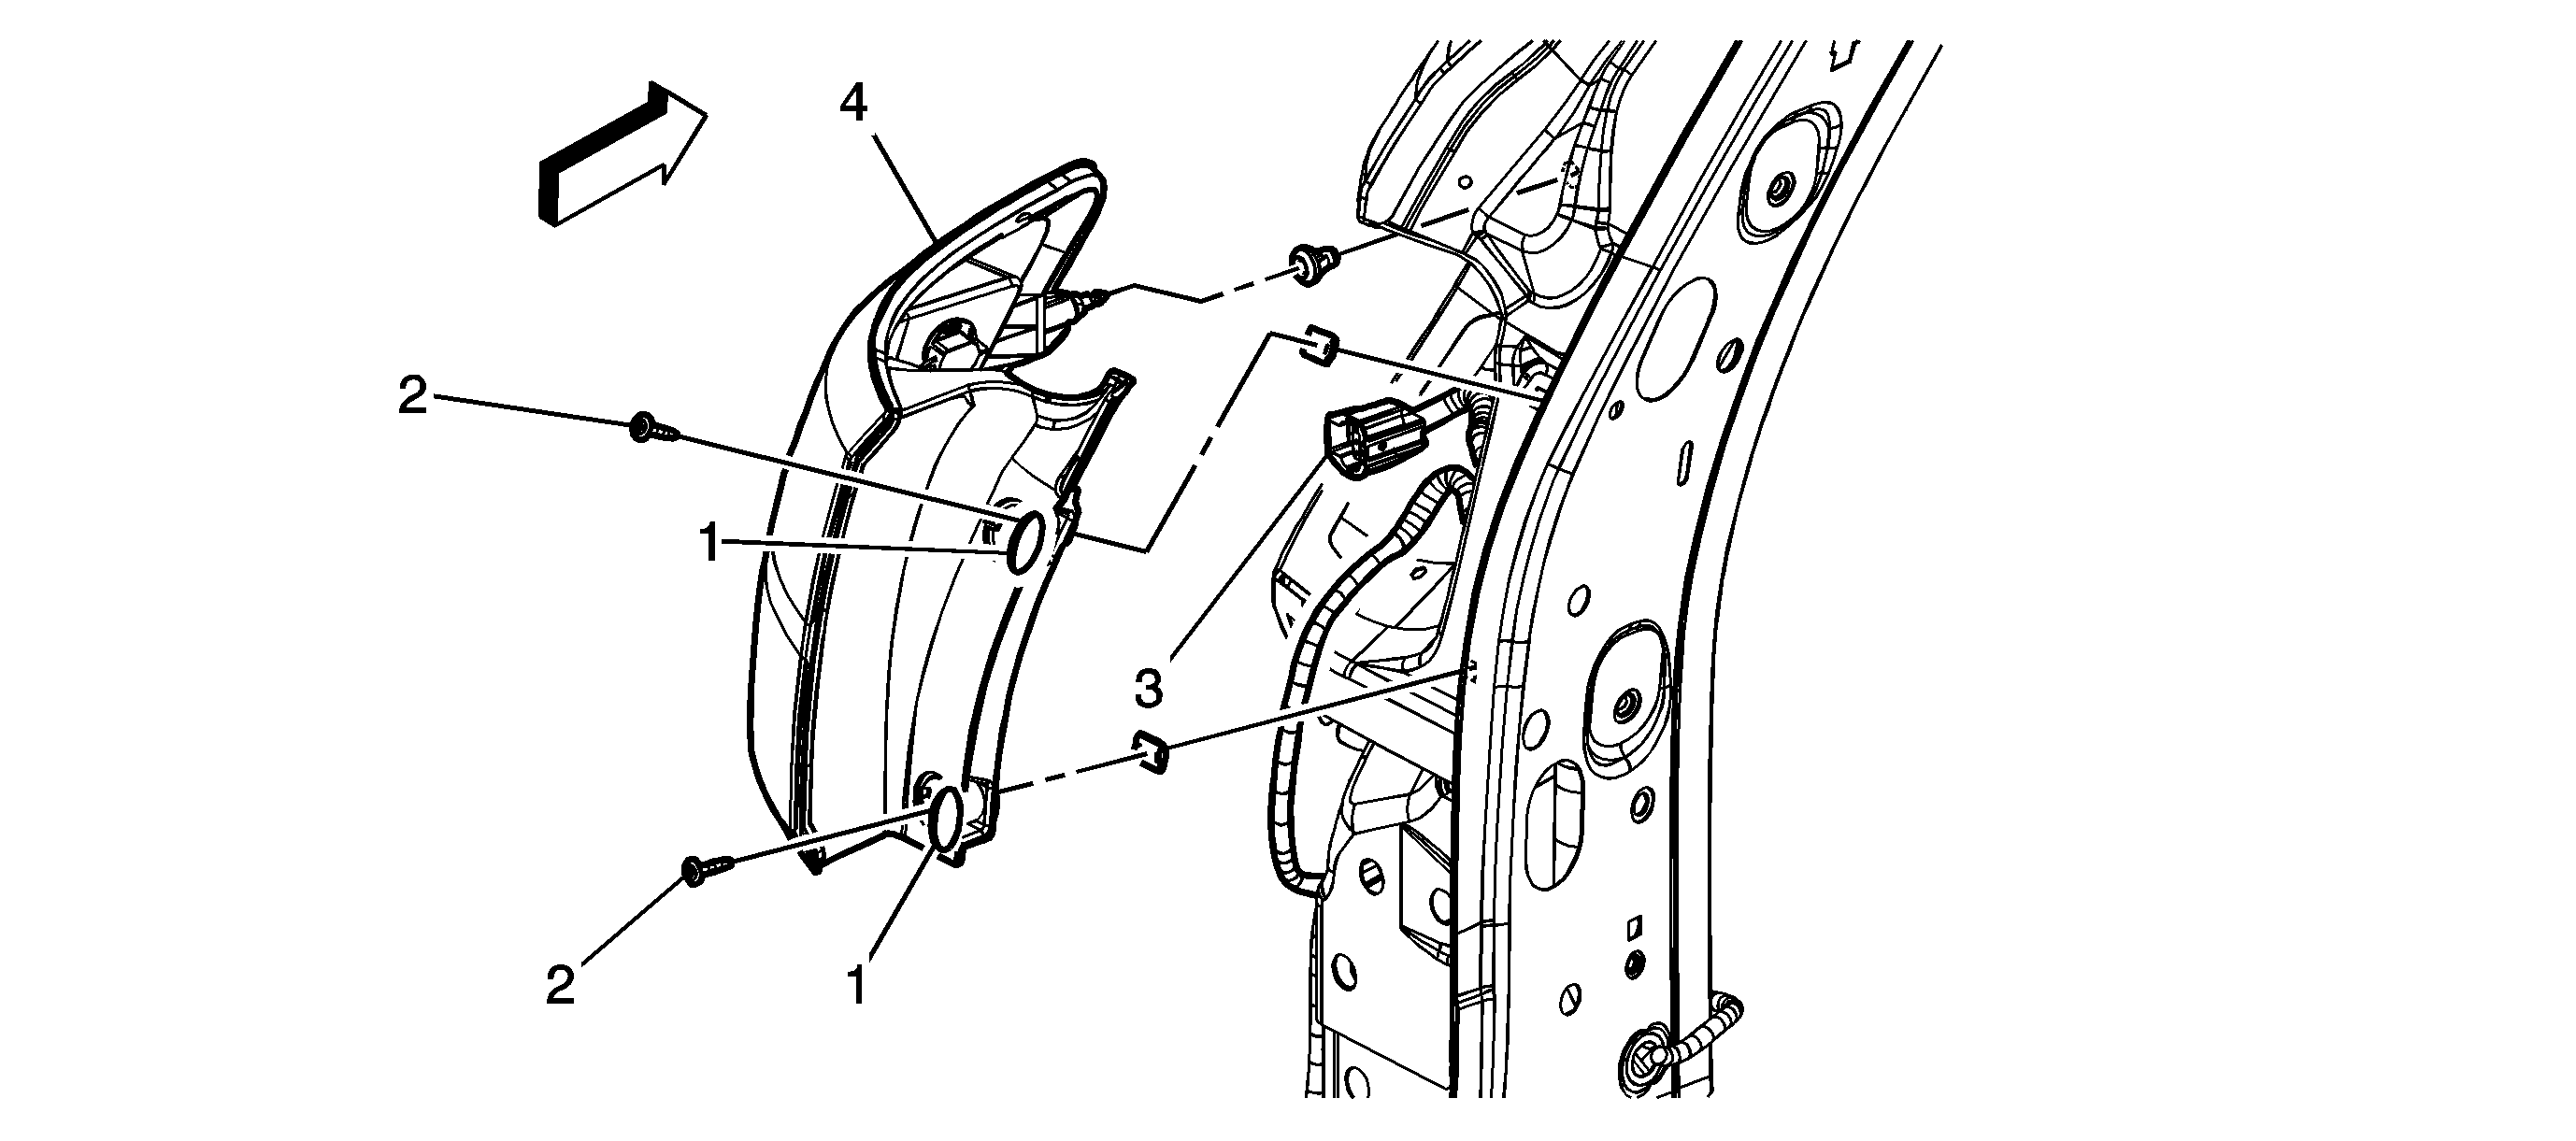
1 | Tail Lamp Access Hole Cover (Qty: 2) ProcedureUse a small flat-bladed tool in order to remove the covers. |
2 | Tail Lamp Screw (Qty: 2) Caution: Refer to Fastener Caution in the Preface section. Tighten |
3 | Tail Lamp Wiring Harness Connector ProcedureDisconnect the harness prior to removing the lamp assembly. |
4 | Tail Lamp Assembly Tip |
