| Table 1: | 4-5-6 Clutch Piston Installation |
| Table 2: | 4-5-6 Clutch Dam Installation |
| Table 3: | 4-5-6 Clutch Plates Installation |
| Table 4: | 3-5 Reverse Clutch Plates Installation |
| Table 5: | Piston and Reluctor Wheel Installation |
| Table 6: | 35R and 456 Clutch Piston Air Check |
4-5-6 Clutch Piston Installation
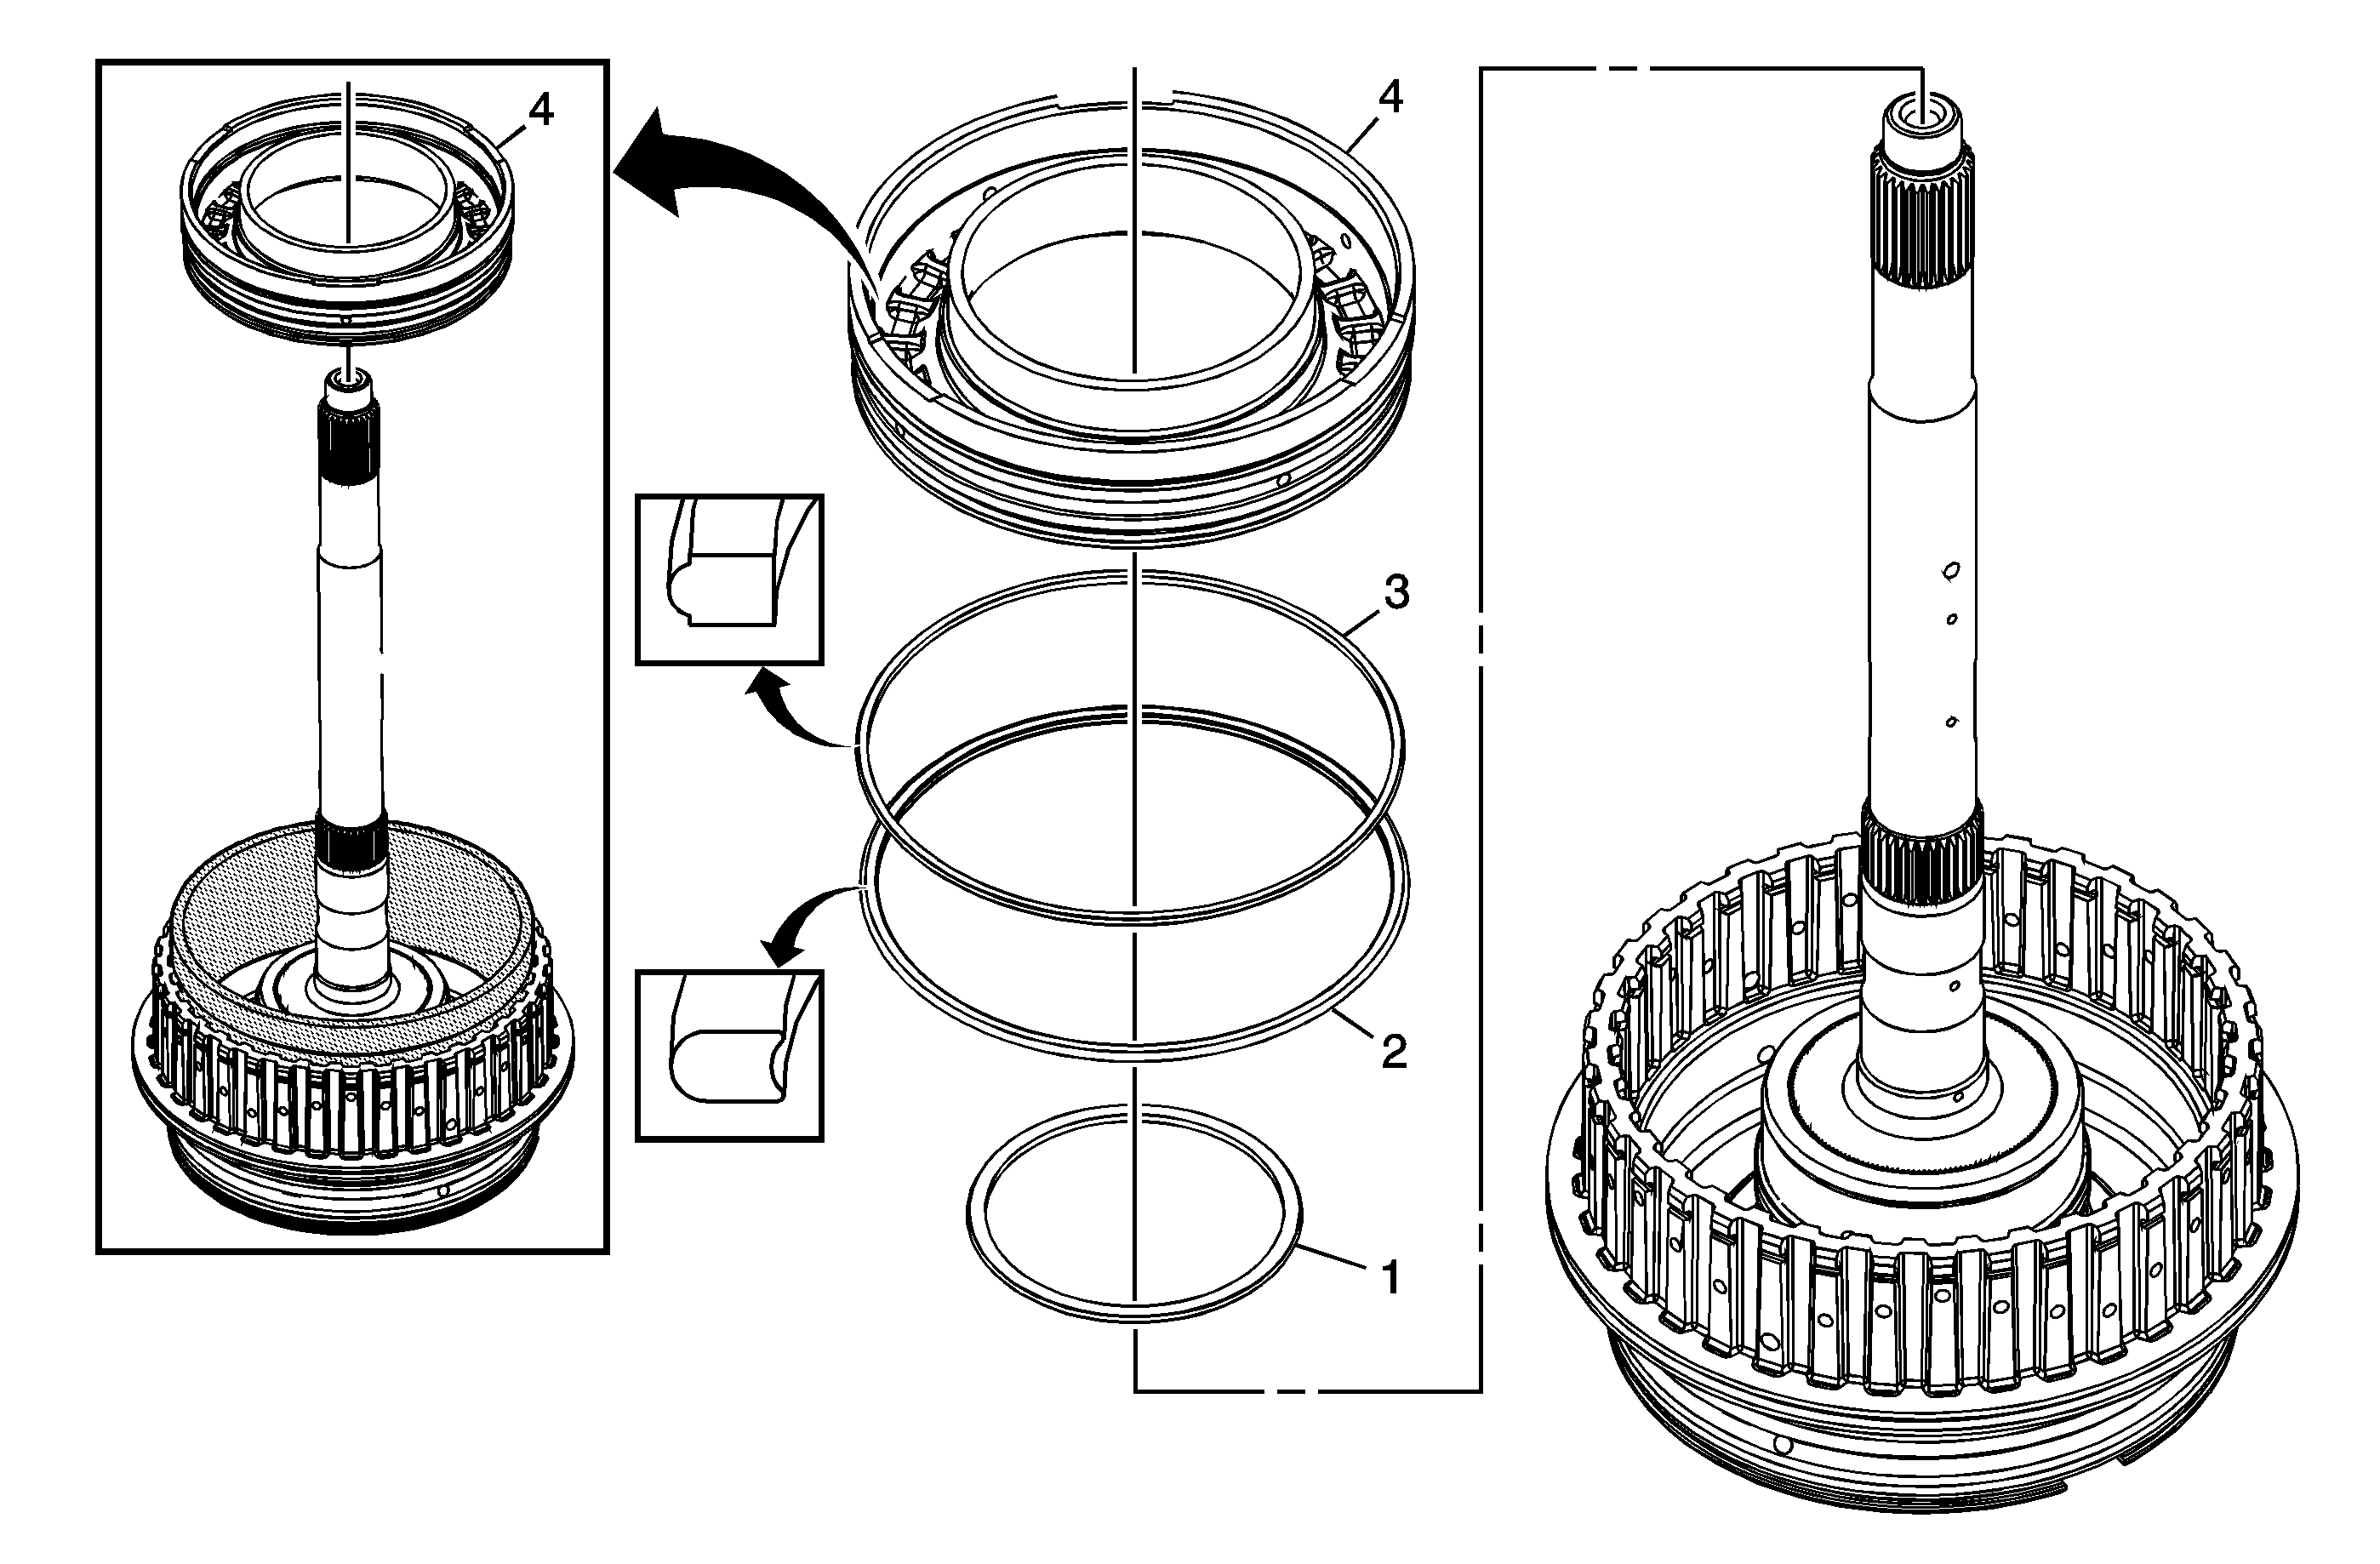
Callout | Component Name |
|---|---|
1 | 4-5-6 Clutch Piston Inner Seal |
2 | 4-5-6 Clutch Piston Outer Seal (Rounded) |
3 | 4-5-6 Clutch Piston Outer Seal (Stepped) (Orange) |
4 | 4-5-6 Clutch Piston Tip Special ToolDT-47859 Piston Outer Seal Protector |
4-5-6 Clutch Dam Installation
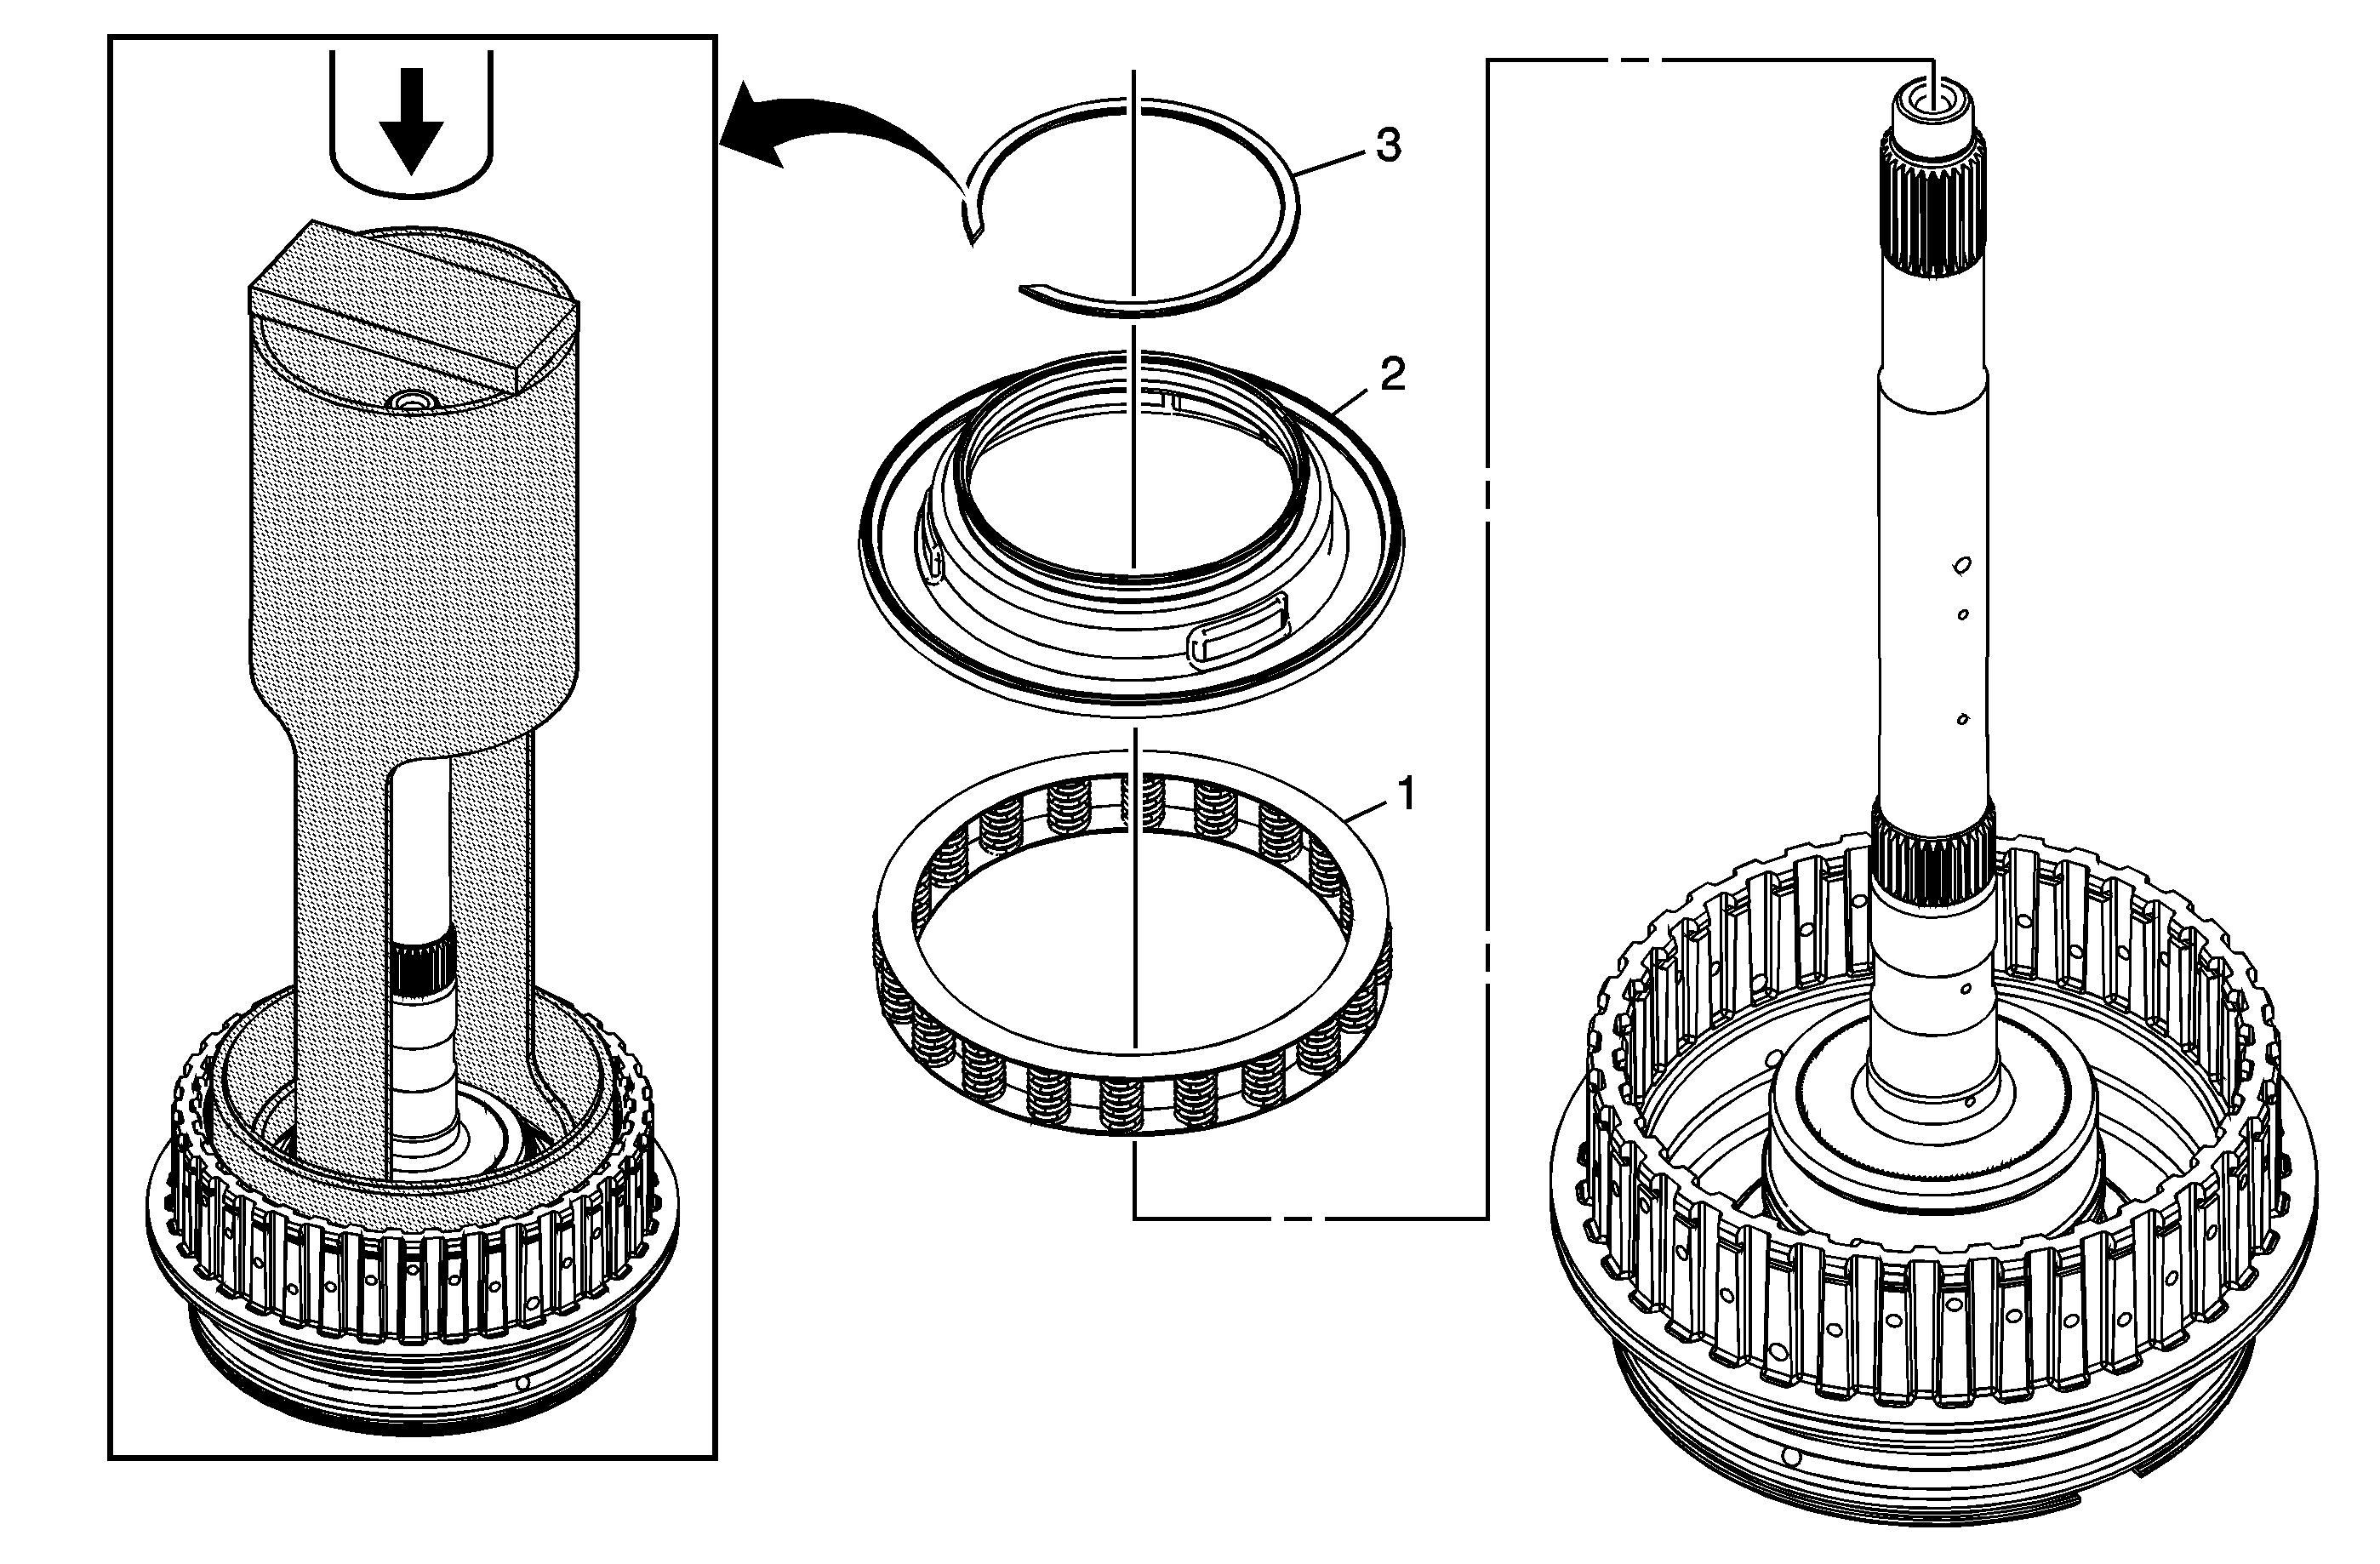
Callout | Component Name | ||||
|---|---|---|---|---|---|
1 | 4-5-6 Clutch Spring | ||||
2 | 4-5-6 Clutch Piston Fluid Dam Tip Special ToolDT-47693 Dam Protector | ||||
3 | 4-5-6 Clutch Dam Retaining Ring Special Tools
|
4-5-6 Clutch Plates Installation
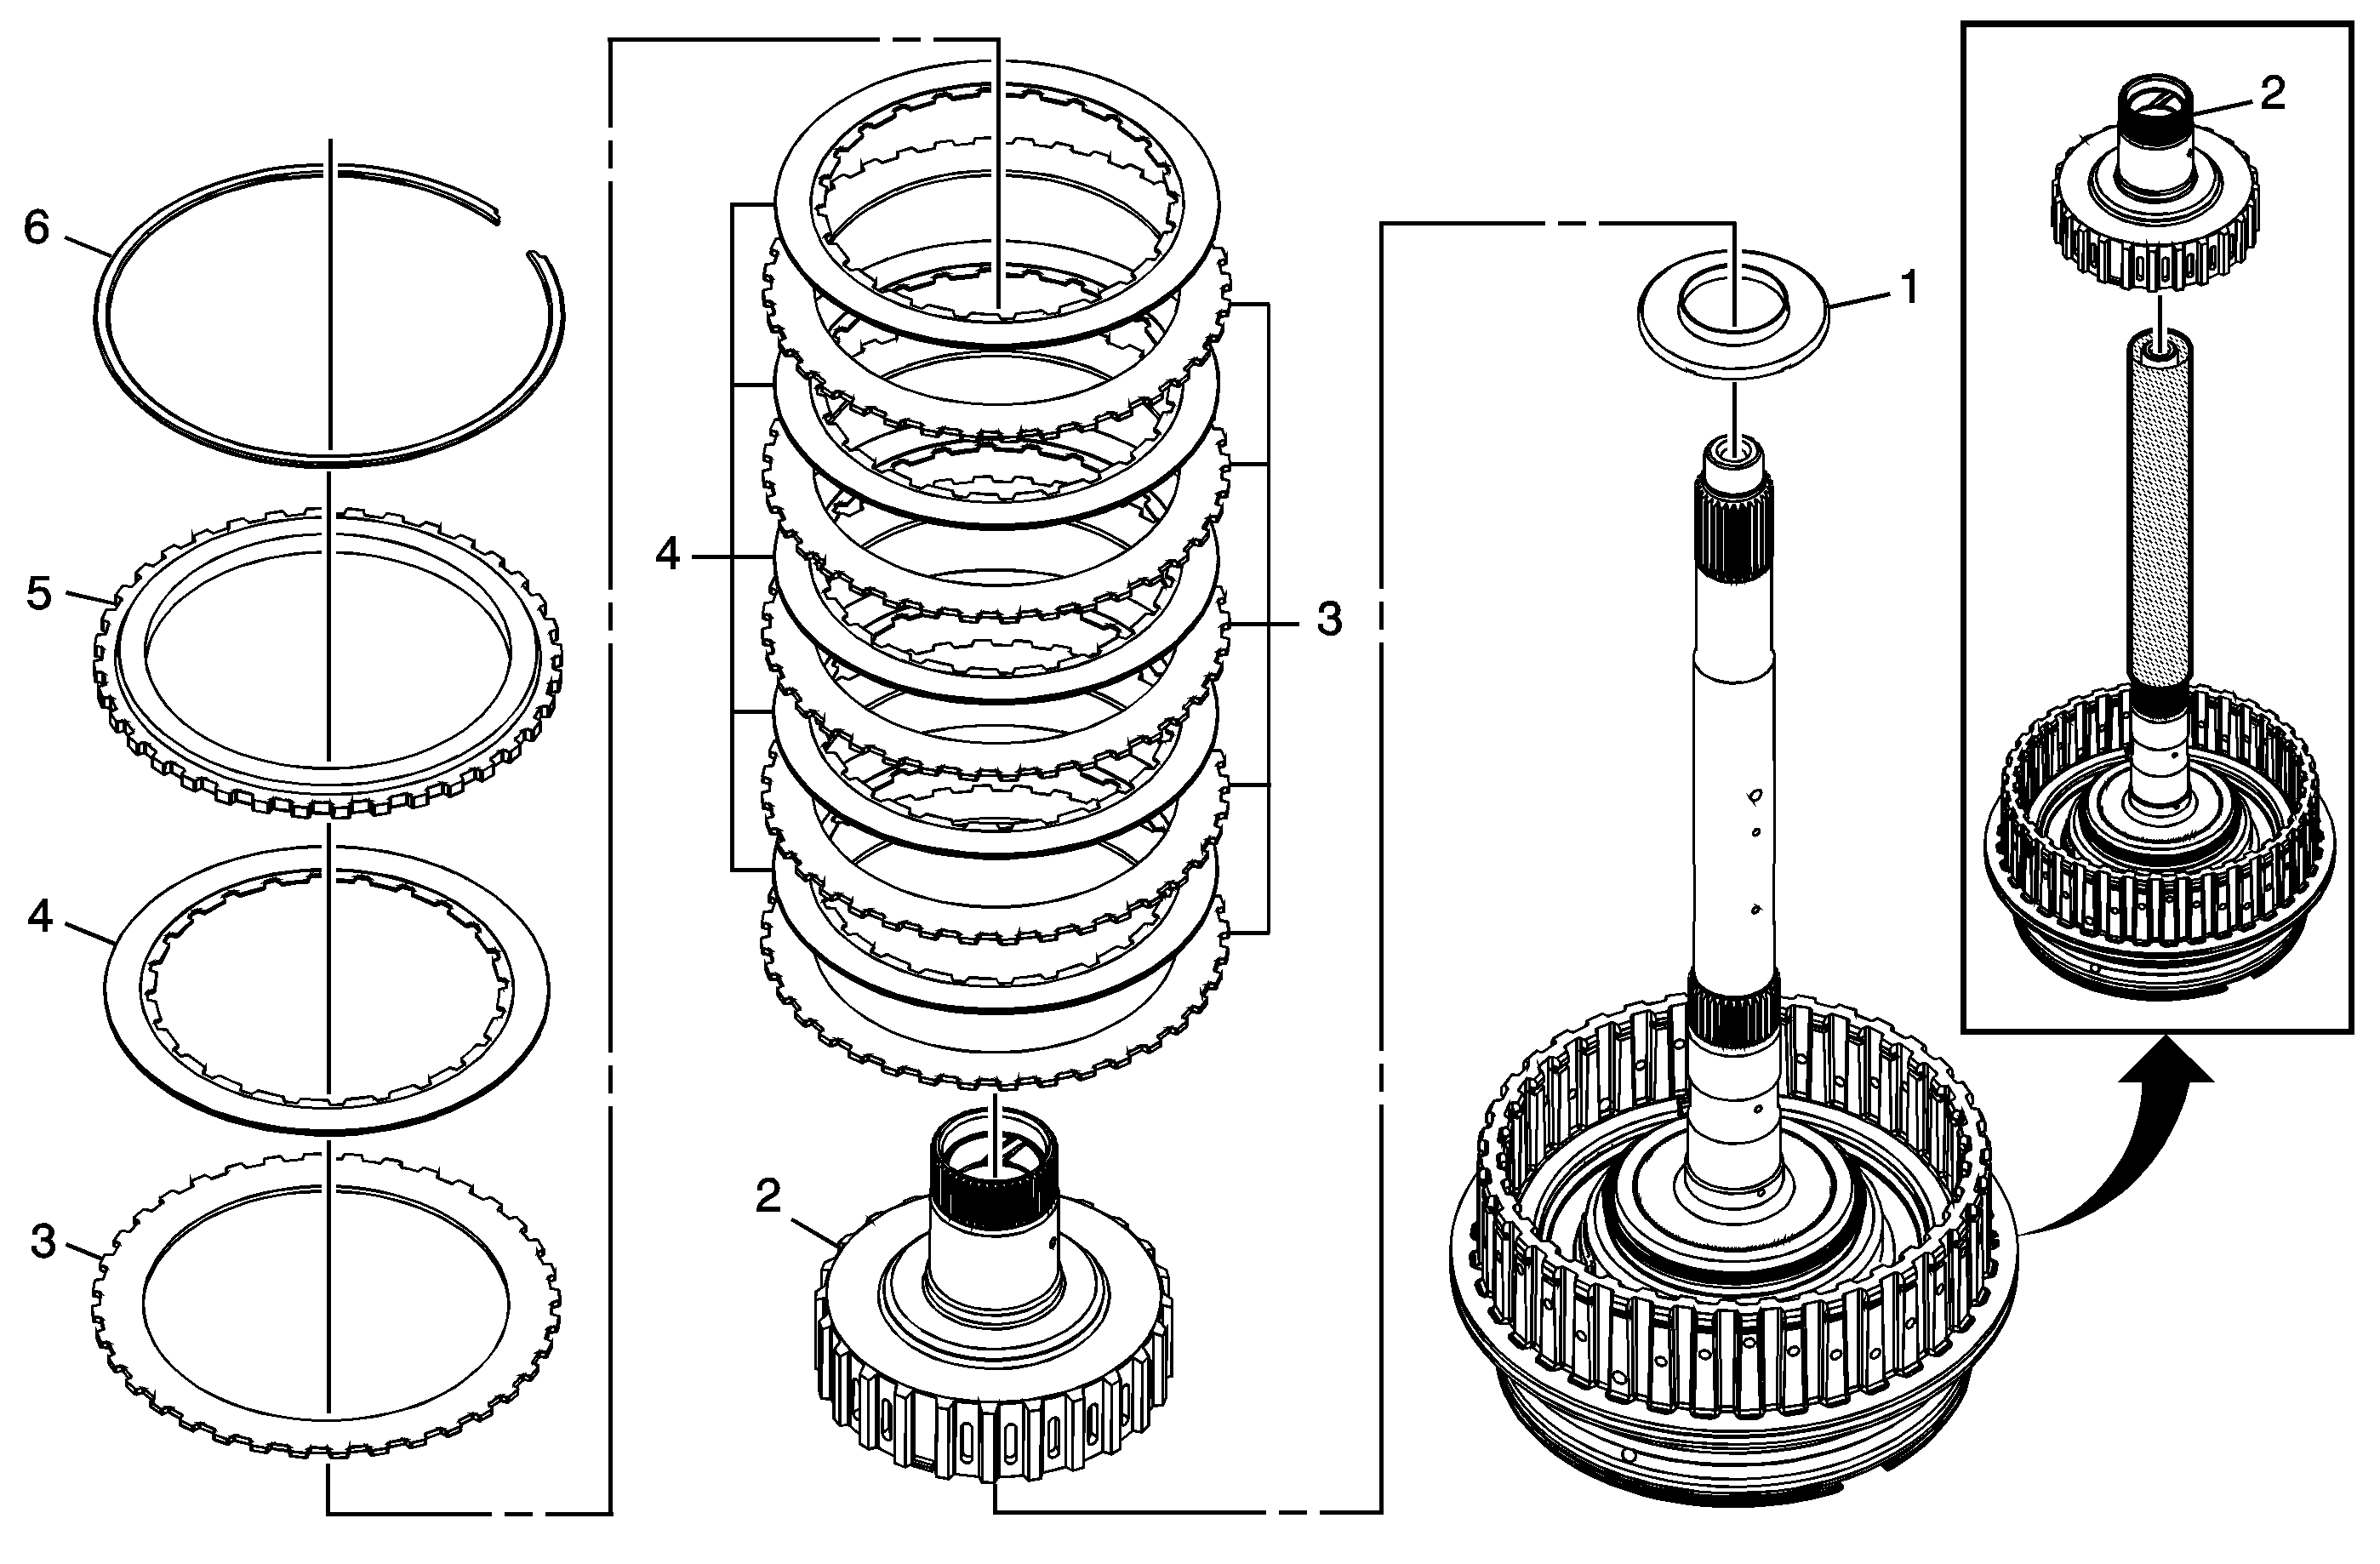
Callout | Component Name |
|---|---|
1 | 4-5-6 Clutch Hub Thrust Bearing Tip |
2 | Reaction Carrier Hub Assembly Notice: Failure to use DT 48551 could cause damage to the hub assembly bushings which could cause premature transmission failure. Tool RequiredDT-48551 Reaction Hub Bushing Protector |
3 | 4-5-6 Clutch Plate (Qty: 6) |
4 | 4-5-6 Clutch (w/Friction Material) Plate Assembly (Qty: 6) |
5 | 4-5-6 Clutch Backing Plate |
6 | 4-5-6 Clutch Backing Plate Retaining Ring Tip |
3-5 Reverse Clutch Plates Installation
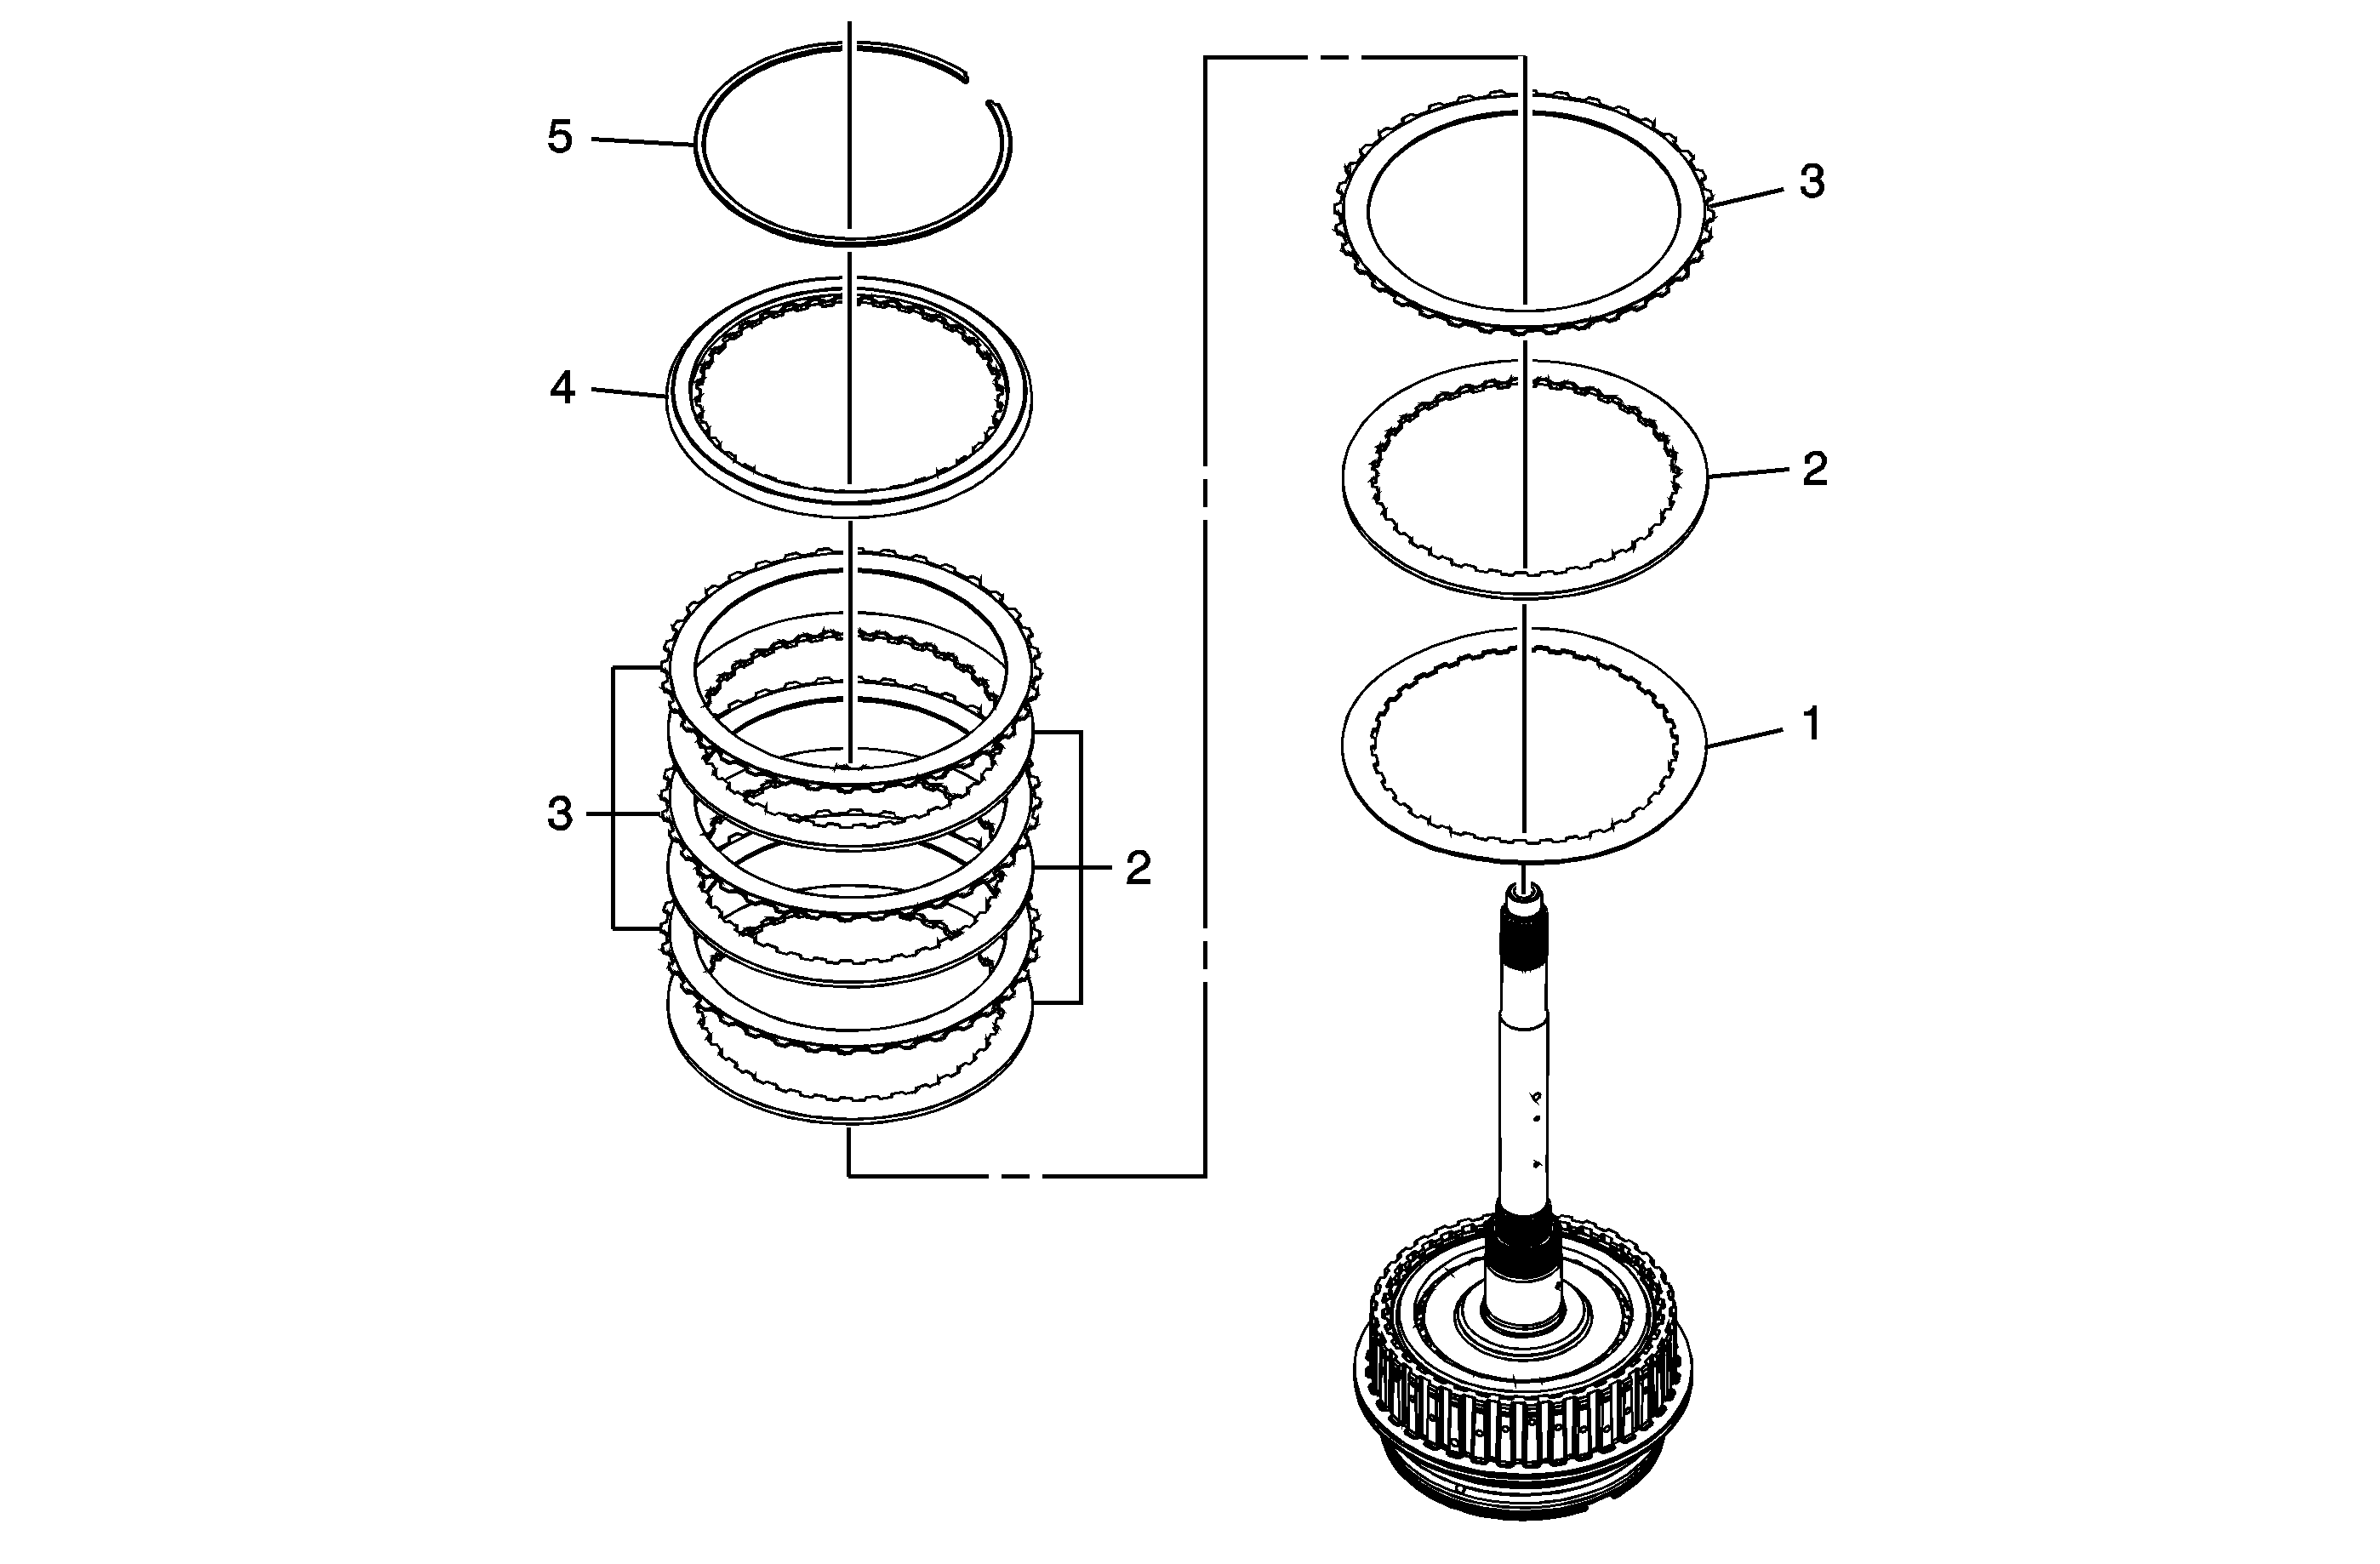
Callout | Component Name |
|---|---|
1 | 3-5 Reverse Clutch (Waved) Plate |
2 | 3-5 Reverse Clutch Plate (Qty: 4) |
3 | 3-5 Reverse Clutch (w/Friction Material) Plate Assembly (Qty: 4) |
4 | 3-5 Reverse Clutch Backing Plate |
5 | 3-5 Reverse Clutch Backing Plate Retaining Ring |
Piston and Reluctor Wheel Installation
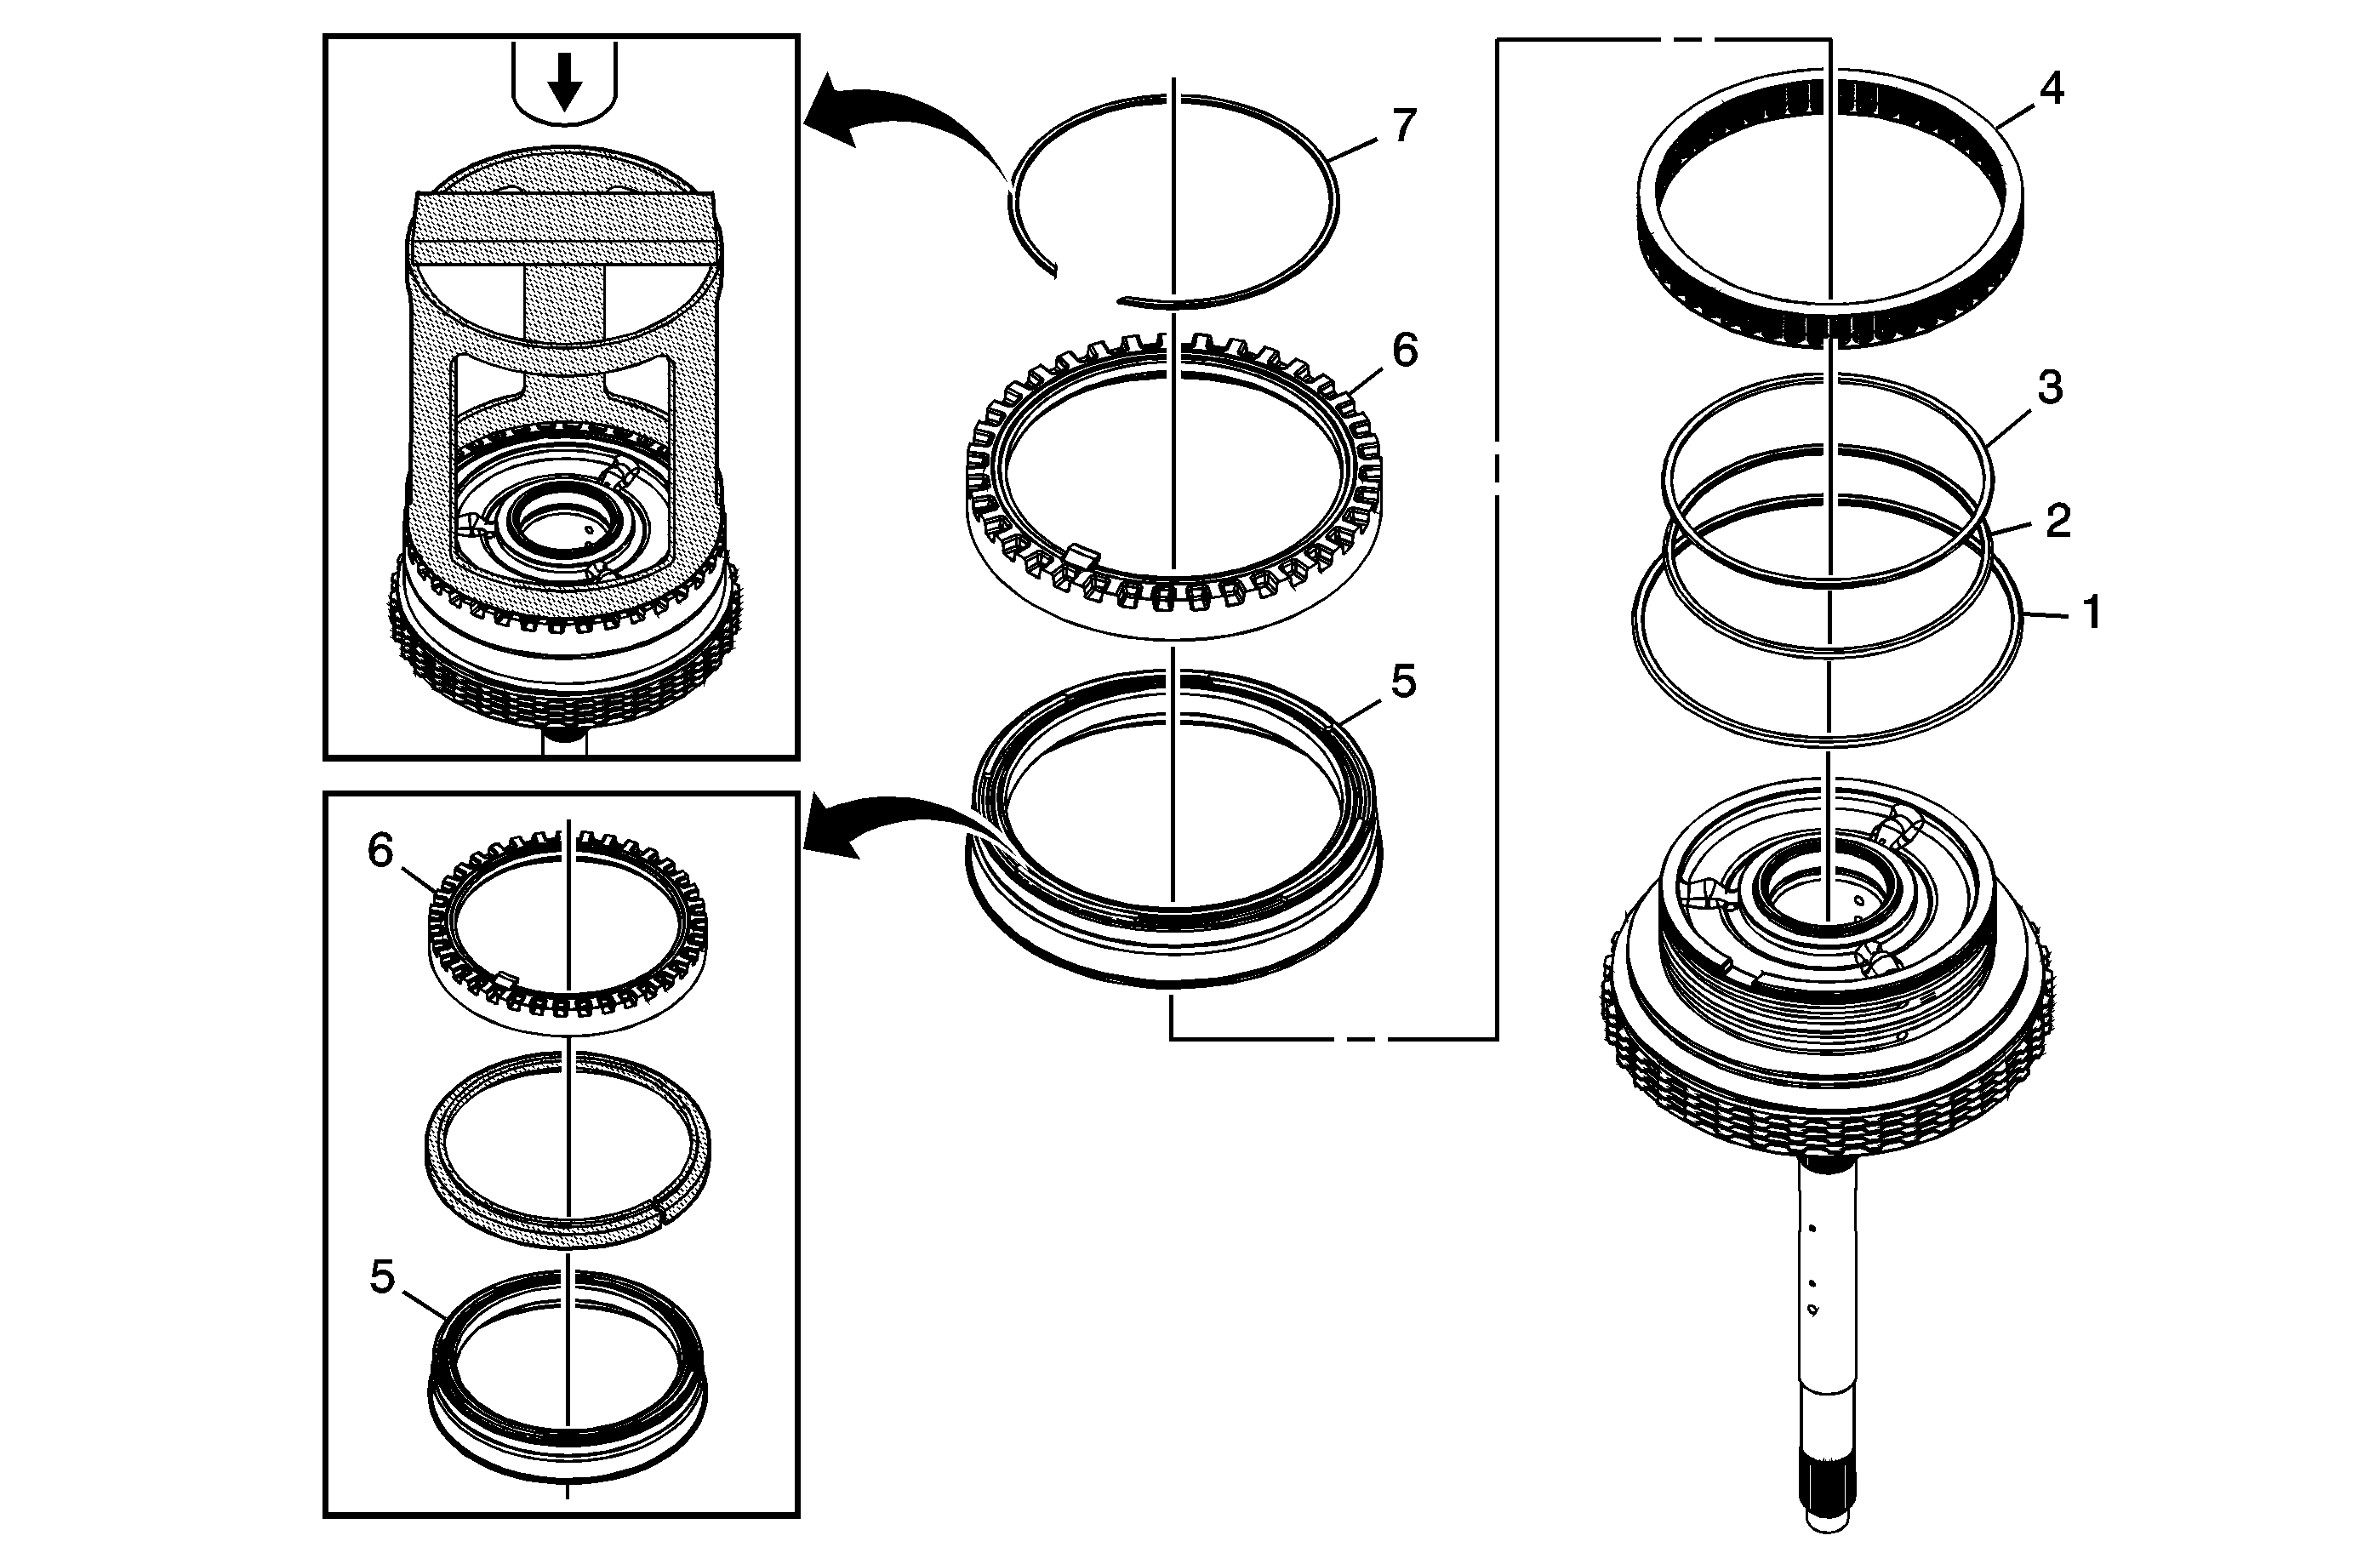
Callout | Component Name | ||||
|---|---|---|---|---|---|
1 | 3-5 Reverse Clutch Piston Dam Seal | ||||
2 | 3-5 Reverse Clutch Piston Inner Seal (Black) Tip | ||||
3 | 3-5 Reverse Clutch Piston Inner Seal (Orange) Tip | ||||
4 | 3-5 Reverse Clutch Spring Assembly | ||||
5 | 3-5 Reverse Clutch Piston Tip
Special ToolJ-46622 Piston Seal Protector | ||||
6 | A/Trans Input Shaft Speed Sensor Reluctor Wheel | ||||
7 | A/Trans Input Shaft Speed Sensor Reluctor Wheel Retaining Ring Notice: Compress the reluctor wheel just enough to clear the retainer ring groove. Over compressing the reluctor wheel will break the alignment tab and the clutch housing. Special ToolDT-47694 Piston Spring Compressor |
35R and 456 Clutch Piston Air Check
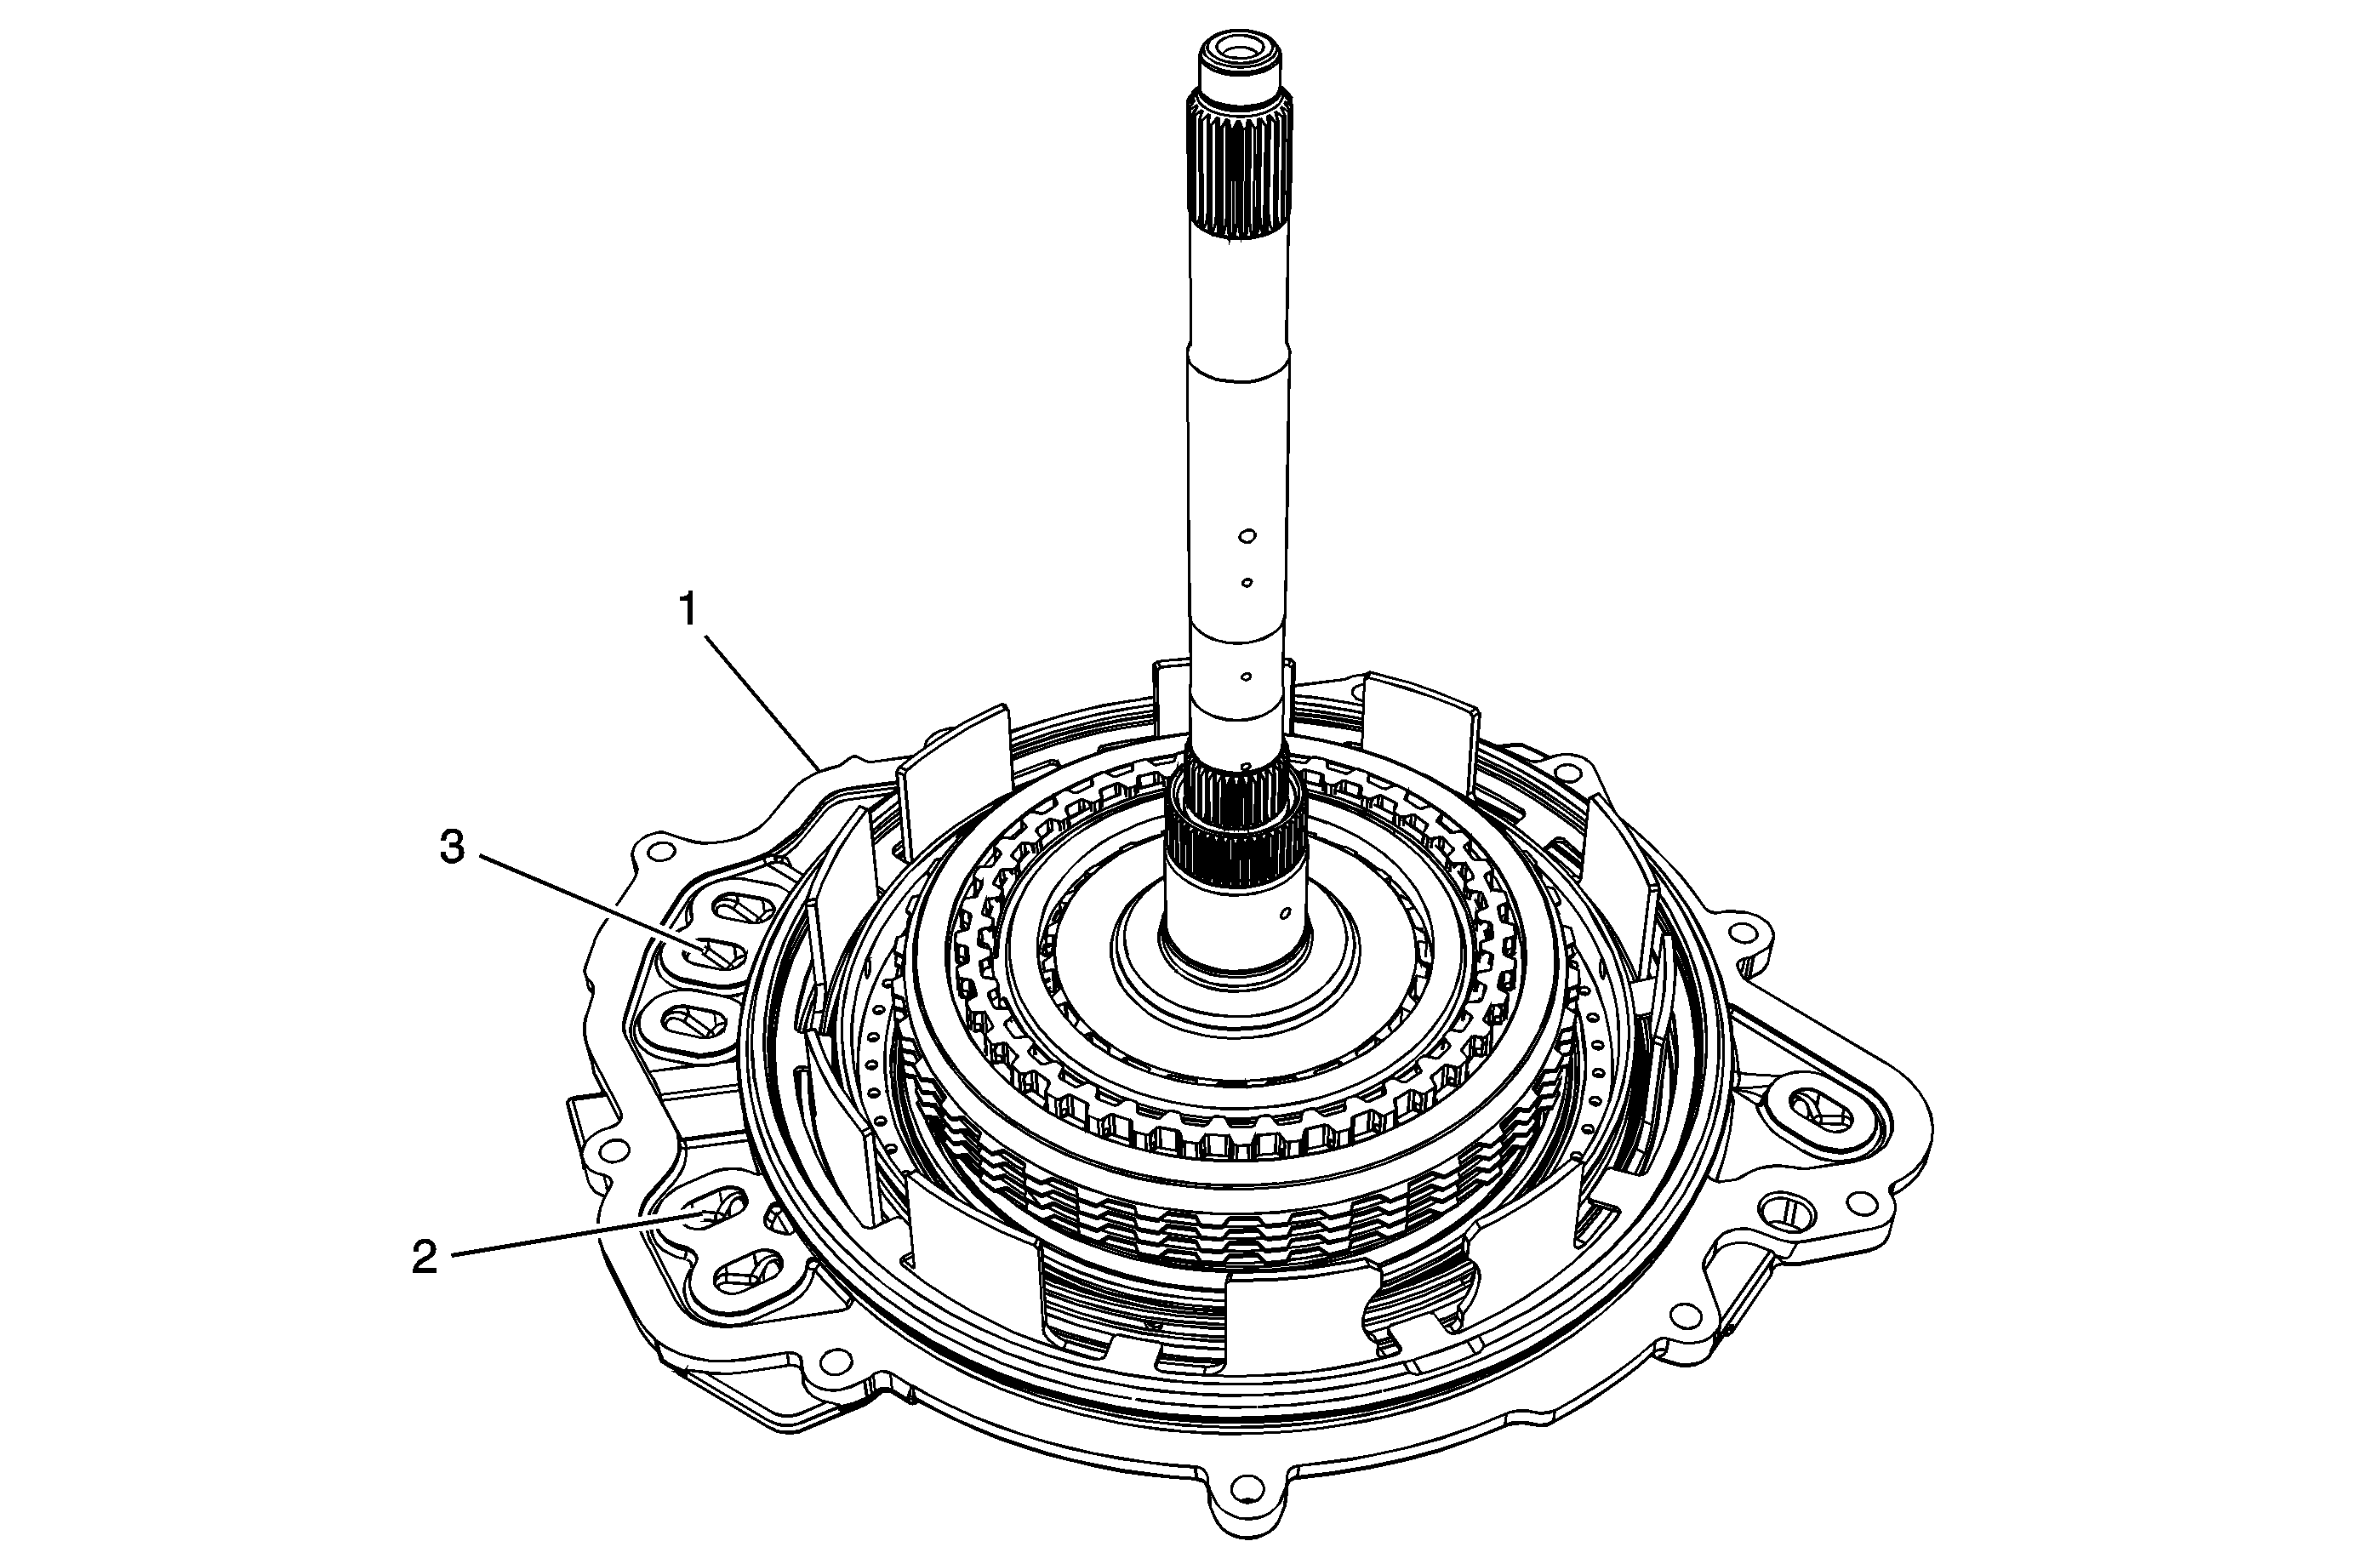
Callout | Component Name |
|---|---|
1 | Case Cover Assembly Tip |
2 | Apply shop air to the 4-5-6 clutch feed. Observe the 4-5-6 piston movement. Notice: Regulate the air pressure to 40 psi maximum. High pressure could cause the piston to over travel and damage the piston seals. Tip |
3 | Apply shop air to the 3-5-Rev clutch feed. Observe the 3-5-Rev piston movement. Notice: Regulate the air pressure to 40 psi maximum. High pressure could cause the piston to over travel and damage the piston seals. Tip |
