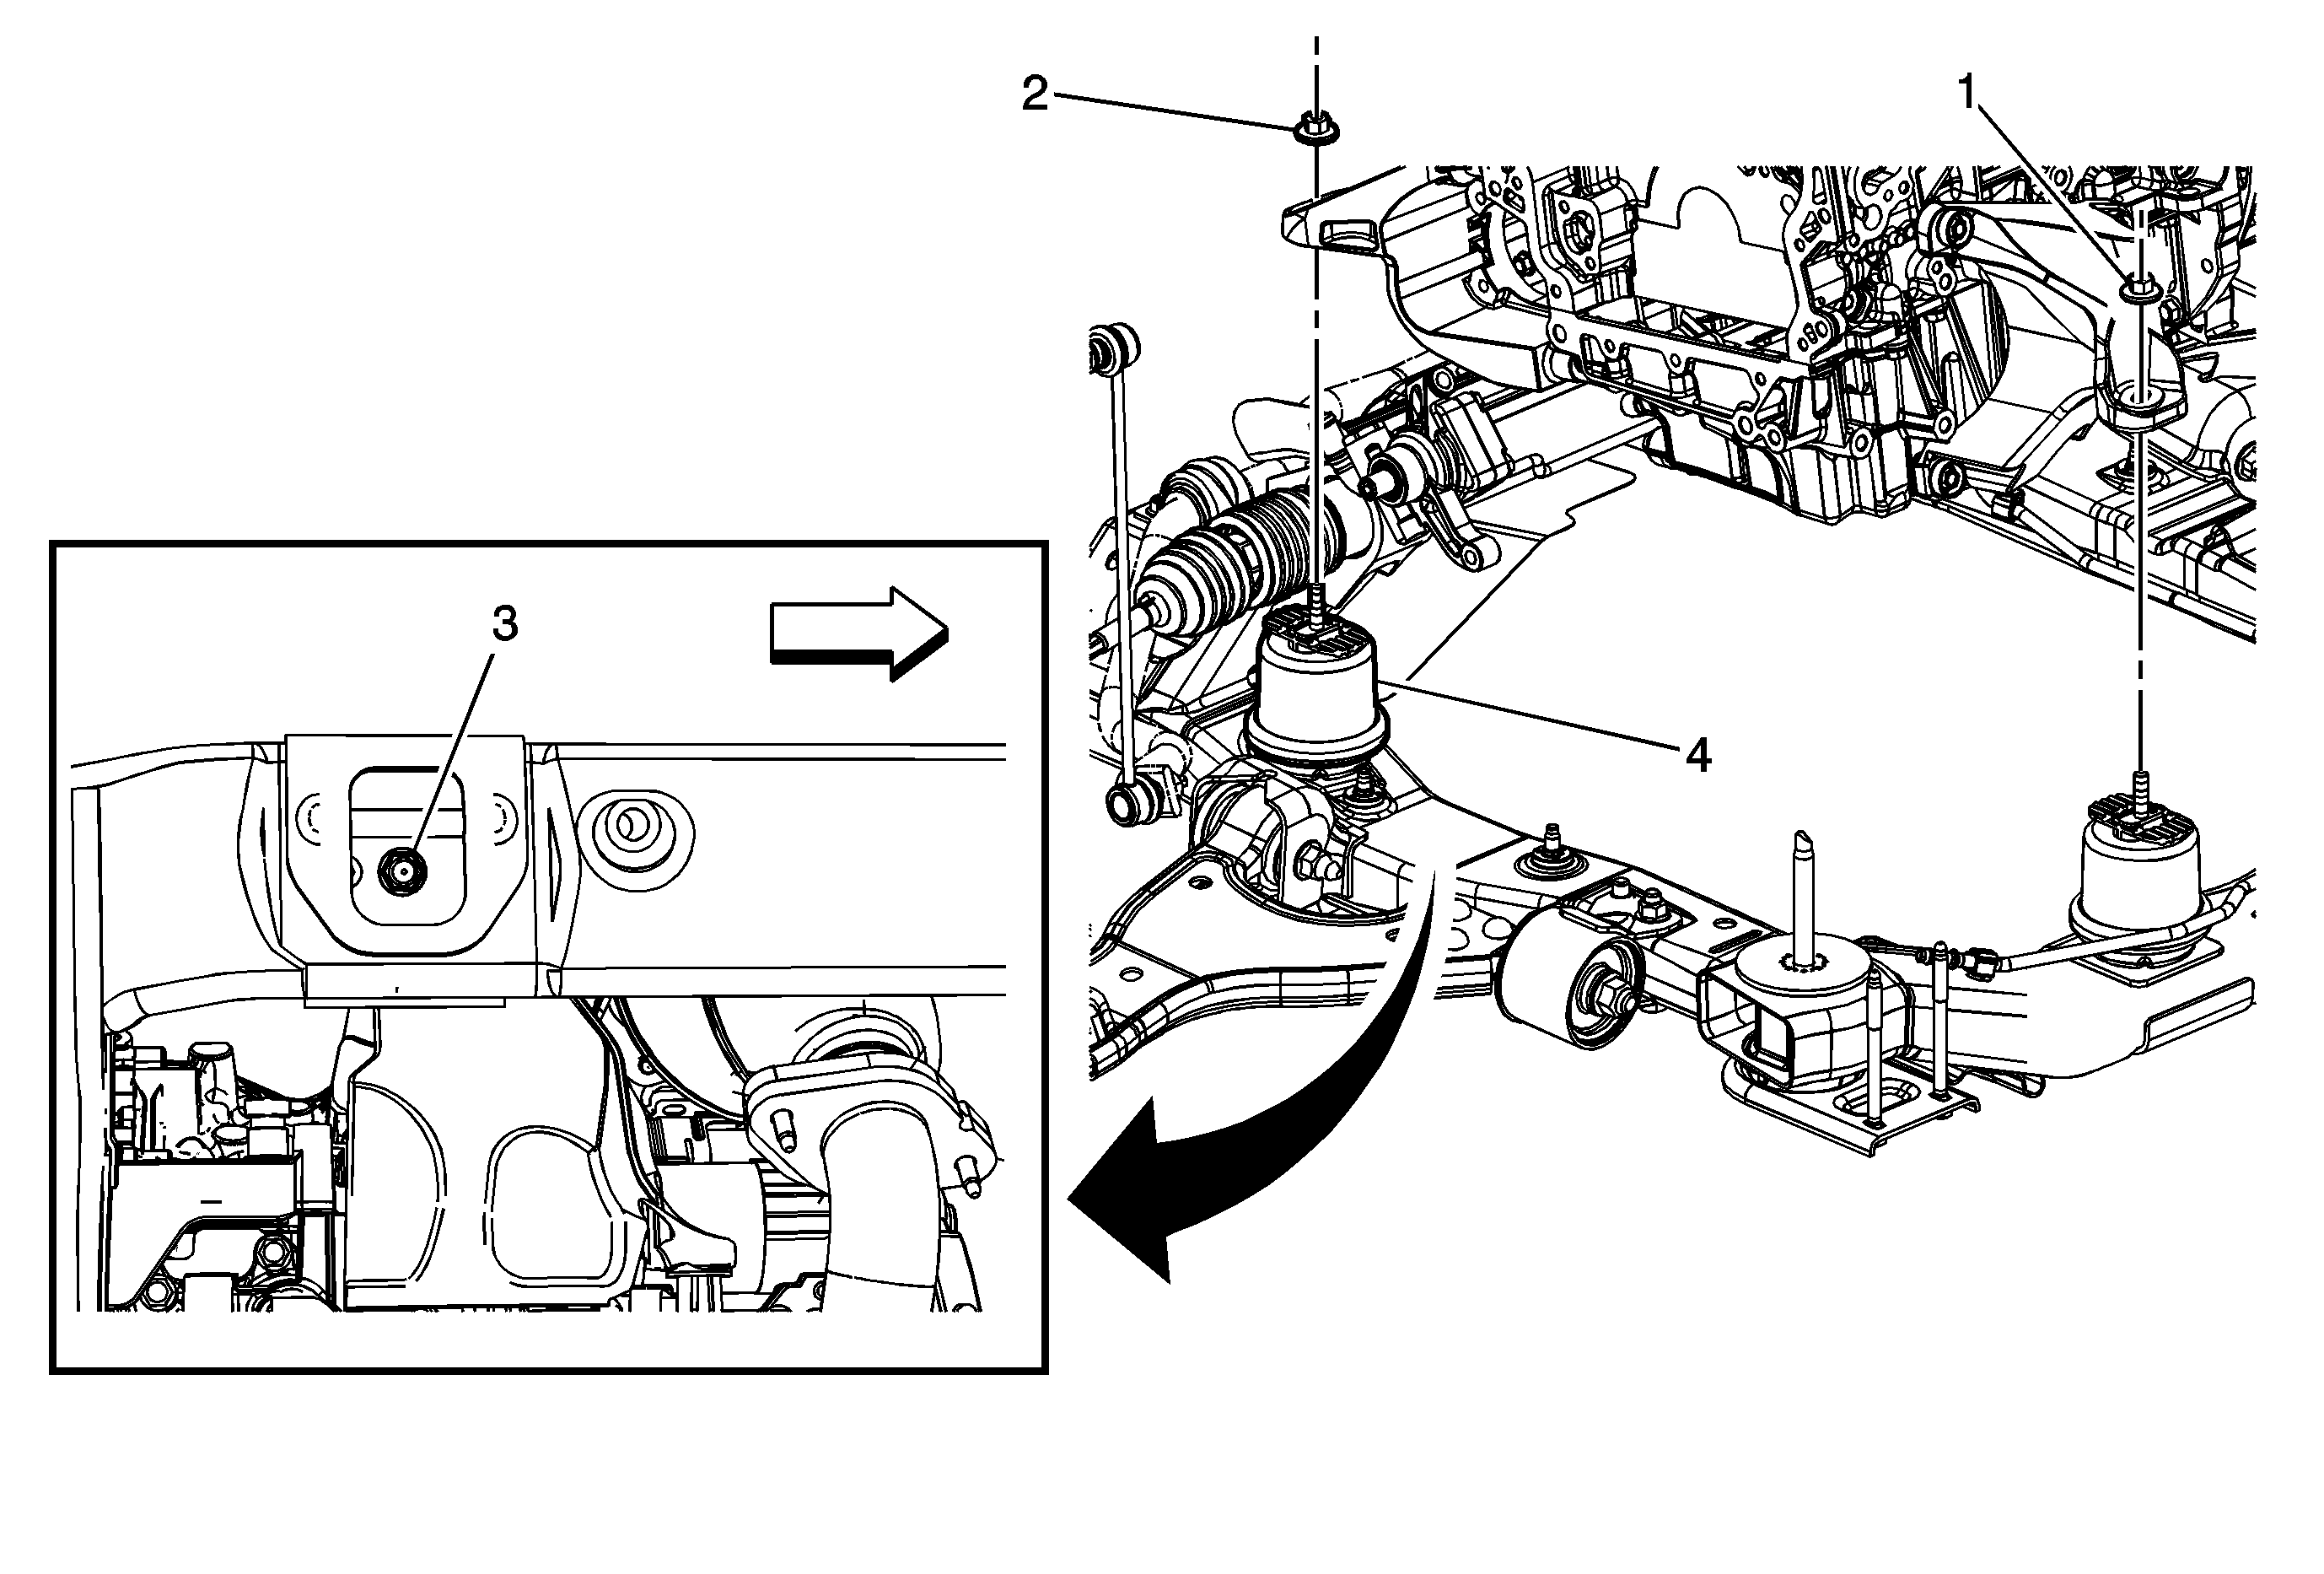
Callout
| Component Name
|
Preliminary Procedures
- Support the engine. Refer to
Engine Support Fixture
.
- Raise and support the vehicle. Refer to
Lifting and Jacking the Vehicle
.
|
1
| Front Upper Engine Mount Nut
Notice: Refer to Fastener Notice in the Preface section.
Procedure
- Remove and discard the engine mount nut.
- Disconnect the active engine mount vacuum line, if equipped.
- Apply threadlocker to the engine mount threads. Refer to
Adhesives, Fluids, Lubricants, and Sealers
.
Tip
The engine mount nuts must be replaced once removed. Allow adhesive on new engine mounts nuts to cure for 24 hours after replacement.
Tighten
75 N·m (55 lb ft) |
2
| Rear Upper Engine Mount Nut
Procedure
- Remove and discard the engine mount nut.
- Apply threadlocker to the engine mount threads. Refer to
Adhesives, Fluids, Lubricants, and Sealers
.
Tip
The engine mount nuts must be replaced once removed. Allow adhesive on new engine mounts nuts to cure for 24 hours after replacement.
Tighten
75 N·m (55 lb ft) |
3
| Rear Lower Engine Mount Nut
Procedure
- Remove and discard the engine mount nut.
- Apply threadlocker to the engine mount threads. Refer to
Adhesives, Fluids, Lubricants, and Sealers
.
Tip
The engine mount nuts must be replaced once removed. Allow adhesive on new engine mounts nuts to cure for 24 hours after replacement.
Tighten
75 N·m (55 lb ft) |
4
| Engine Mount
Tip
To remove the engine mount, use the engine support fixture to raise engine. |

