For 1990-2009 cars only
Removal Procedure
- Raise and support the vehicle. Refer to Lifting and Jacking the Vehicle.
- Remove the propeller shaft assembly. Refer to Propeller Shaft Replacement.
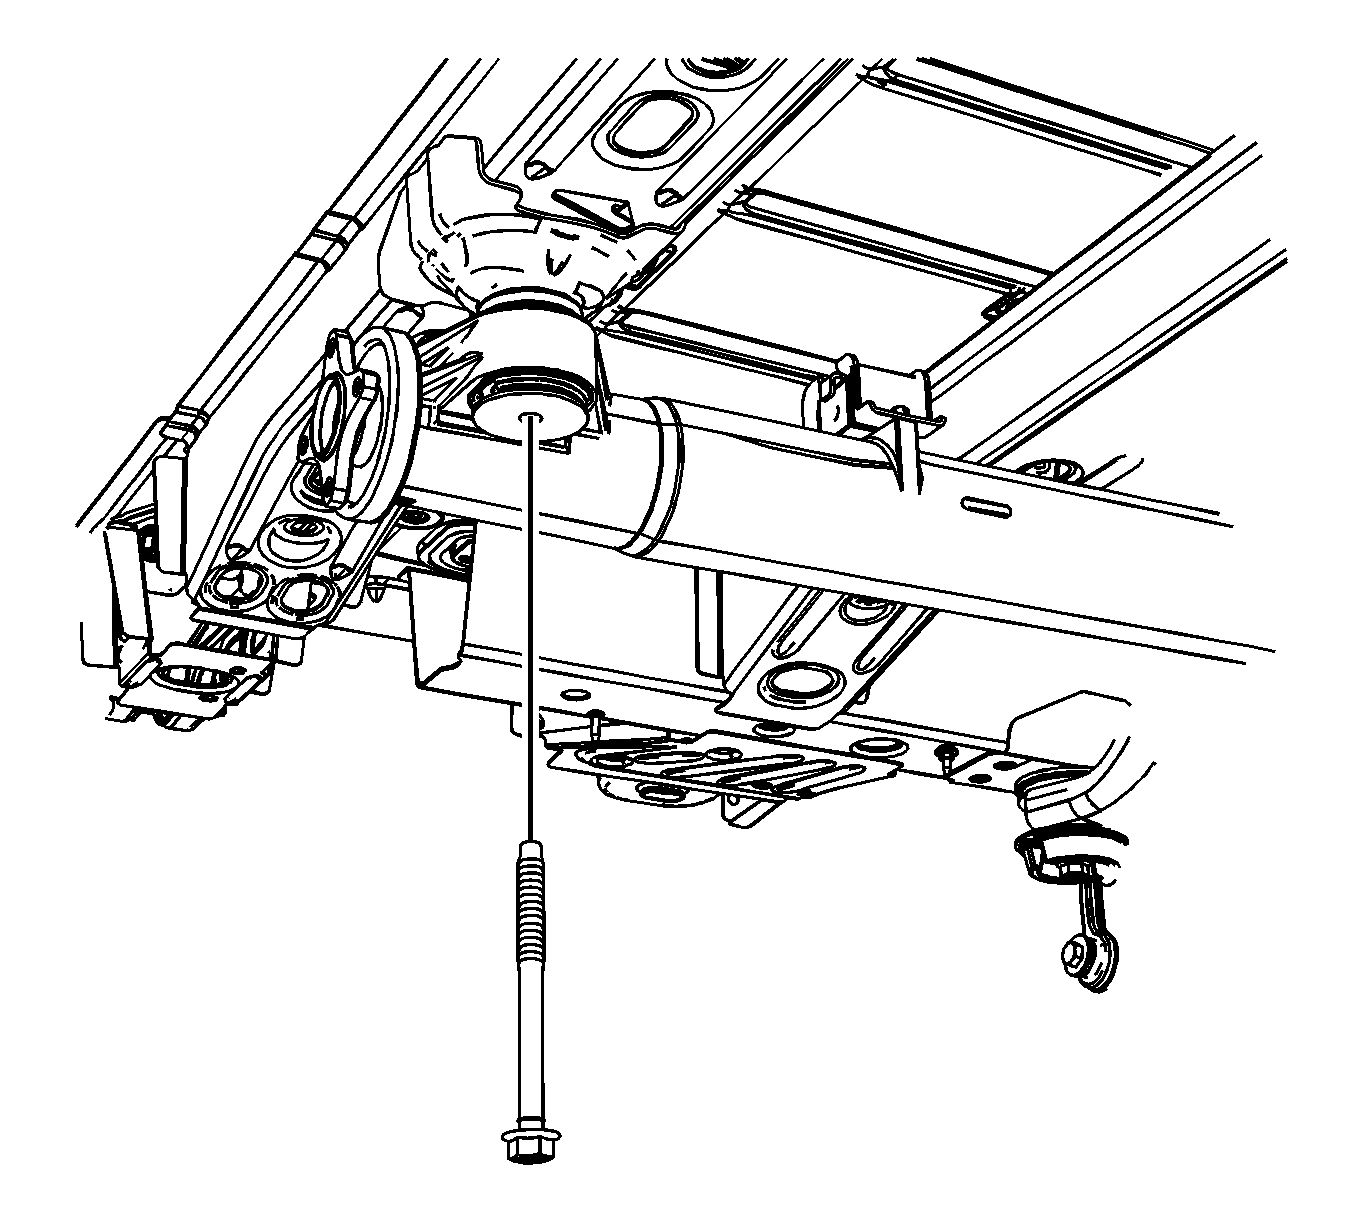
- Remove the torque tube mounting bolt.
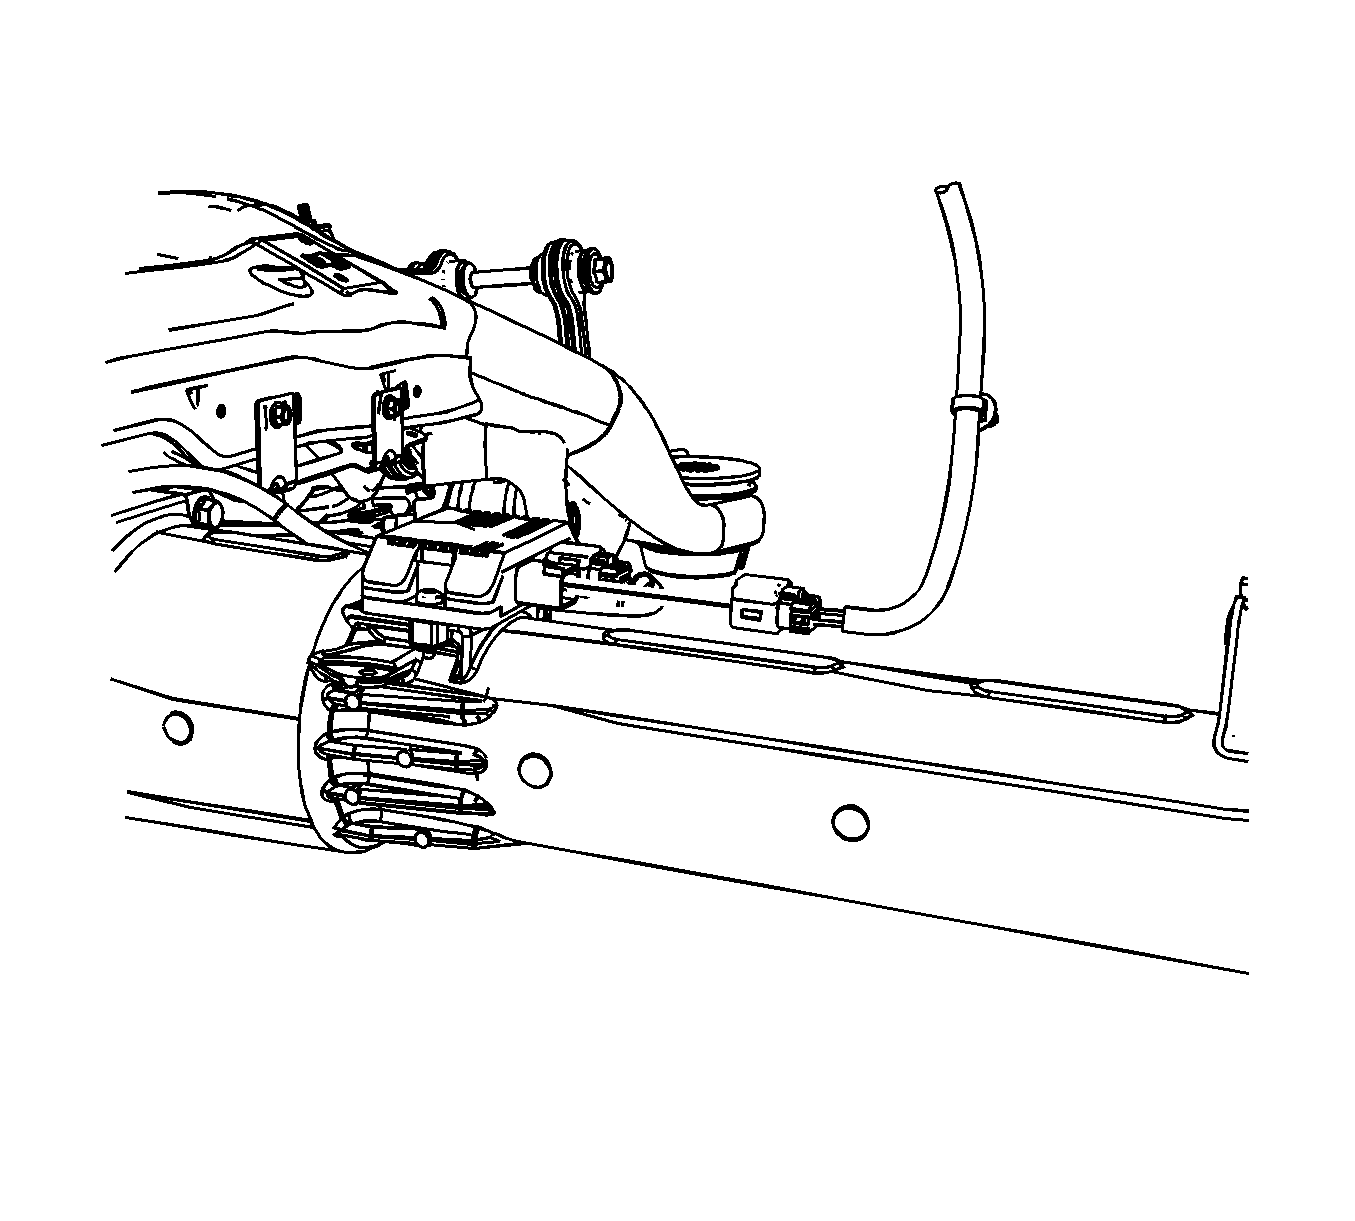
- Disconnect the electrical connector from the clutch control module.
- Remove the clutch control module, if needed. Refer to Rear Differential Clutch Control Module Replacement.
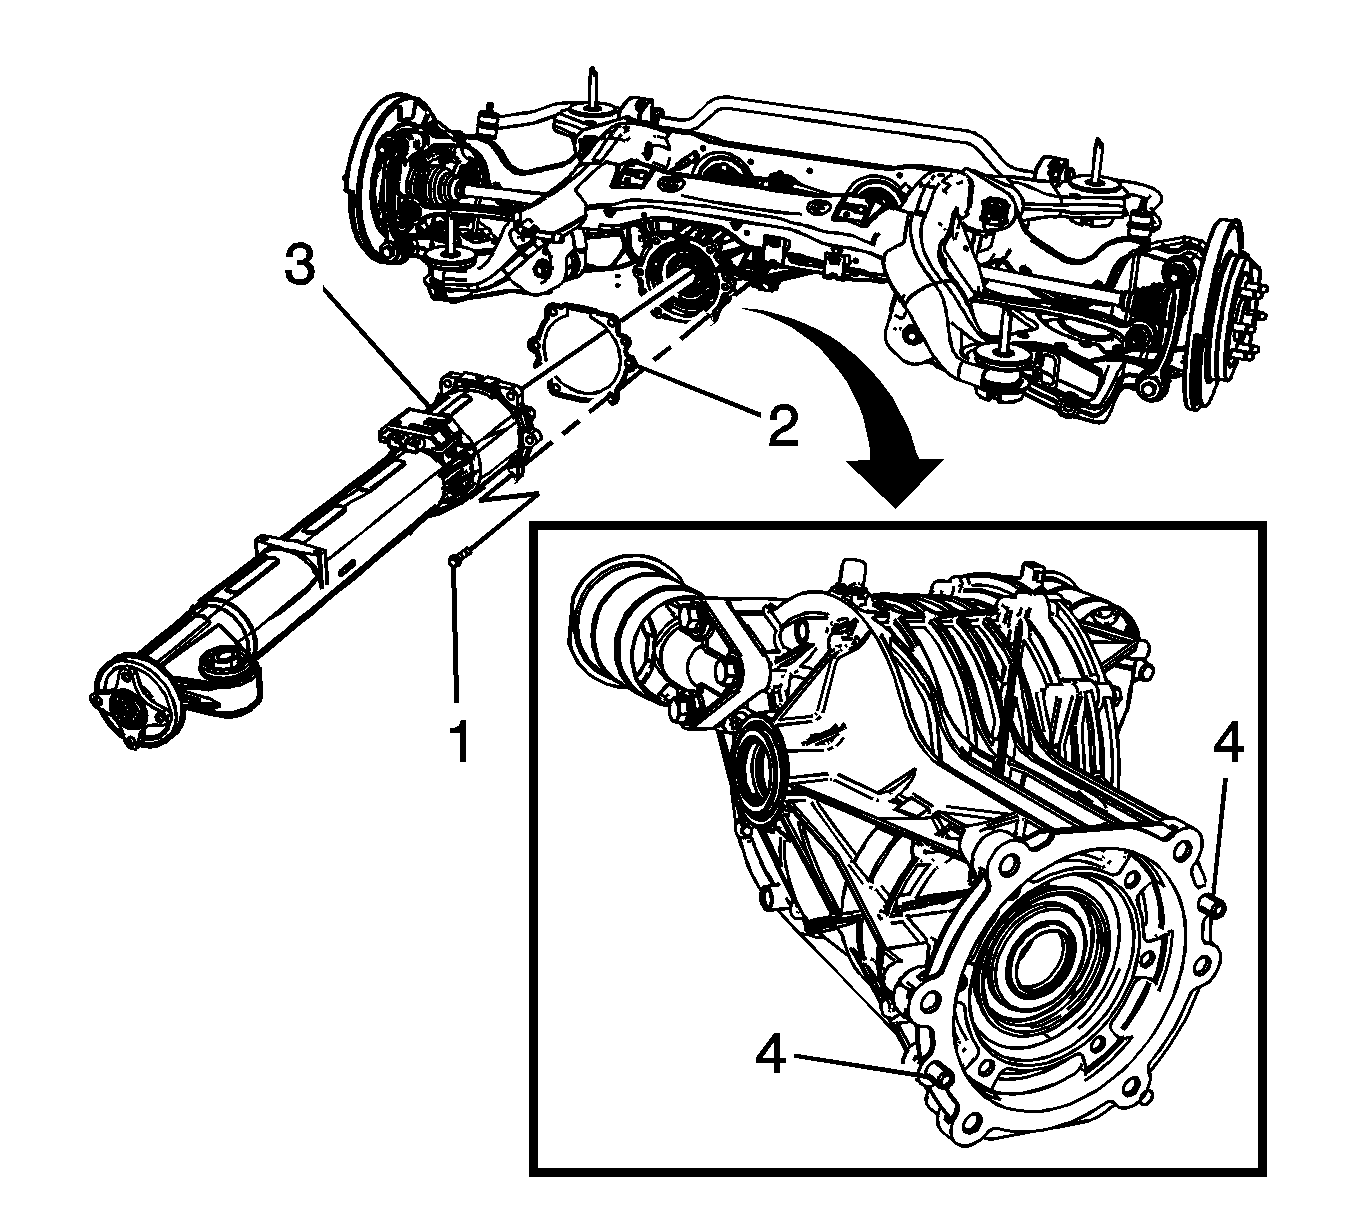
- Remove the torque tube mounting bolts (1) from the rear differential.
- Remove the torque tube gasket (2) from the rear differential and the alignment pins (4).
- Remove the torque tube assembly (3) from the rear differential assembly.
- Remove the torque tube assembly (3) from the vehicle.


Note: If removing the torque tube assembly to service the rear differential, the clutch control module does not have to be removed.

Note: DO NOT re-use the old gasket, discard and use NEW only.
Note: If any fluid is found in the torque tube, check the condition of pinion oil seal.
Installation Procedure
- Install the NEW torque tube gasket (2) to the rear differential assembly.
- Position torque tube (3) on the alignment pins (4) on the rear differential.
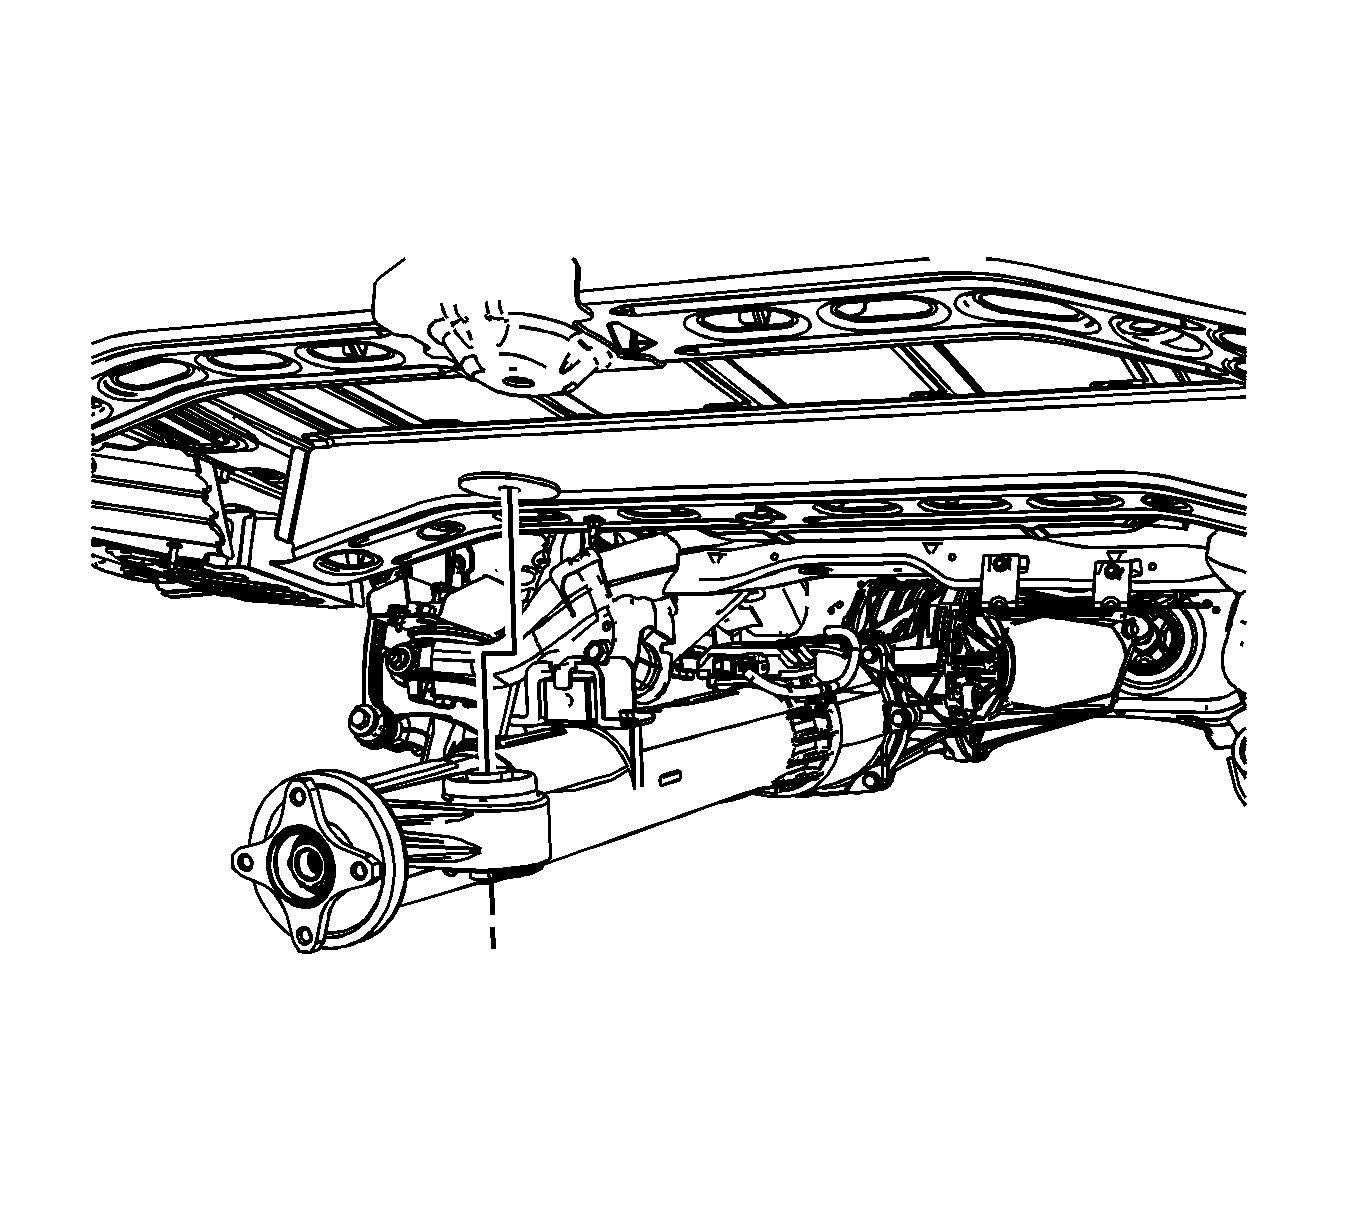
- Using a suitable jack stand support the torque tube assembly.
- Hand tighten the torque tube to differential bolts (1) before torquing to specifications.
- Torque the mounting bolts (1) to specifications.
- Install the clutch control module, if needed. Refer to Rear Differential Clutch Control Module Replacement.
- Install the electrical connector for the clutch control module.
- Using the jack stand or the aide of an assistant reposition the torque tube to allow installation of the mounting bolt.
- Install the torque tube mounting bolt.
- Install the propeller shaft assembly. Refer to Propeller Shaft Replacement.
- Remove the support and lower the vehicle.

Caution: Refer to Fastener Caution in the Preface section.
Tighten
Tighten the bolts to 55 N·m (40 lb ft).


Tighten
Tighten the bolt to 185 N·m (137 lb ft).
