For 1990-2009 cars only
Removal Procedure
Caution: Do not allow smoking or the use of open flames in the area where work on the fuel or EVAP system is taking place. Anytime work is being done on the fuel system, disconnect the negative battery cable, except for those tests where battery voltage is required.
- Remove the fuel fill cap.
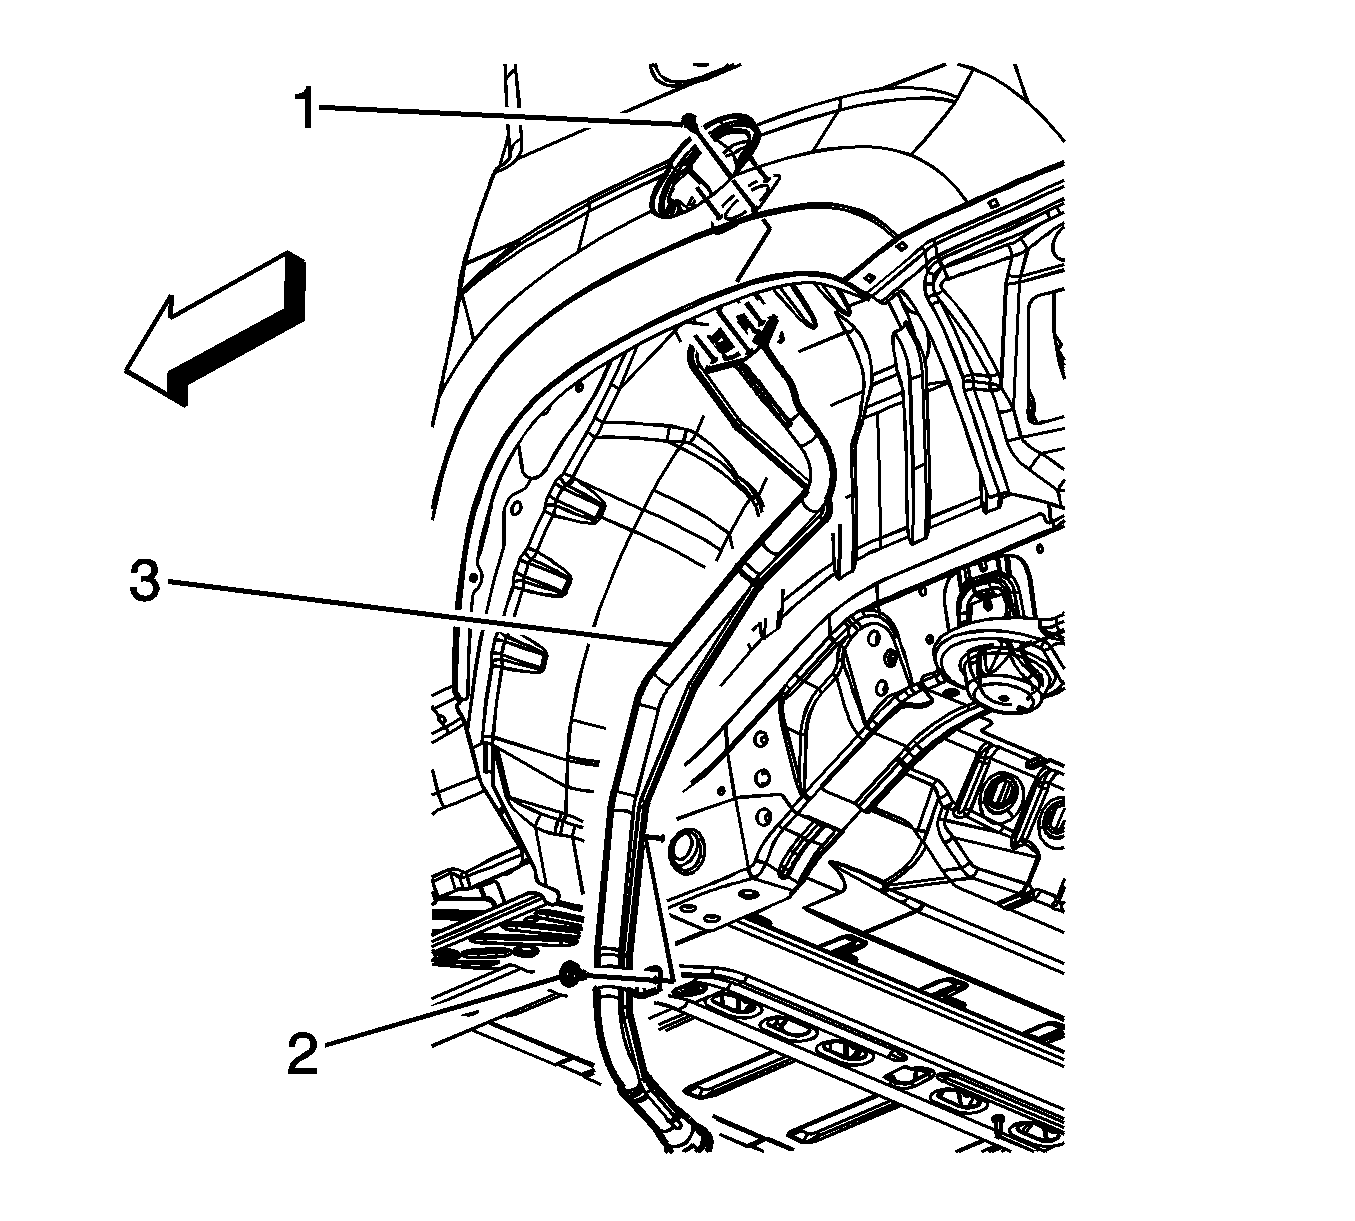
- Remove the fuel tank fill pipe housing to fuel tank fill pipe bolts (1).
- Drain the fuel tank. Refer to Fuel Tank Draining.
- Remove the left rear wheel and tire. Refer to Tire and Wheel Removal and Installation.
- Remove the left rear wheelhouse liner panel. Refer to Rear Wheelhouse Panel Liner Replacement.
- Remove the fuel tank fill pipe bracket bolt (2).
- Remove the fuel tank fill pipe assembly (3) from the vehicle.
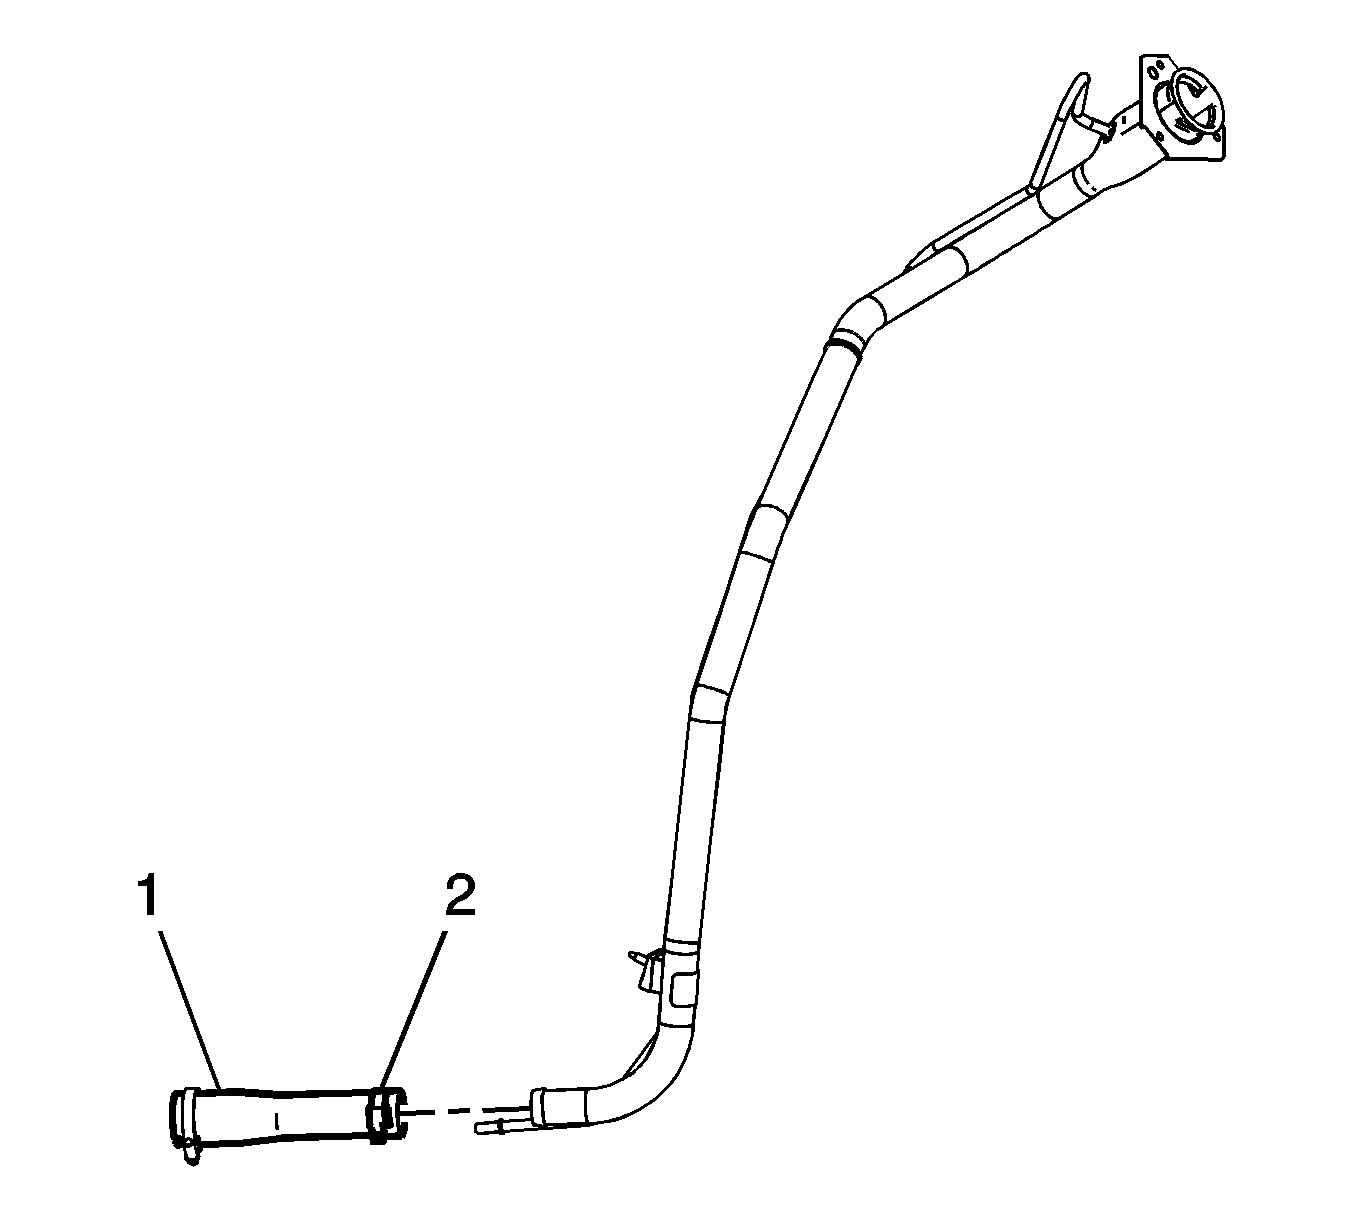
- Loosen the fuel tank fill hose clamp (2), if necessary.
- Remove the fuel tank fill hose (1), if necessary.


Installation Procedure
- Install the fuel tank fill hose (1), if necessary.
- Tighten the fuel tank fill hose clamp (2), if necessary.
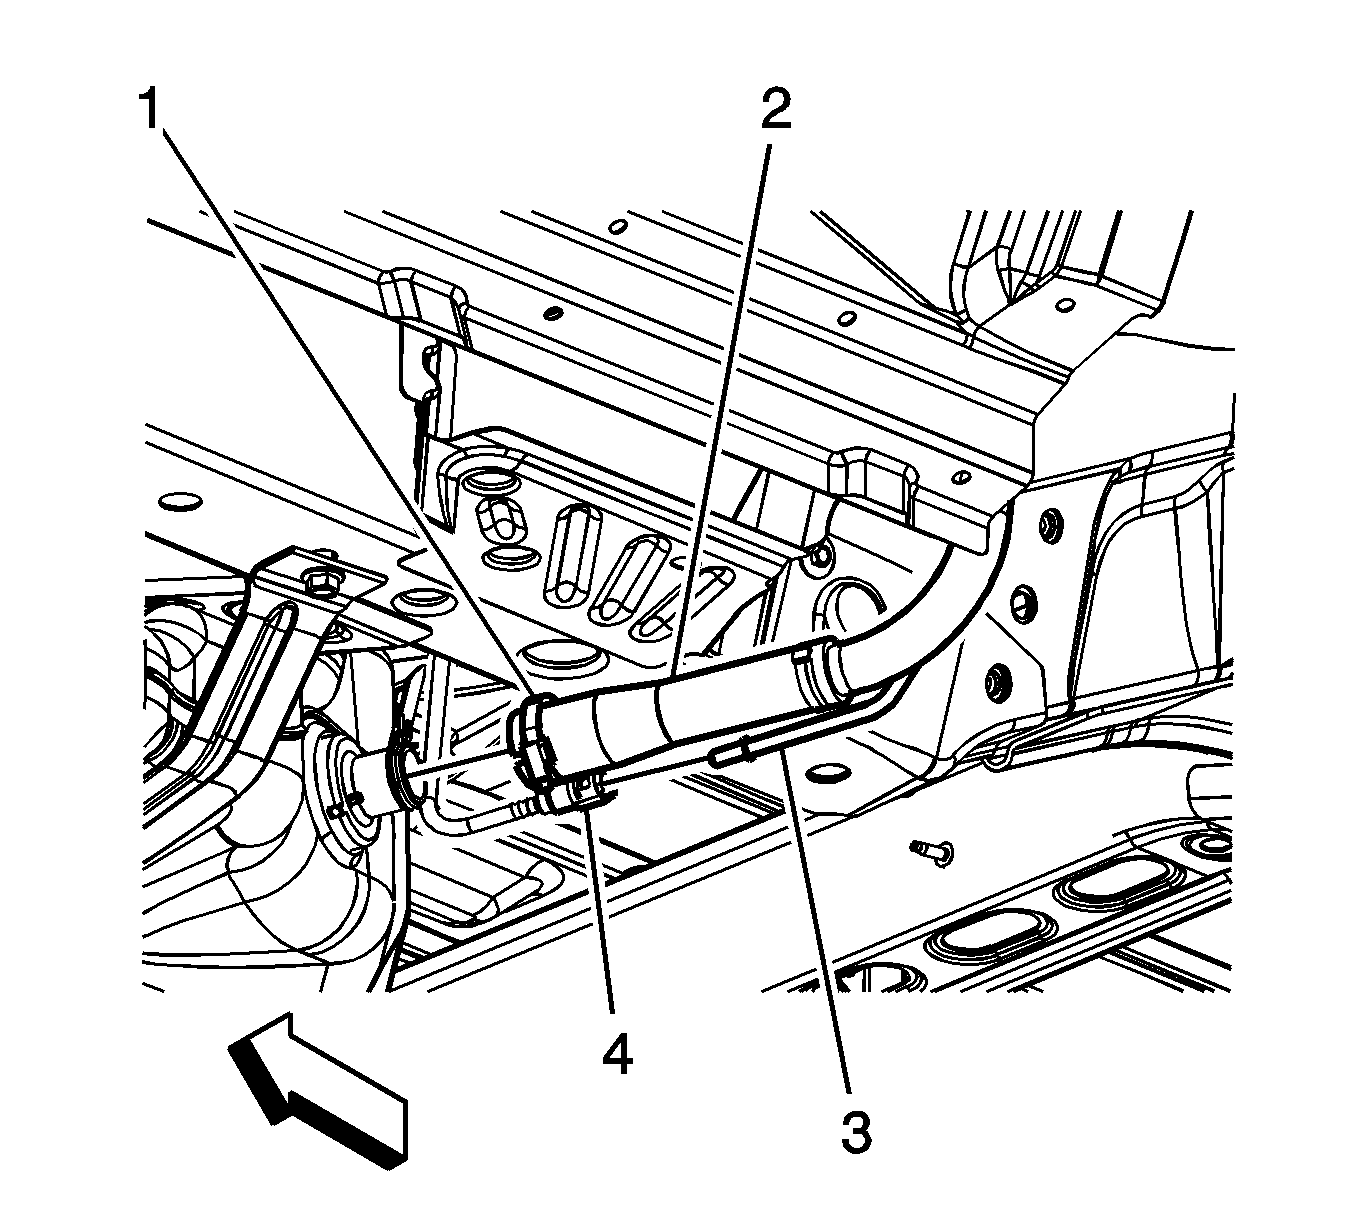
- Position and install the fuel tank fill hose (2) to the fuel tank.
- Connect the evaporative emission (EVAP) canister vent rear pipe quick connect fitting (4) to the recirculation line on the fuel tank fill pipe (3). Refer to Plastic Collar Quick Connect Fitting Service.
- Tighten the fuel tank fill hose clamp (1) at the fuel tank.
- Install the fuel tank fill pipe bracket bolt (2).
- Install the left rear wheelhouse liner panel. Refer to Rear Wheelhouse Panel Liner Replacement.
- Install the left rear wheel and tire. Refer to Tire and Wheel Removal and Installation.
- Lower the vehicle.
- Install the fuel tank fill pipe housing to fuel tank fill pipe bolts (1).
- Install the fuel fill cap.

Notice: Refer to Fastener Notice in the Preface section.
Tighten
Tighten the clamp to 3.3 N·m (29 lb in).

Important: Ensure that the notch in the fill hose aligns with the tab on the fuel tank.
Tighten
Tighten the clamp to 3.3 N·m (29 lb in).

Tighten
Tighten the bolt to 12 N·m (106 lb in).
Tighten
Tighten the bolts to 2 N·m (18 lb in).
