For 1990-2009 cars only
Tools Required
J 39400-A Halogen Leak Detector
Removal Procedure
- Recover the refrigerant. Refer to Refrigerant Recovery and Recharging .
- Remove the air cleaner outlet duct. Refer to Air Cleaner Outlet Duct Replacement .
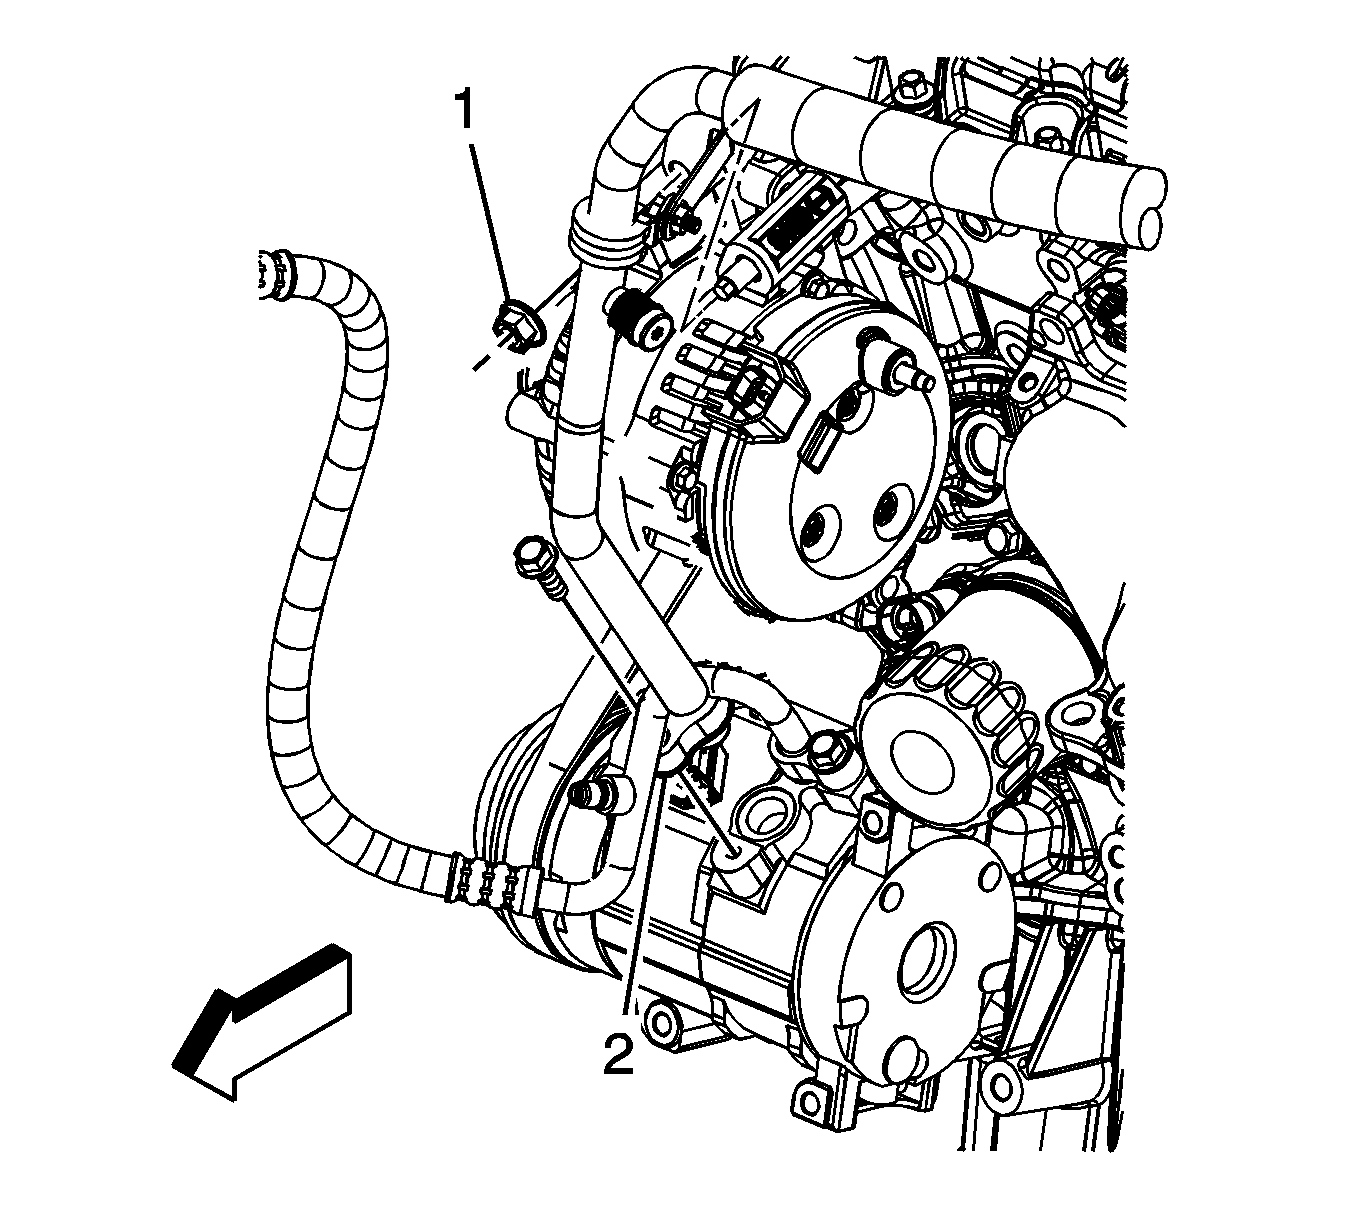
- Remove the suction hose bracket nut (1) and remove bracket.
- Remove the suction hose/pipe bolt from the A/C compressor.
- Disconnect the suction hose/pipe from the A/C compressor.
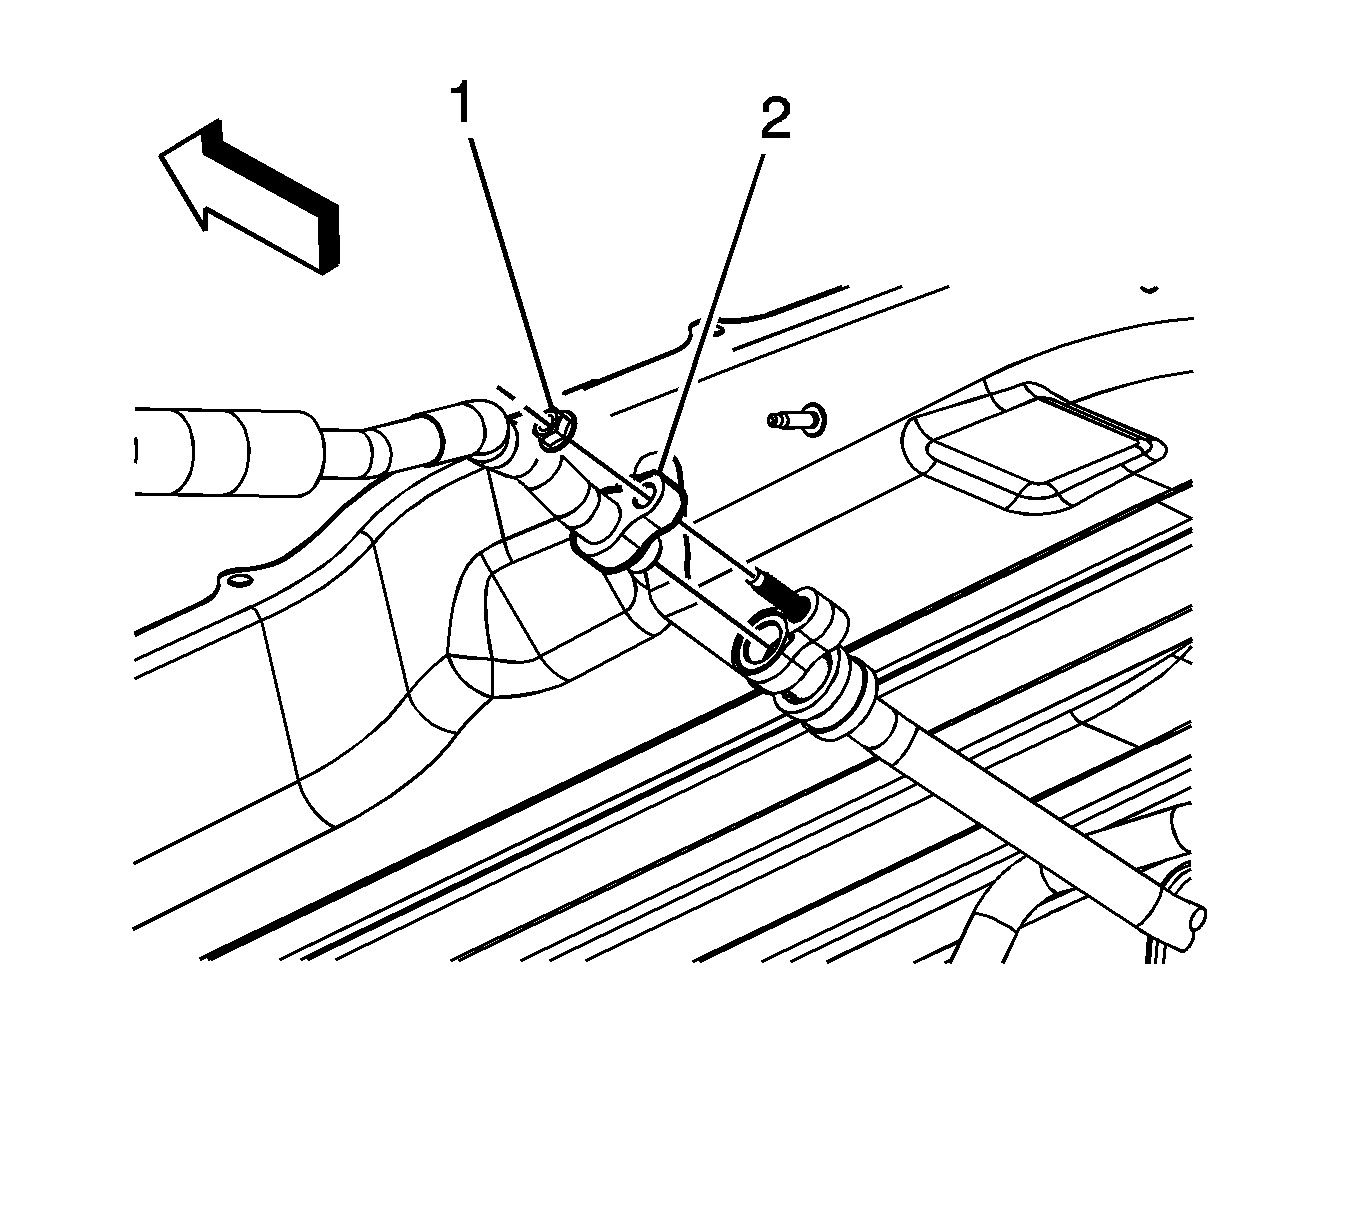
- Remove the suction hose/pipe nut (1) from TXV tube.
- Disconnect the suction hose/pipe from the TXV tube (2).
- Remove the suction hose/pipe.
- Remove and discard the suction hose/pipe O-rings.


Installation Procedure
- Install new O-rings to the suction hose/pipe. Refer to O-Ring Replacement .
- Connect the suction hose/pipe to the TXV tube.
- Install the suction hose/pipe to TXV nut (1).
- Connect the suction hose/pipe to the A/C compressor.
- Install the suction hose/pipe bolt to the A/C compressor.
- Install the suction hose/pipe bracket and secure with nut (1).
- Install the air cleaner outlet duct. Refer to Air Cleaner Outlet Duct Replacement .
- Evacuate and recharge the refrigerant system. Refer to Refrigerant Recovery and Recharging .
- Leak test the fittings of the component using J 39400-A .

Notice: Refer to Fastener Notice in the Preface section.
Tighten
Tighten the bolt to 9 N·m (80 lb in).

Tighten
Tighten the bolt to 9 N·m (80 lb in).
