Sunroof Sunshade Replacement Rear Power
Removal Procedure
- Open both the sunroof sunshades to the fully open position.
- Remove the sunroof window. Refer to Sunroof Window Replacement.
- It is only necessary to lower the headliner. Only do those step in headliner replacement that will lower the headliner enough to gain access to the part. Refer to Headlining Trim Panel Replacement.
- Remove the sunroof module. Refer to Sunroof Module Assembly Replacement.
- Remove the sunroof sunshade trim cover.
- Grasping the front corners of the sunshade, roll the sunshade counterclockwise to release the front bar from the sunshade guides.
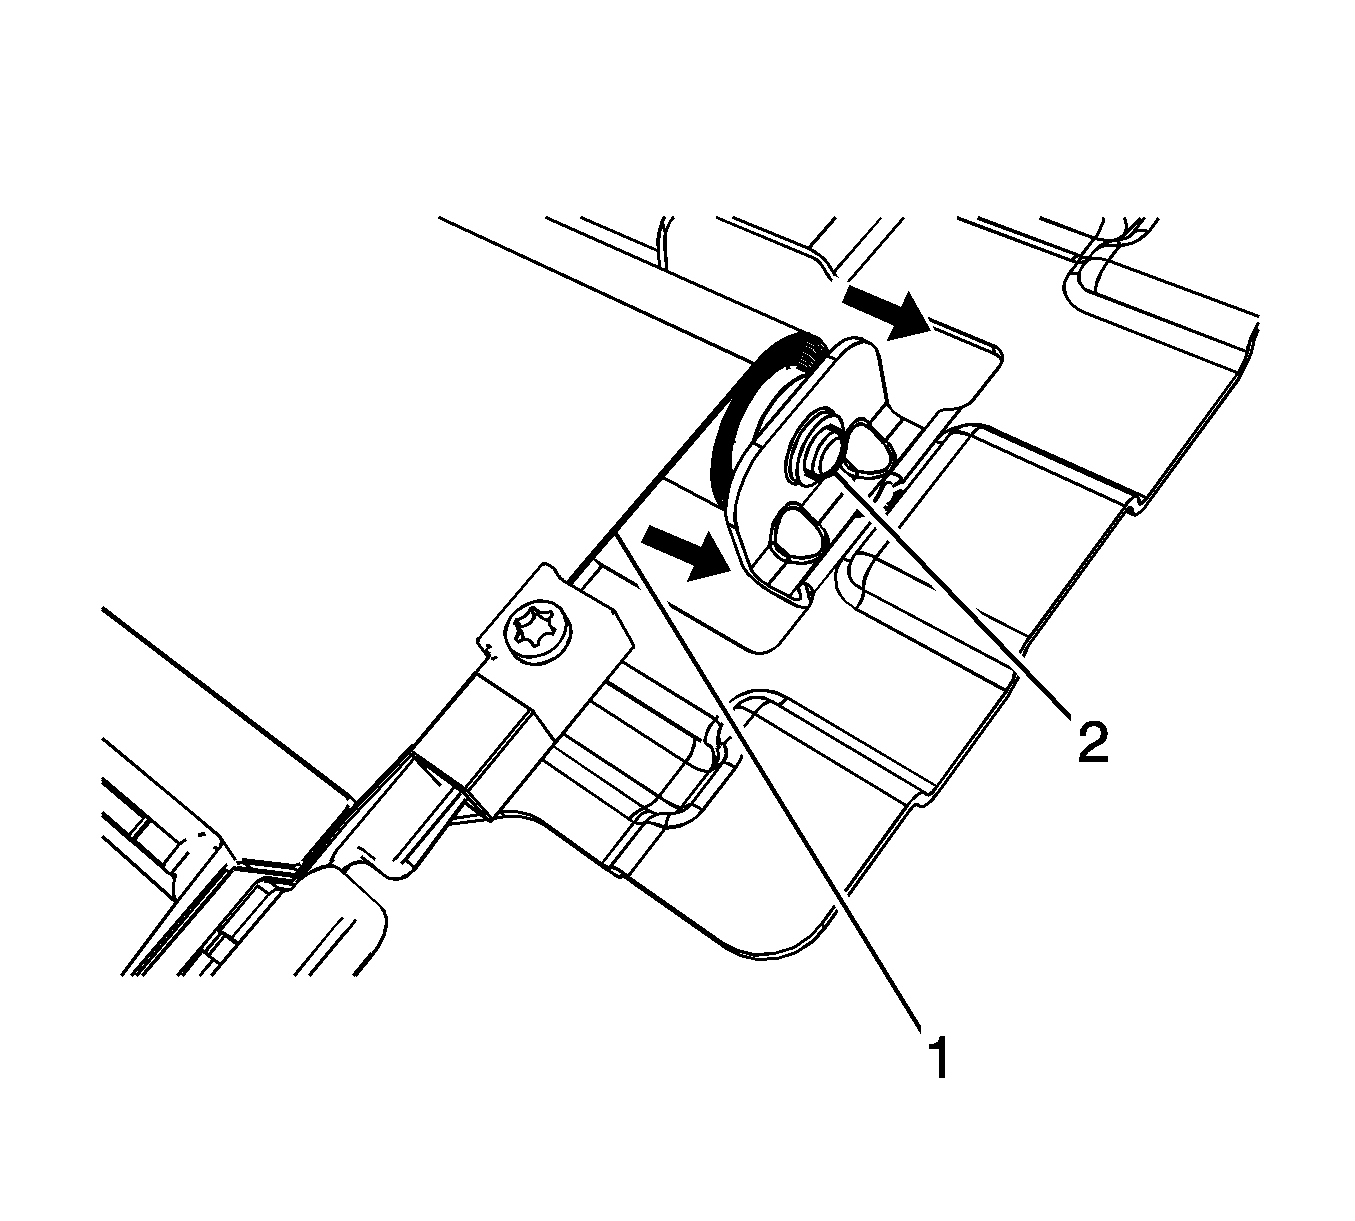
- Close the sunshade (1) until the cam locking hole (2) come in to view.
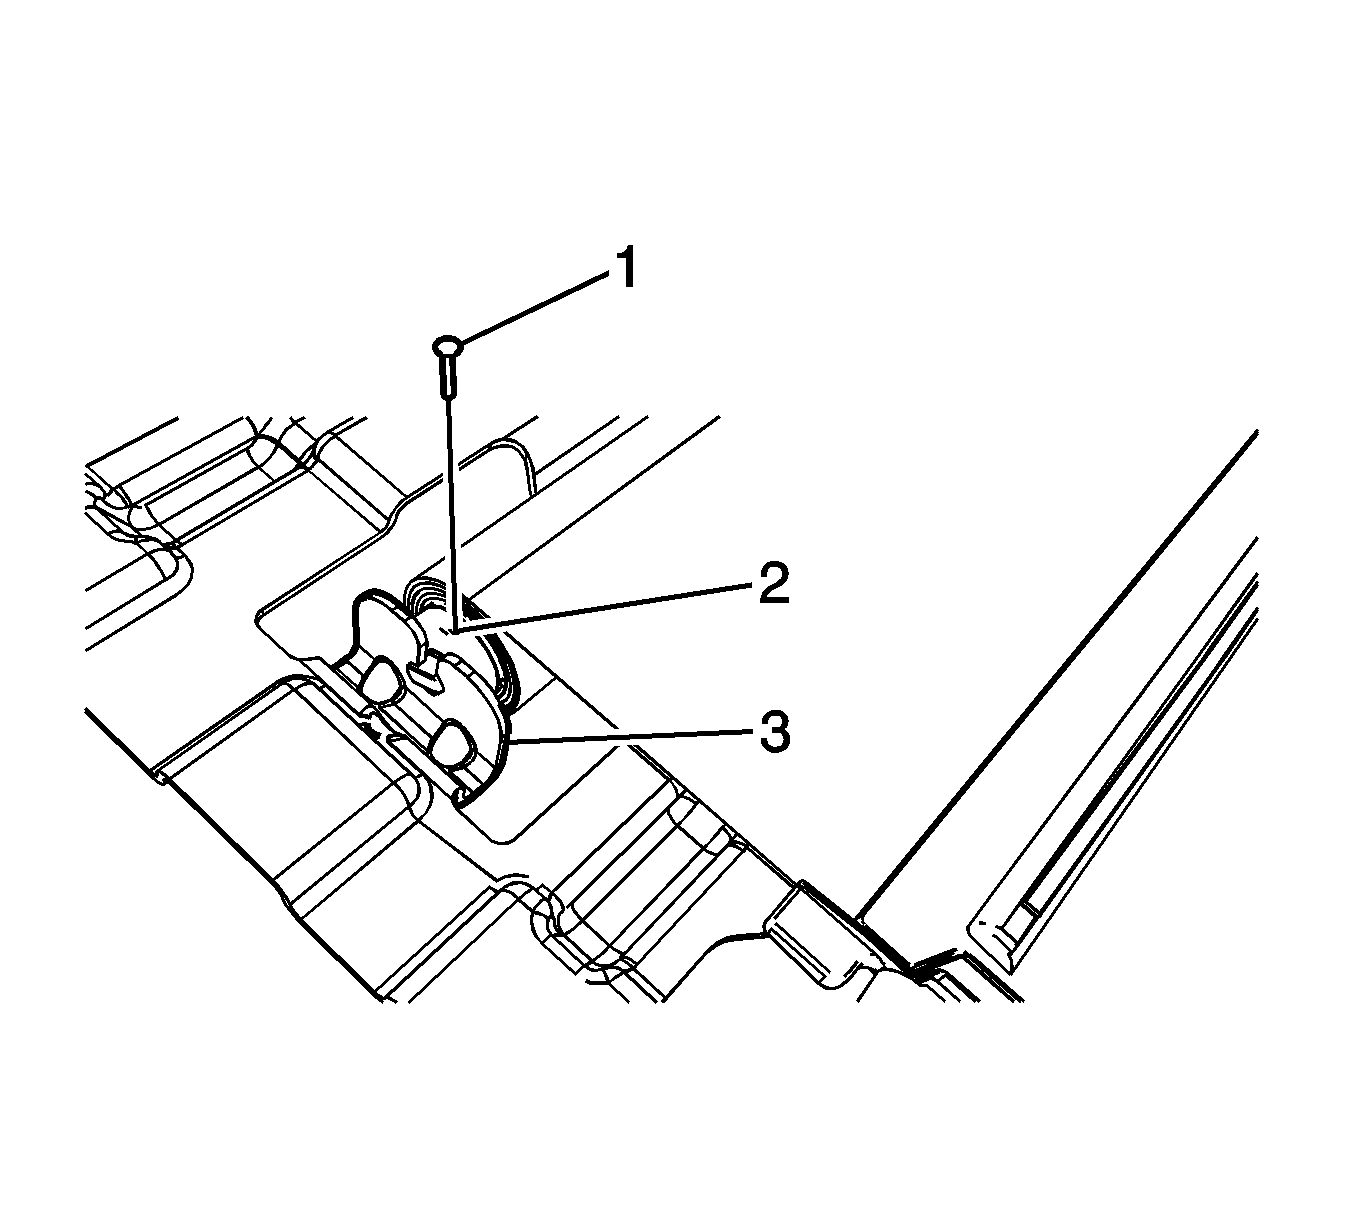
- Insert a suitable tool (1) into the sunshade cam locking hole (2).
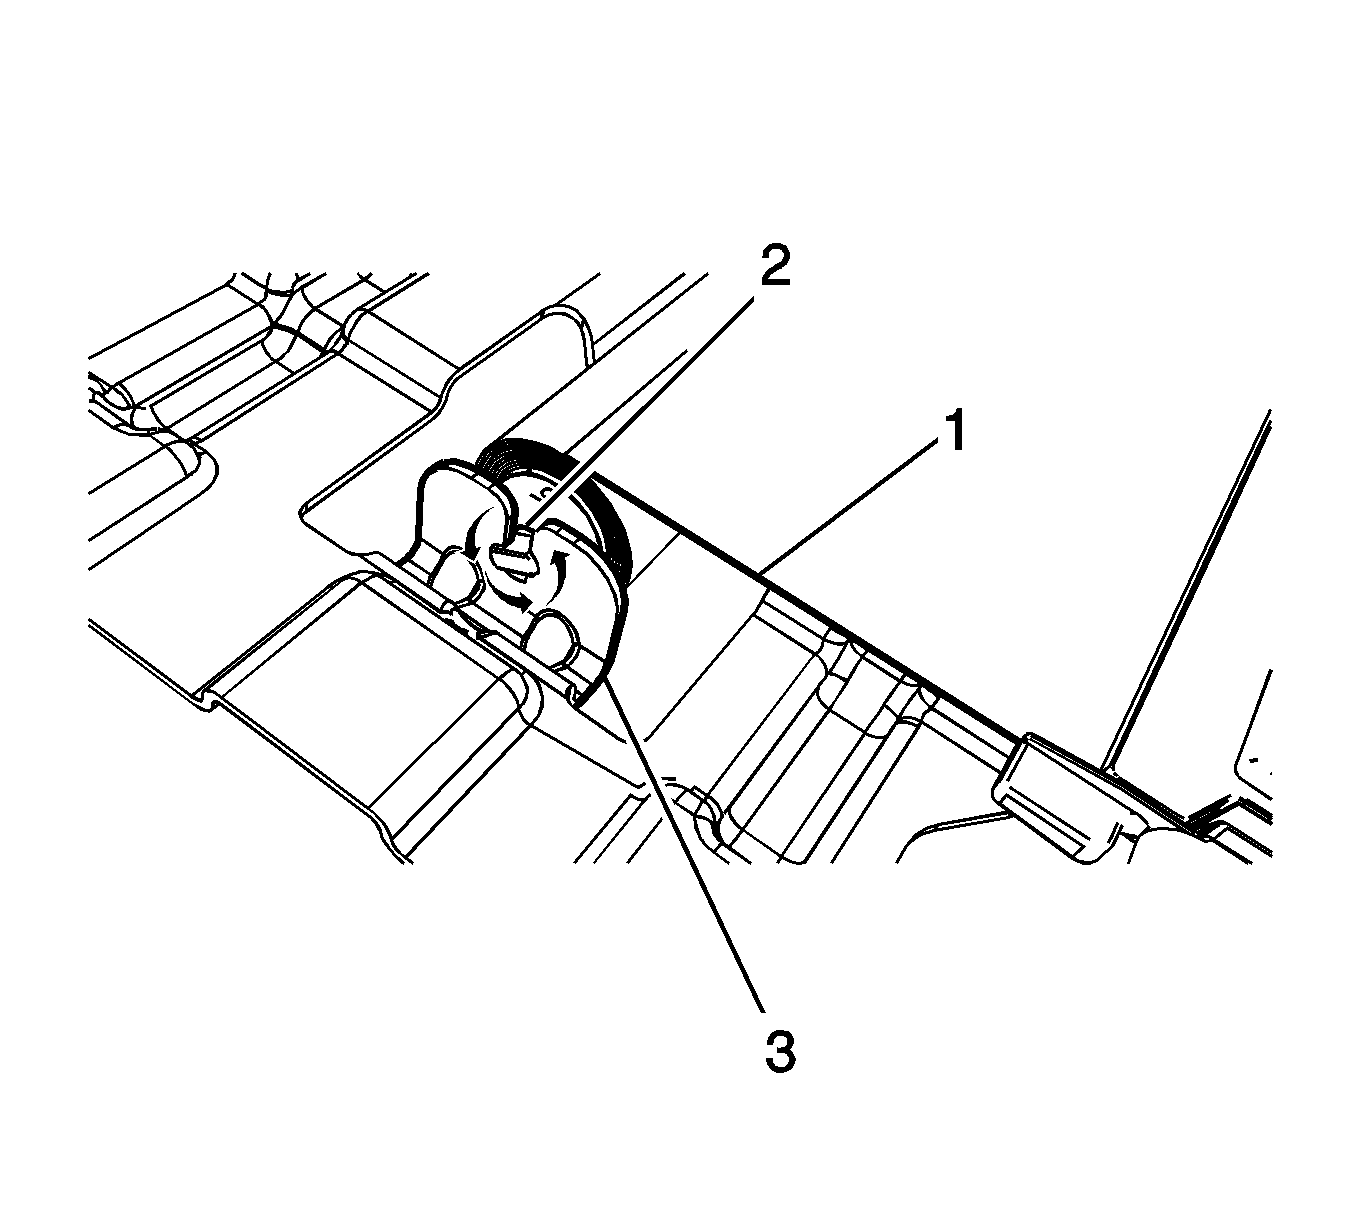
- Turn the sunshade (1) counterclockwise until the shade cam (2) is aligned with the bracket (3) notch.
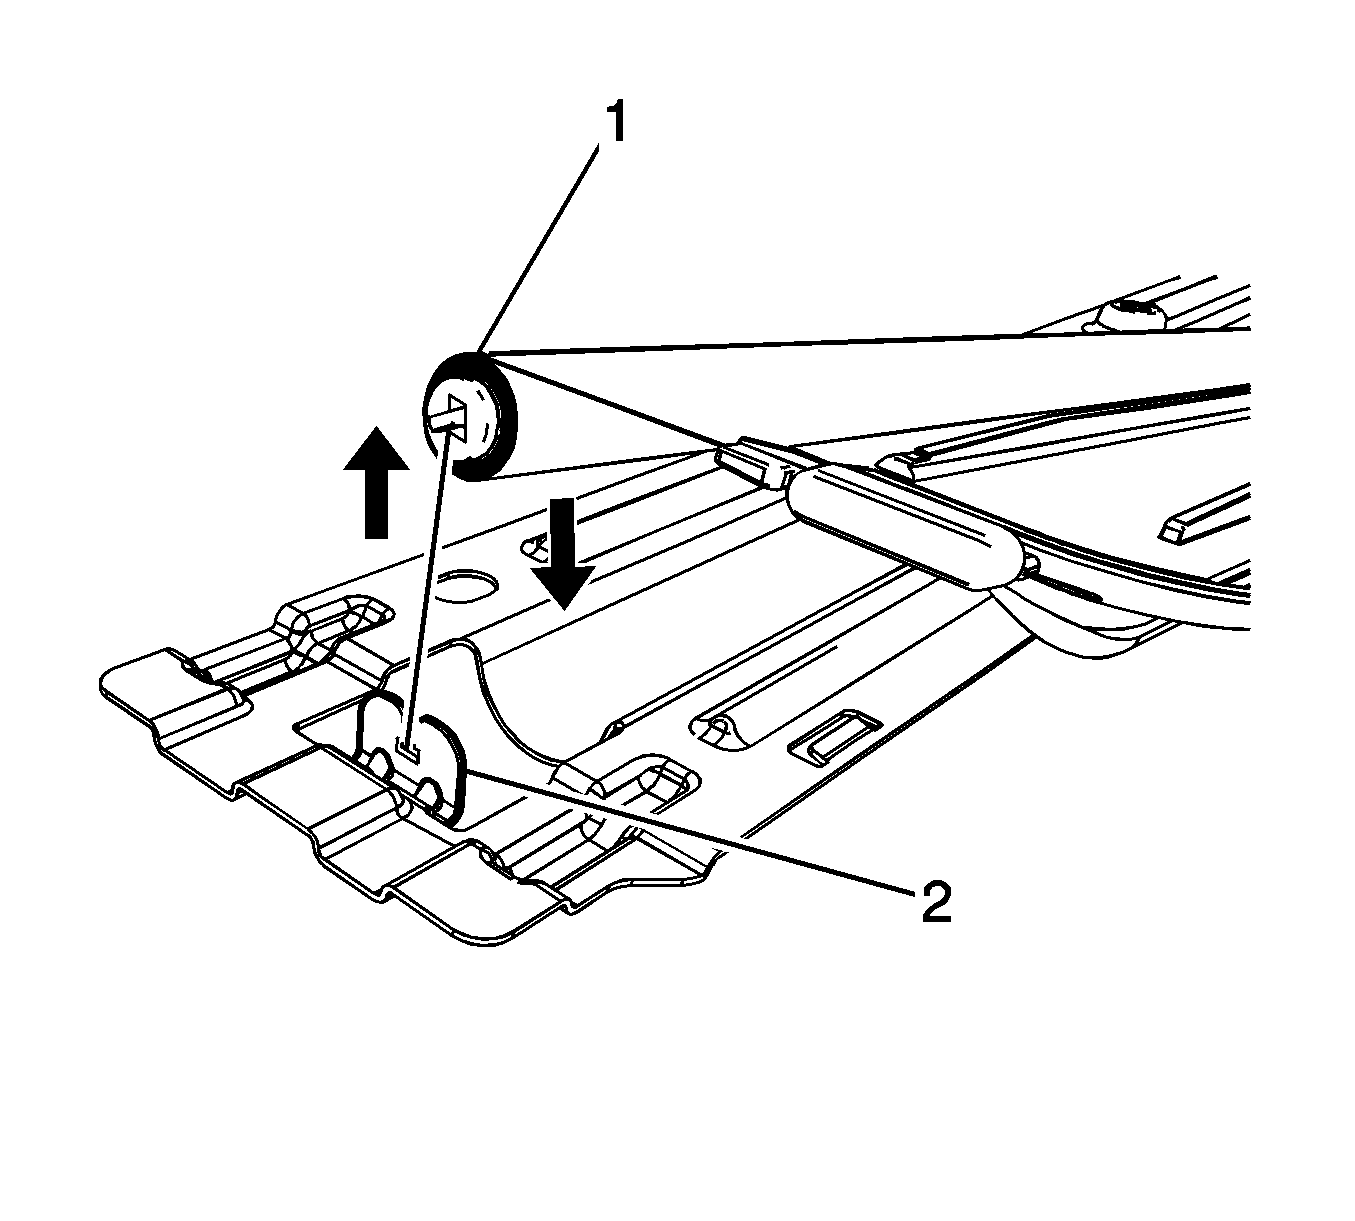
- Lift upward on the sunshade (1) removing it from the bracket (2).
- Remove the sunshade.
Important: If the sunshade spring releases, it will be necessary to rewind it.
Important: A new sunshade service part comes pre-loaded with a pin tool holding spring tension on the sunshade. If the sunshade spring releases, it will be necessary to rewind it and reinstall the pin tool. Following installation, retain the pin tool for future applications.
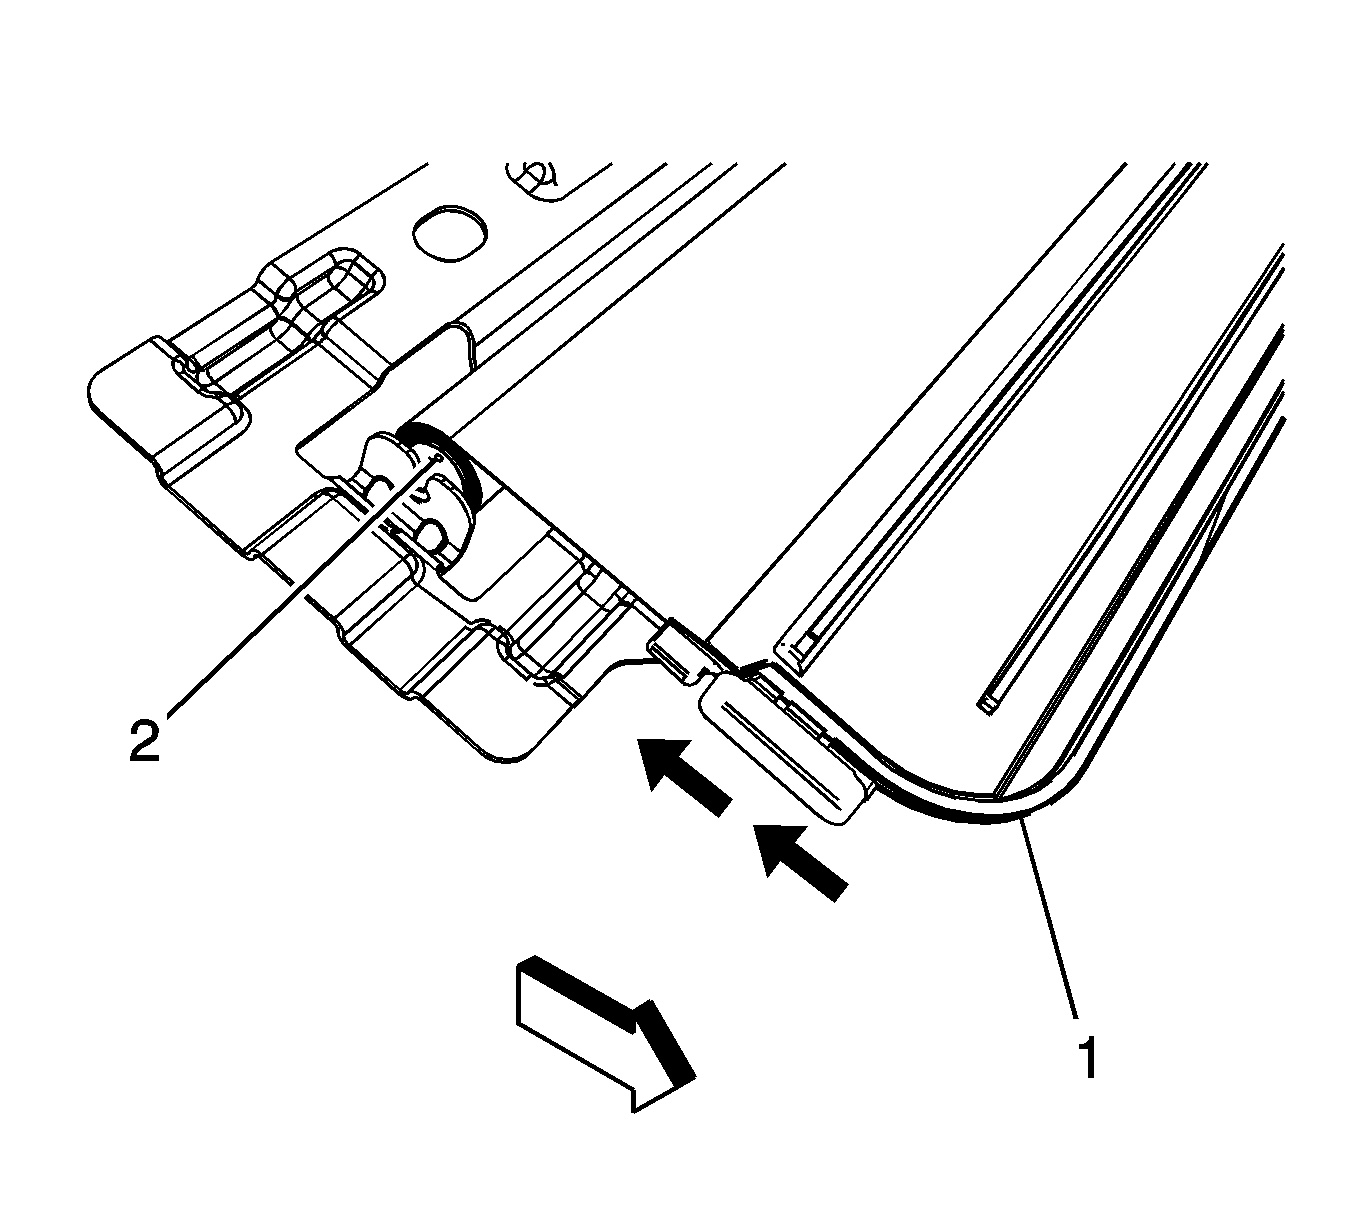
Important: The cam locking hole will come in to view when the sunshade is in the fully open position on the passengers side.
Installation Procedure
- If the sunshade spring released turn the sunshade roller end slot 20 times in the counterclockwise direction. Insert a suitable tool (1) into the sunshade cam locking hole (2).
- Install the sunshade to the vehicle from the passengers side.
- Insert the end of the sunshade (1) to the driver side bracket (2) notch.
- Insert the sunshade (1) to the passengers side bracket (2) notch.
- Turn the sunshade cam (2) until it is aligned with the bracket (3) notch.
- Install the sunshade front bar to the sunshade guides on the frame.
- Remove the suitable tool (1) from the sunshade cam locking hole (2).
- Ensure that the sunshade cam (2) is fully seated in the bracket (3).
- Install the sunroof sunshade trim cover. Refer to Sunroof Module Assembly Replacement.
- Install the sunroof module. Refer to Sunroof Module Assembly Replacement.
- Install the headliner. Refer to Headlining Trim Panel Replacement.
- Install the sunroof window. Refer to Sunroof Window Replacement.
- Initialization/Teach sunshade motor/actuator. Refer to Sunroof Motor/Actuator Initialization/Teach Process.
- Verify the operation of the sunshade.

Important: If the sunshade spring releases, it will be necessary to rewind it.


Sunroof Sunshade Replacement Front Manual
Removal Procedure
- Remove the sunroof window. Refer to Sunroof Window Replacement .
- Power the sunroof module window tracks to the fully open position.
- Close the sunshade (1) until the cam locking hole (2) come in to view.
- Insert a suitable tool (1) into the sunshade cam locking hole (2).
- Turn the sunshade (1) counterclockwise until the shade cam (2) is aligned with the bracket (3) notch.
- Lift upward on the sunshade (1) removing it from the bracket (2).
- Remove the sunshade from outside of the vehicle.
Important: If the sunshade spring releases, it will be necessary to rewind it. Turn the sunshade roller end slot 20 times in the counterclockwise direction.
Important: A new sunshade service part comes pre-loaded with a pin tool holding spring tension on the sunshade. If the sunshade spring releases, it will be necessary to rewind it and reinstall the pin tool. Following installation, retain the pin tool for future applications.

Important: The cam locking hole will come in to view when the sunshade is in the fully open position on the passengers side.


Important: The sunshade must be removed from the top of the vehicle.
Installation Procedure
- Install the sunshade to the vehicle from the passengers side.
- Insert the end of the sunshade (1) to the driver side bracket (2) notch.
- Insert the sunshade (1) to the passengers side bracket (2) notch.
- Turn the sunshade cam (2) until it is aligned with the bracket (3) notch.
- Install the sunshade.
- Remove the suitable tool (1) from the sunshade cam locking hole (2).
- Ensure that the sunshade cam (2) is fully seated in the bracket (3) and the sunshade slides smoothly.
- Power the sunroof module window tracks to the fully closed position.
- Install the sunroof window. Refer to Sunroof Window Replacement .
- Verify the operation of the sunshade.


