Info - General Windnoise/Waterleak Diagnostic Guide

| Subject: | General Windnoise/Waterleak Diagnostic Guide |
| Models: | 2005 Buick Terraza |
| 2005 Chevrolet Uplander |
| 2005 Pontiac Montana |
| 2005 Saturn Relay |
This bulletin contains information on various windnoise and waterleak conditions starting from front of vehicle to the rear of the vehicle. Refer to the following table for a quick reference to the conditions and the corresponding illustrations:
Condition | Best Described In |
|---|---|
Buzz type noise in front end. | #1 |
Road noise, Windnoise or the windshield fogs up. | #2 |
Windnoise around the top of the door. | #3 |
Windnoise from the sliding side door. | #4 |
Windnoise from the sliding side door glass. | #5 |
Windrush from the sliding side door glass. | #6 |
Water running down the "A" pillar. | #7 |
Water at bottom of the door. | #8 |
Water settles in the trim around the rear door striker | #9 |
Headliner is wet or water is coming out of the "D" pillar trim to rear quarter trim. | #10 |
Water may be dripping from "D" pillar trim to rear quarter trim or the rear carpet is wet. | #11 |
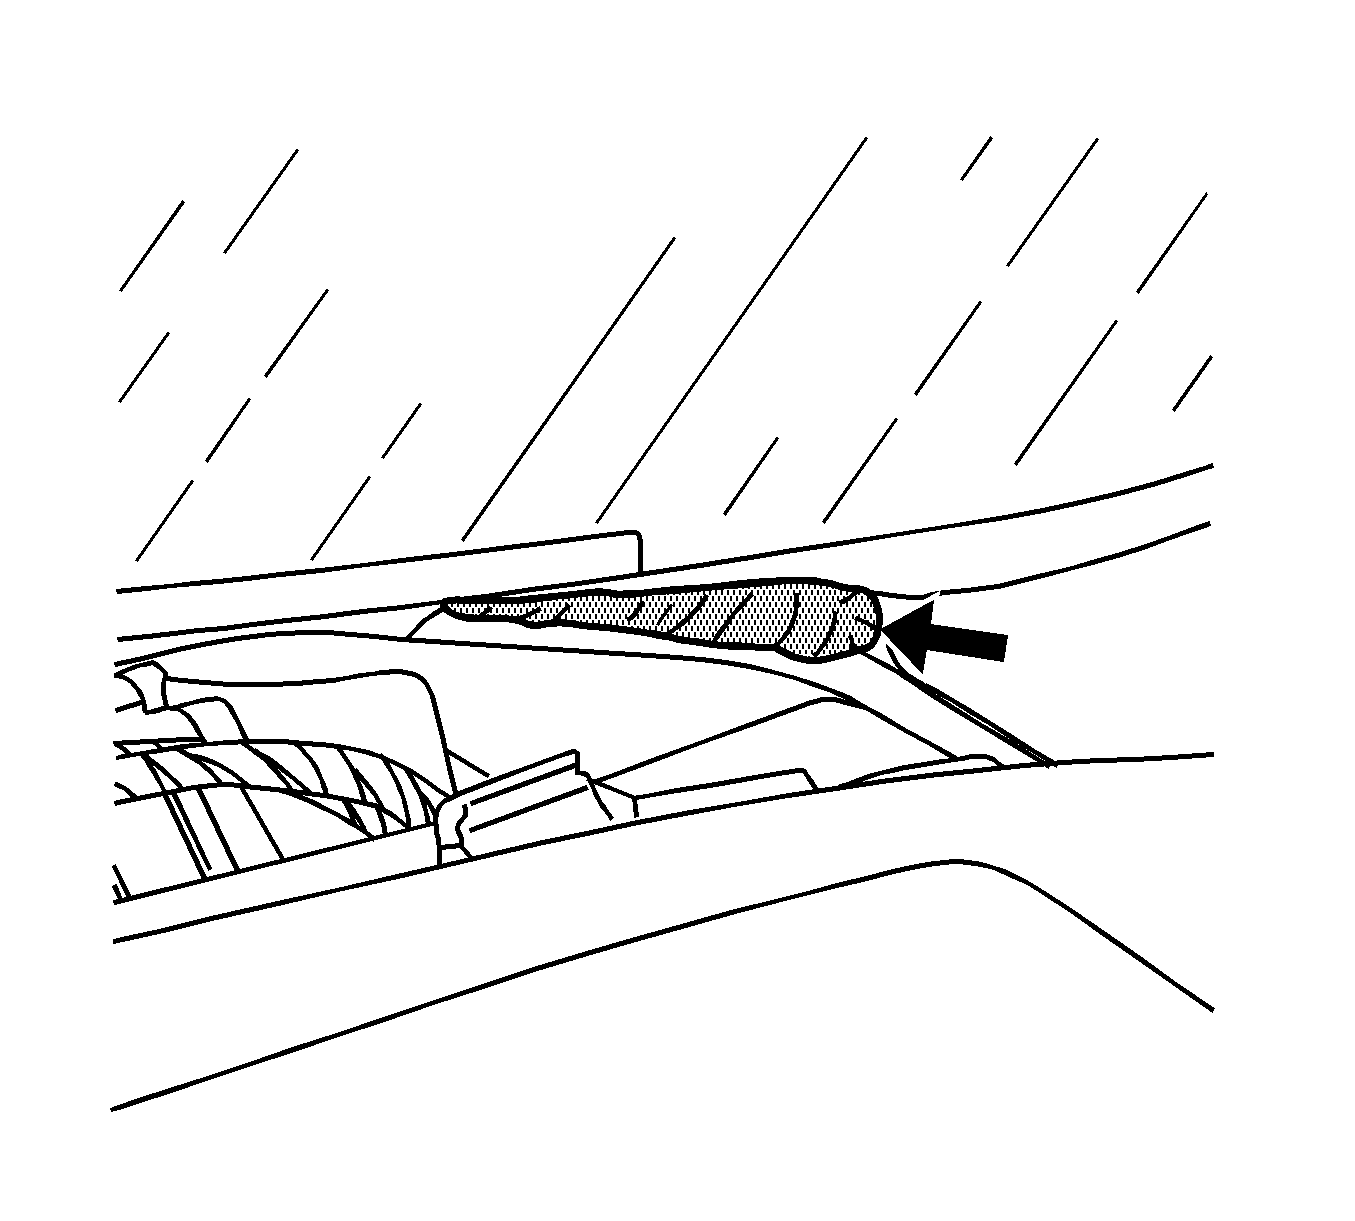
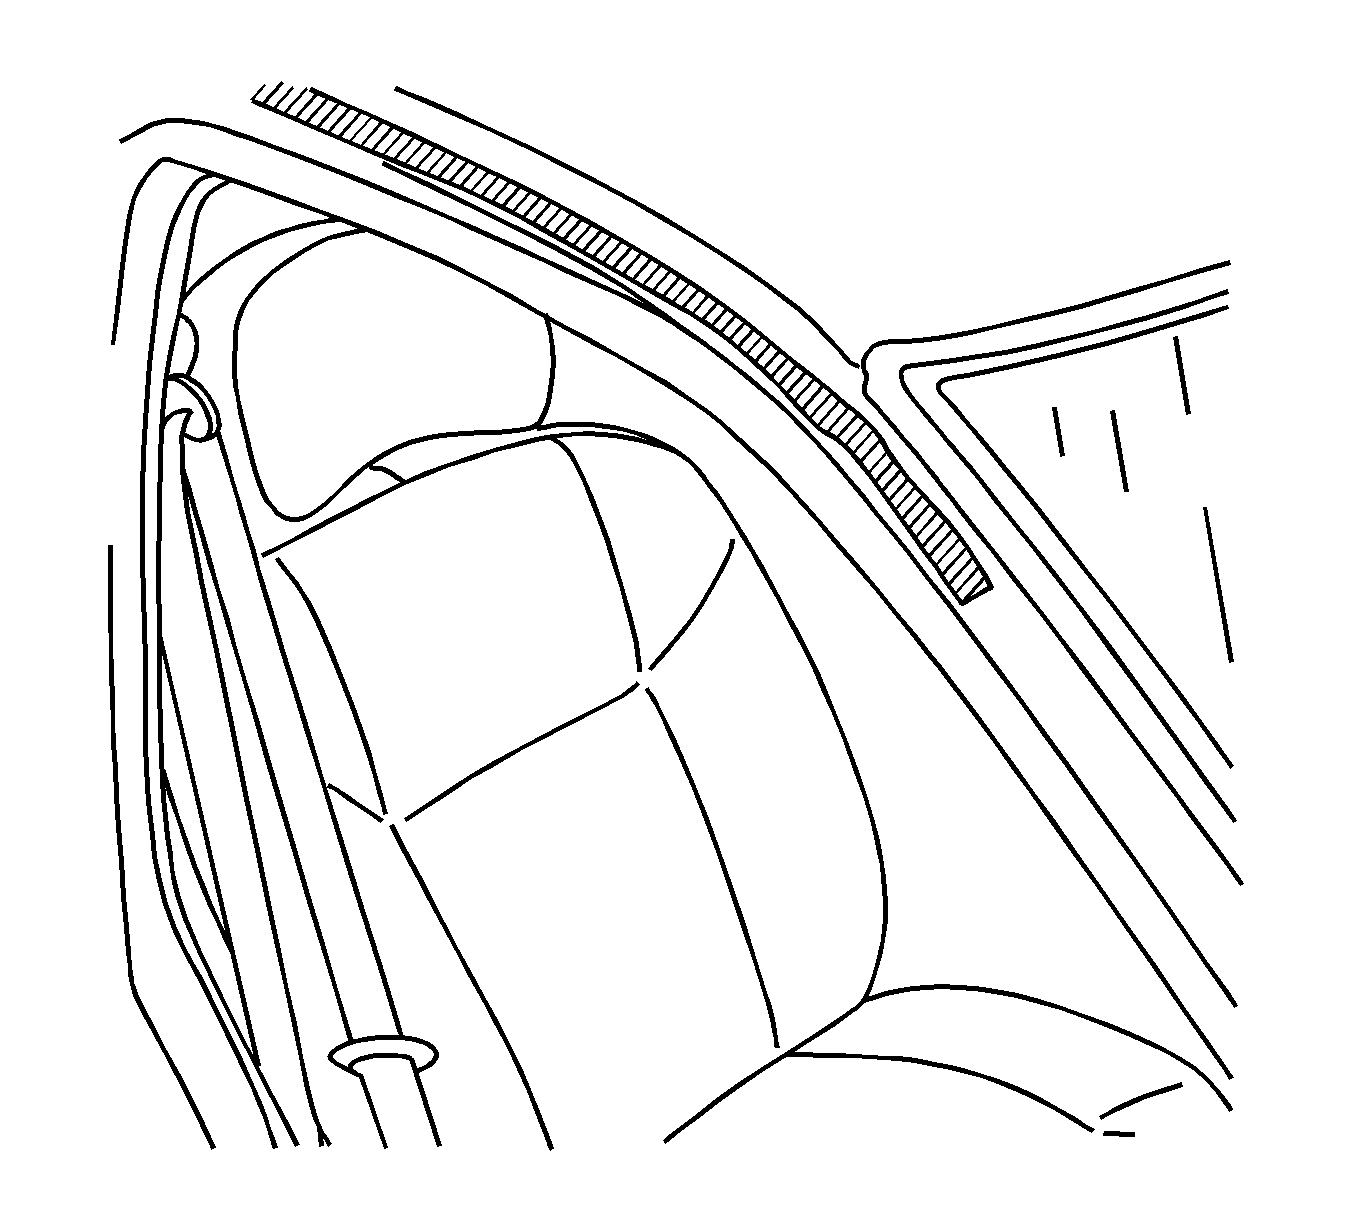
Condition #1
There is a buzz, moan type or a sound similar to that of a Kazoo or a Reed. This condition usually happens at highway speeds with temperatures below 4°C (40°F) and more pronounced if there is a good cross wind.
Cause
The primary door weatherstrip lip may vibrate against the "A" pillar reveal molding.
Correction
Pull the primary seal weatherstrip back, clean and apply two-way tape 130 mm (12 in) long to the weatherstrip lip. Refer to the illustration above. Clean and then seat the primary seal to the "A" pillar.
Condition #2
Road noise, windnoise or the windshield fogs up on the right hand side.
Cause
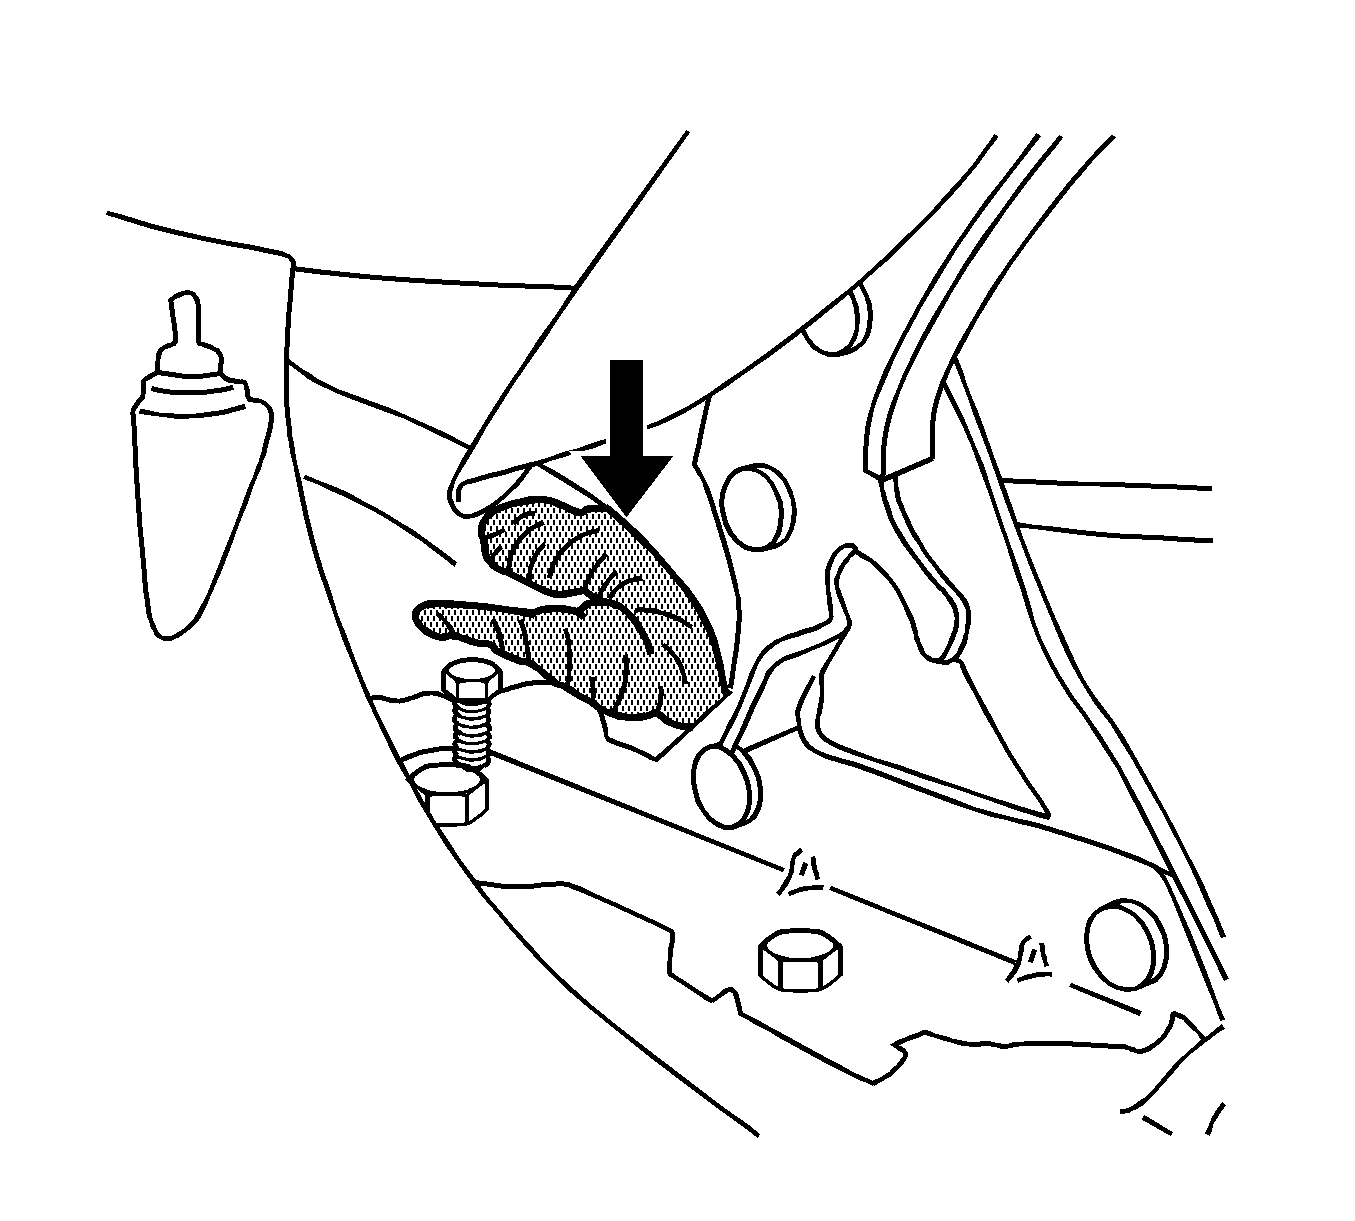
A foaming operation may have been missed at the bottom of the "A" pillar. Open the hood and look for the foam in the illustration shown above.
Correction
From the inside of the vehicle, place duct tape horizontally in the hole so that when the foam is applied, it doesn't drop down into the dash. Apply Kent Ure-foam™ Expandable Foam, P/N P10630, or 3M™ Automix™ flexible foam, P/N 08463, to the bottom of the "A" pillar. Refer to the illustration above. Apply a second tube from outside the vehicle. Refer to the foam in the illustration under the cause.
Condition #3
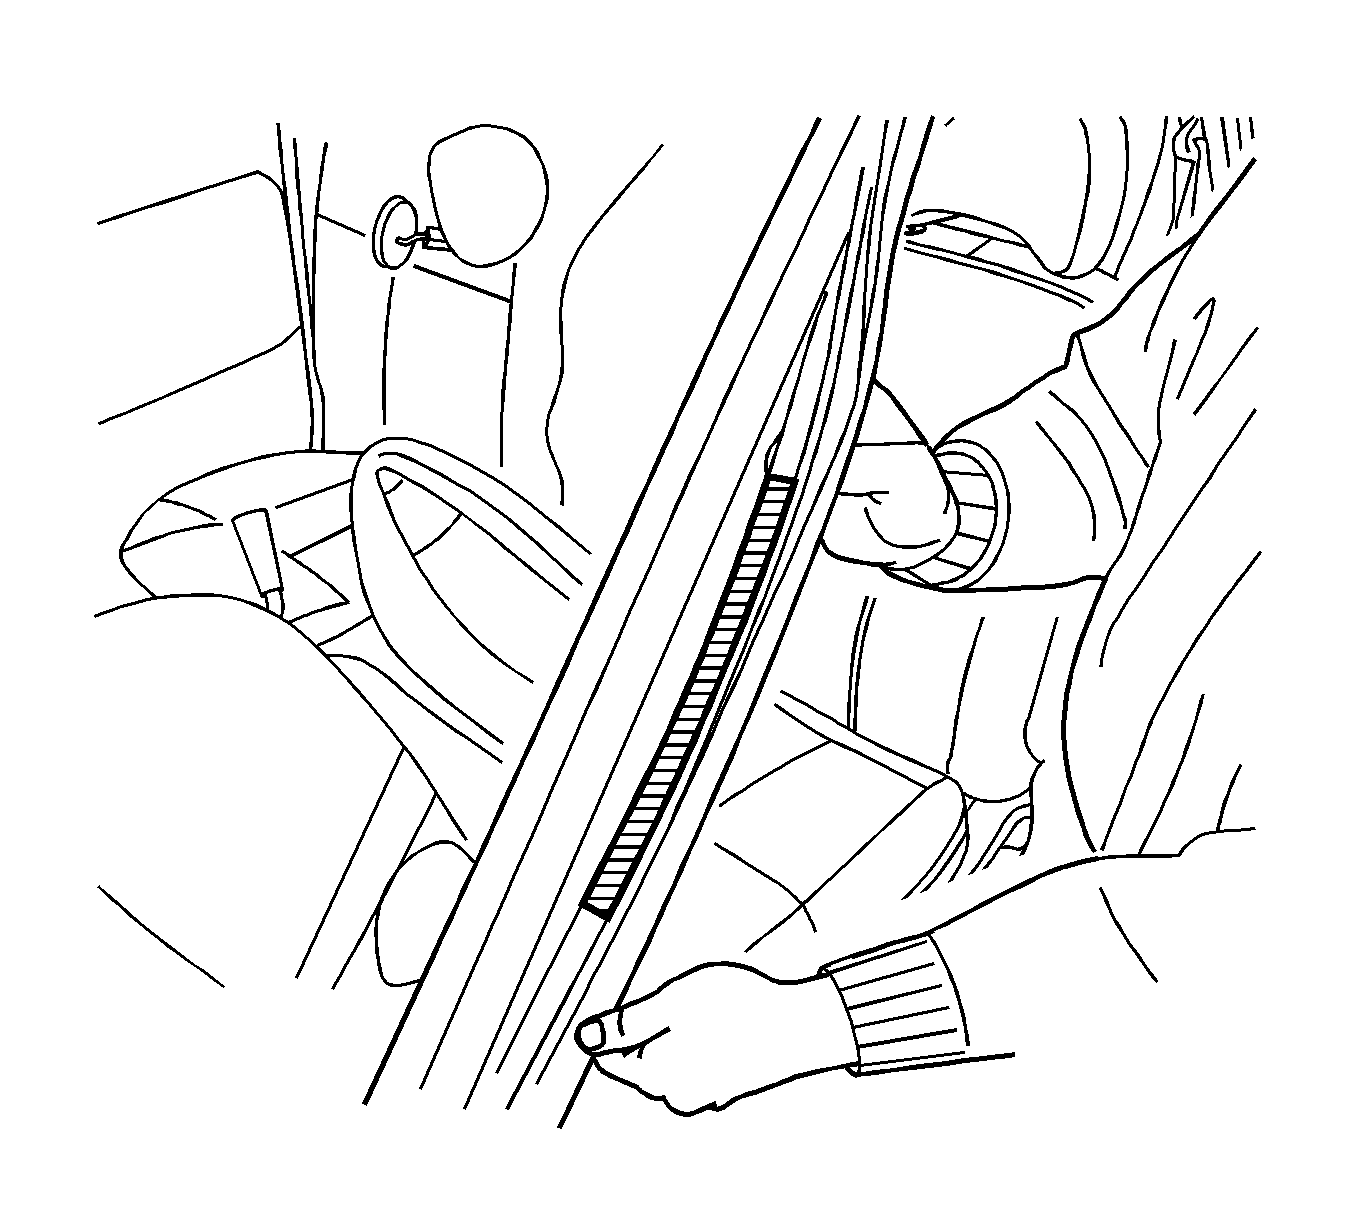
There is windnoise from around the top of the front doors.
Cause
The primary seal might not be making good contact to the door surface. Check the seal contact with the dollar bill method.
Correction
Pull the primary seal down and measure the distance between the door surface and the body. Refer to the illustration above. Adjust the door striker to achieve 15 mm (9/16 in) between the door and the hem flange.
Condition #4
There is windnoise from the sliding side door.
Cause
The sliding side door may be outboard of the front door.
Correction
Adjust the sliding side door inboard 1 mm of the front door.
Condition #5
There is windnoise from the sliding side door glass.
Cause
There may be a gap in the sliding side door glass urethane.
Correction
Clean the leak area and reseal with urethane.
Condition #6
There is a windrush from the sliding side door glass.
Cause
The sliding side door glass is sticking outboard from the sliding side door outer sheet metal too far.
Correction
Tape off the glass to verify. If that corrects the condition, it will be necessary to remove the glass and reset it in the opening.
Condition #7
There is water running down the "A" pillar.
Cause
Pull the primary seal back at the top of the door and make sure that the piece of tape is attached to the hem flange.
Correction
If the piece of tape is loose, try and press it down or apply weatherstrip adhesive under the tape. Refer to the illustration for tape location.
Condition #8
There is water at the bottom of the front door.
Cause
The bottom of the water deflector may not be sealed to the door frame. Refer to the illustration above.
Correction
Look at the seal on the water deflector to make sure it is not dirty. Clean the door surface and reapply the water deflector to the door. If the deflector does not stick, it will be necessary to install a new one.
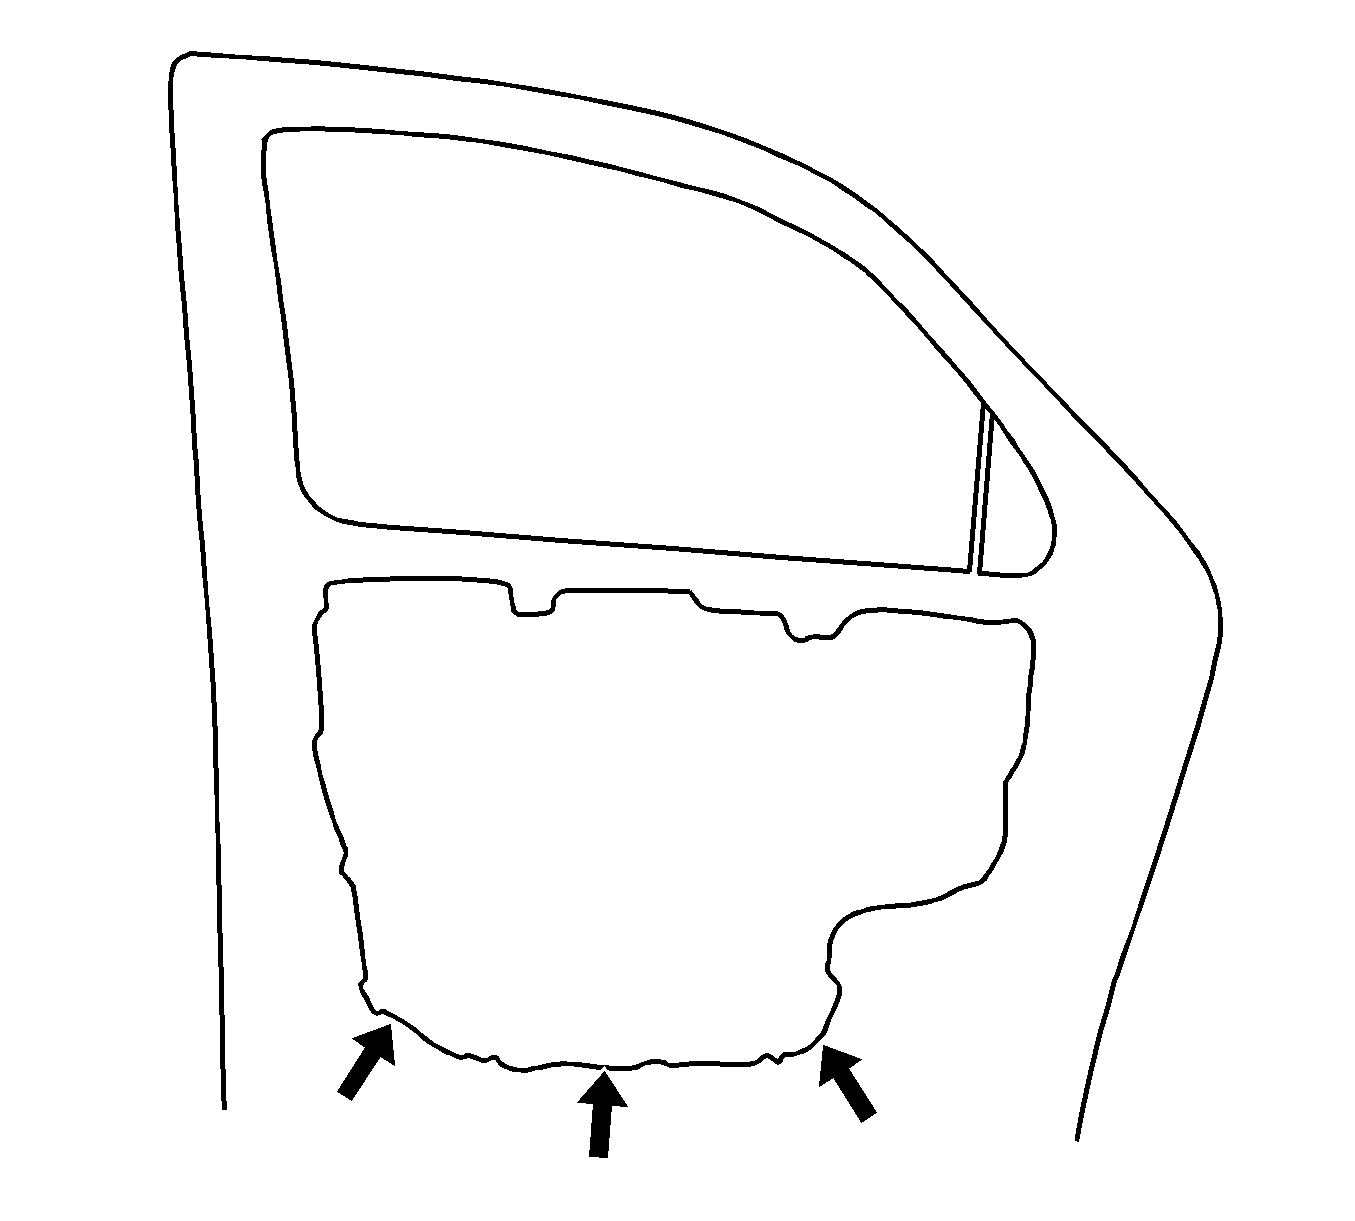
Condition #9

Water settles in the trim around the rear door striker. Refer to the illustration above.
Cause
The lift gate emblem studs may not be sealed. Refer to the illustration above.
Correction
Clean the studs off and seal with weatherstrip adhesive.
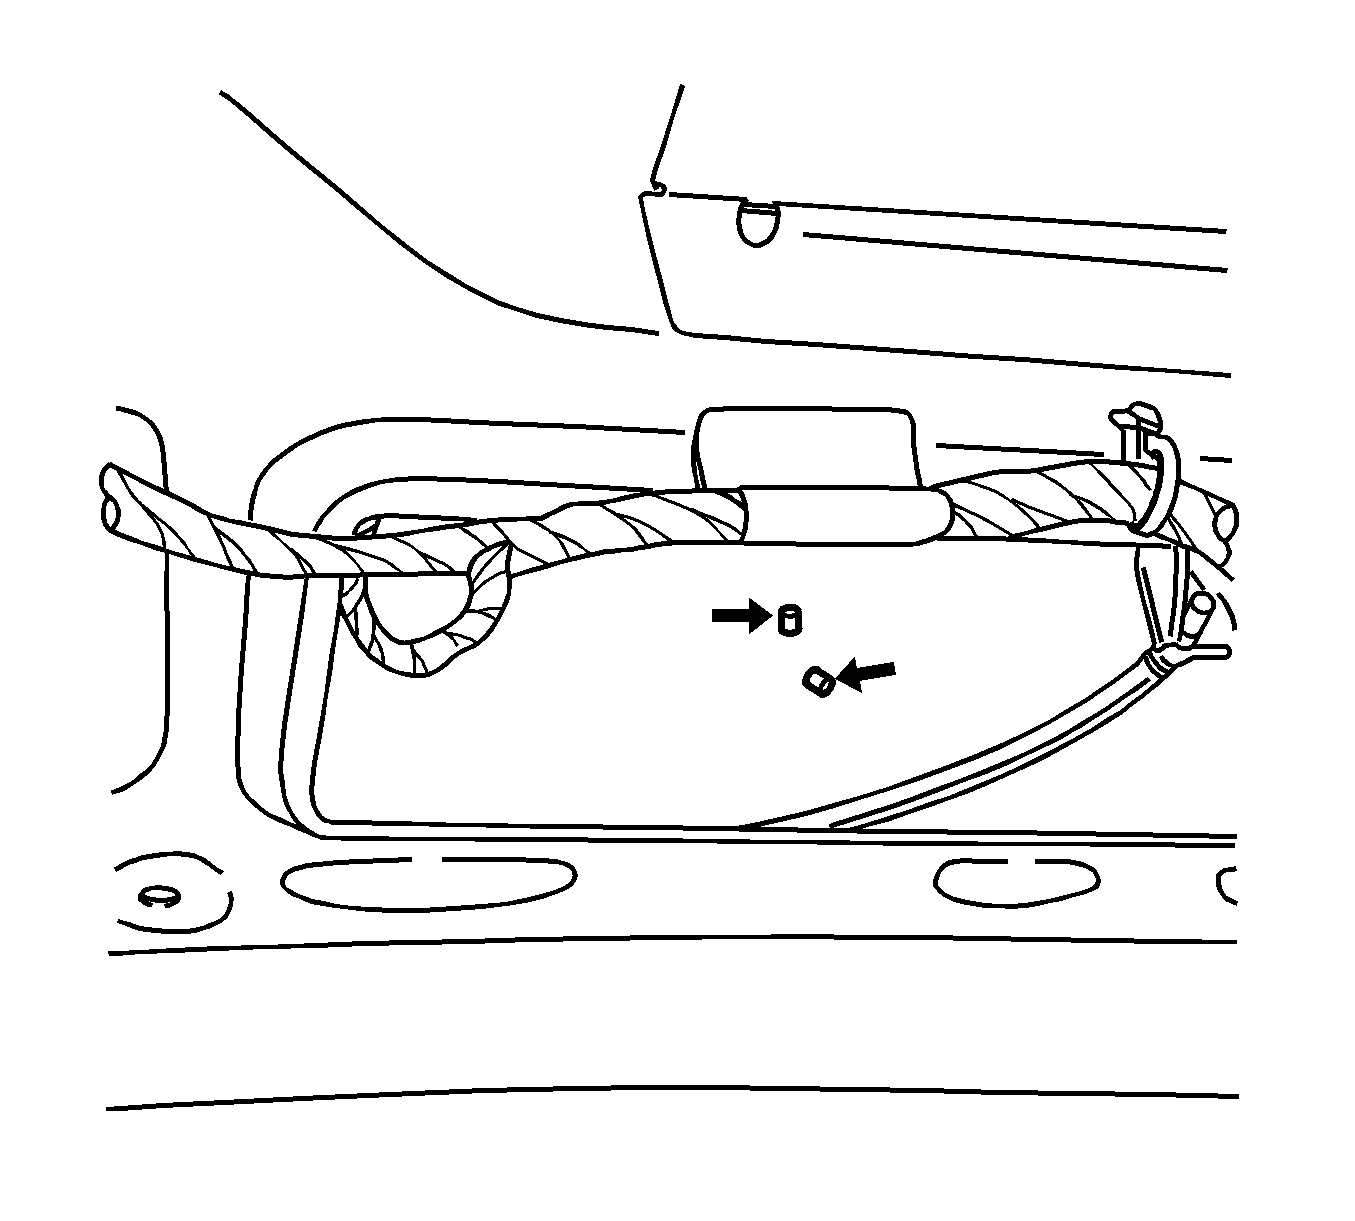
Condition #10
The headliner is wet or water is coming out of the "D" pillar trim to rear quarter trim.
Cause
The rear door wire pass through grommet may not be seated to the body. Refer to the illustration above.
Correction
Reseat the end of the grommet.
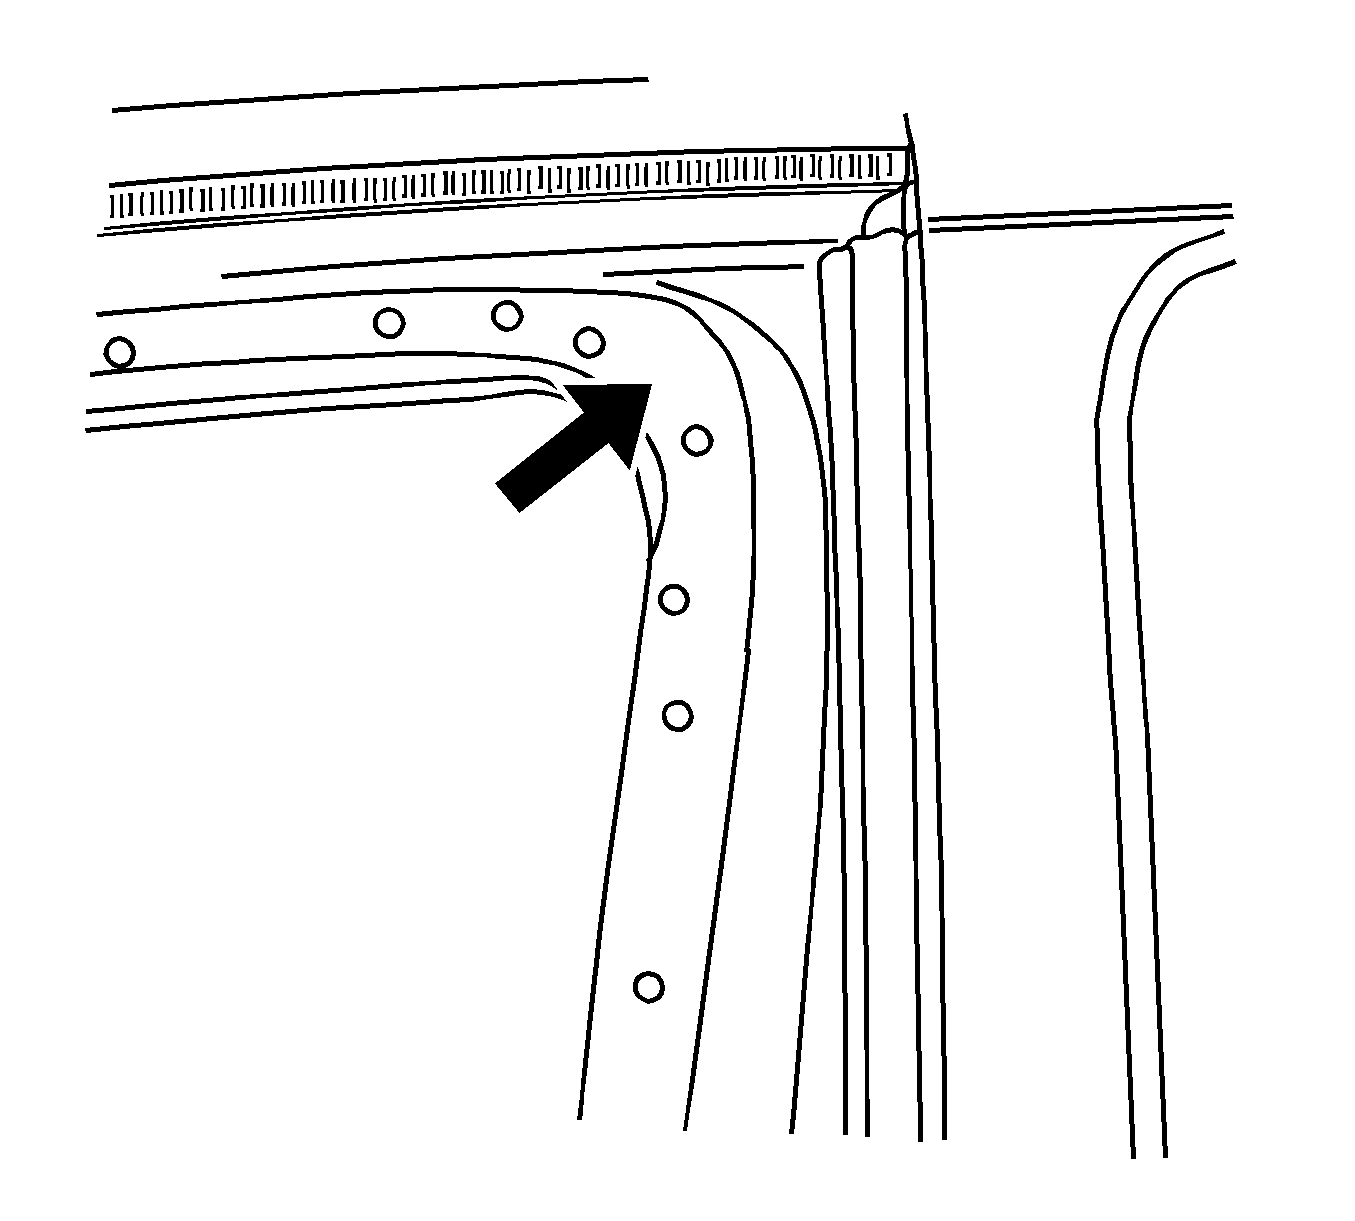
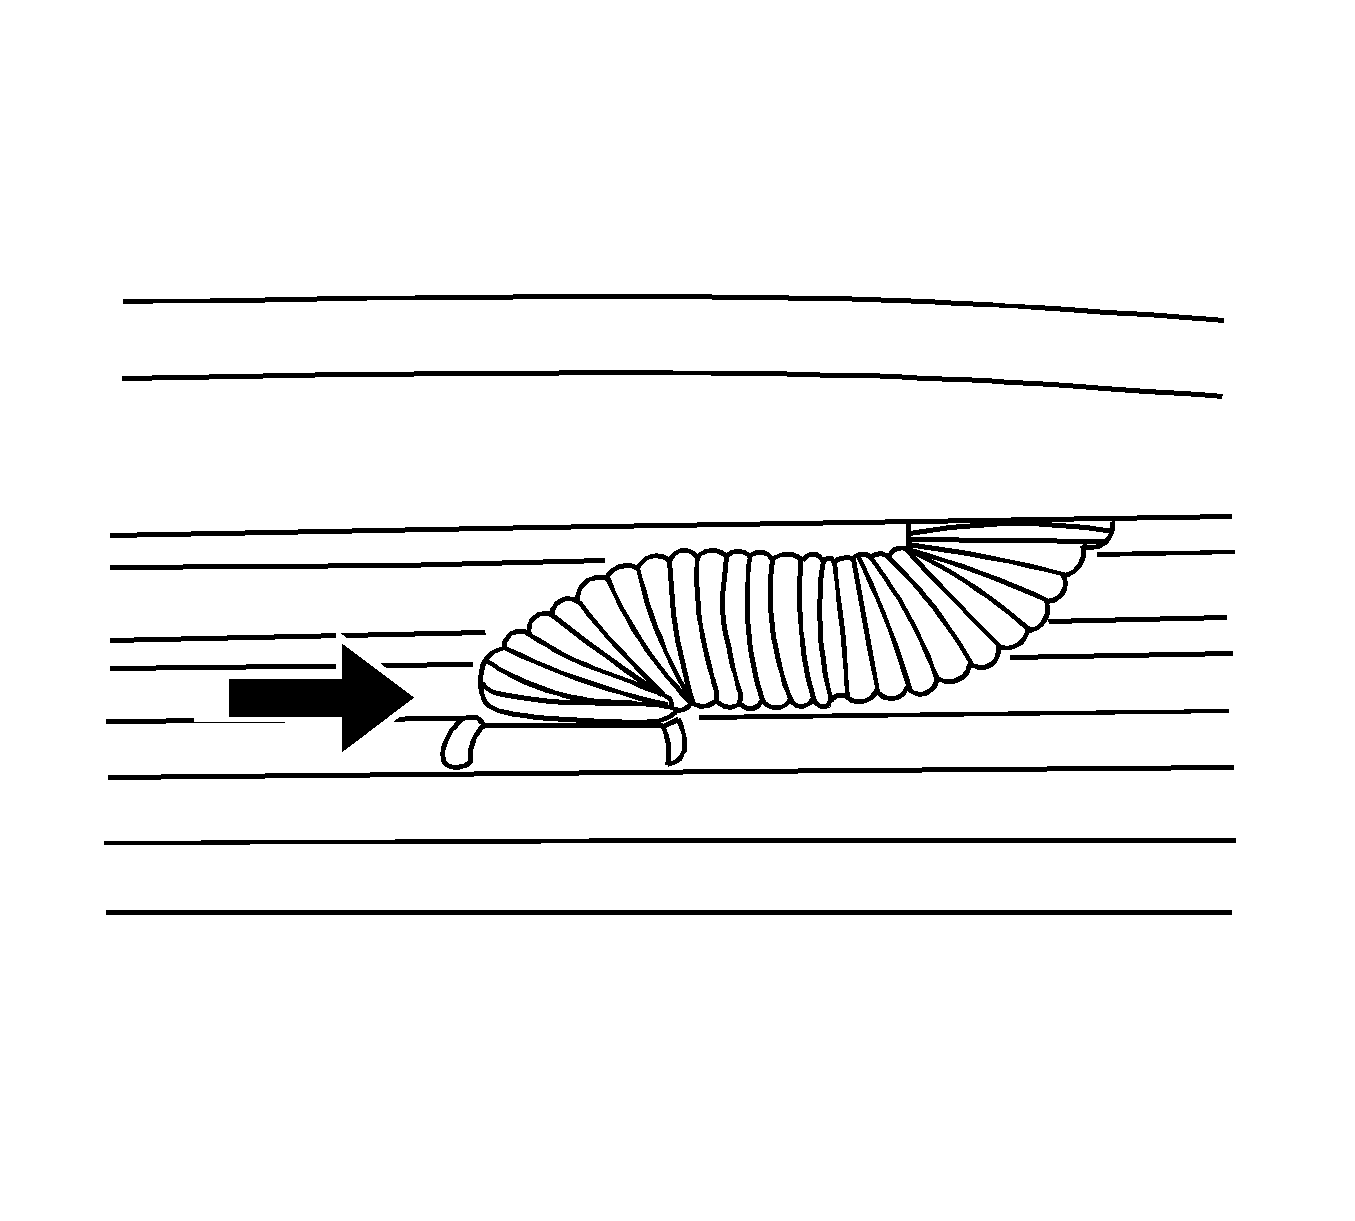
Condition #11
Water may be dripping from the "D" pillar trim to rear quarter trim or the rear carpet is wet.
Cause
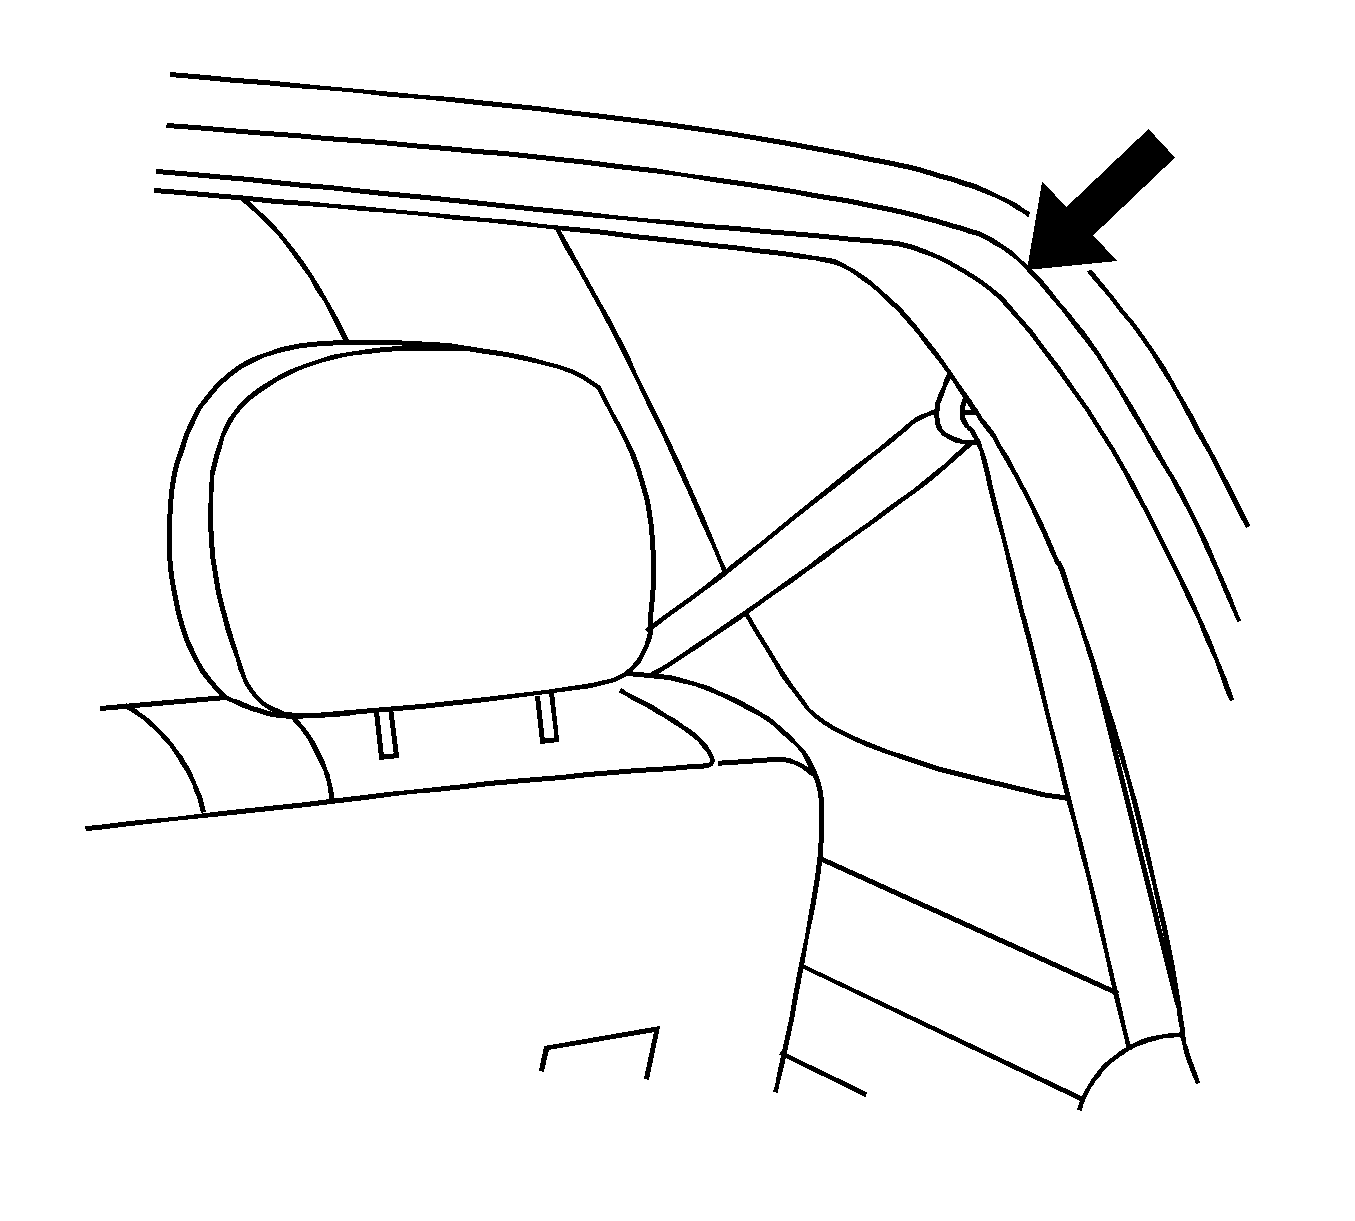
The rear door primary seal may not be seated to the body. Refer to the arrow in the illustration above.
Correction
Fully seat the primary weatherstrip.
Warranty Information
For vehicles repaired under warranty, use:
Condition # | Labor Operation | Description | Labor Time |
|---|---|---|---|
#1&7 | C1080 | Front right door primary seal | 0.1-0.3 hr |
#1&7 | C1081 | Front left primary seal | 0.1-0.3 hr |
#2 | C2420 | Panel, Instrument panel upper | 0.2 hr |
| Add | Apply Foam to pillar | 0.3 hr |
#3 | B4000 | Right front door align | 0.1-0.3 hr |
#3 | B4001 | Left front door align | 0.1-0.3 hr |
#4 | B5000 | PSD Right Align | 0.1-0.3 hr |
#5&10 | B5410 | Body Reseal | 0.1-0.4 hr |
#6 | C0462 | Side door glass | 0.7 hr |
#8 | C3364 | Right front door water deflector | 0.3 hr |
#8 | C3365 | Left front door water deflector | 0.3 hr |
#9 | C4860 | Lift Gate Trim panel | 0.3 hr |
| Add | To clean and apply sealer | 0.1 hr |
