For 1990-2009 cars only
Door Body Side Molding Replacement Front
Tools Required
J 25070 Heat Gun
Removal Procedure
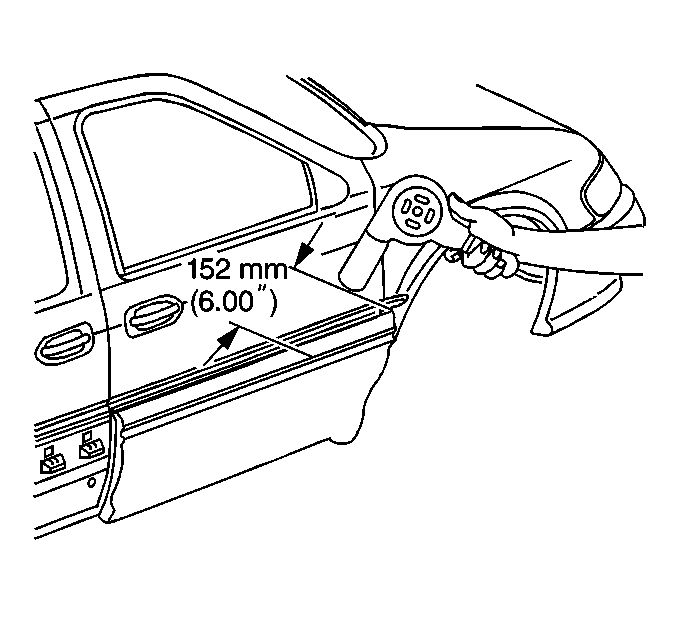
- Use J 25070 152 mm (6 in) from the surface to heat the lower edge of the front door molding.
- Use a plastic flat-bladed tool to remove the lower edge of the molding from the surface.
- Pull the lower edge of the molding out to release the adhesive tape and locating pins.
- Pull the lower edge of the molding up to release the molding from the door.
- Remove the molding from the door body side.
- Use oil-free naphtha or alcohol to clean all traces of adhesive from the body panel.
- Dry the surface thoroughly.

Use a circular motion for 30 seconds when applying the heat.
Notice: Refer to Exterior Trim Emblem Removal Notice in the Preface section.
Installation Procedure
- Use a J 25070 to warm the door to a minimum of 21°C (70°F), if necessary.
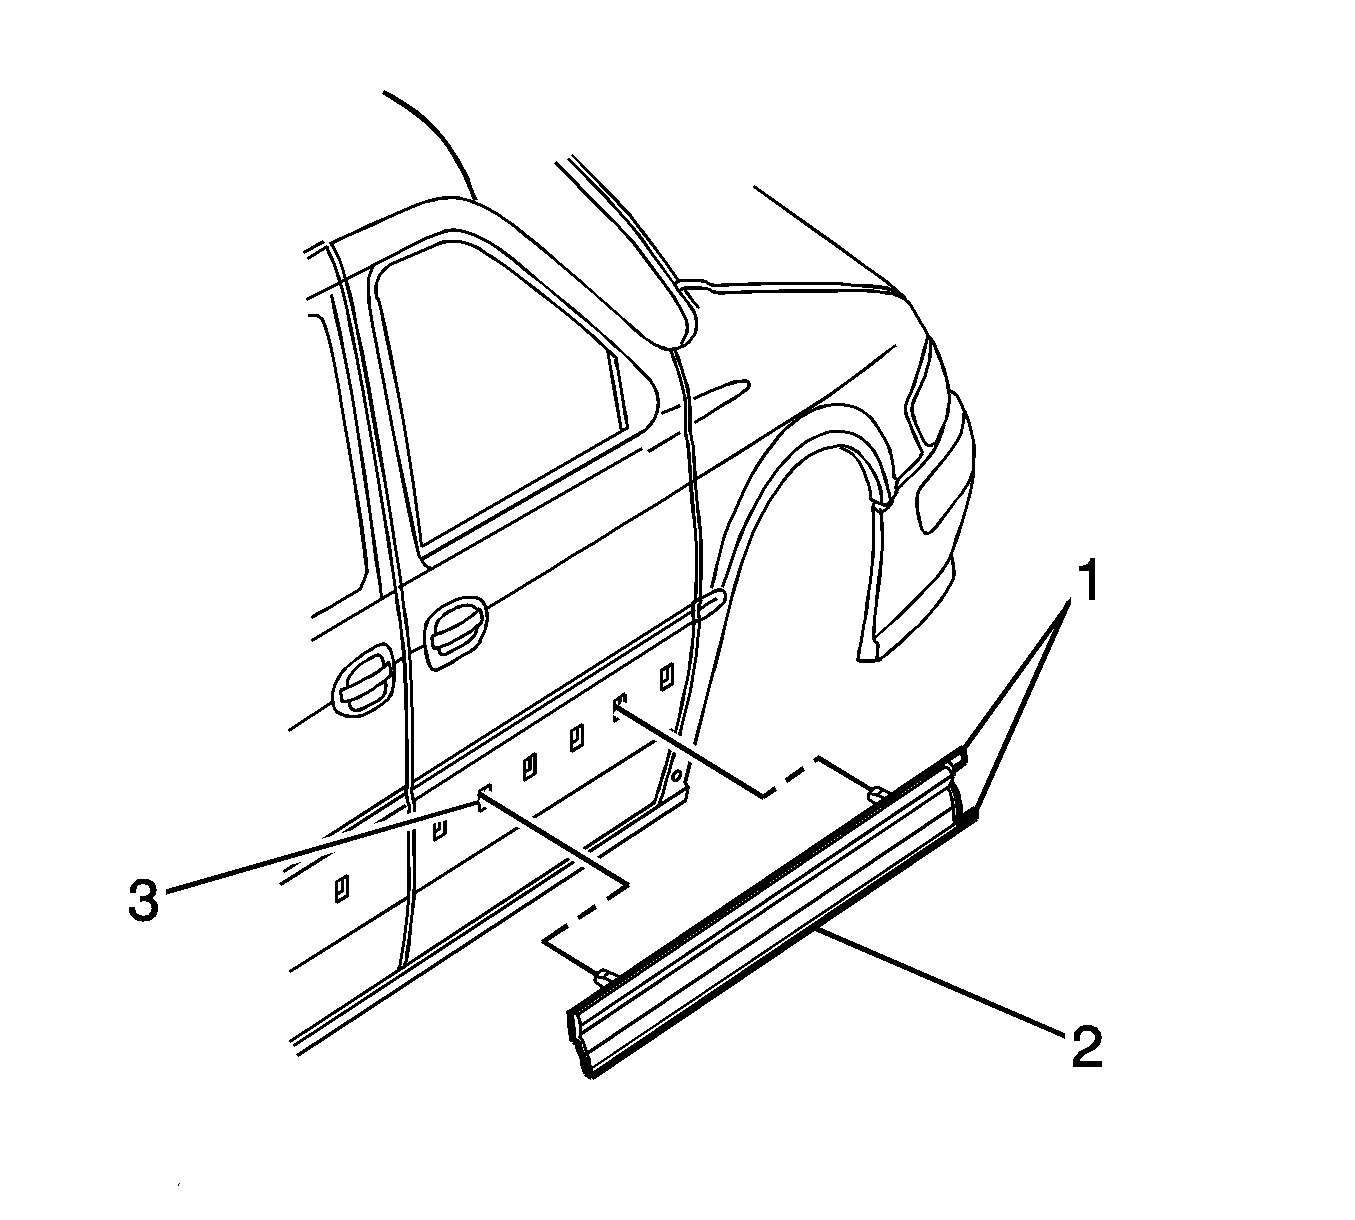
- Insert the alignment pins (3) into the holes, starting at the rear (3) first.
- Remove the protective liner (1) from the back side of the molding (2).
- Position the retainers at the front and rear edges of the molding.
- Press the molding firmly in order to wet-out the adhesive tape.

Important:
• Do NOT touch the exposed adhesive tape with your hands. • Do NOT allow the exposed adhesive tape to collect any dirt or foreign material.
Door Body Side Molding Replacement Rear
Tools Required
J 25070 Heat Gun
Removal Procedure
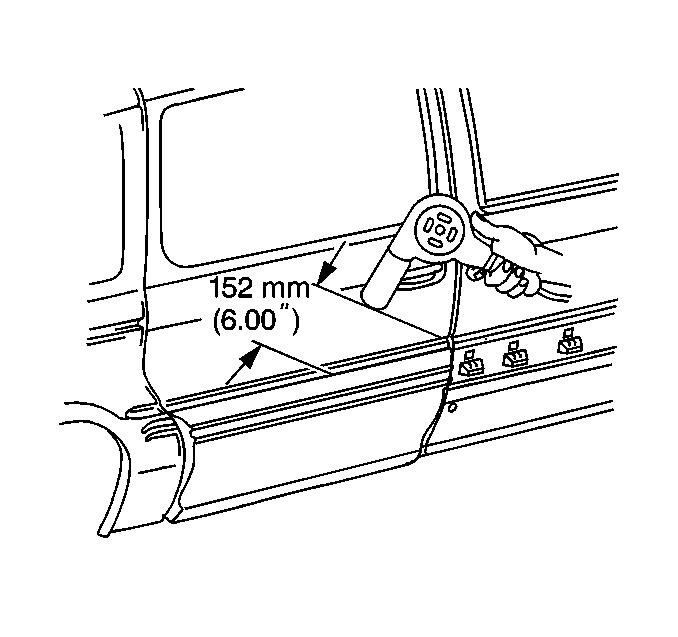
- Use J 25070 152 mm (6 in) from the surface to heat the lower edge of the sliding door molding.
- Use a plastic flat-bladed tool to remove the lower edge of the molding from the surface.
- Pull the lower edge of the molding out to release the adhesive tape and locating pins.
- Pull the lower edge of the molding up to release the molding from the door.
- Remove the molding from the door.
- Use oil-free naphtha or alcohol to clean all traces of adhesive from the body panel.
- Dry the surface thoroughly.

Use a circular motion for 30 seconds when applying the heat.
Notice: Use a plastic, flat-bladed tool to prevent paint damage when removing an emblem/name plate.
Installation Procedure
- Use a J 25070 to warm the door to a minimum of 21°C (70°F), if necessary.
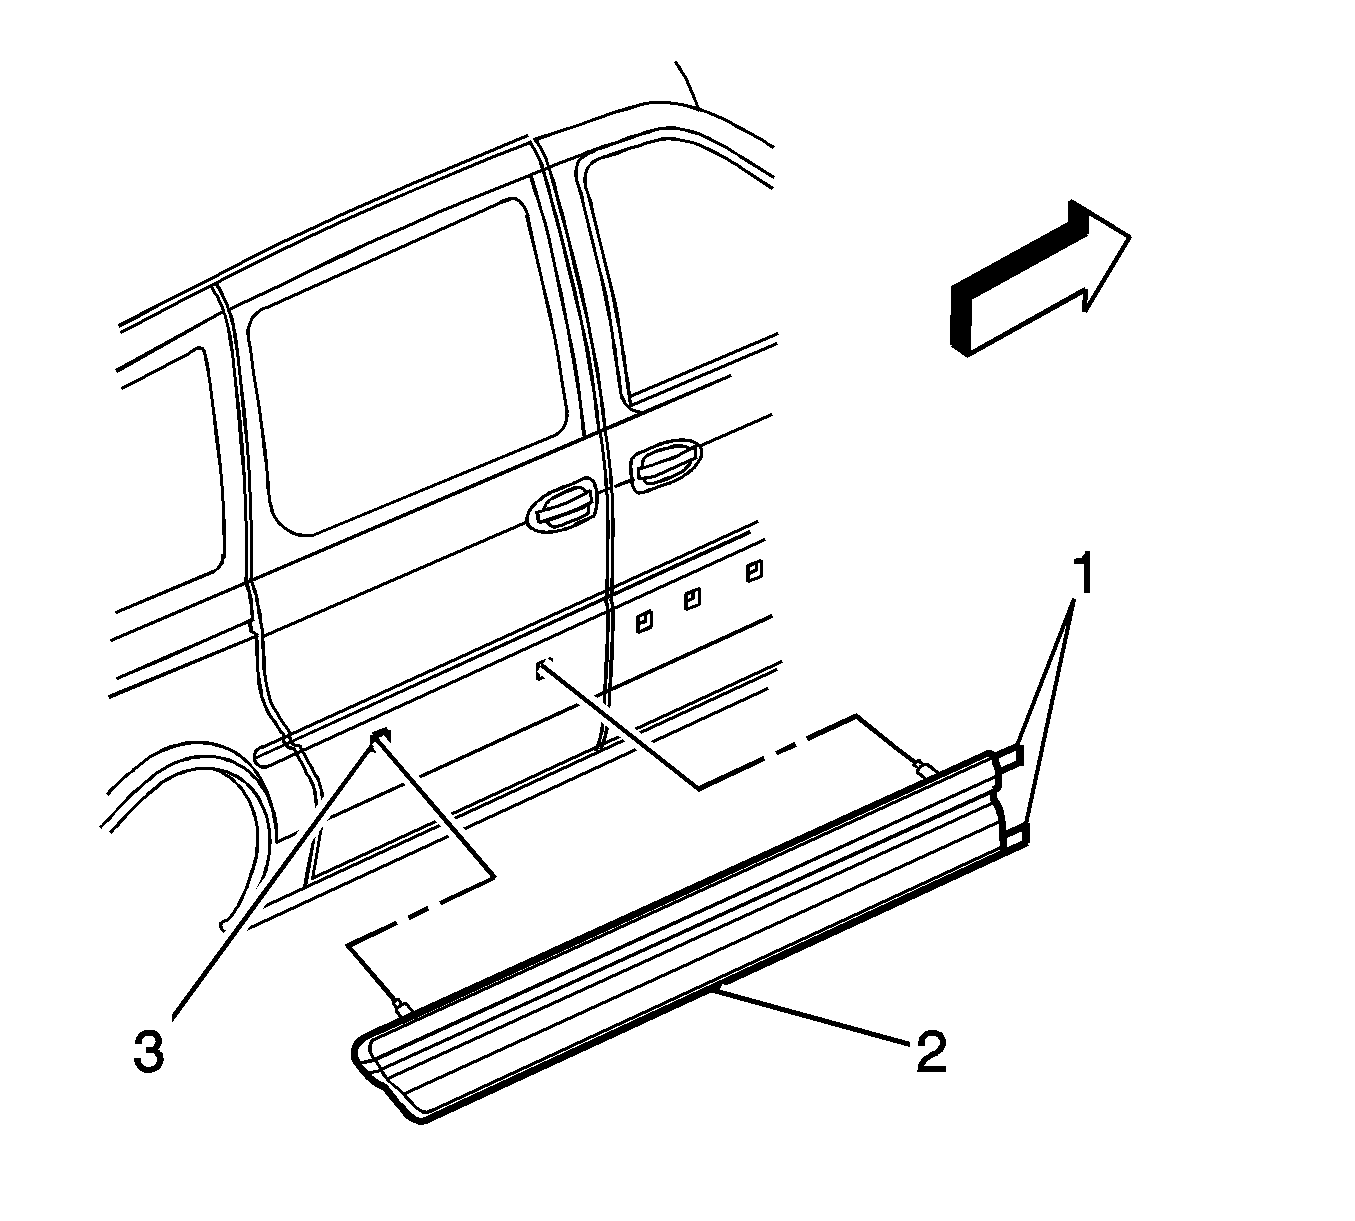
- Insert the rear alignment pins (3) into the holes starting at the rear.
- Remove the protective liner (1) from the back side of the molding (2).
- Press the molding firmly in order to wet-out the adhesive tape.
- Push in the retainers at the front and rear edges of the molding.

Important:
• DO NOT touch the exposed adhesive tape with your hands. • DO NOT allow the exposed adhesive tape to collect any dirt or foreign material.
