For 1990-2009 cars only
Quarter Window Replacement Without A20 Manual
Tools Required
J 34946 Window Pin Remover
Removal Procedure
- Install the bodyside window garnish molding. Refer to Upper Rear Trim Finish Panel Replacement .
- Install the body side rear upper garnish molding. Refer to Body Lock Pillar Upper Trim Panel Replacement .
- Open the bodyside window to the full open position.
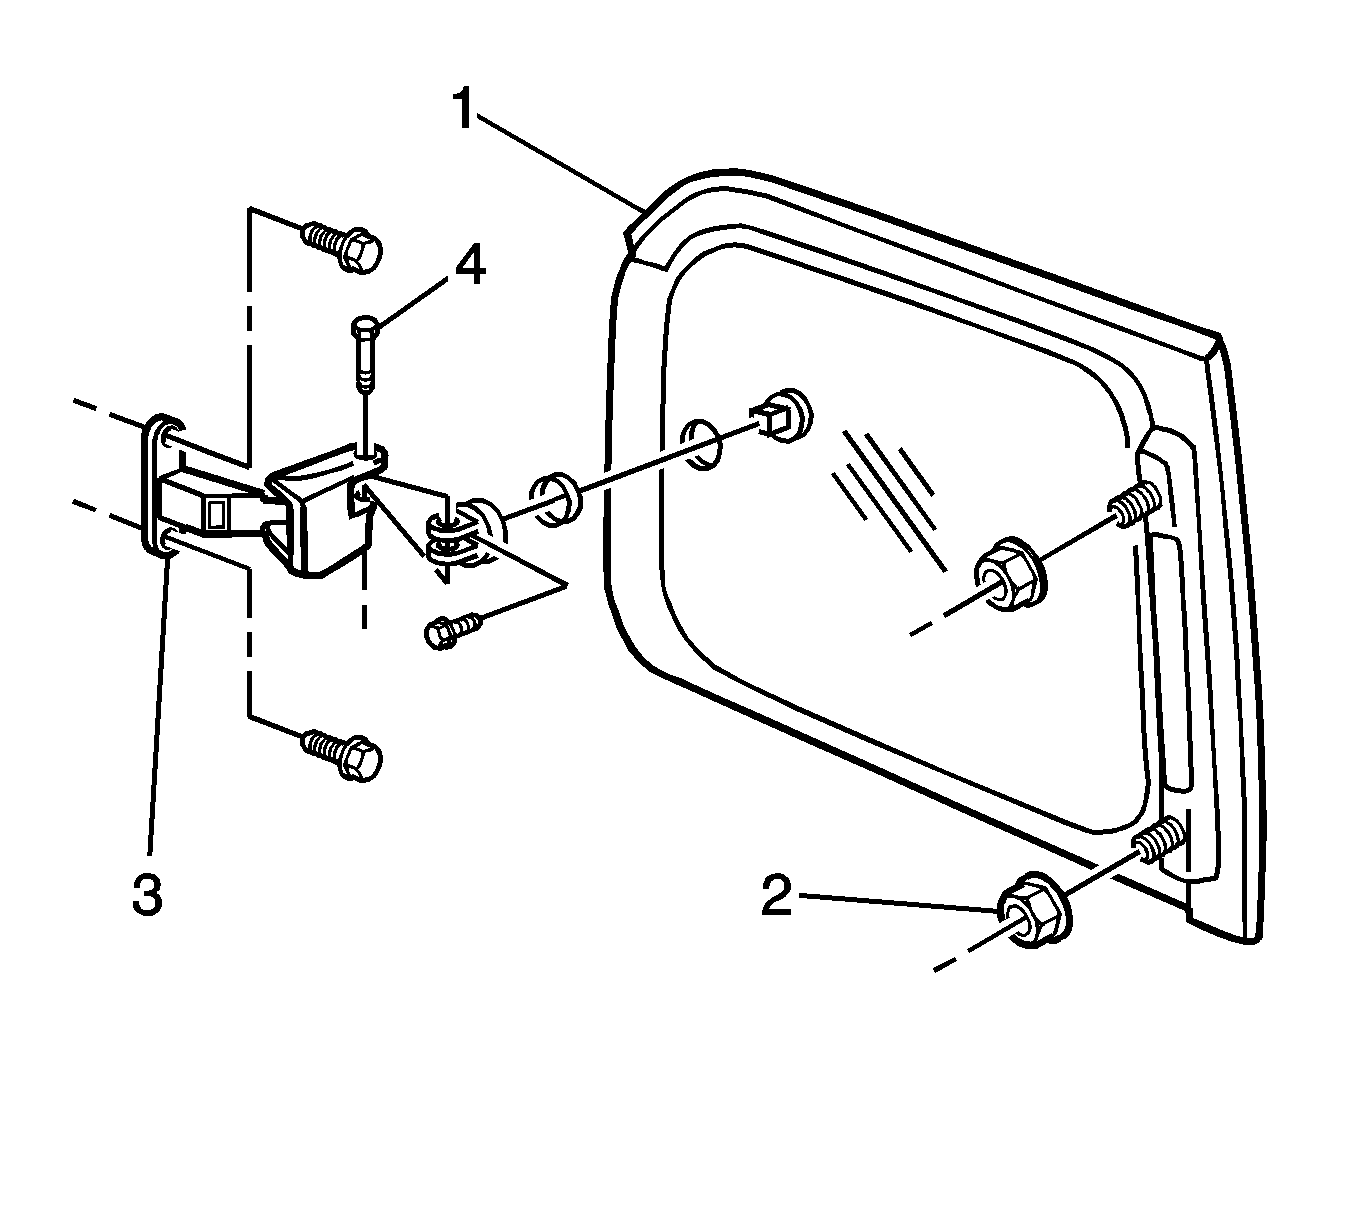
- Use J 34946 or equivalent in order to remove the latch hinge pin.
- Remove the bodyside window hinge nuts (2) from the body.
- Remove the bodyside window from the opening.
- Remove the bodyside window latch hinge screw from the window.
- Remove the retainers.
- Remove the bushings.

Important: Before removing a bodyside window, apply a layer of masking tape around the perimeter of the painted surfaces and inner trim of the window.
Remove the bodyside window latch hinge pin (4) from the latch (3).
Installation Procedure
- Install the bushings.
- Install the retainers.
- Install the bodyside window latch hinge screw to the window.
- Install the bodyside window in the opening.
- Install the bodyside window hinge nuts (2) to the body.
- Use J 34946 or equivalent in order to install the latch hinge pin.
- Install the bodyside window latch hinge pin (4) to the latch (3).
- Inspect the bodyside window for proper operation.
- Close the bodyside window.
- Install the body side rear upper garnish molding. Refer to Body Lock Pillar Upper Trim Panel Replacement .
- Install the bodyside window garnish molding. Refer to Upper Rear Trim Finish Panel Replacement .
- Remove the masking tape from around the perimeter of the painted surfaces and inner trim of the window.

Notice: Refer to Fastener Notice in the Preface section.
Tighten
Tighten the screw (2) to 1.6 N·m (1.4 lb in).
Tighten
Tighten the nuts (2) to 3.5 N·m (1.6 lb in).
Quarter Window Replacement With A20 Power
Removal Procedure
- Remove the body side rear upper finish panel. Refer to Body Lock Pillar Upper Trim Panel Replacement .
- Remove the rear corner upper finish panel. Refer to Upper Rear Trim Finish Panel Replacement .
- Open the bodyside window to the full open position.
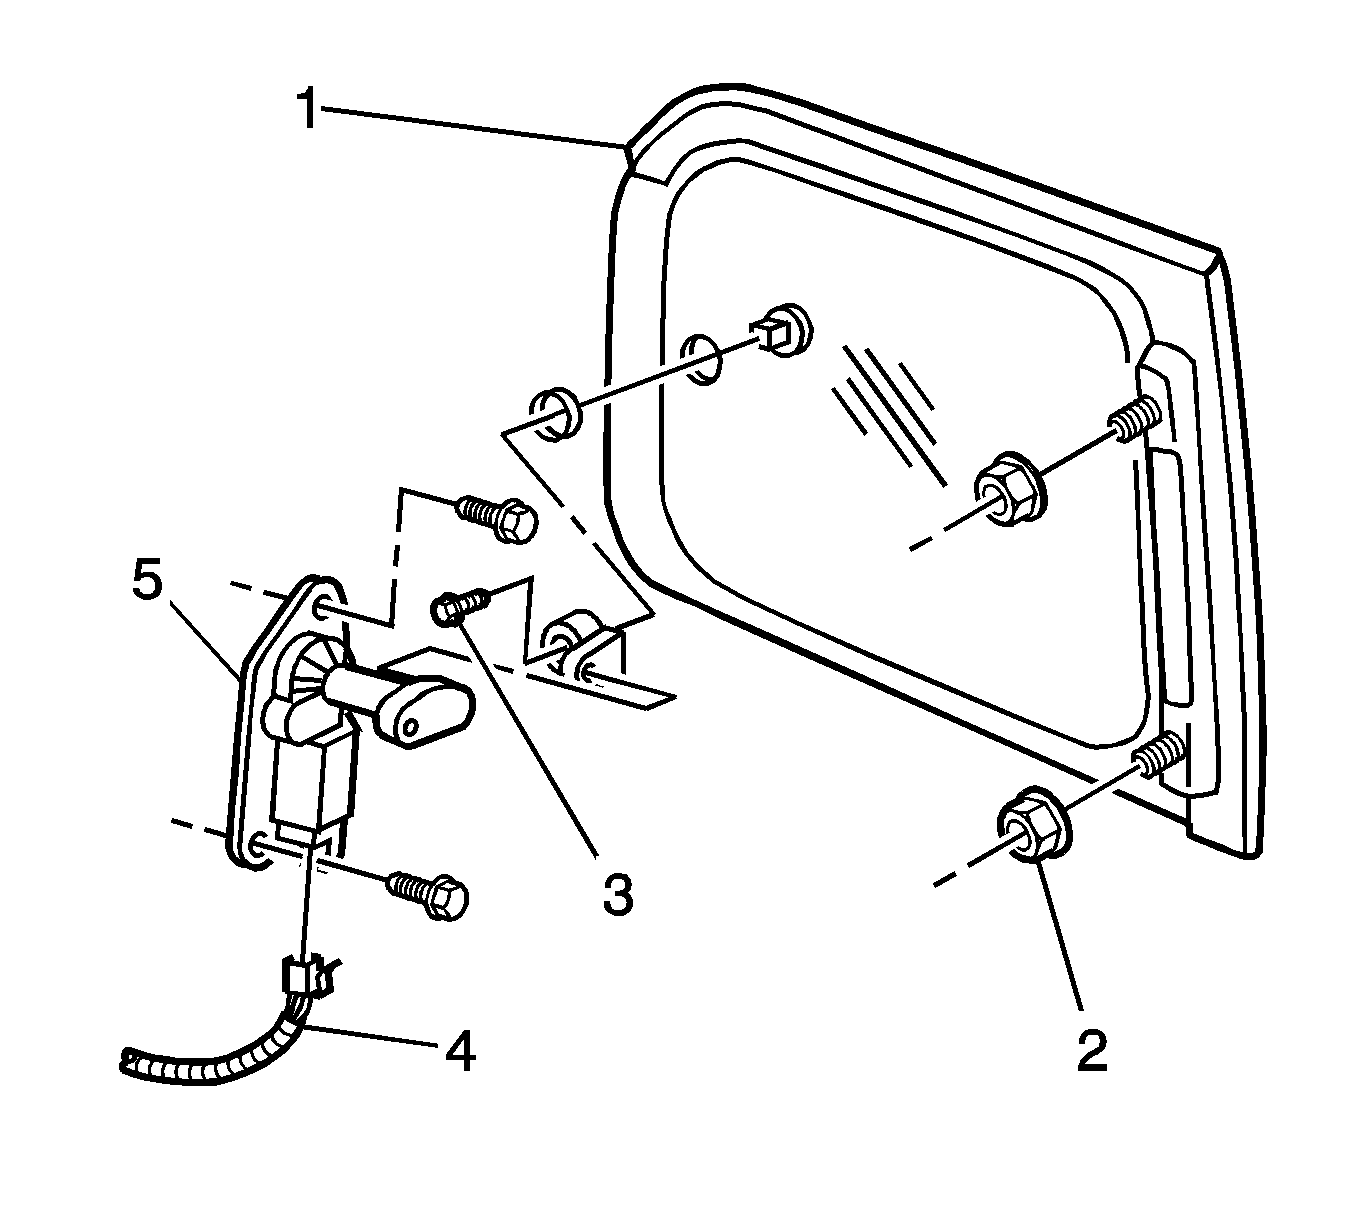
- Disconnect the electrical connector (4) from the power window actuator (5).
- Disconnect the actuator arm from the rear window hinge.
- Remove the bodyside window hinge nuts (2).
- Remove the bodyside window (1) from the opening.
- Inspect the quarter window weatherstrip. Replace the weatherstrip, if damaged. Refer to Rear Quarter Window Weatherstrip Replacement .
- Remove the hinge screw (3) from the window (1).

Important: Before removing a stationary window, apply a layer of masking tape around the perimeter of the painted surfaces and inner trim of the window.
Installation Procedure
- Install the bodyside window hinge screw (3) to the window (1).
- Install the bodyside window to the bodyside opening.
- Install the bodyside window hinge nuts (2).
- Secure the window hinge to the actuator arm.
- Connect the electrical connector (4) to the power window actuator (5).
- Inspect the bodyside window for proper operation.
- Close the bodyside window.
- Remove the masking tape from around the perimeter of the painted surfaces and inner trim of the window.
- Install the rear corner upper finish panel. Refer to Upper Rear Trim Finish Panel Replacement .
- Install the body side rear upper finish panel. Refer to Body Lock Pillar Upper Trim Panel Replacement .
Notice: Refer to Fastener Notice in the Preface section.

Tighten
Tighten the screw (3) to 1.6 N·m (1.4 lb in).
Tighten
Tighten the nuts (2) to 10 N·m (89 lb in).
