For 1990-2009 cars only
Tools Required
J 38778 Door Trim Pad Clip Remover
Removal Procedure
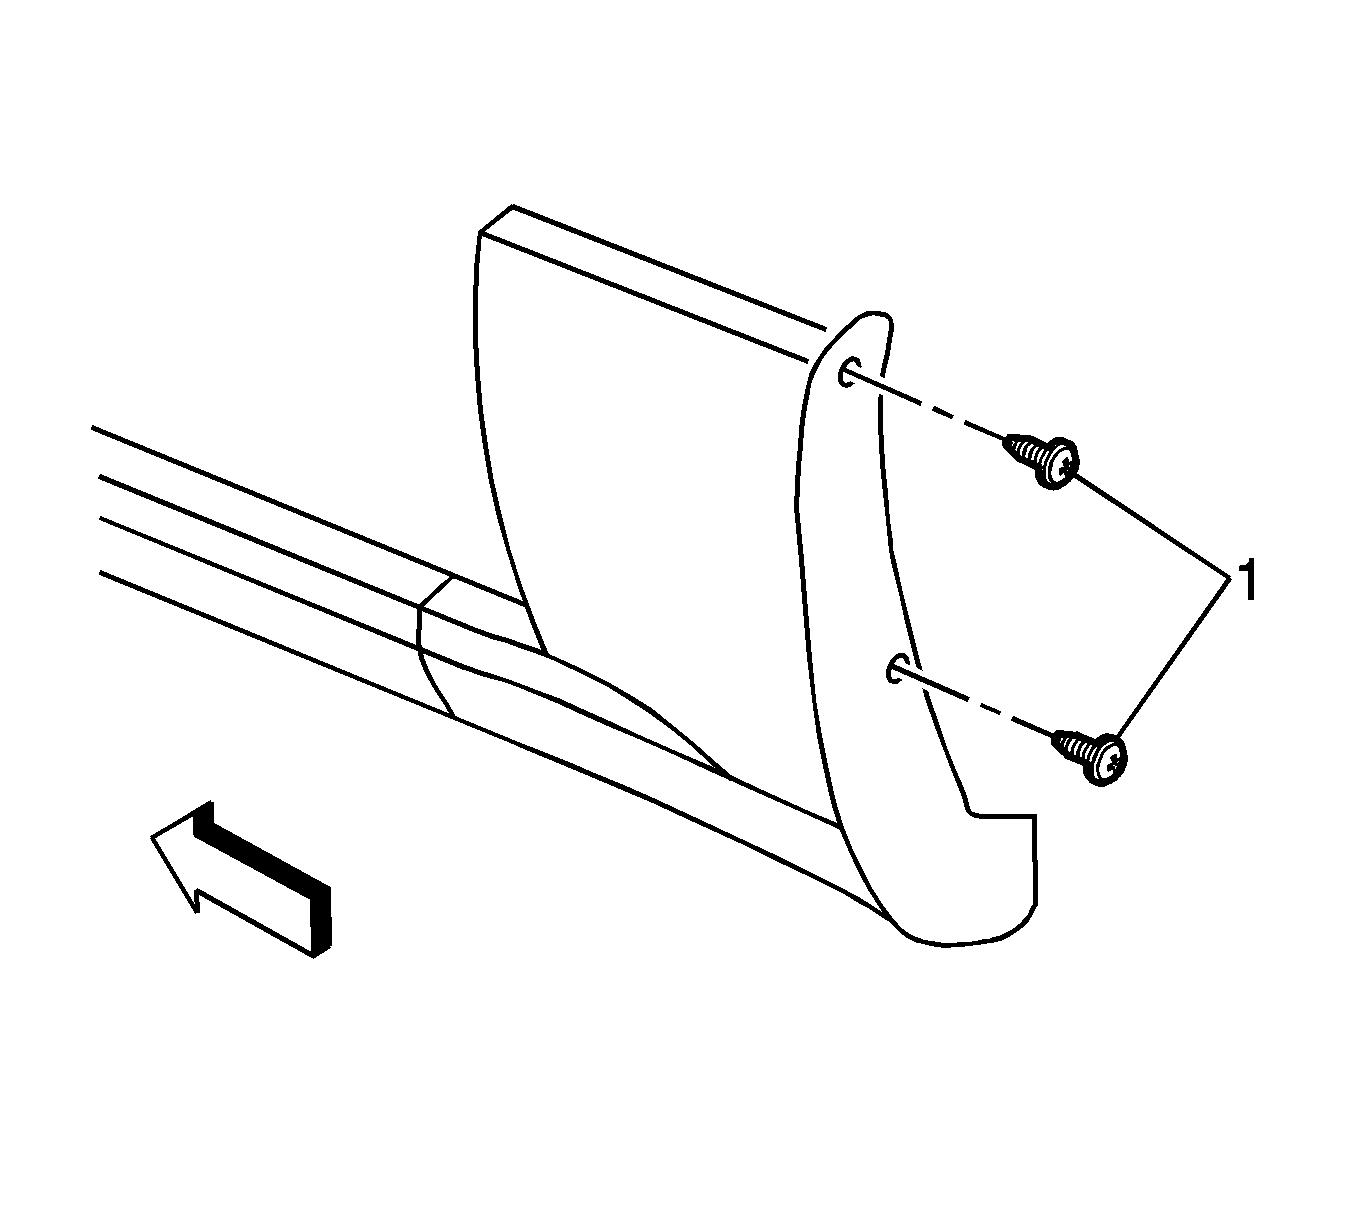
- Remove the 2 rear lower rocker panel to wheelhouse molding screws (1).
- Release the adhesive tape from the top horizontal edge of the rear molding.
- Slide the rear molding rearward in order to release the molding from the body and front rocker molding.
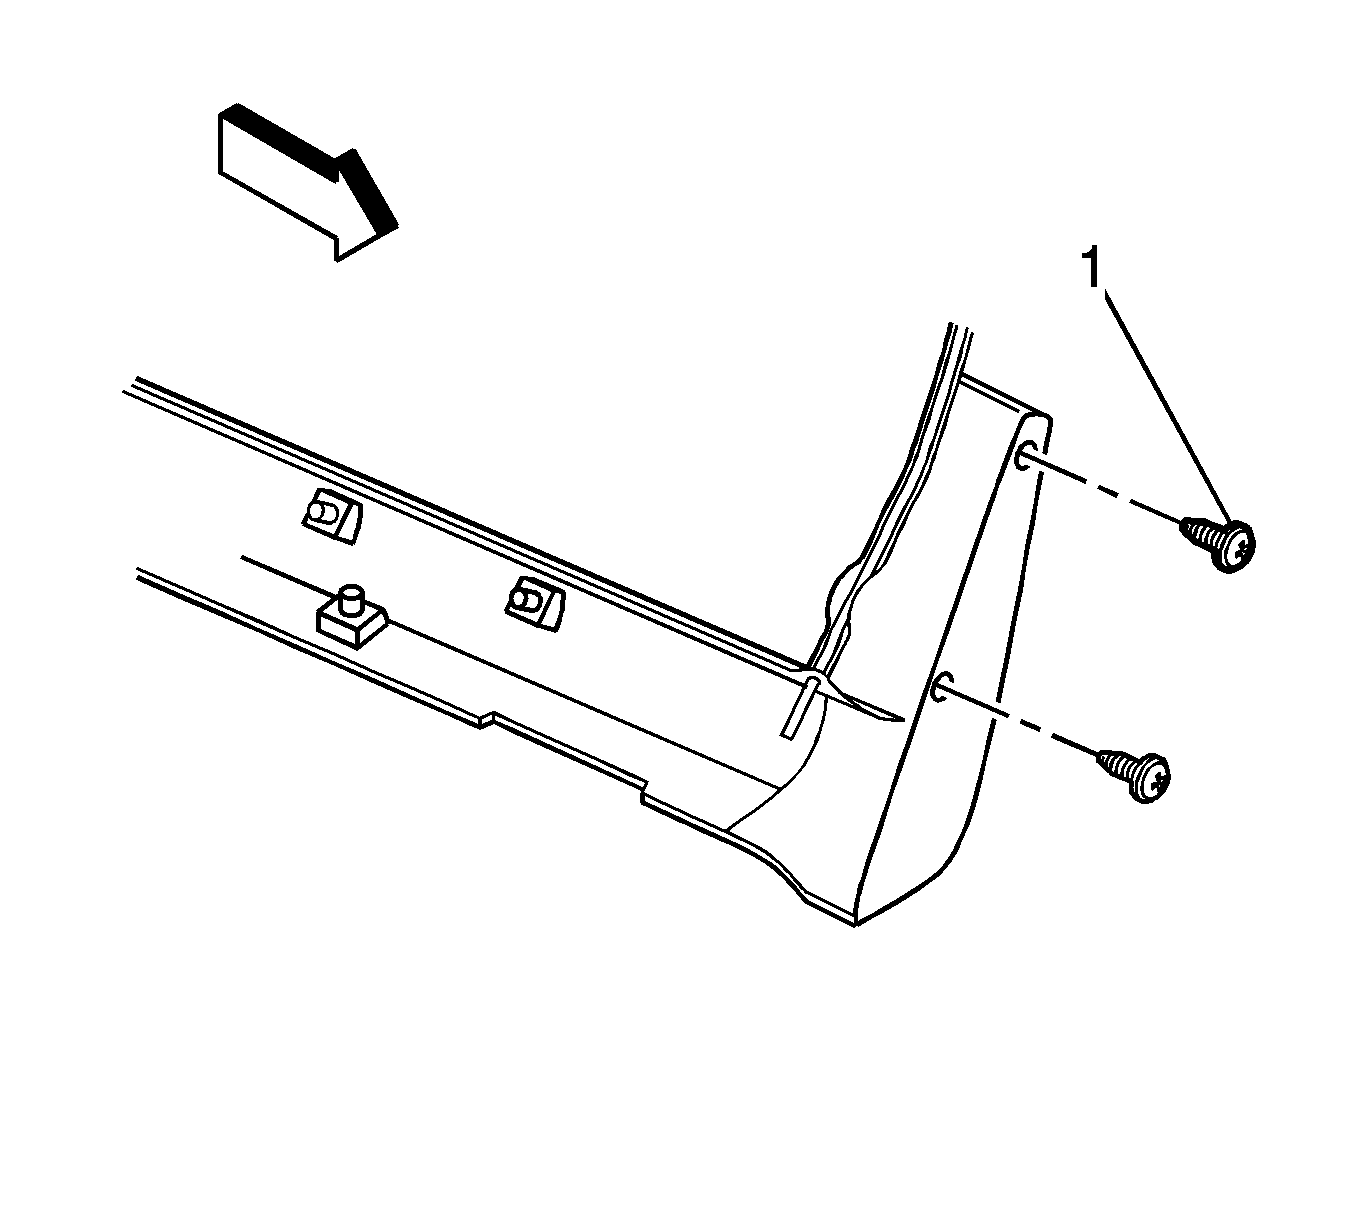
- Remove the 2 front wheelhouse panel screws (1).
- Release the adhesive tape from the vertical edge of the front rocker panel molding.
- Use the J 38778 in order to remove the 6 push-in retainers at the bottom edge of the rocker molding.
- Using the J 38778 , remove the 9 retainers at the top edge of the rocker panel molding.
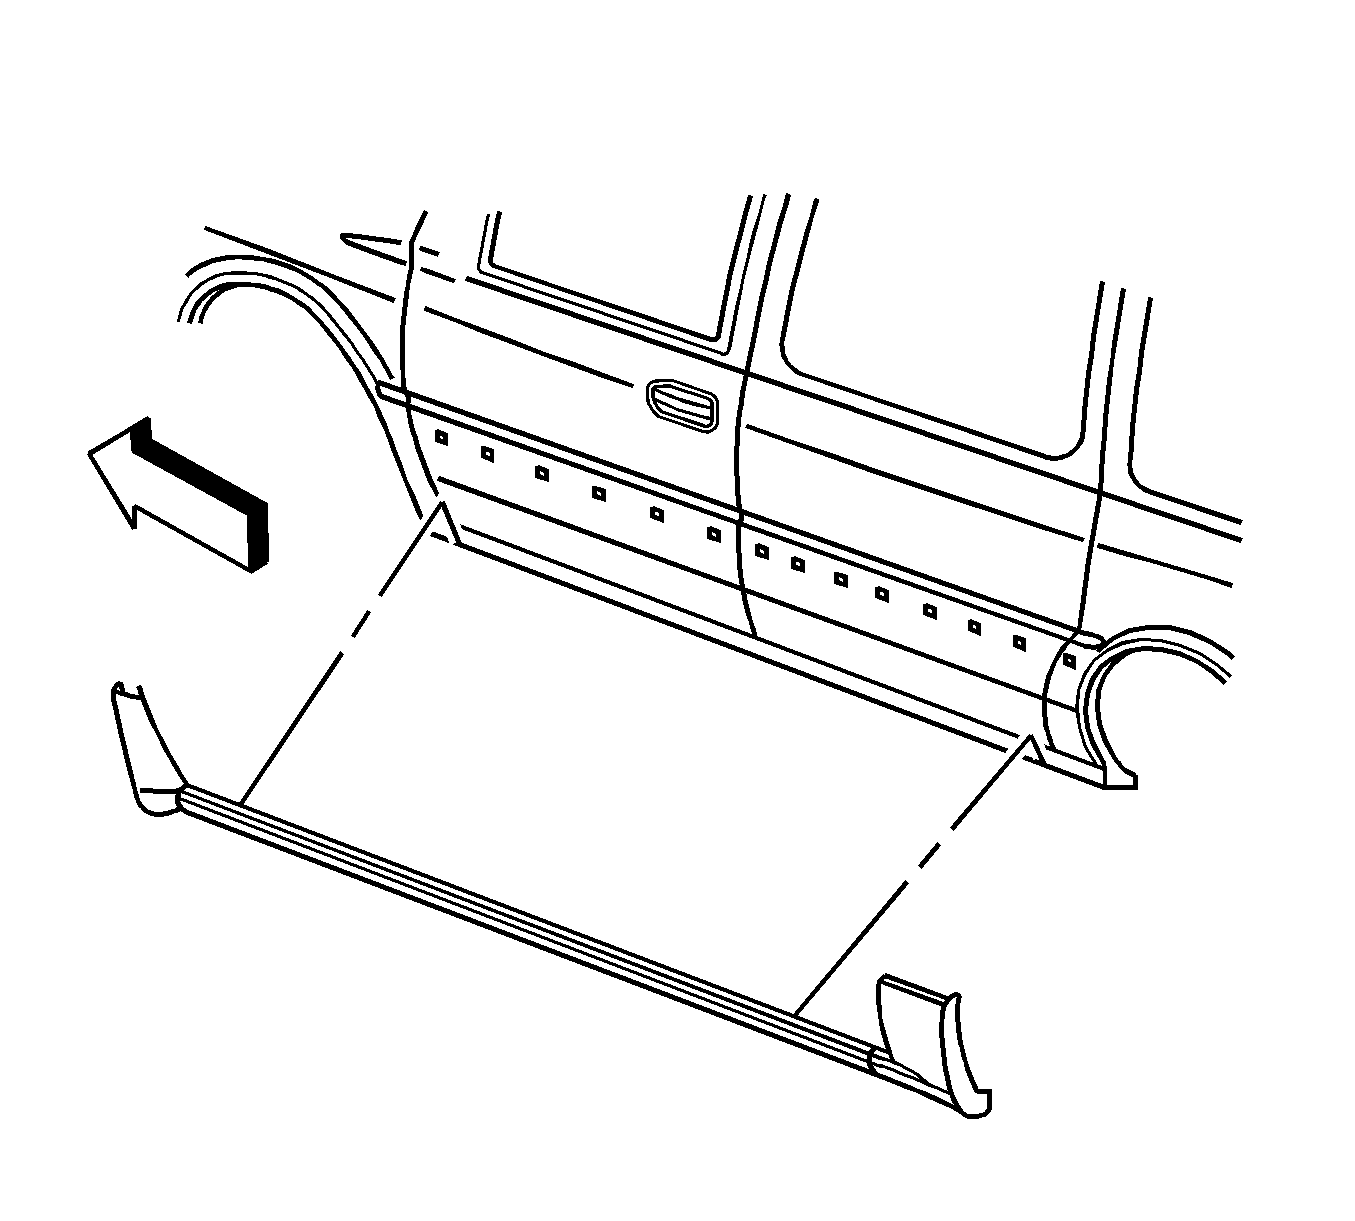
- Remove the rocker panel molding from the vehicle.
- Clean the adhesive from the body panel using a 50/50 mixture by volume of isopropyl alcohol and water.
- Dry the surface thoroughly before applying the new molding.


Installation Procedure
- Bend the tape backing outward of the molding in order to release after the molding is secured.
- Install the retainers to the new rocker panel molding.
- Position the front molding to the body side.
- Align the 9 upper retainers to the body panel.
- Push the molding inward in order to secure.
- Align the 6 bottom retainers to the body panel and push inward in order to secure.
- Release the adhesive tape backing from the front vertical edge of the molding and secure the molding to the body.
- Install the 2 forward screws (1).
- Secure the retainer clip to the rear rocker panel molding.
- Position the forward edge of the rear molding under the rear edge of the forward molding.
- Secure the forward 2 clips.
- Position the retainer to the body panel hole.
- Push inward in order to secure.
- Release the adhesive tape backing from the horizontal edge of the molding and wet-out the adhesive tape.
- Install the screws (1).
Important: Do not release the adhesive tape backing from the molding until the molding is in position.

Notice: Refer to Fastener Notice in the Preface section.

Tighten
Tighten the screws to 2 N·m (18 lb in).

Tighten
Tighten the screws to 2 N·m (18 lb in).
