Removal Procedure
- Disconnect the negative battery cable. Refer to
Battery Negative Cable Disconnection and Connection
.
- Remove the carpet from the trunk area. Refer to
Floor Panel Carpet Replacement
.
- Remove the following components as needed:
| • | The sound deadening materials |
| • | The corrosion materials |
- Remove the rear suspension support bolt.
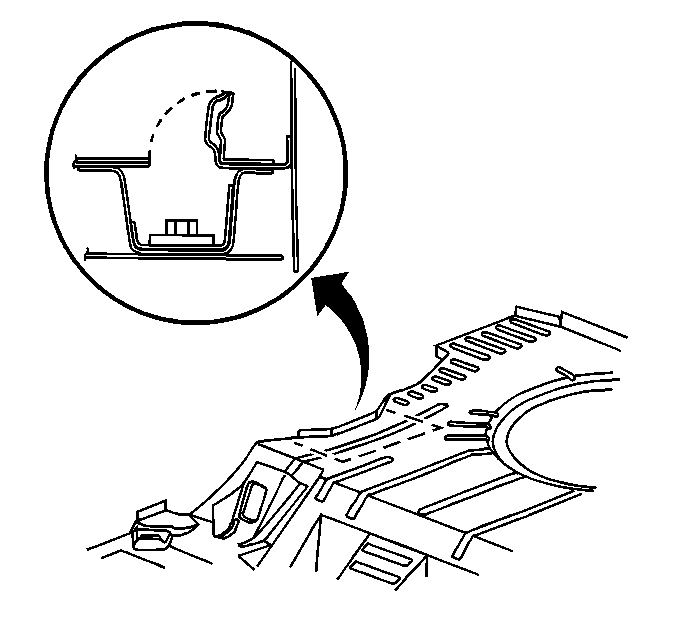
- Place a center punch through the damaged rear suspension support nut. Strike the center punch using a hammer. The punch will leave a dimple on the floor. Use the dimple in order to locate the area where the frame crossmember nut will be removed.
Important: Do not cut or damage the adjacent panels or the reinforcements.

- Use a cutoff wheel in order to cut an access panel.
- Lift the panel upward in order to gain access to the frame crossmember nut retainer.
Important: Reuse the frame crossmember nut retainer if the retainer is not damaged from the stripped out bolt.

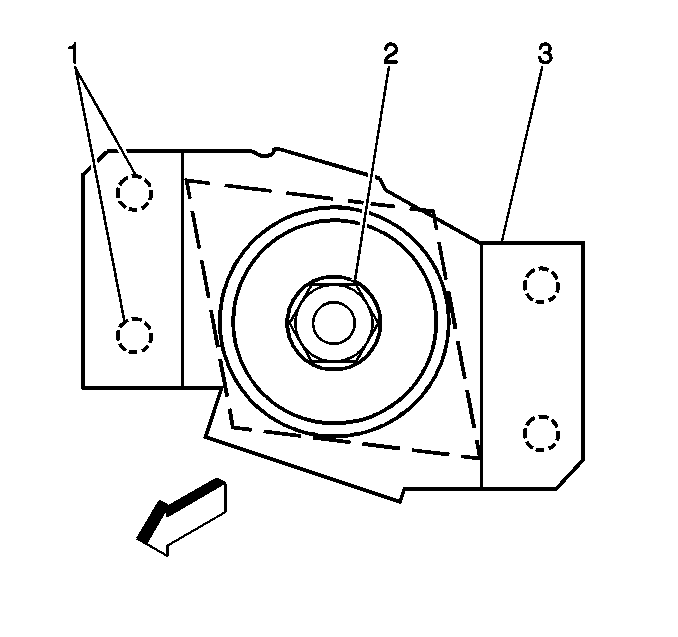
- Use an air chisel in order to break away the spot welds (1) on one side of the frame crossmember nut retainer (3).
- Lift one side of the frame crossmember nut retainer enough in order to remove the frame crossmember nut.
- Remove the rear suspension support nut (2).
Installation Procedure

- Install the rear suspension support nut (2).
- Lower the frame crossmember nut retainer into place. Ensure that the following conditions exist:
| • | The frame crossmember nut is correctly positioned. |
| • | The frame crossmember nut operates correctly. |
- Spot weld the frame crossmember nut retainer in the original location.
- Clean and prepare the welded surfaces.
- Apply corrosion protection. Refer to
Anti-Corrosion Treatment and Repair
.
Notice: Refer to Fastener Notice in the Preface section.
- Install the new rear suspension support bolt to the frame crossmember nut.
Tighten
Tighten the bolt to 130 N·m (96 lb ft).

- Reposition the panel downward to the original position.
- Stitch weld the panel back to the original position using 25 mm (0.98 in) welds along the seam. Leave 25 mm (0.98 in) gaps between the welds. A solid joint with minimal heat distortion will result. Continue to finish the
stitch weld procedure.
- Use a small grinder in order to remove the excess material from the floor panel until the following conditions exist:
| • | The floor panel is smooth. |
| • | The floor panel is free from rough edges. |
- Clean and prepare the welded surfaces.
- Apply anti-corrosion compound GM P/N 12346225 or equivalent. Thoroughly coat the inside of the repair area through the access hole.
- Apply Primer and let the primer dry for approximately 30 minutes. Then apply Dominion Sure Seal P/N 110900 Sound Deadener or the equivalent to the repair area.
- Install the carpet and the pad over the repair area Refer to
Floor Panel Carpet Replacement
.
- Connect the negative battery cable. Refer to
Battery Negative Cable Disconnection and Connection
.


