Shock, Shock Component, and/or Spring Replacement Base Suspension
Tools Required
J 45400 Strut Spring Compressor
Removal Procedure
- Raise and support the vehicle. Refer to Lifting and Jacking the Vehicle .
- Remove the tire and wheel. Refer to Tire and Wheel Removal and Installation .
- Remove the shock module from the vehicle. Refer to Shock Absorber and Spring Assembly Replacement .
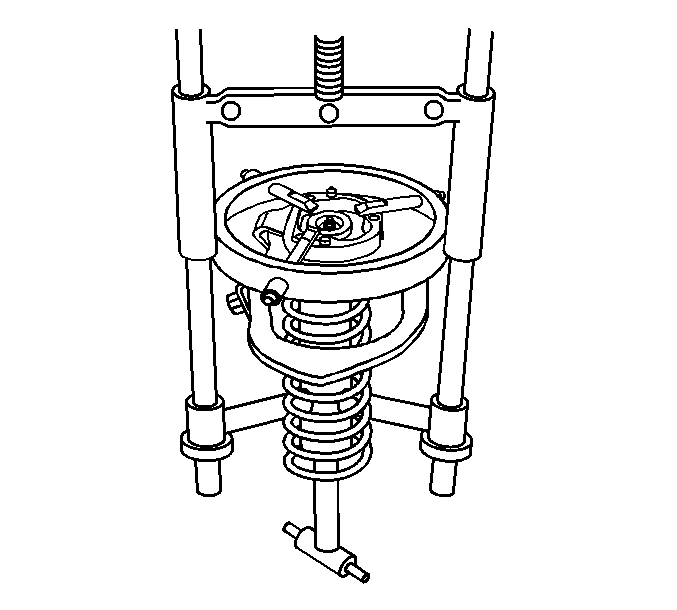
- Install the shock module into the spring compressor J 45400 .
- Mark the upper control arm assembly and insulator for proper installation.
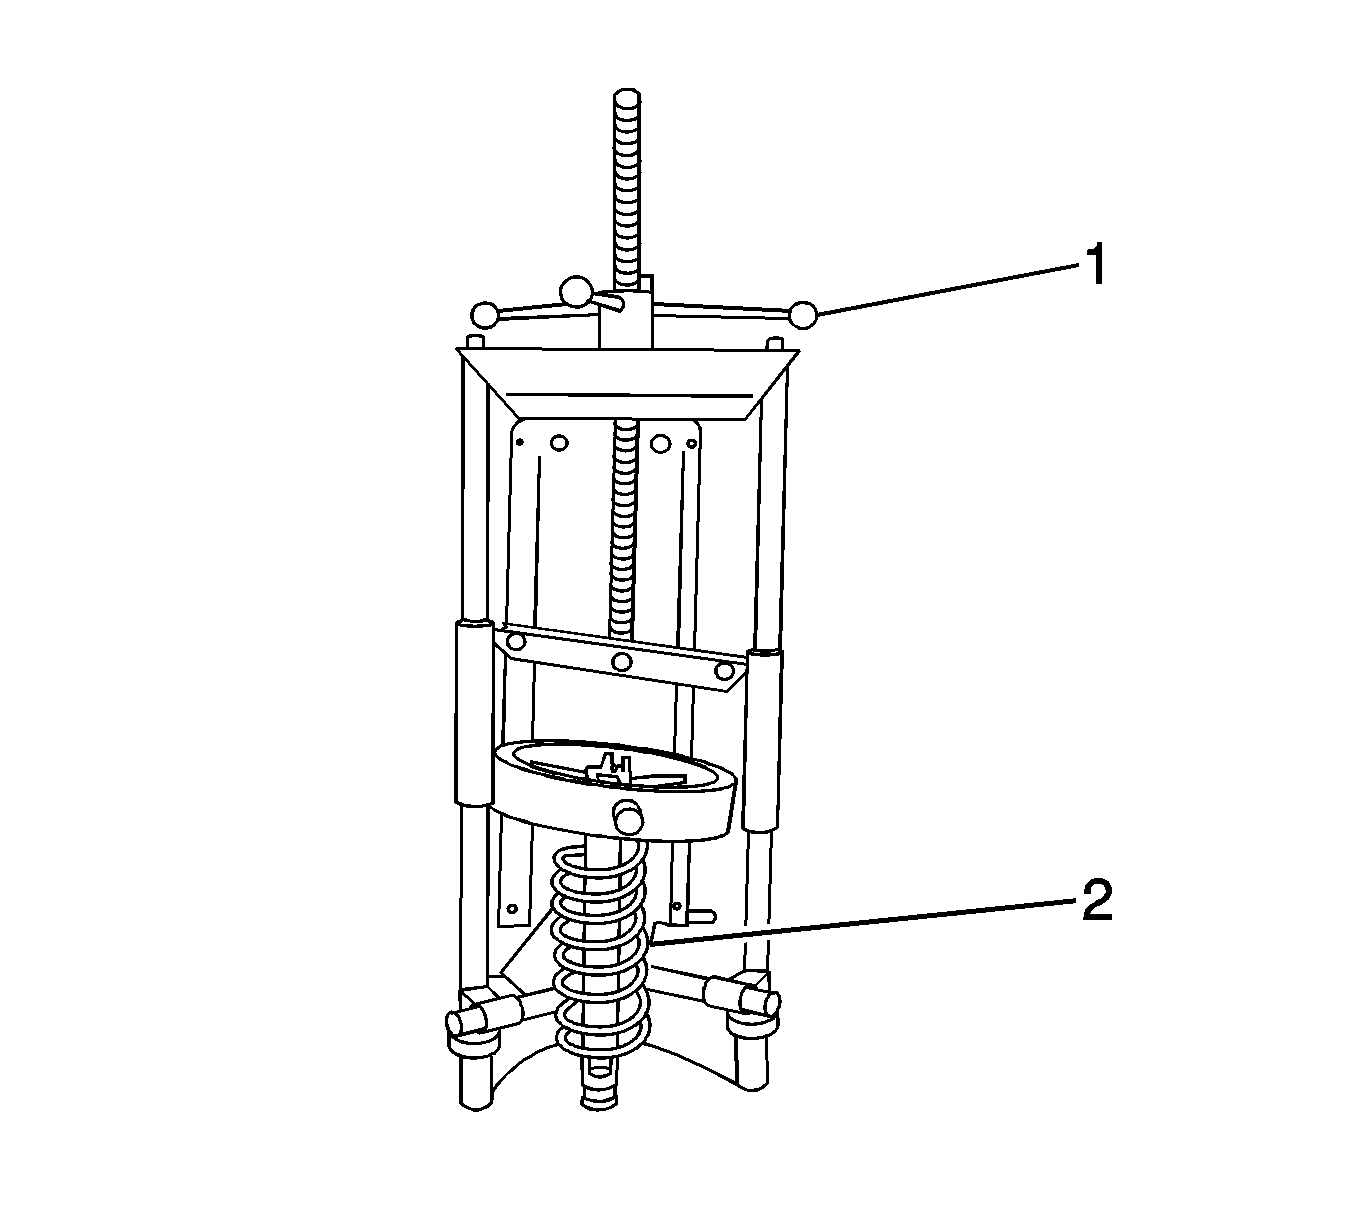
- Turn the spring compressor forcing screw (1) until the coil spring (2) is compressed.
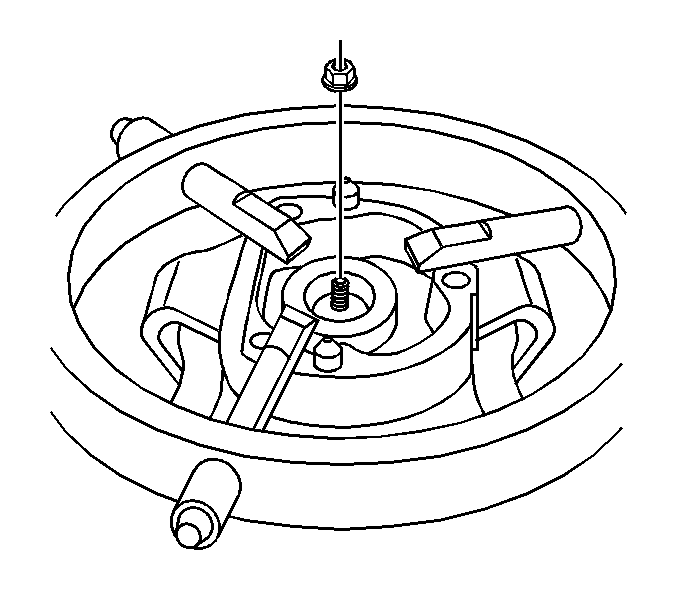
- Remove the shock absorber upper retaining nut.
- Remove the shock absorber from the shock module.
- Loosen the compressor forcing screw until the upper mounting plate and the coil spring may be removed.
- Remove the upper control arm bracket assembly, the insulator, and the coil spring from the spring compressor J 45400 .
Notice: Use care when handling the coil springs in order to avoid chipping or scratching the coating. Damage to the coating will result in premature failure of the coil springs.


Important: The spring is compressed when the shock absorber moves freely.

Installation Procedure
- Install the coil spring, the insulator, the upper control arm bracket assembly, and the shock absorber to the spring compressor J 45400 , aligning all marks made in disassembly procedure.
- Turn the spring compressor forcing screw (1) until the coil spring is compressed.
- Install the shock absorber retaining nut.
- Remove the shock module from the spring compressor J 45400 .
- Install the shock module to the vehicle. Refer to Shock Absorber and Spring Assembly Replacement .
- Install the tire and wheel. Refer to Tire and Wheel Removal and Installation .
- Lower the vehicle.

Important: Ensure the alignment pins in the upper control arm bracket are orientated 90 degrees with the shock absorber lower mounting holes.
Notice: Refer to Fastener Notice in the Preface section.

Tighten
Tighten the nut to 42 N·m (31 lb ft).

Shock, Shock Component, and/or Spring Replacement Sport Suspension

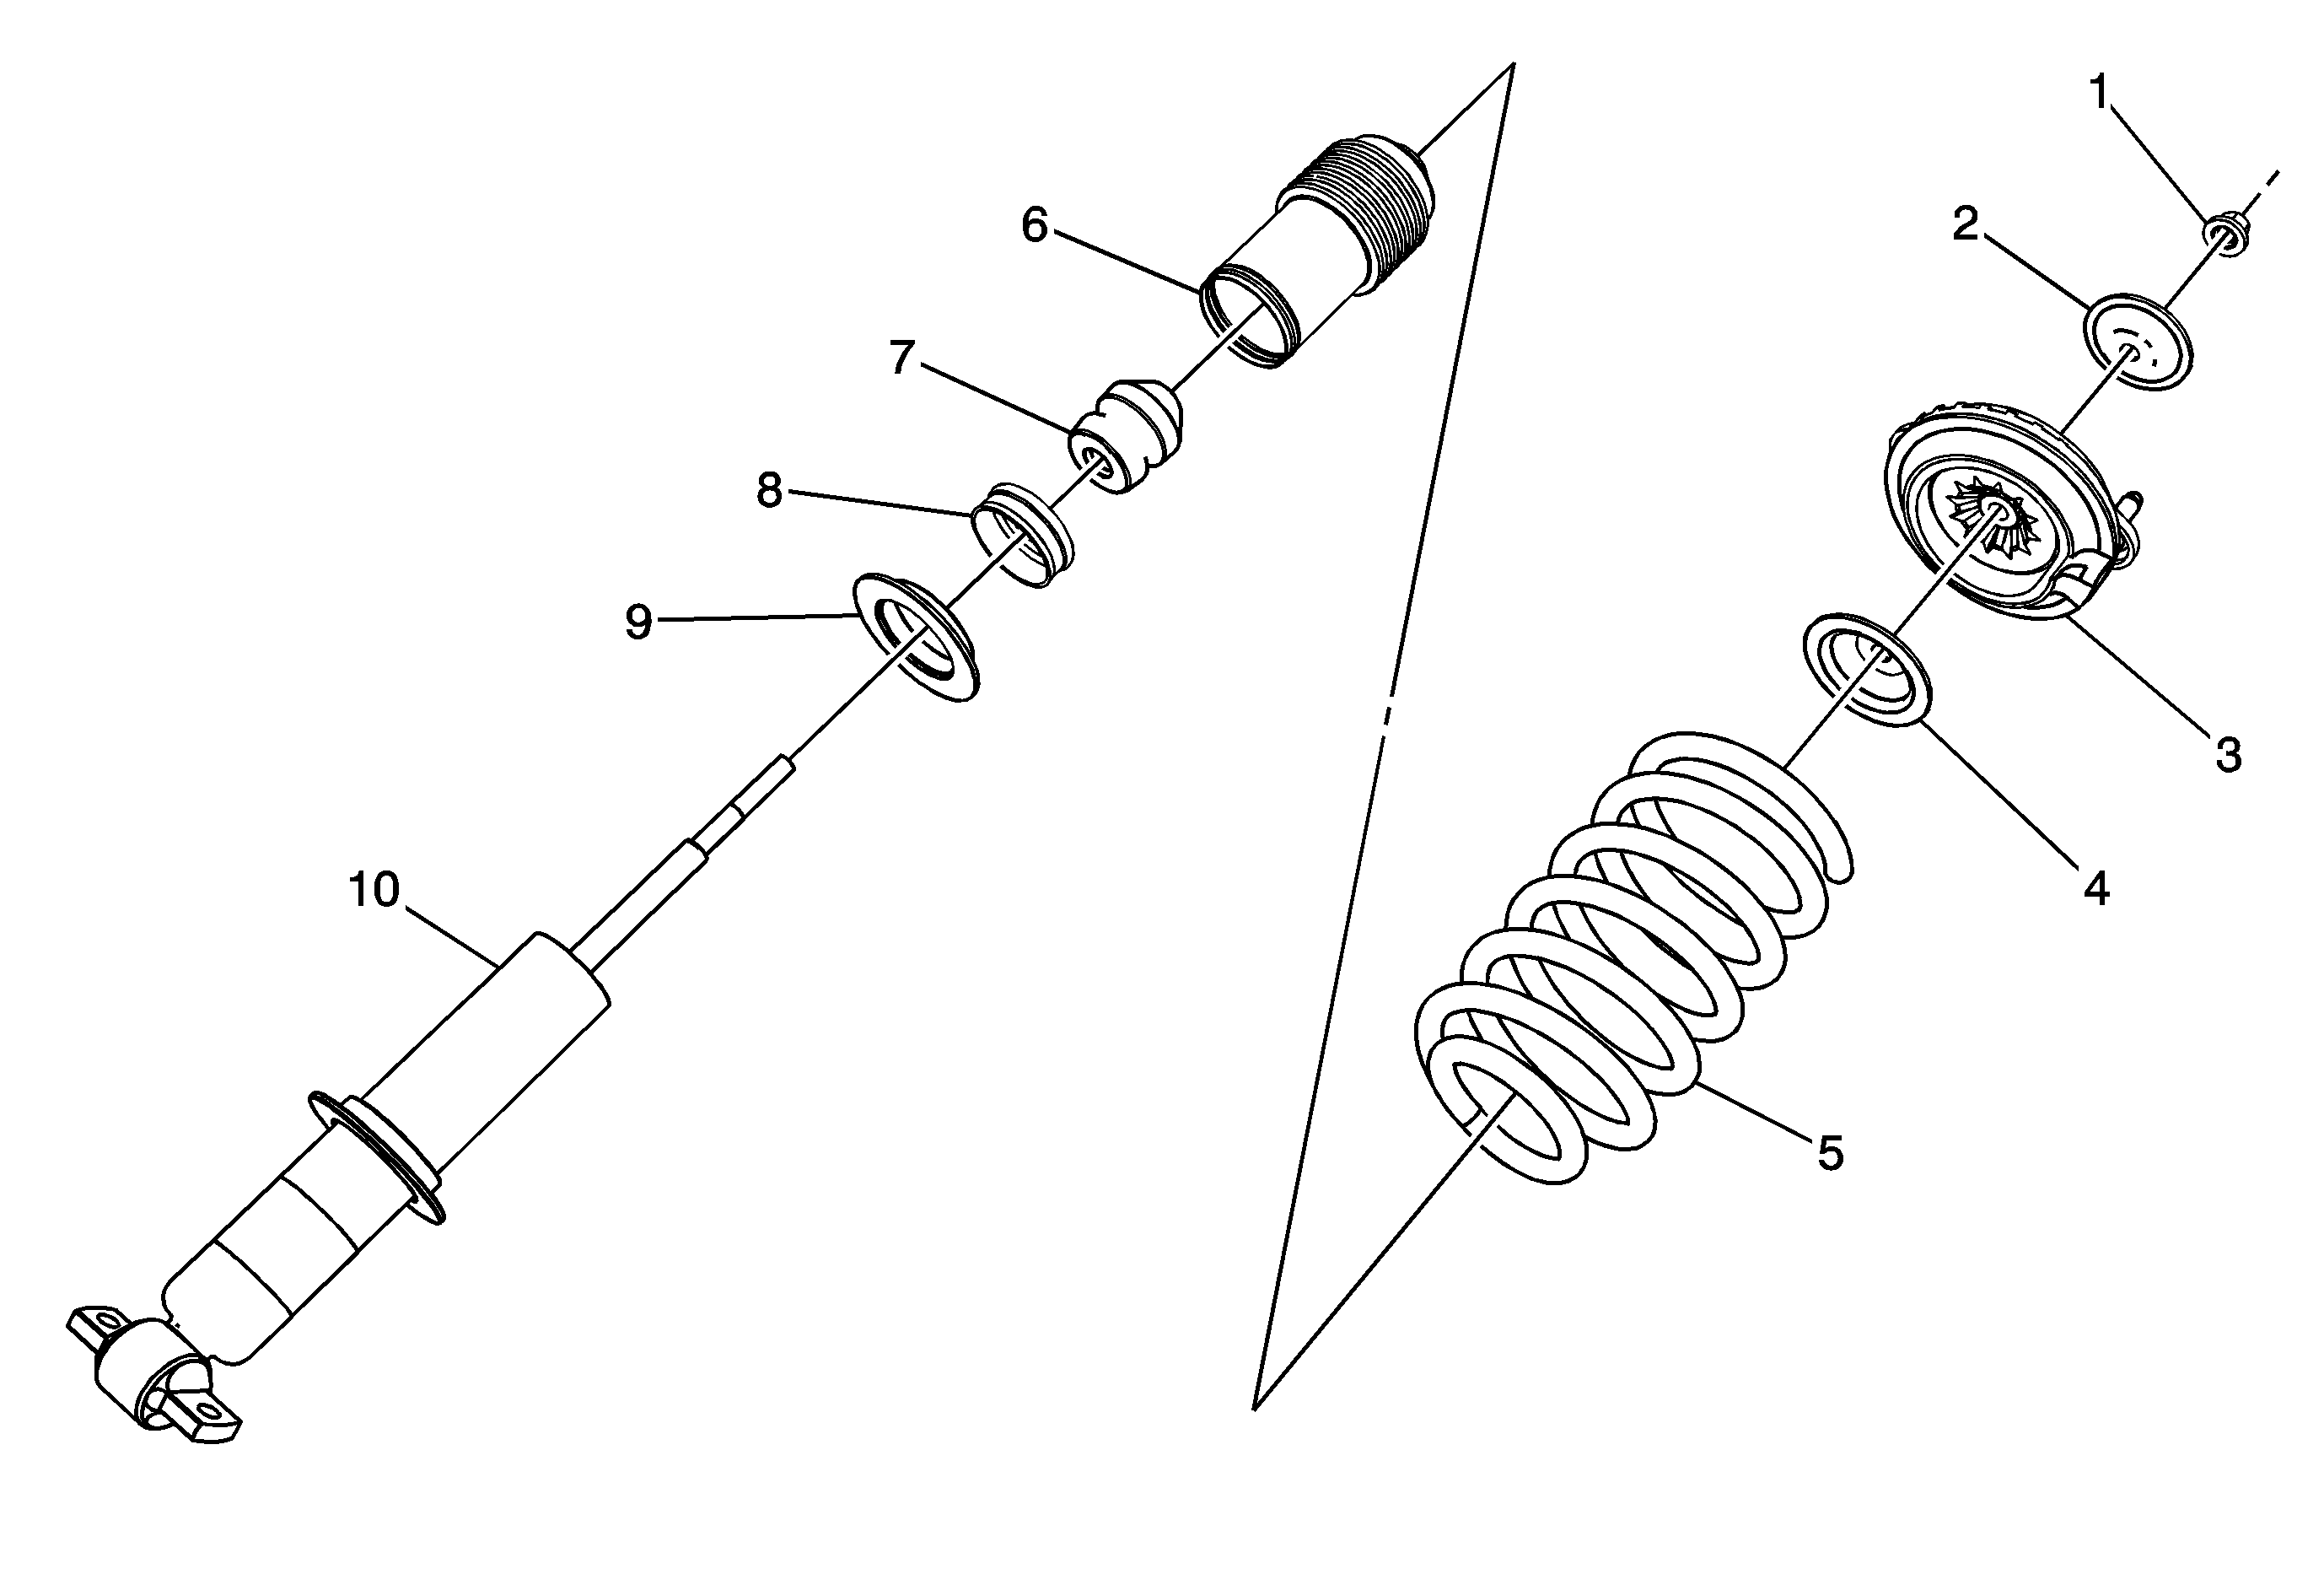
Callout | Component Name | ||||||
|---|---|---|---|---|---|---|---|
Preliminary ProcedureNotice: Use care when handling the coil springs in order to avoid chipping or scratching the coating. Damage to the coating will result in premature failure of the coil springs. Remove the shock module. Refer to Shock Absorber and Spring Assembly Replacement . | |||||||
1 | Nut Notice: Do not allow the absorber rod to rotate during disassembly/reassembly. Use hand tools to keep the absorber rod from rotating. If air tools are used, and the rod is allowed to rotate, damage to the absorber may occur. Notice: Refer to Fastener Notice in the Preface section. Tip
Tighten | ||||||
2 | Top Mount Washer | ||||||
3 | Mount Assembly | ||||||
4 | Jounce Bumper Retainer | ||||||
5 | Spring | ||||||
6 | Dust Shield | ||||||
7 | Jounce Bumper | ||||||
8 | Striker Cap Tip | ||||||
9 | Spacer Tip | ||||||
10 | Shock Absorber Assembly Important: Ensure the alignment pins in the upper control arm bracket are orientated 90 degrees with the shock absorber lower mounting holes. | ||||||
