GM Service Manual Online
For 1990-2009 cars only

Master Cylinder Replacement w/o JL4
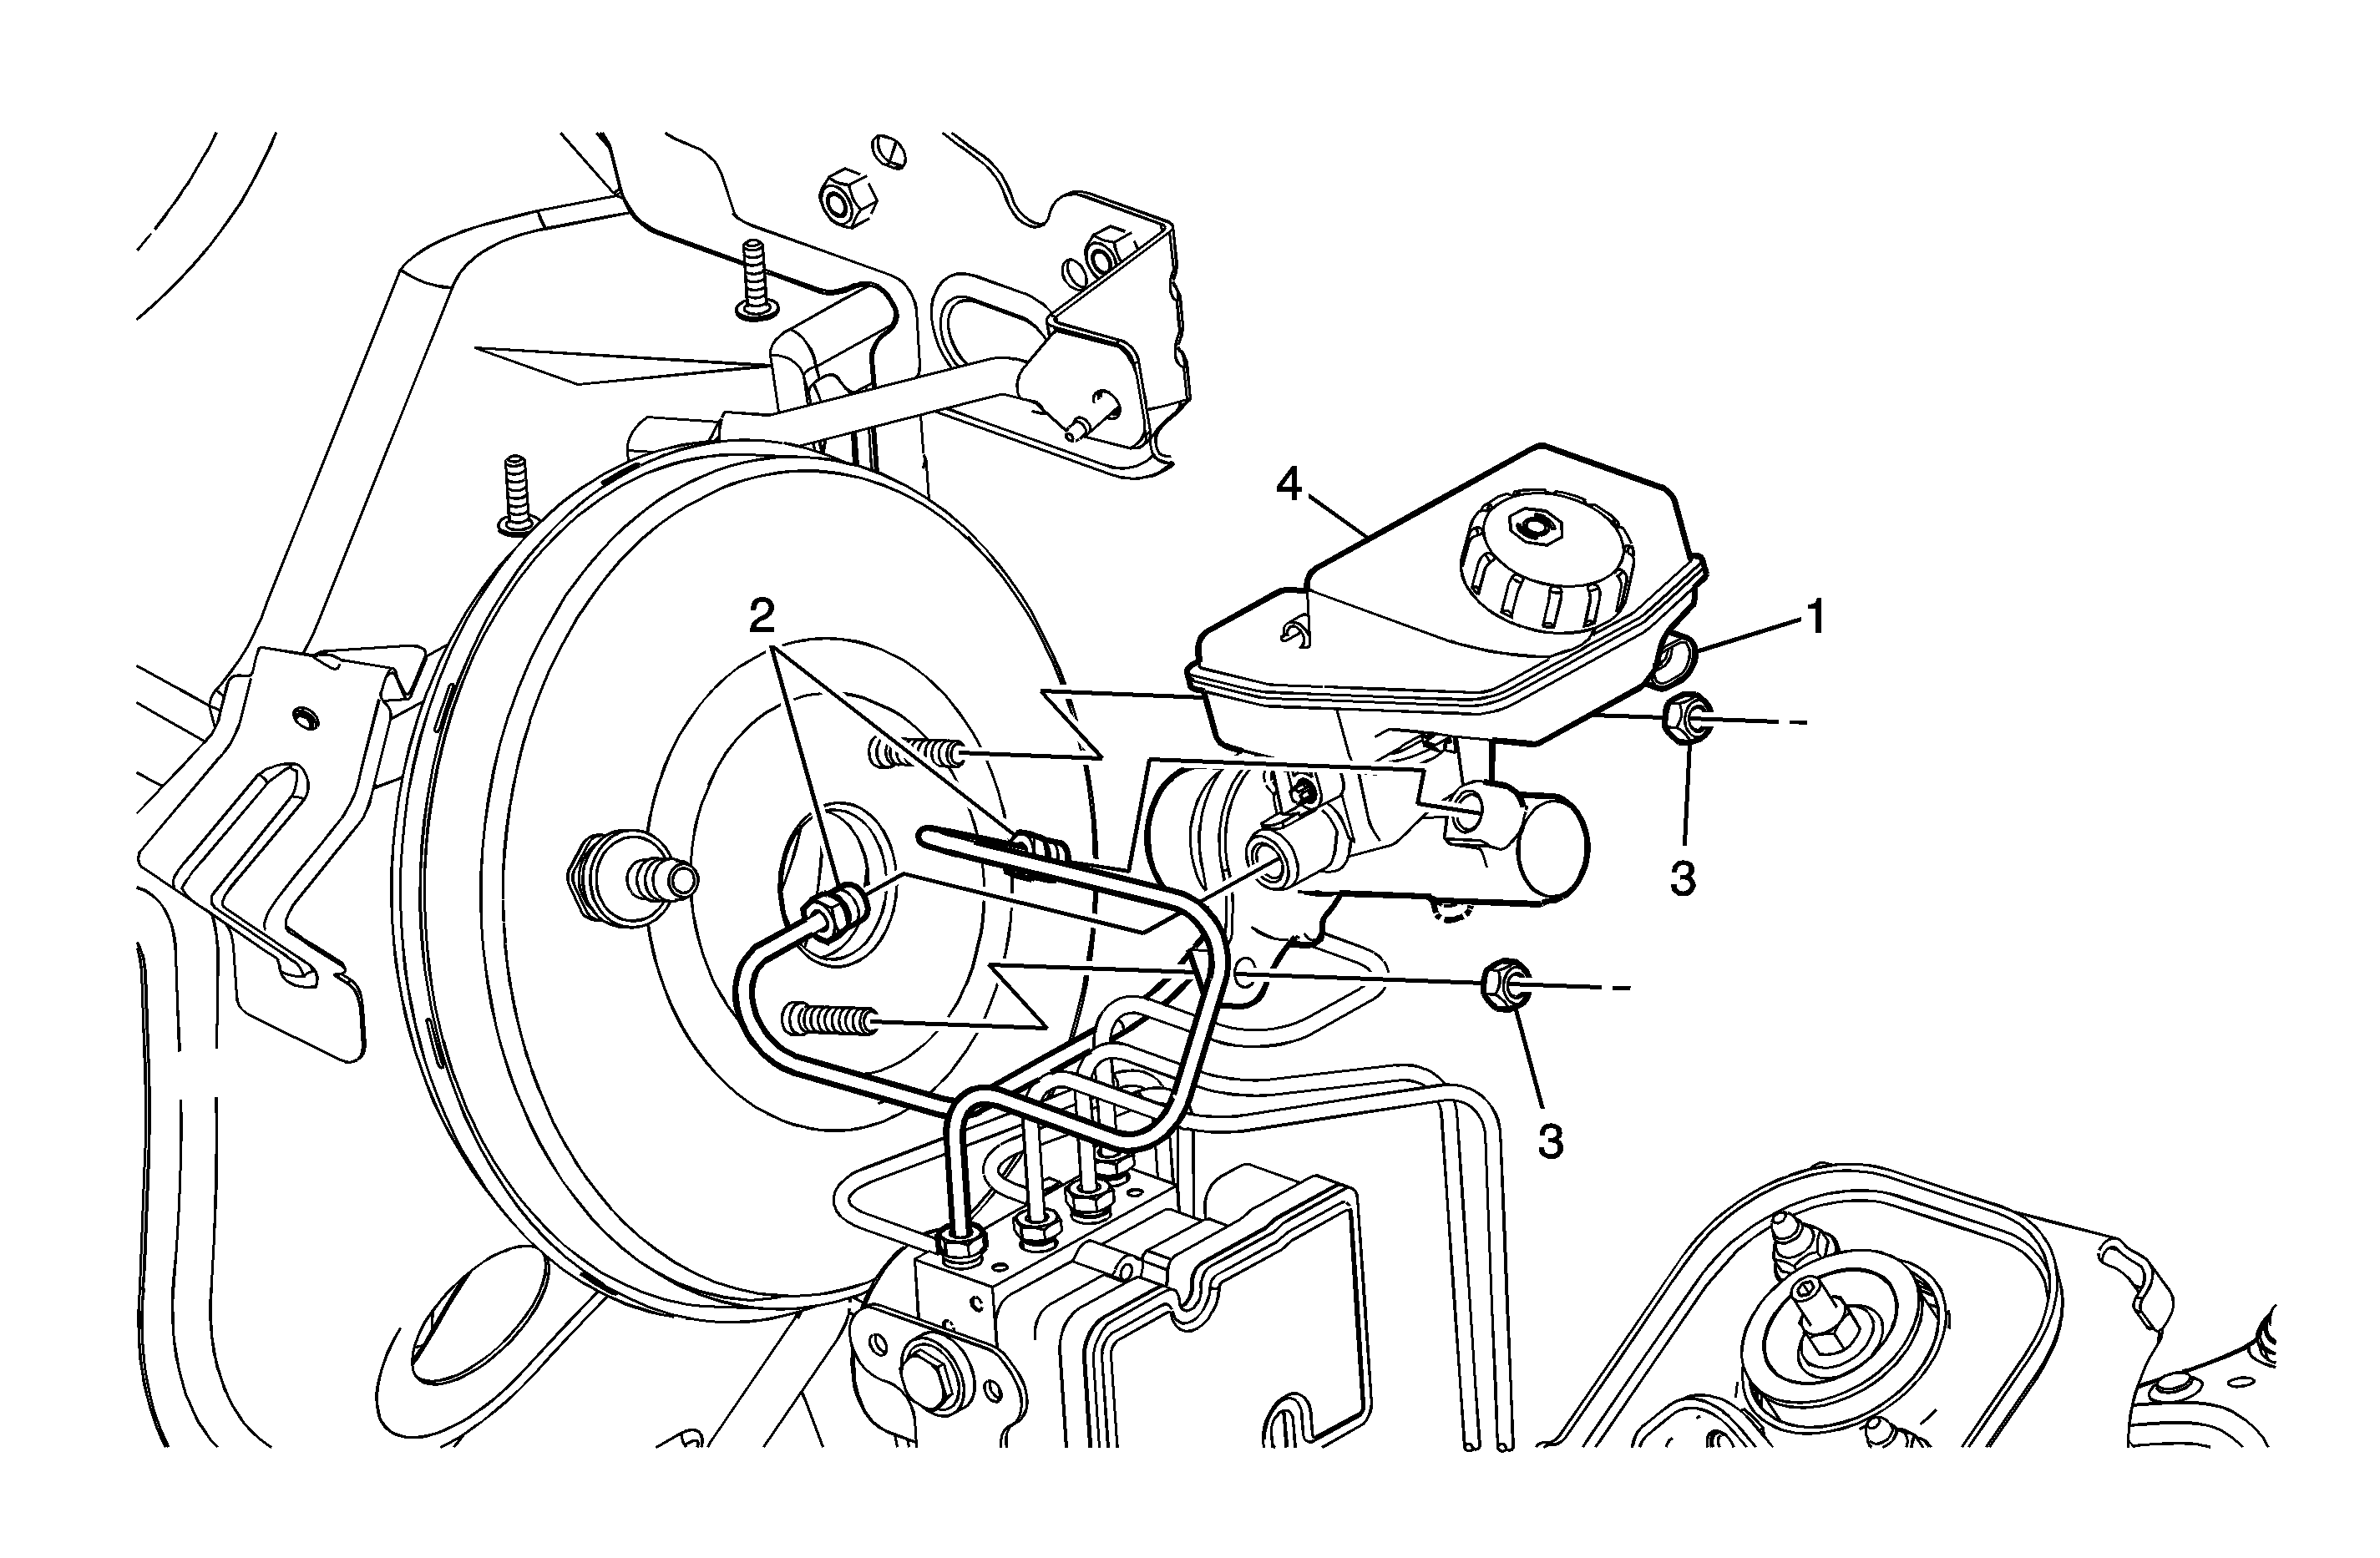

Object Number: 1737350  Size: MF

Callout

Component Name

Caution: Refer to Brake Fluid Irritant Caution in the Preface section.

Notice: Refer to Brake Fluid Effects on Paint and Electrical Components Notice in the Preface section.

Preliminary Procedure

On manual transmission vehicles, disconnect the clutch hose from the master cylinder reservoir and plug the hose and cap the reservoir hose nipple.

1

Master Cylinder Fluid Level Sensor Electrical Connector

2

Brake Pipe Fitting (Qty: 2)

Notice: Refer to Fastener Notice in the Preface section.

Procedure

Cap the brake pipe fittings and plug the master cylinder outlet ports to prevent brake fluid loss and contamination.

Tighten
20 N·m (15 lb ft)

3

Brake Master Cylinder Nut (Qty: 2)

Procedure

  1. Discard the brake master cylinder nuts.
  2. Install NEW brake master cylinder nuts.

Tighten
15 N·m (11 lb ft)

4

Brake Master Cylinder

Procedure

  1. When removing the master cylinder, ensure the master cylinder to booster seal between the vacuum booster and the master cylinder is properly seated in the groove at the rear of the master cylinder and is not damaged. Replace the seal if necessary.
  2. If necessary, remove the brake master cylinder reservoir. Refer to Master Cylinder Reservoir Replacement .
  3. If installing a new master cylinder, bench bleed the master cylinder. Refer to Master Cylinder Bench Bleeding .
  4. Fill the master cylinder reservoir. Refer to Master Cylinder Reservoir Filling .
  5. Bleed the brake system. Refer to Hydraulic Brake System Bleeding .

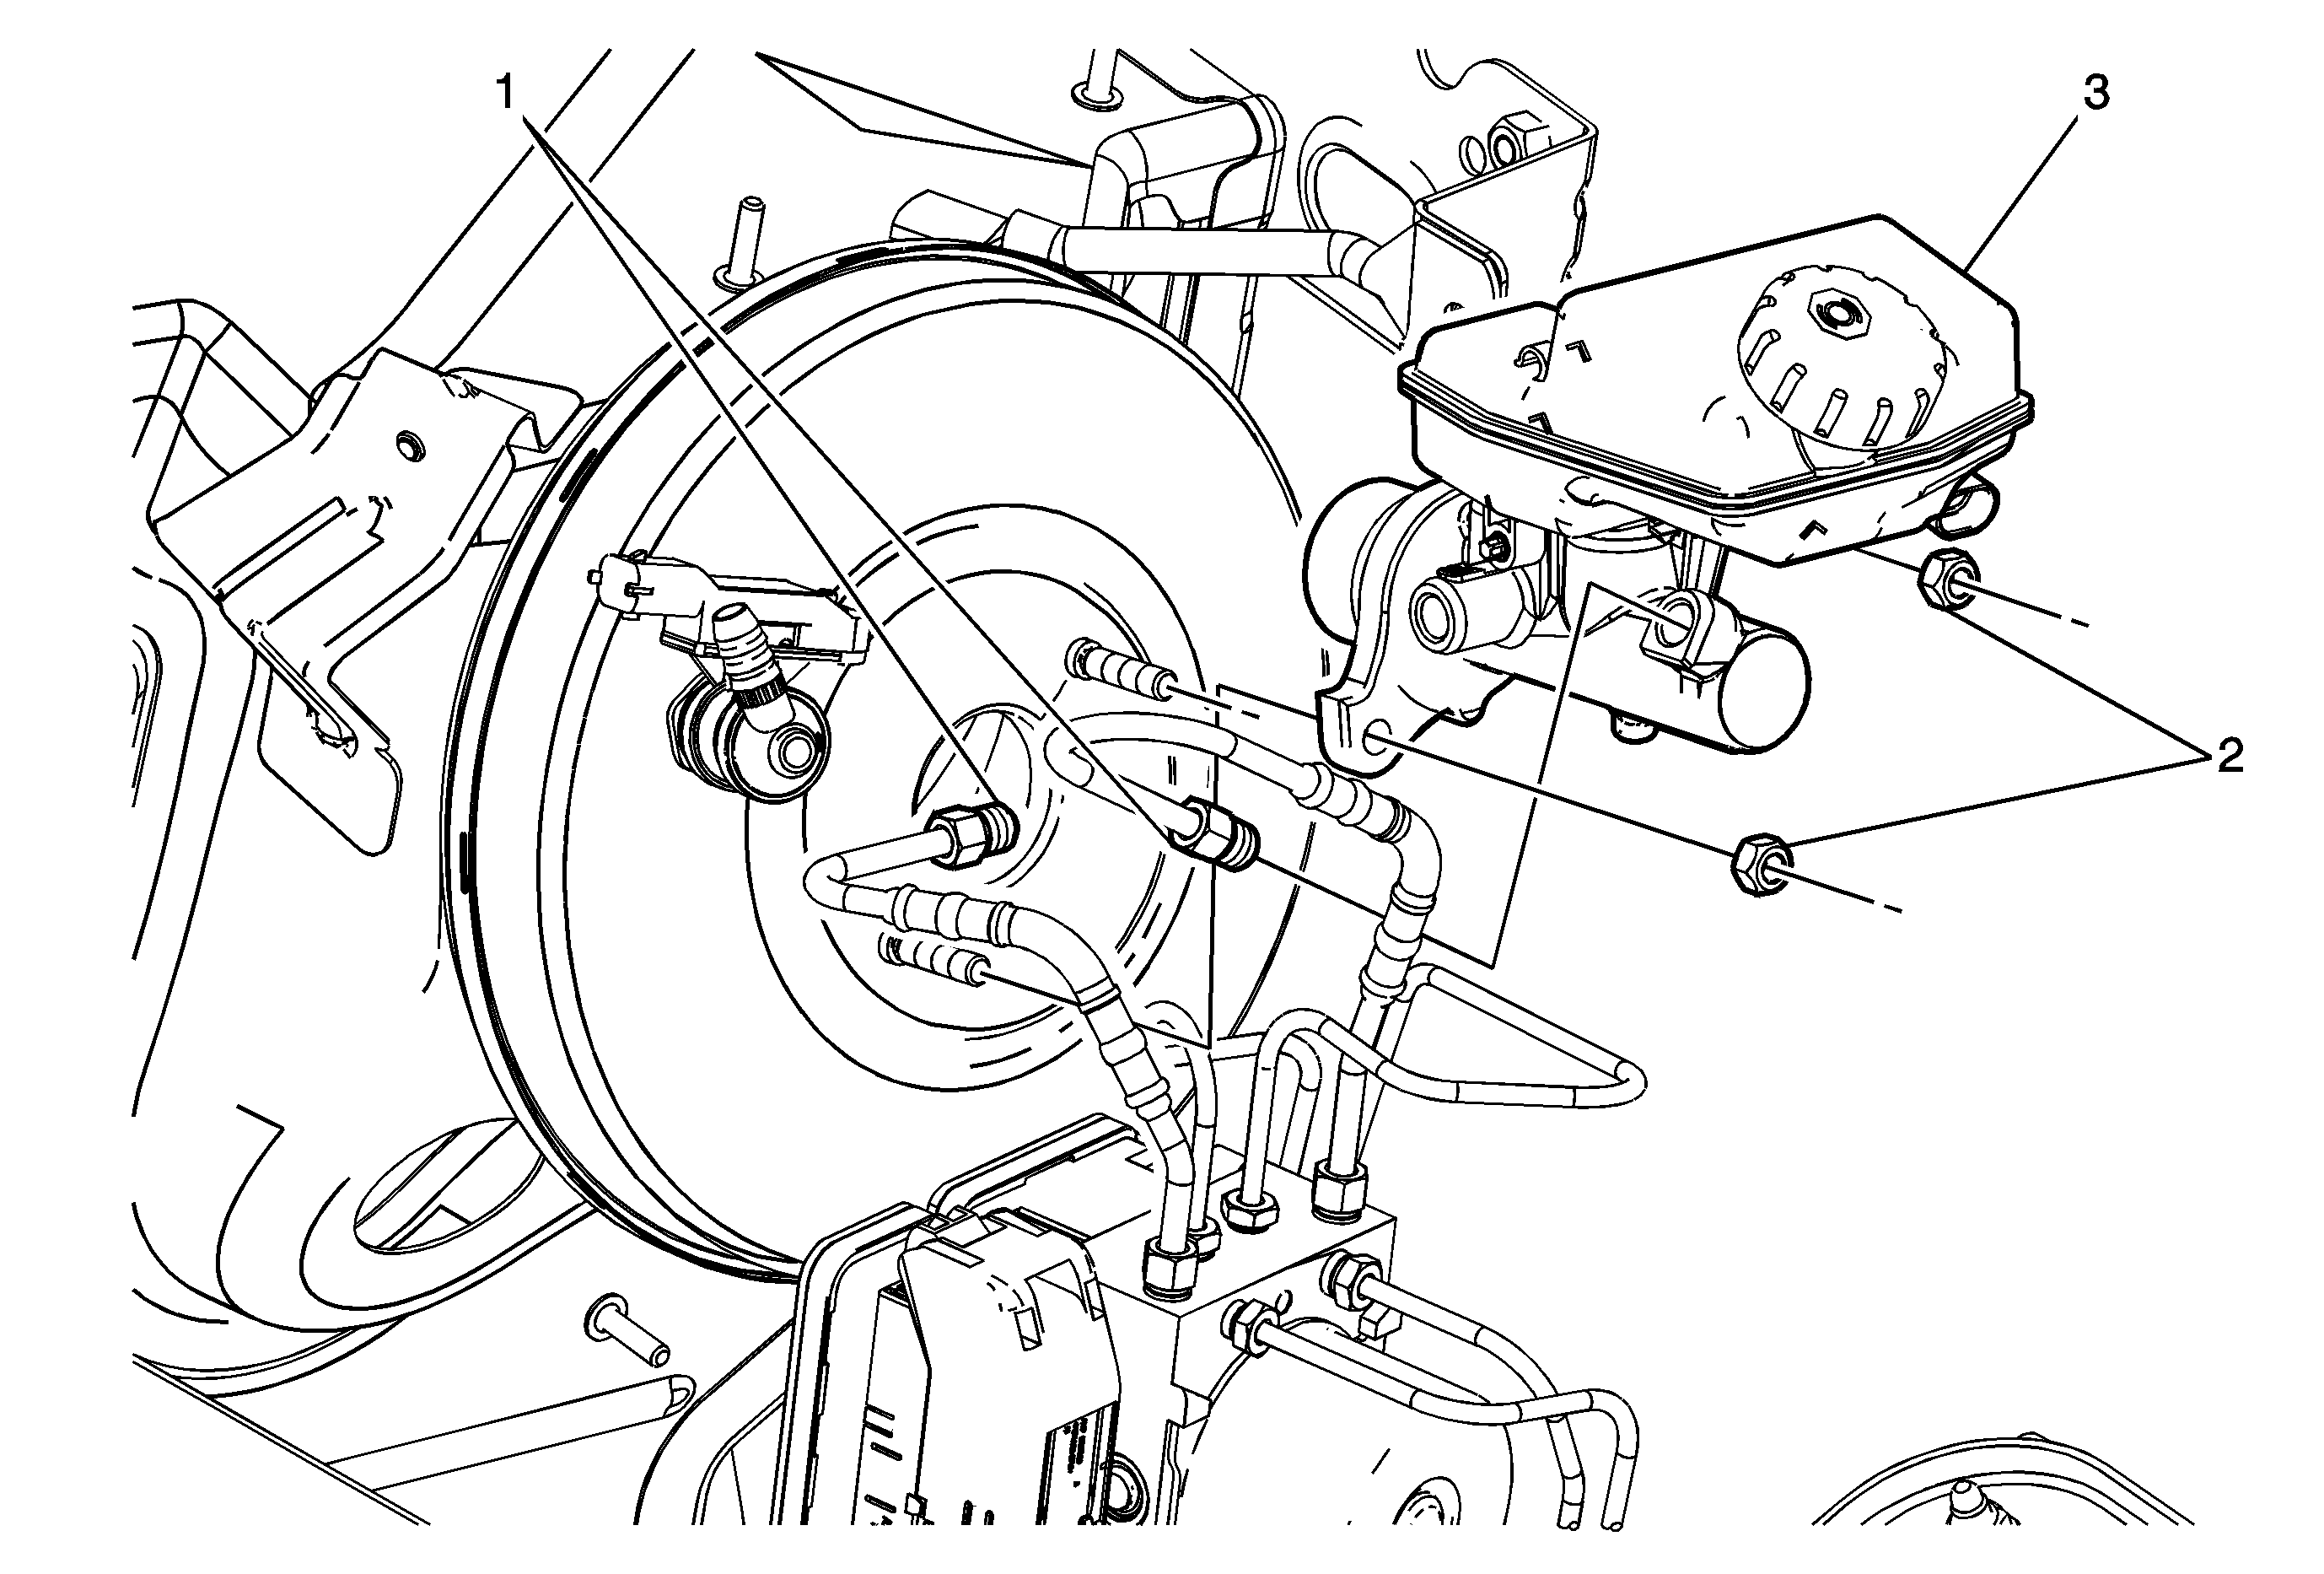
Master Cylinder Replacement w/JL4


Object Number: 1831065  Size: MF

Callout

Component Name

Caution: Refer to Brake Fluid Irritant Caution in the Preface section.

Notice: Refer to Brake Fluid Effects on Paint and Electrical Components Notice in the Preface section.

Preliminary Procedures

  1. With the engine OFF, apply the brake pedal several times until the brake pedal becomes firm to deplete the vacuum brake booster vacuum reserve.
  2. If equipped, disconnect the clutch master cylinder hose from the brake master cylinder reservoir.
  3. Cap the brake fluid reservoir outlet and plug the clutch master cylinder hose inlet to prevent brake fluid loss and contamination.
  4. Disconnect the brake fluid level sensor electrical connector.

1

Brake Pipe Fitting (Qty: 2)

Notice: Refer to Fastener Notice in the Preface section.

Procedure

Cap the brake pipe fittings and plug the master cylinder outlet ports to prevent brake fluid loss and contamination.

Tighten
20 N·m (15 lb ft)

2

Brake Master Cylinder Nut (Qty: 2)

Procedure

  1. Discard the brake master cylinder nuts.
  2. Install NEW brake master cylinder nuts.

Tighten
15 N·m (11 lb ft)

3

Brake Master Cylinder

Procedure

  1. When removing the master cylinder, ensure the master cylinder to booster seal between the vacuum booster and the master cylinder is properly seated in the groove at the rear of the master cylinder and is not damaged. Replace the seal if necessary.
  2. If necessary, remove the brake master cylinder reservoir. Refer to Master Cylinder Reservoir Replacement .
  3. If installing a new master cylinder, bench bleed the master cylinder. Refer to Master Cylinder Bench Bleeding .
  4. Fill the master cylinder reservoir. Refer to Master Cylinder Reservoir Filling .
  5. Bleed the brake system. Refer to Hydraulic Brake System Bleeding .