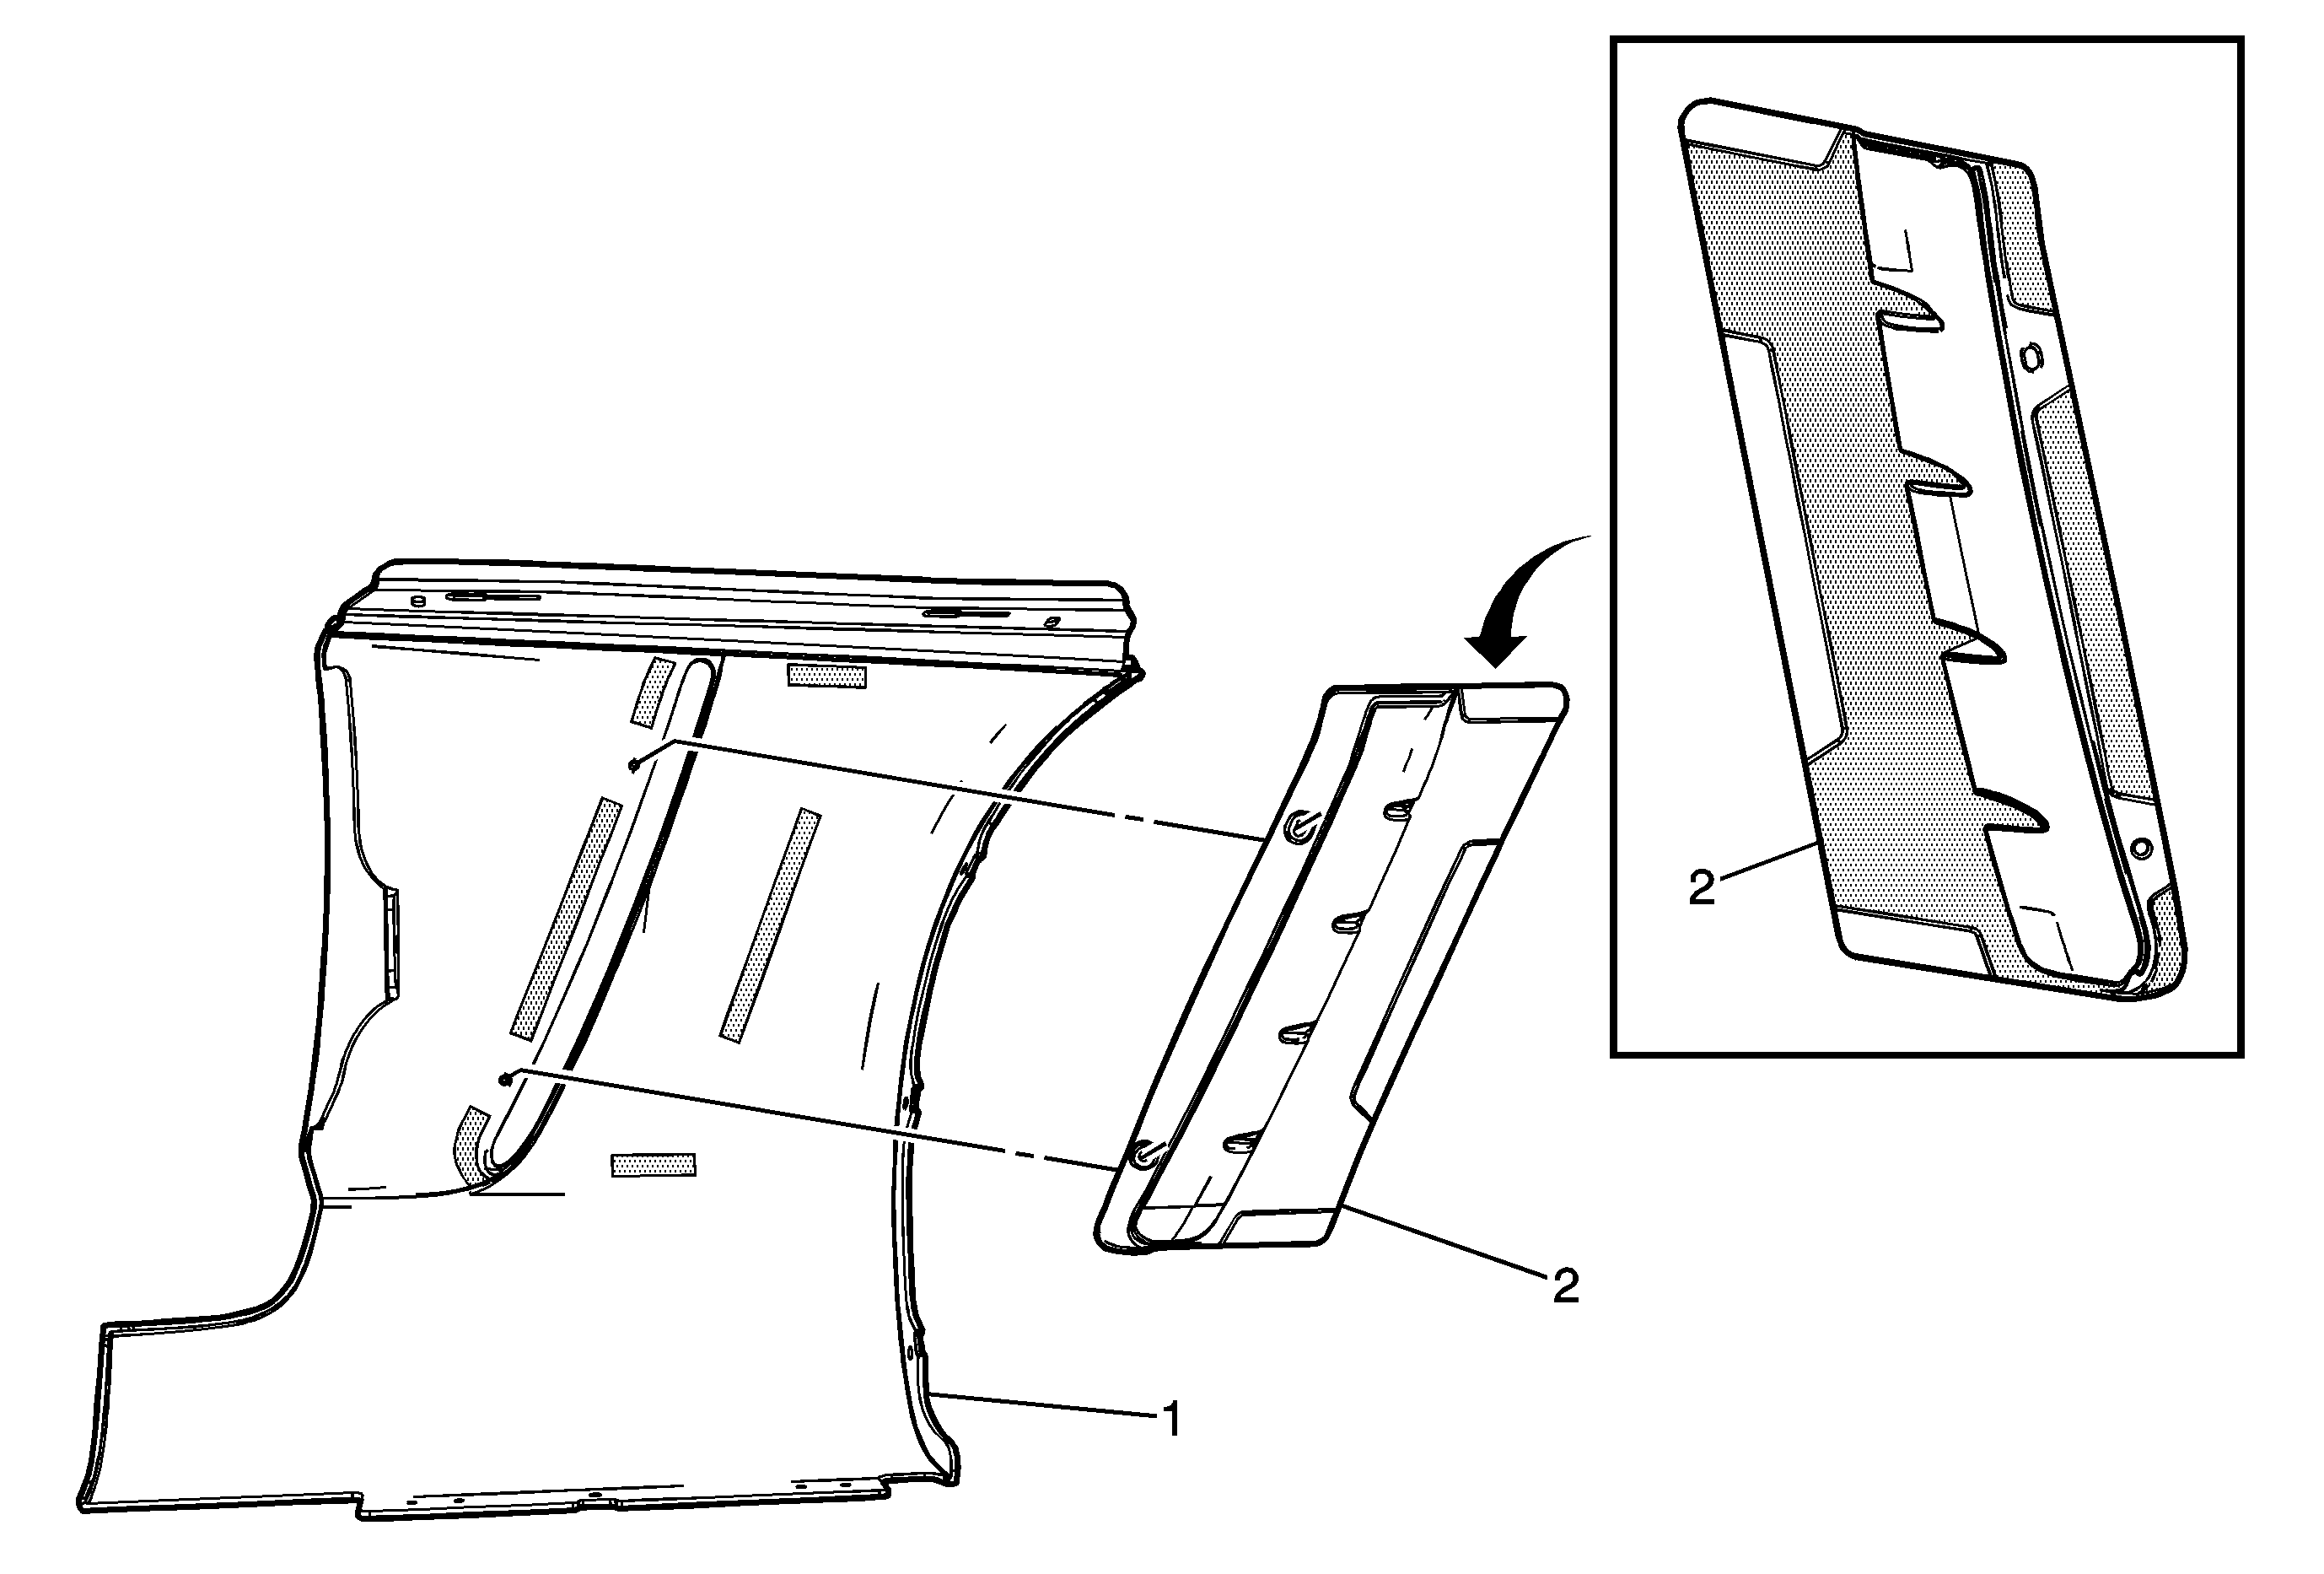
Callout
| Component Name
|
|
Notice: The air extractor cannot be removed from the fender without damage to the fender.
Preliminary Procedures
- Remove the fender. Refer to
Front Fender Replacement
.
- Paint the fender and the air extractor before assembly. Refer to
Basecoat/Clearcoat Paint Systems
.
- The part and surface should be 21°C (70°F) prior to installation. The vehicle part should remain 21°C (70°F) for one hour after assembly to allow adhesive to develop sufficient bond strength.
|
1
| Fender Panel
Procedure
- Roughen the shaded surface on the back of the fender panel with ScotchBrite™ or 150 grit sand paper. Wipe clean and dry.
- Apply 3M-4298 adhesion promoter over the roughened surface to fully cover the shaded area on the back of the fender panel. Allow to dry.
|
2
| Air Extractor
Procedure
- Roughen the shaded surfaces on the front of the air extractor. Wipe clean and dry. Apply 3M-4298 adhesion promoter over the roughened surface of pockets. Allow to dry.
- Install large and small tape pieces in pockets of the air extractor. Press firmly in place.
- Place the air extractor over the locating pins on the back of the fender panel.
- Press the air extractor firmly in place by hand. Use roller to firmly press over tape pocket areas.
|

