For 1990-2009 cars only
Removal Procedure
- Remove the intake manifold cover. Refer to Intake Manifold Cover Replacement .
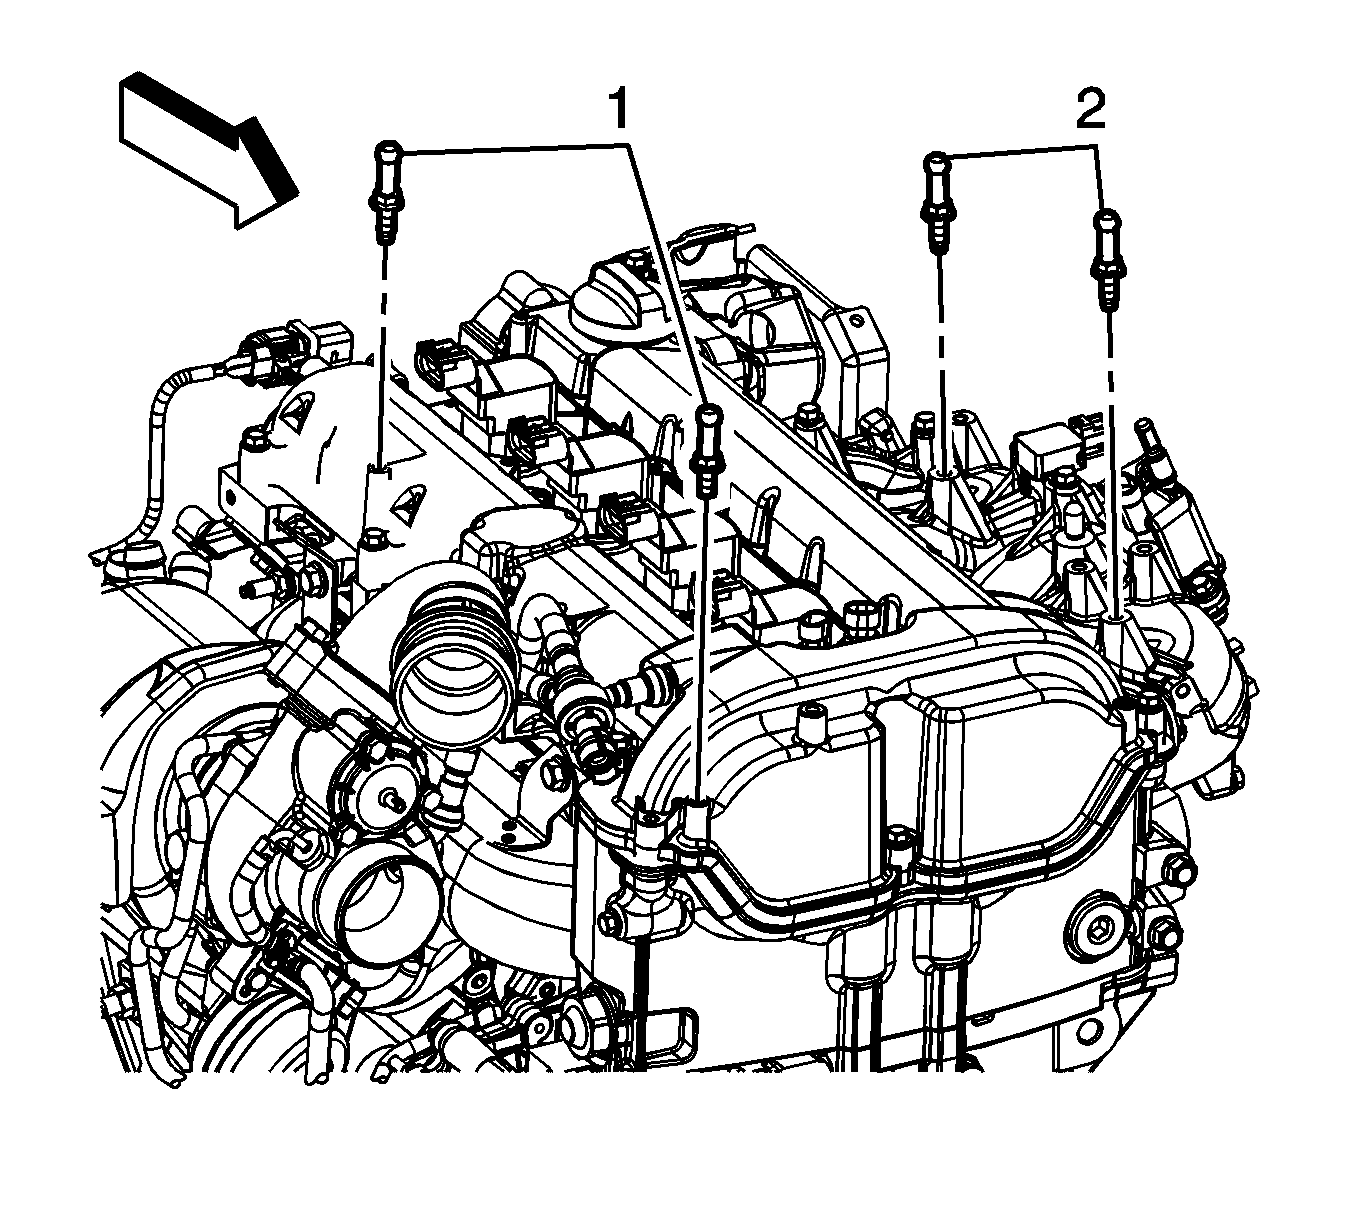
- Remove the intake manifold cover studs (1).
- Remove the air cleaner outlet. Refer to Air Cleaner Outlet Duct Replacement .
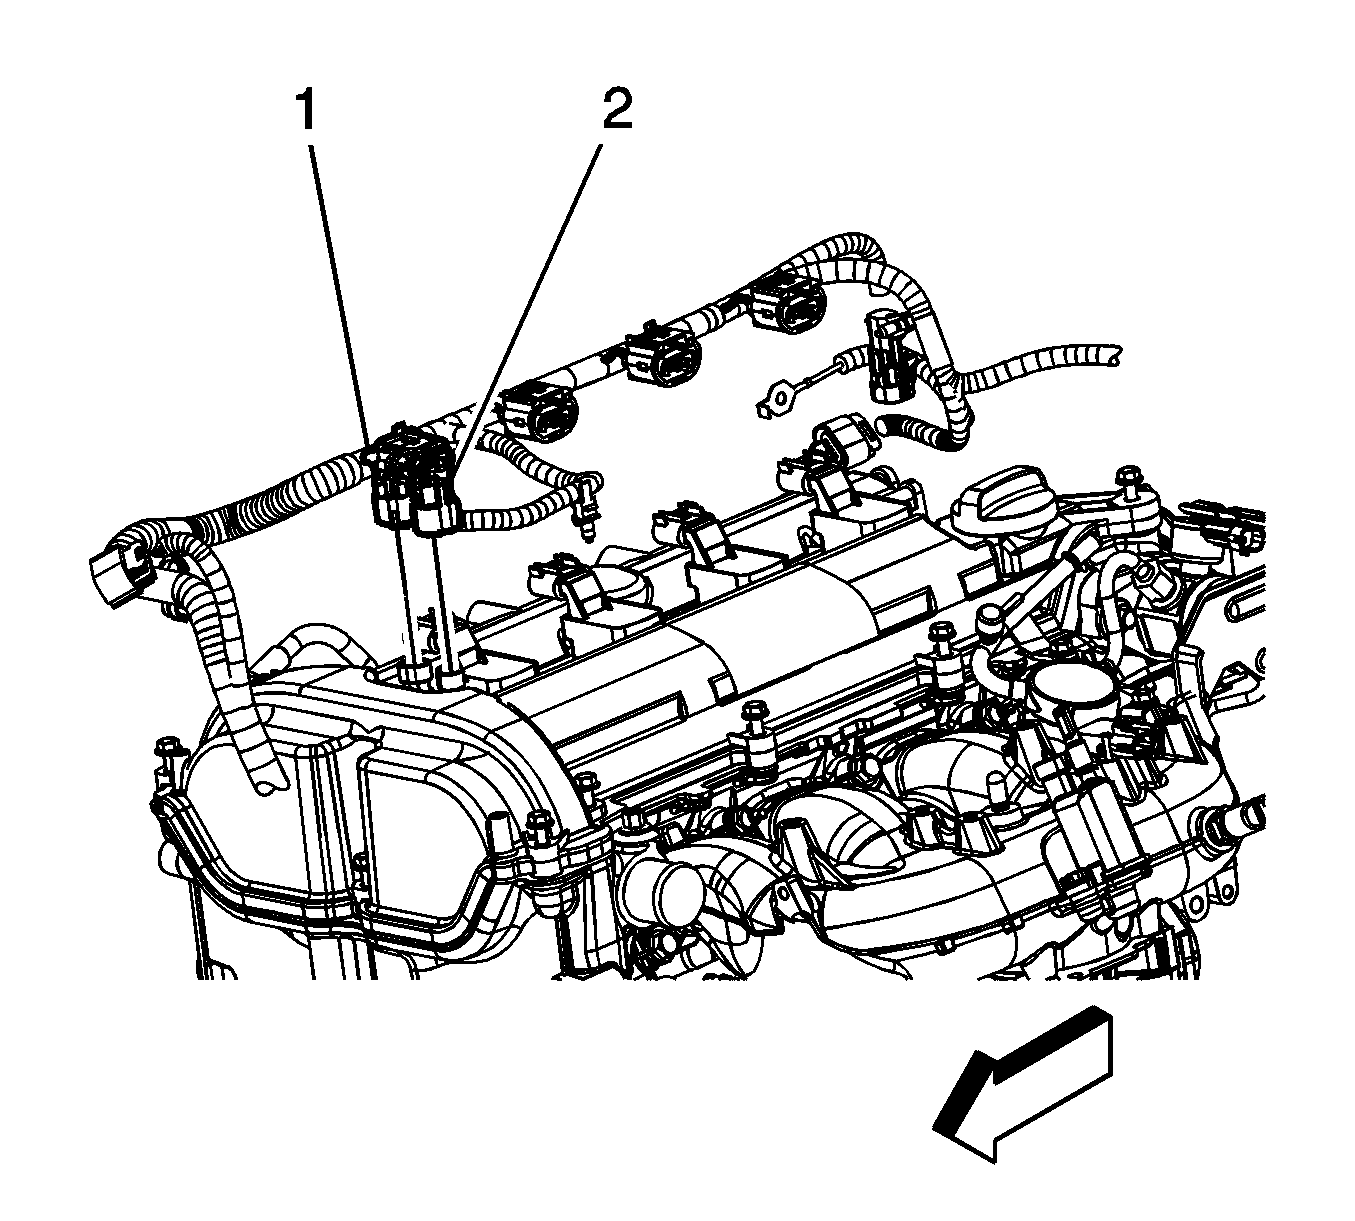
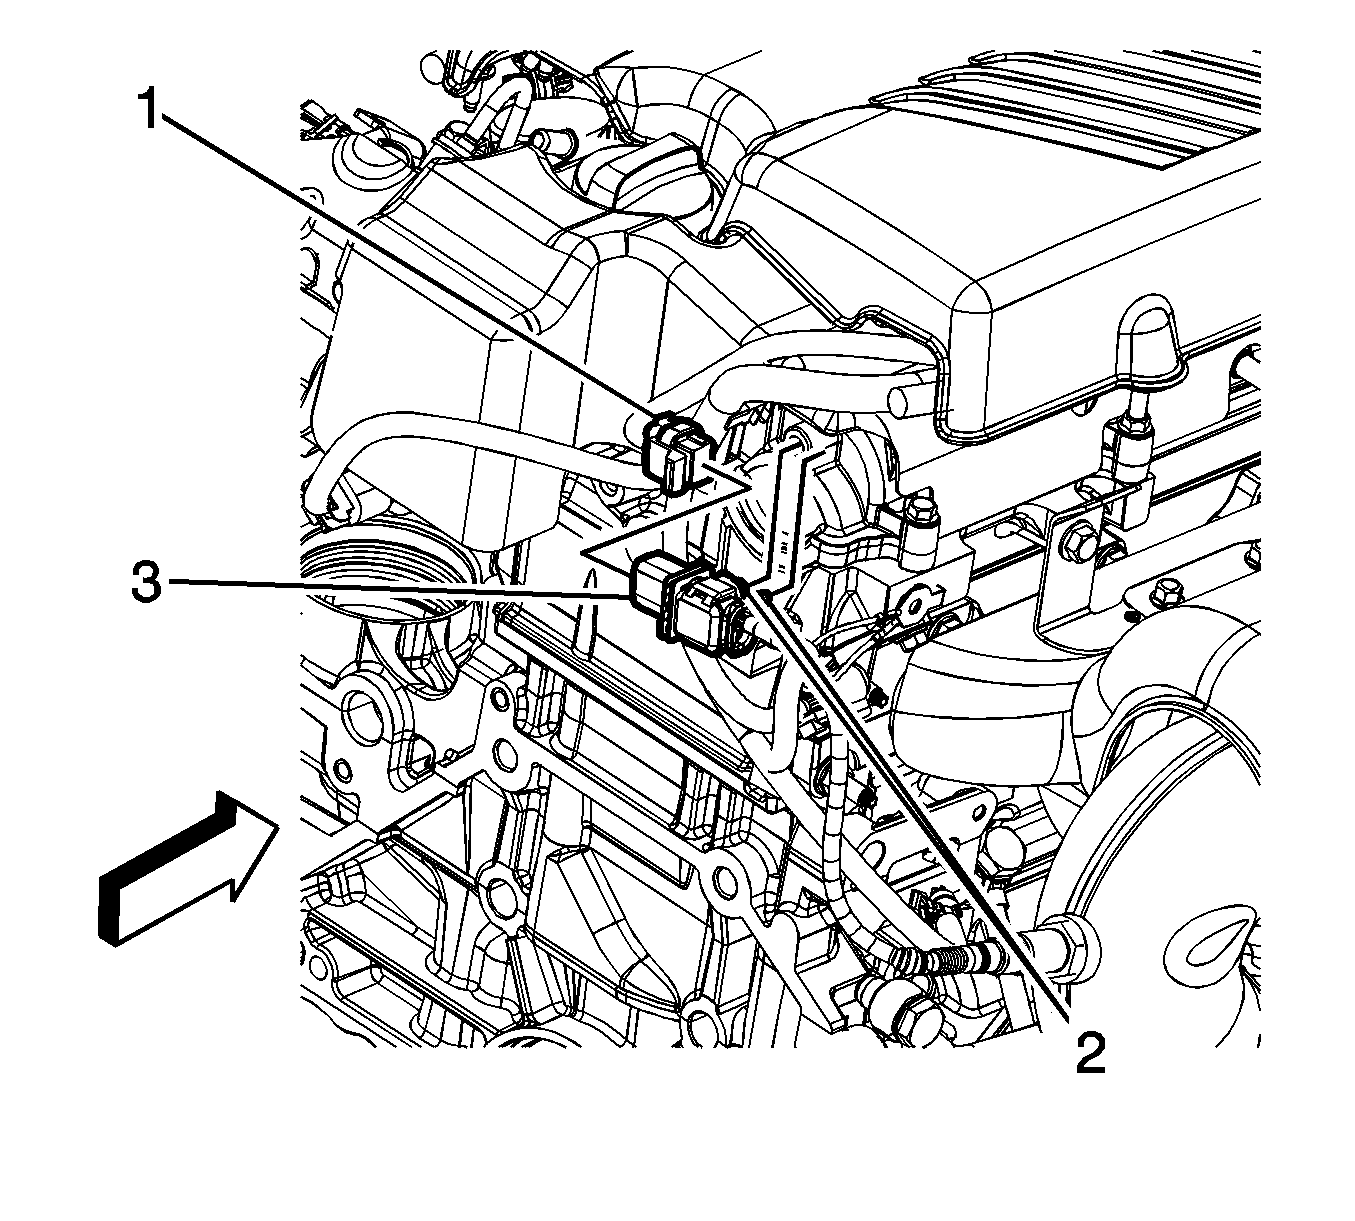
- Disconnect the engine wiring harness intake (2) and exhaust (1) electrical connectors from the camshaft position actuator solenoid valves.
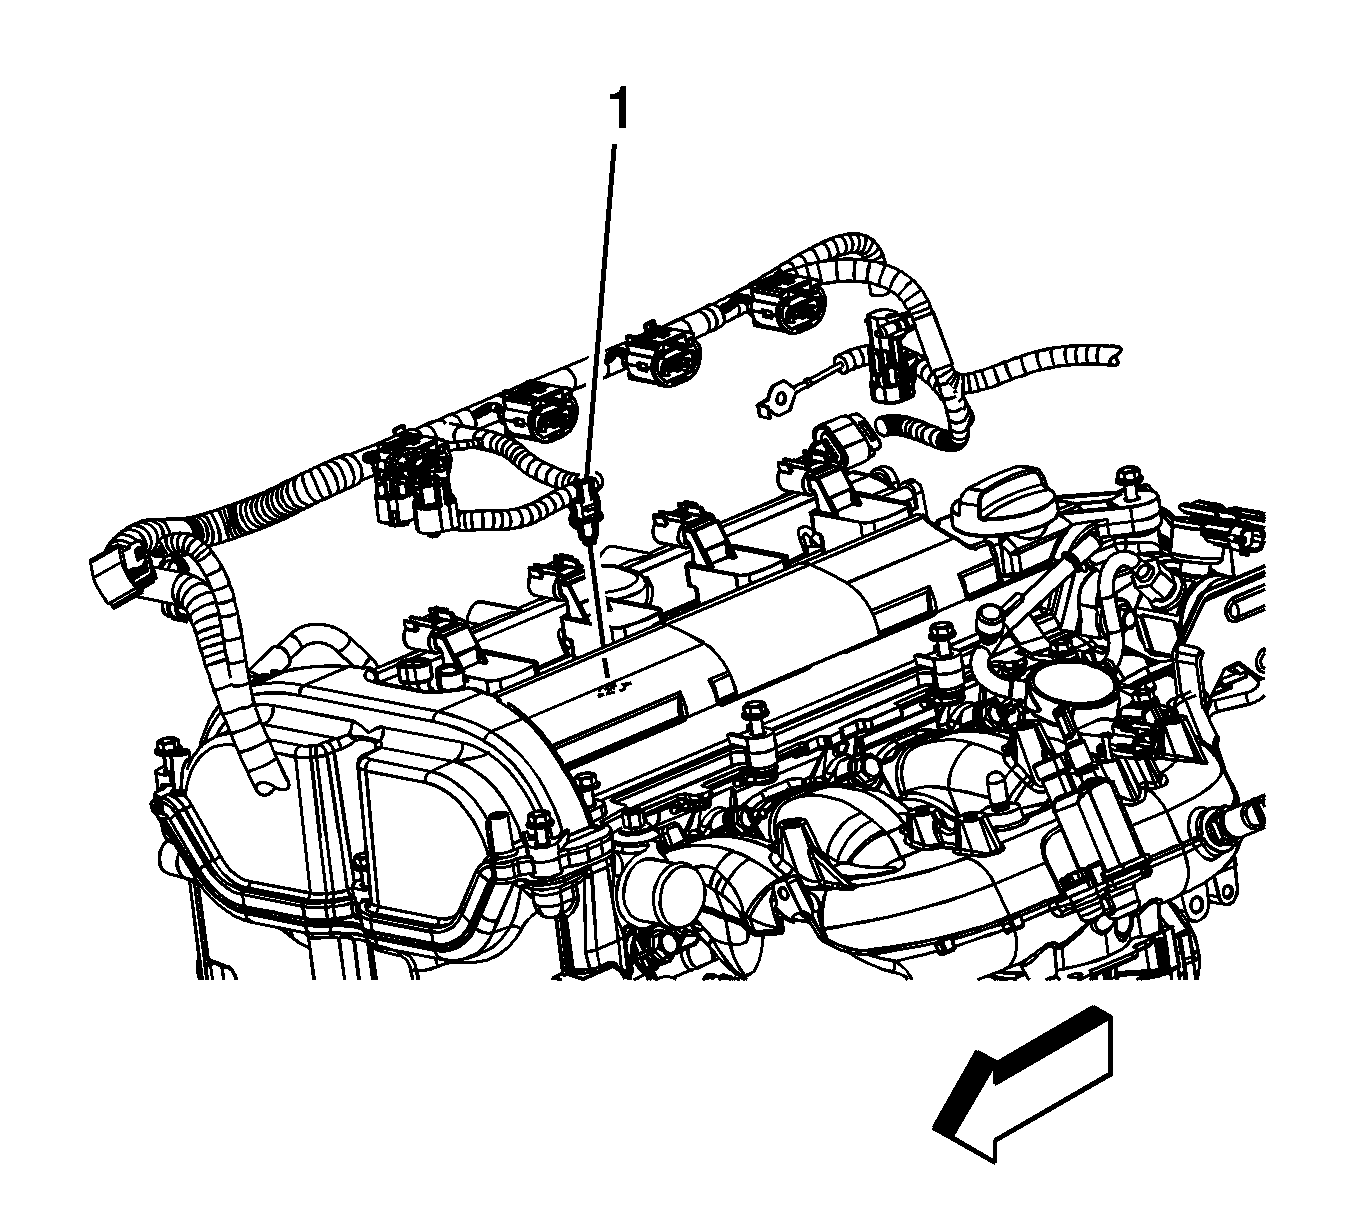
- Remove the engine wiring harness clip (1) from the camshaft cover.
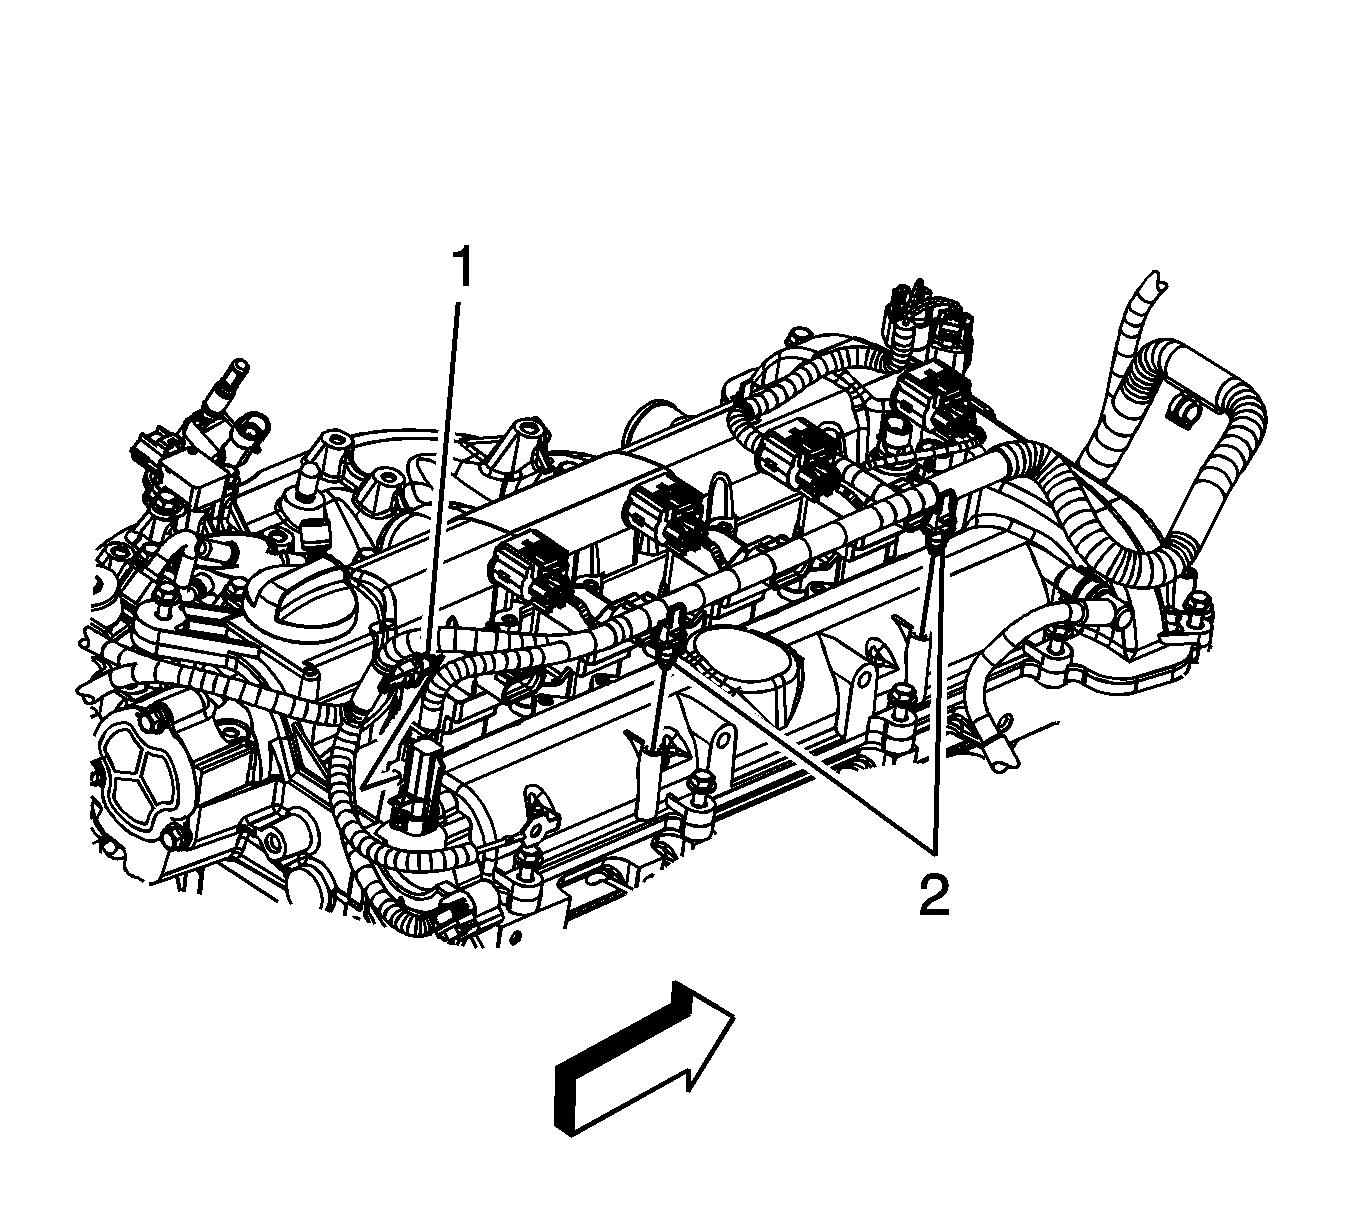
- Remove the engine wiring harness clips (1, 2) from the camshaft cover.
- Disconnect the engine wiring harness electrical connector from the evaporative emission (EVAP) canister purge solenoid valve.
- Remove the ignition coils. Refer to Ignition Coil Replacement .
- Remove the heated oxygen sensor (HO2S) electrical connector clip (2) from the camshaft cover.
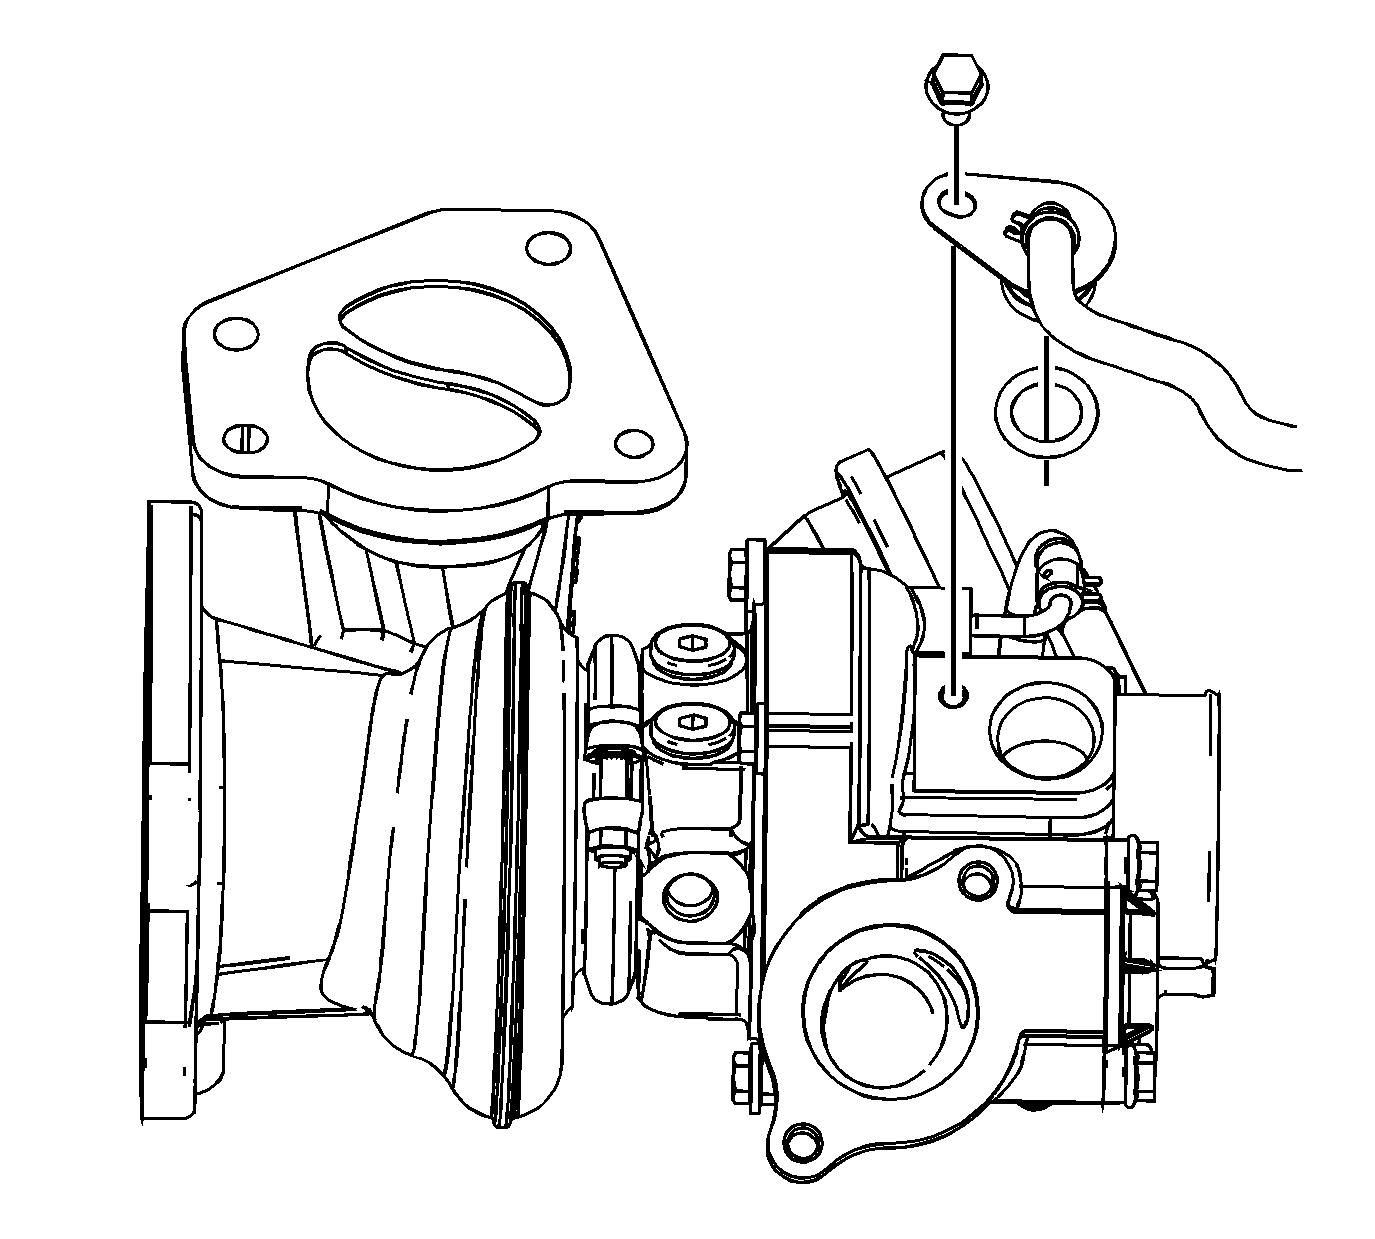
- Remove the positive crankcase ventilation (PCV) fitting bolt from the turbocharger. Reposition the PCV pipe (with fitting) out of the way.
- Remove the air inlet grille panel. Refer to Air Inlet Grille Panel Replacement .
- Remove the electrical harness attached at the rear of the camshaft cover.
- Remove the camshaft cover bolts.
- Remove the camshaft cover.
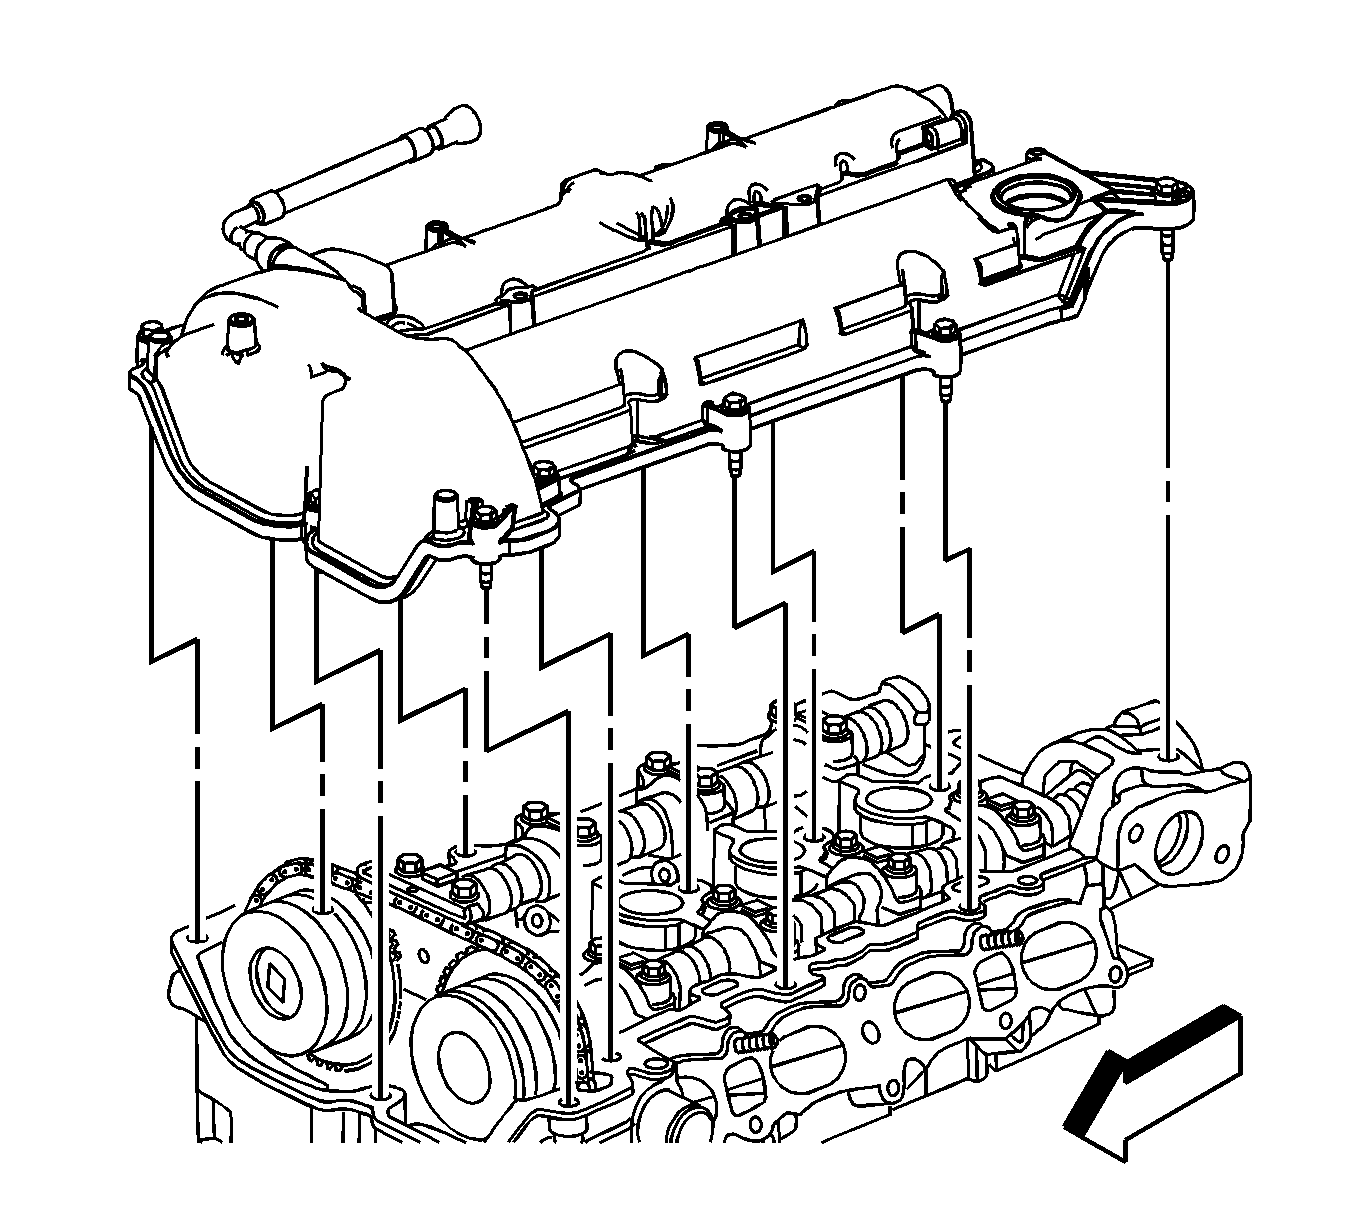
Important: The PCV hose should NOT be disconnected from the camshaft cover as damage to the hose connection will result.
Installation Procedure
- Install the camshaft cover and bolts.
- Attach the electrical harness at the rear of the camshaft cover.
- Install the air inlet grille panel. Refer to Air Inlet Grille Panel Replacement .
- Install a NEW O-ring seal to the PCV fitting.
- Position the PCV pipe (with fitting) and install the PCV fitting bolt to the turbocharger.
- Install the HO2S electrical connector clip (2) to the camshaft cover.
- Install the ignition coils. Refer to Ignition Coil Replacement .
- Disconnect the engine wiring harness electrical connector from the evaporative emission (EVAP) canister purge solenoid valve.
- Install the engine harness clips (1, 2) to the camshaft cover.
- Install the engine wiring harness clip (1) to the camshaft cover.
- Connect the engine wiring harness intake (2) and exhaust (1) electrical connectors to the camshaft position actuator solenoid valves.
- Install the air cleaner outlet. Refer to Air Cleaner Outlet Duct Replacement .
- Install the intake manifold cover studs (1).
- Install the intake manifold cover. Refer to Intake Manifold Cover Replacement .
Notice: Refer to Fastener Notice in the Preface section.

Tighten
Tighten the bolts to 10 N·m (89 lb in).

Tighten
Tighten the bolt to 10 N·m (89 lb in).


Tighten
Tighten the studs to 9 N·m (80 lb in).
