Cooling System Draining and Filling GE-47716
Special Tools
| • | J 26568 Coolant and Battery Fluid Tester |
| • | J 42401 Radiator Pressure Adapter |
Draining Procedure
- Remove the pressure cap.
- Raise and support the vehicle. Refer to Lifting and Jacking the Vehicle.
- Place a drain pan under the right side lower radiator mount.
- Open the radiator drain cock.
- Drain the cooling system.
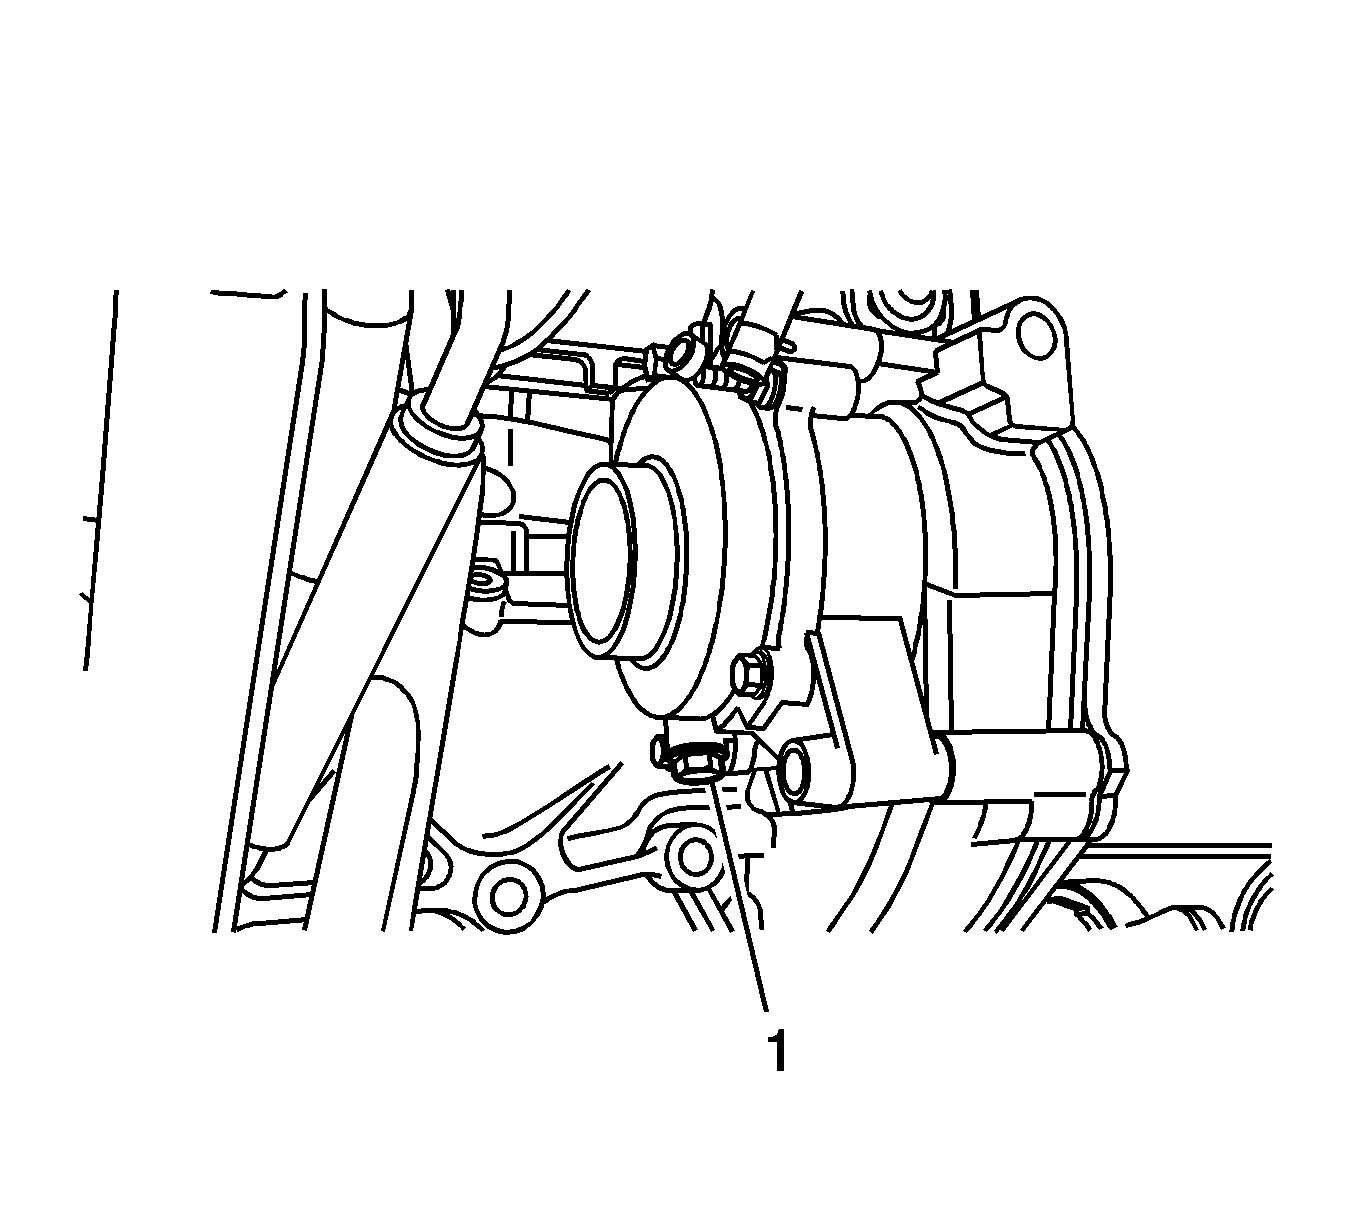
- If a complete block drain is required, place a drain pan under the water pump drain.
- Remove the water pump drain plug (1).
- Drain the cooling system.
- Inspect the appearance of the engine coolant for discoloration:
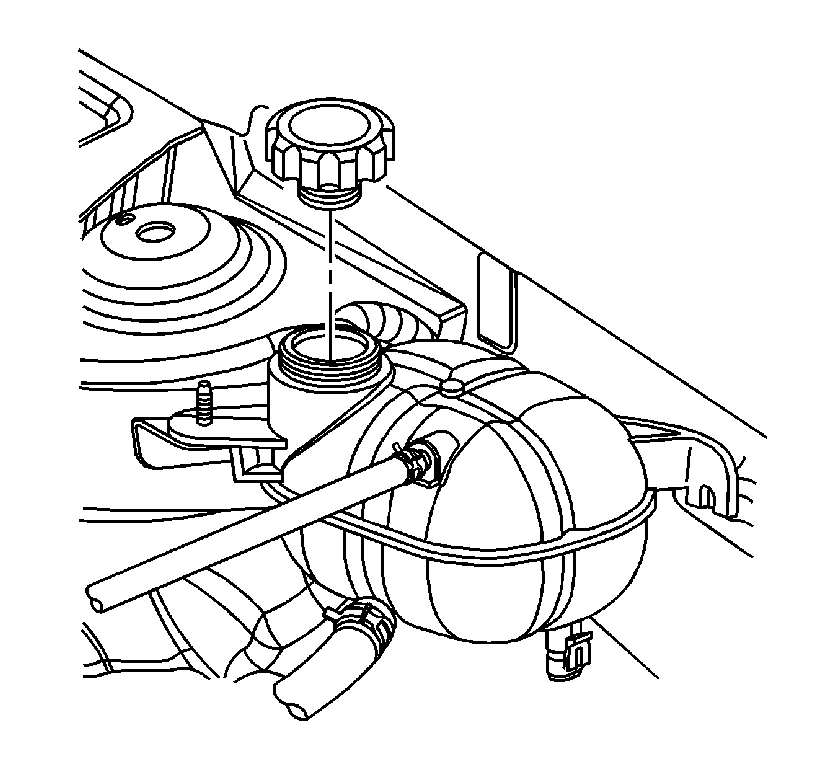
Warning: To avoid being burned, do not remove the radiator cap or surge tank cap while the engine is hot. The cooling system will release scalding fluid and steam under pressure if radiator cap or surge tank cap is removed while the engine and radiator are still hot.
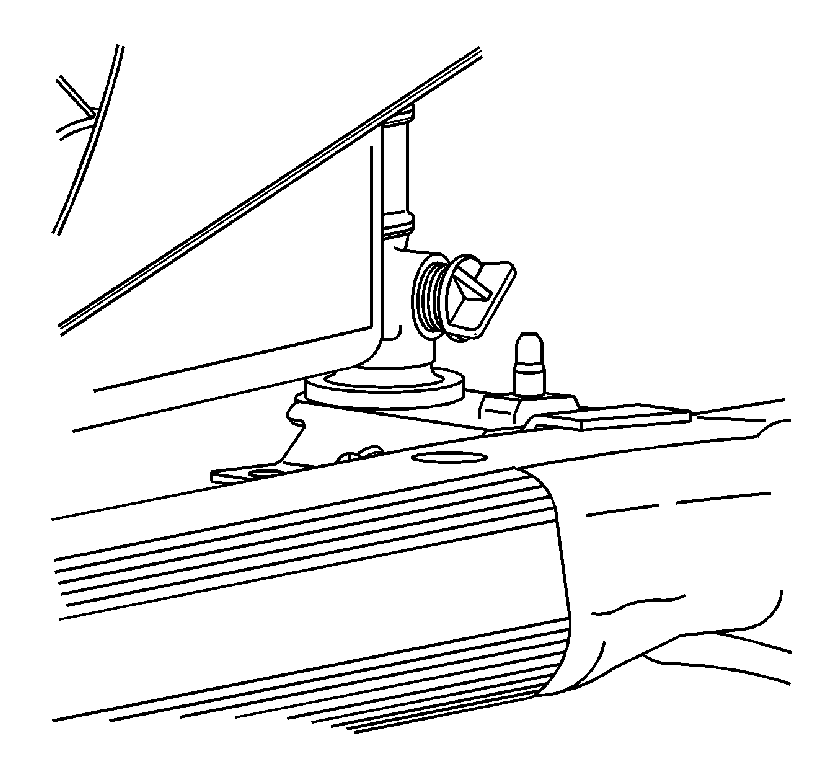
| • | Discolored--Follow the flush procedure. Refer to Flushing. |
| • | Normal in appearance--Follow the filling procedure. |
Vac-N-Fill Procedure
- Close the radiator drain cock by hand.
- Install the water pump drain plug if removed during the draining process (1) and tighten to 22 N·m (16 lb ft).
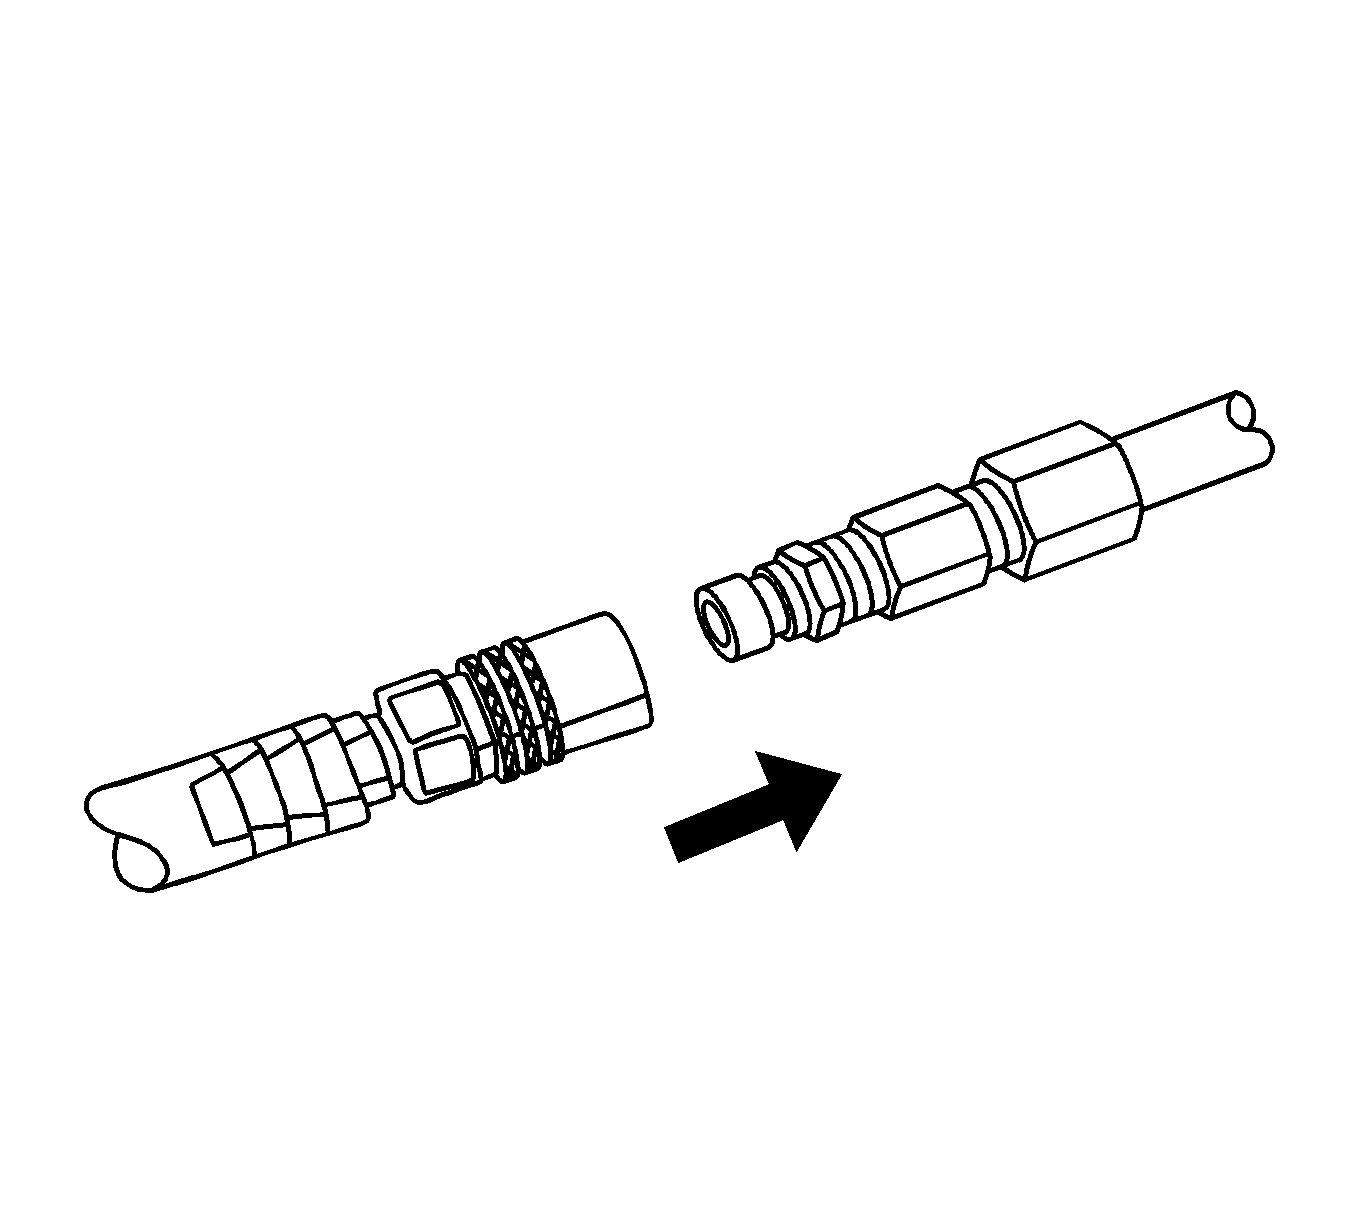
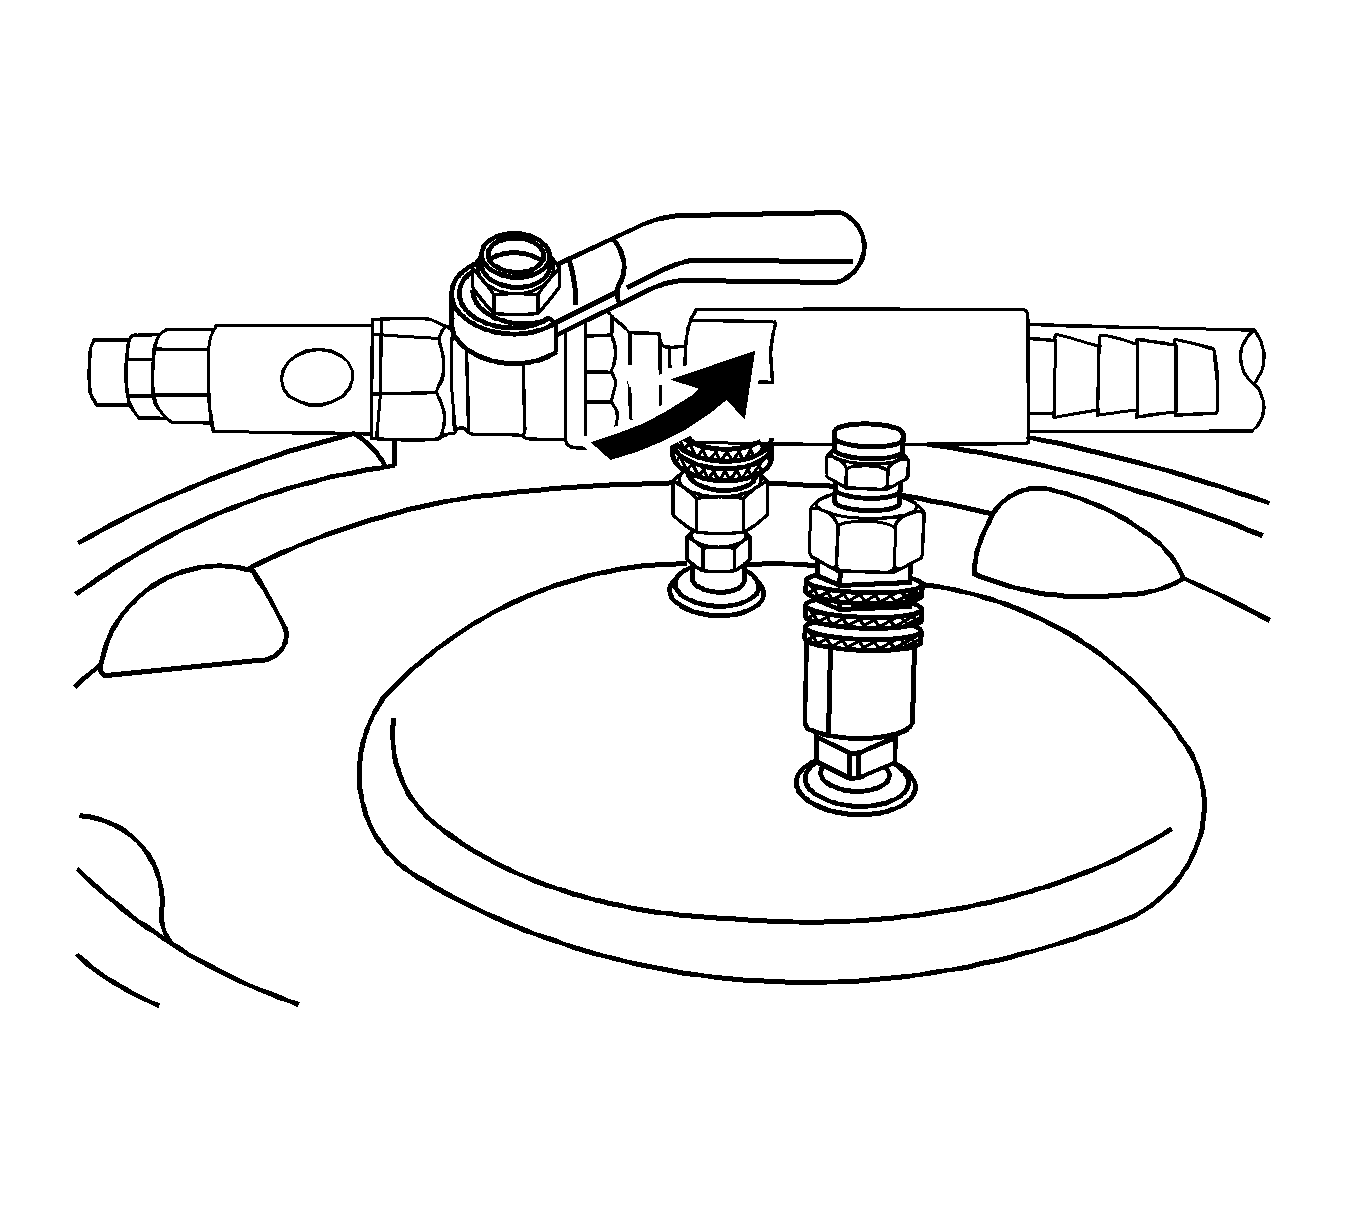
- Install J-42401-2 into the surge tank fill neck.
- Install J-42401-3 to the surge tank fill neck.
- Attach the Vac N Fill cap to the J-42401-3.
- Attach the vacuum gauge assembly to the Vac N Fill cap.
- Attach the fill hose to the barb fitting on the vacuum gauge assembly.
- Pour the coolant mixture into the graduated reservoir.
- Place the fill hose in the graduated reservoir.
- Install the vacuum tank on the graduated reservoir with the fill hose routed through the cut-out area in the vacuum tank.
- Attach the venturi assembly to the vacuum tank.
- Attach a shop air hose to the venturi assembly.
- Attach the vacuum hose to the vacuum gauge assembly and the vacuum tank.
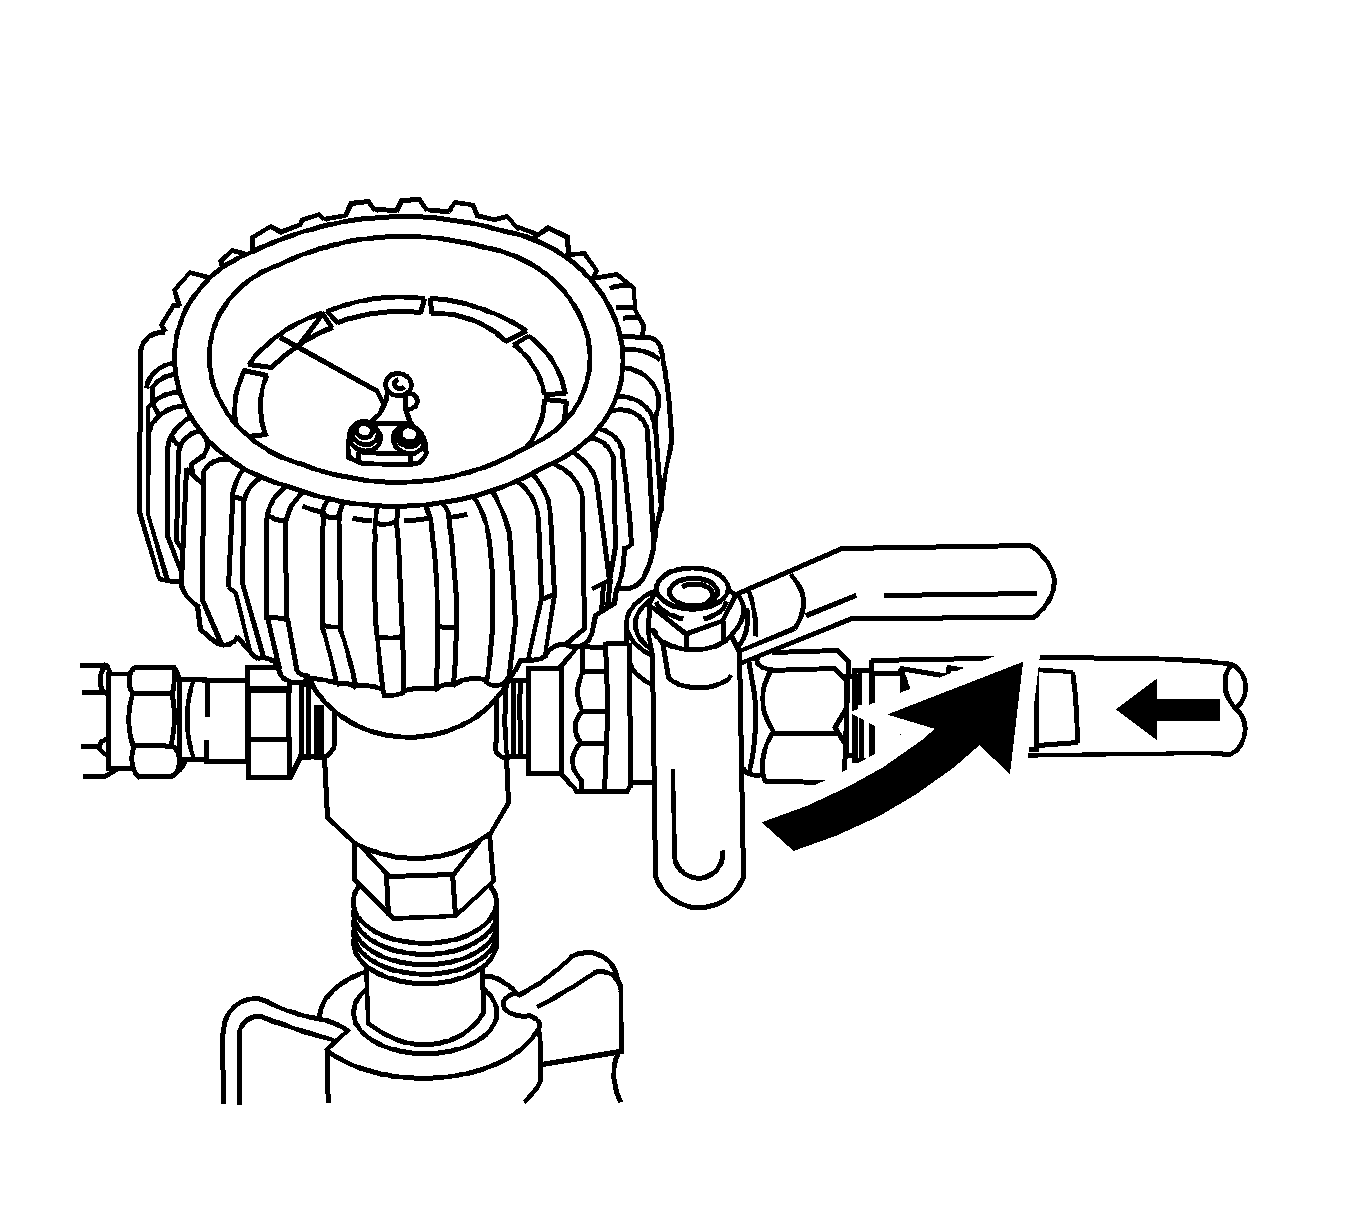
- Open the valve on the venturi assembly. The vacuum gauge will begin to rise and a hissing noise will be present.
- Continue to draw vacuum until the needle stops rising. This should be 610-660 mm Hg (24-26 in Hg).
- To aid in the fill process, position the graduated reservoir above the surge tank.
- Slowly open the valve on the vacuum gauge assembly. When the coolant reaches the top of the fill hose, close the valve. This will eliminate air from the fill hose.
- Close the valve on the venturi assembly.
- If there is a suspected leak in the cooling system, allow the system to stabilize under vacuum and monitor for vacuum loss.
- Open the valve on the vacuum gauge assembly. The vacuum gauge will drop as coolant is drawn into the system.
- Once the vacuum gauge reaches zero, close the valve on the vacuum gauge assembly and repeat steps 10-16.
- Detach the Vac N Fill cap from the vehicle's coolant fill port.
- Add coolant to the system as necessary.
- Inspect the concentration of the coolant mixture using J 26568 .
- Detach the vacuum hose from the vacuum gauge assembly.
- Attach the extraction hose to the vacuum hose.
- Open the valve on the venturi assembly to start a vacuum draw.
- Use the extraction hose to draw out coolant to the proper level.
- The vacuum tank has a drain valve on the bottom of the tank. Open the valve to drain coolant from the vacuum tank into a suitable container for disposal.

Caution: The procedure below must be followed. Improper coolant level could result in a low or high coolant level condition, causing engine damage.
Caution: Refer to Fastener Caution in the Preface section.

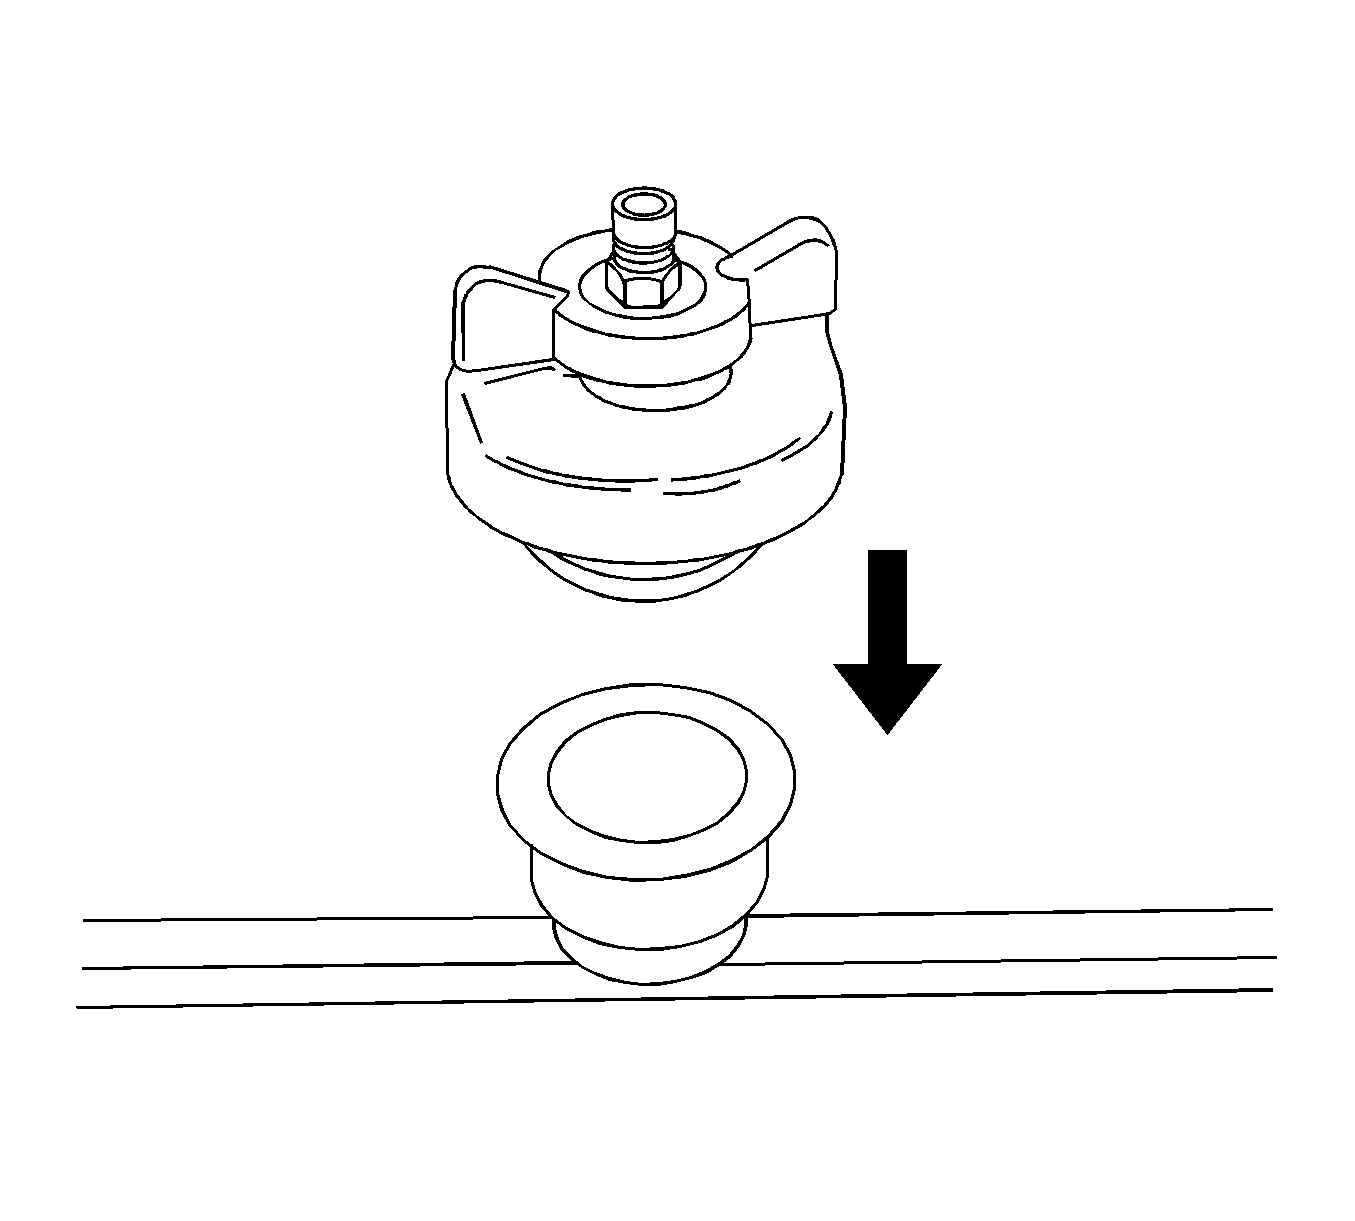
Note: To prevent boiling of the coolant/water mixture in the vehicle’s cooling system, do not apply vacuum to a cooling system above 49° C (120° F). The tool will not operate properly when the coolant is boiling.
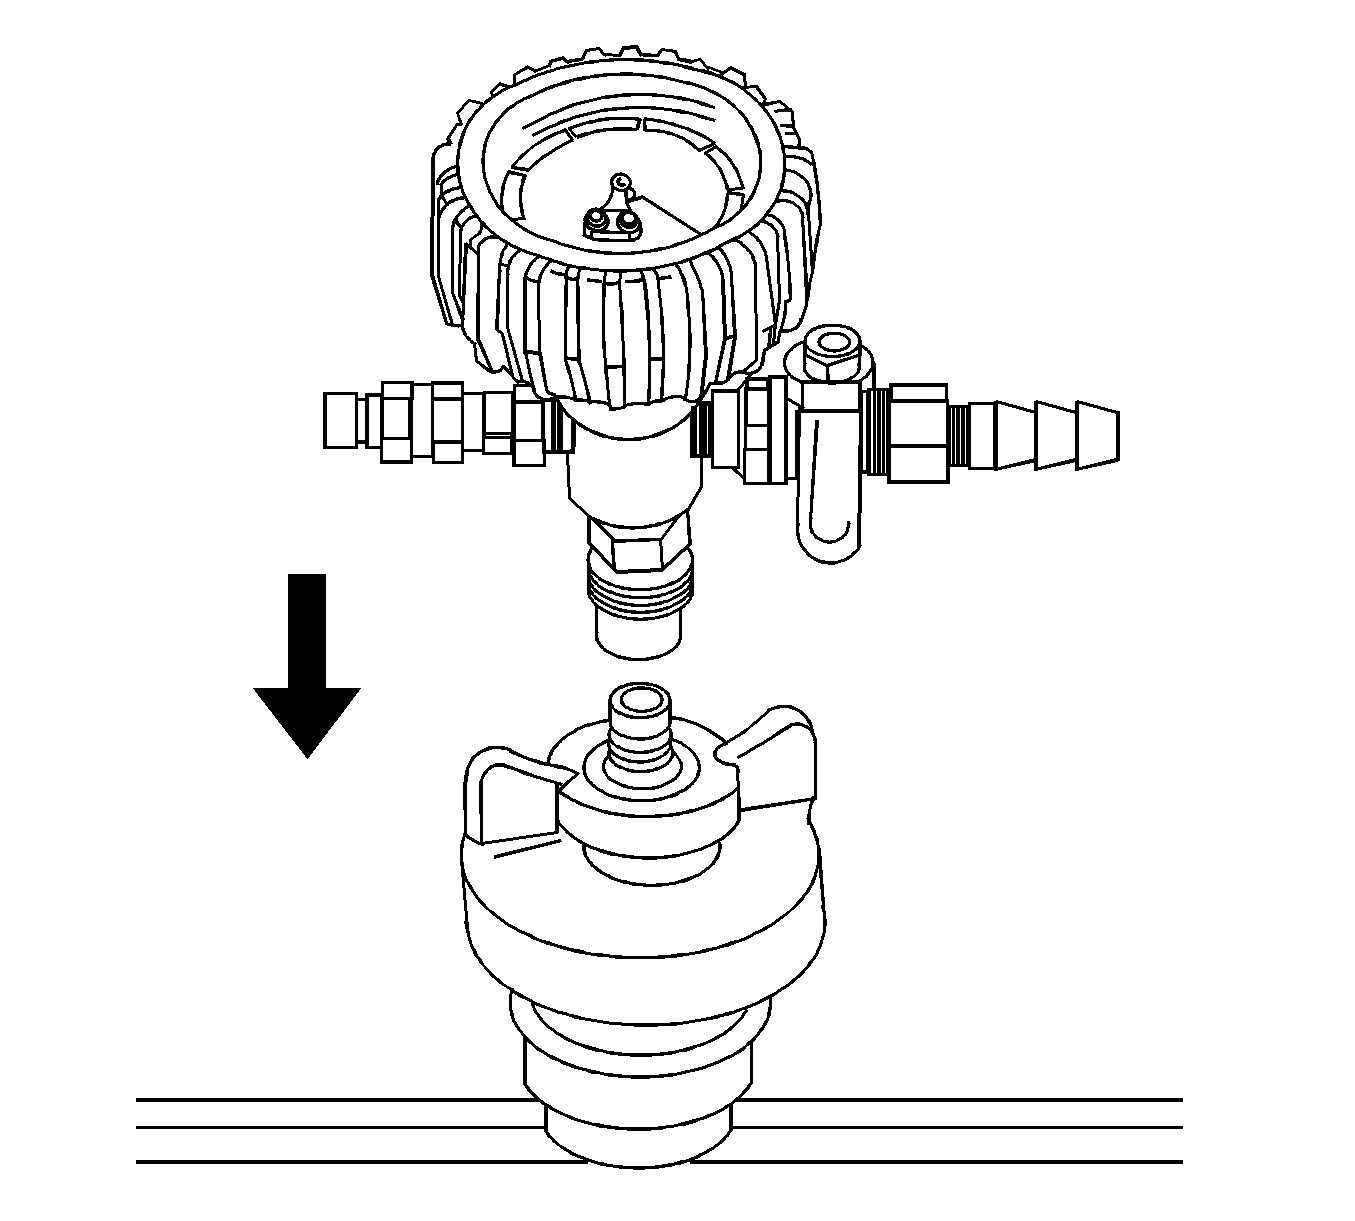
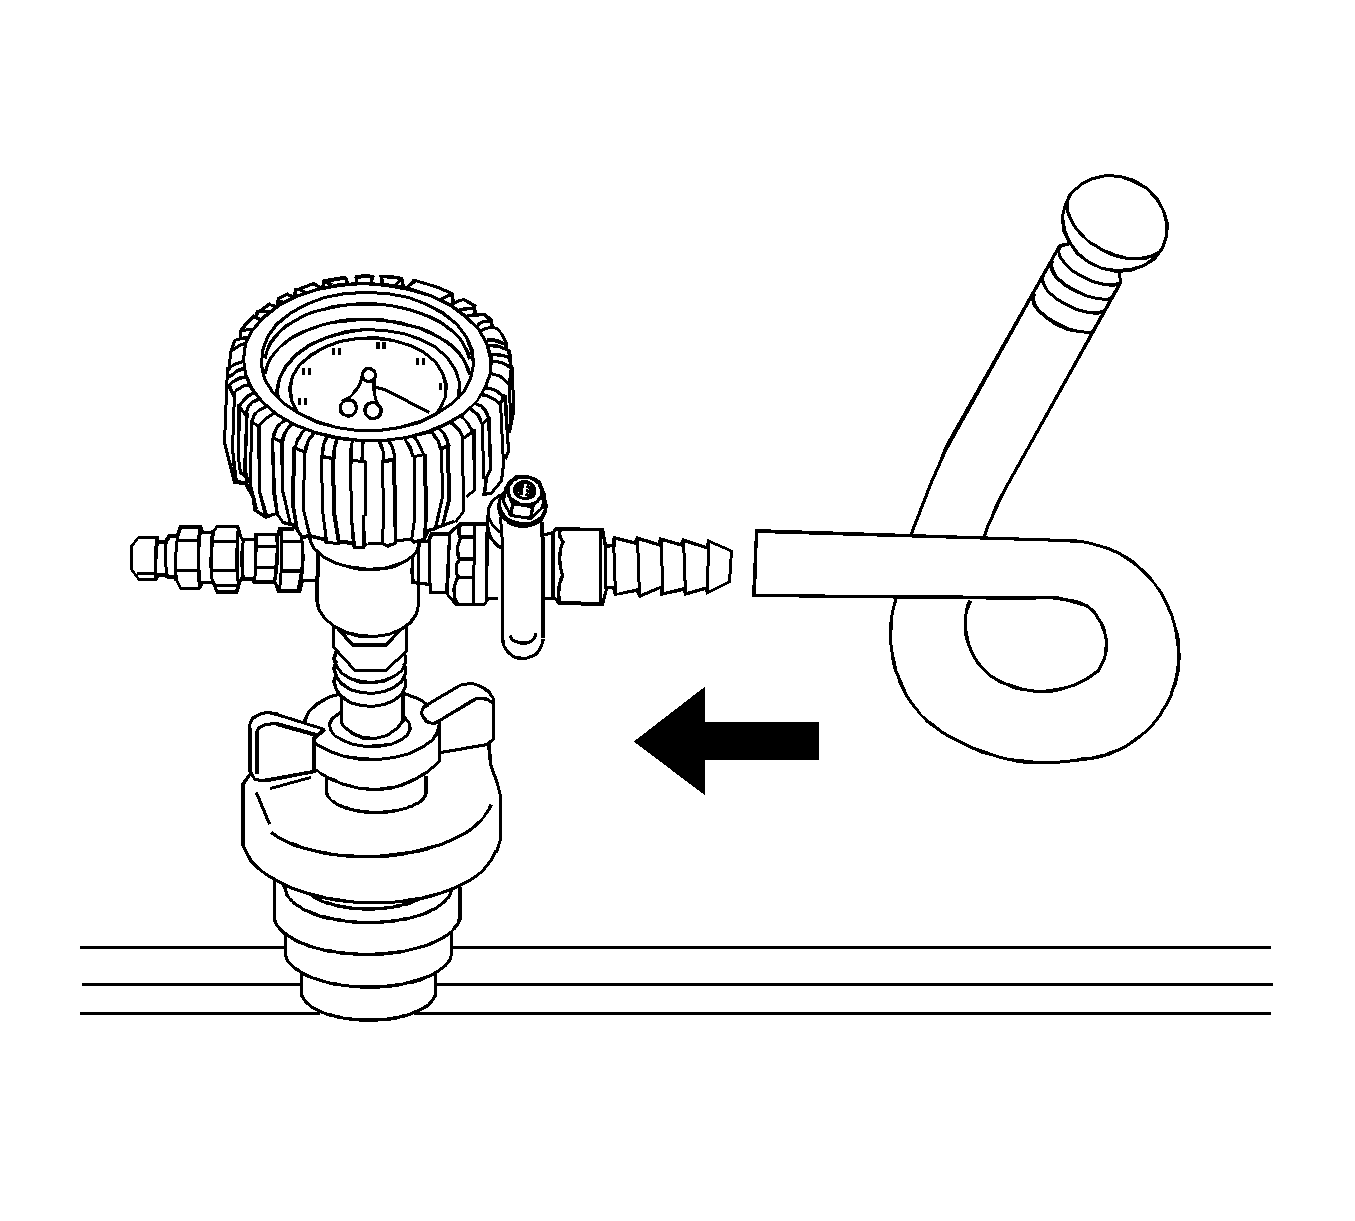
Ensure that the valve is closed.
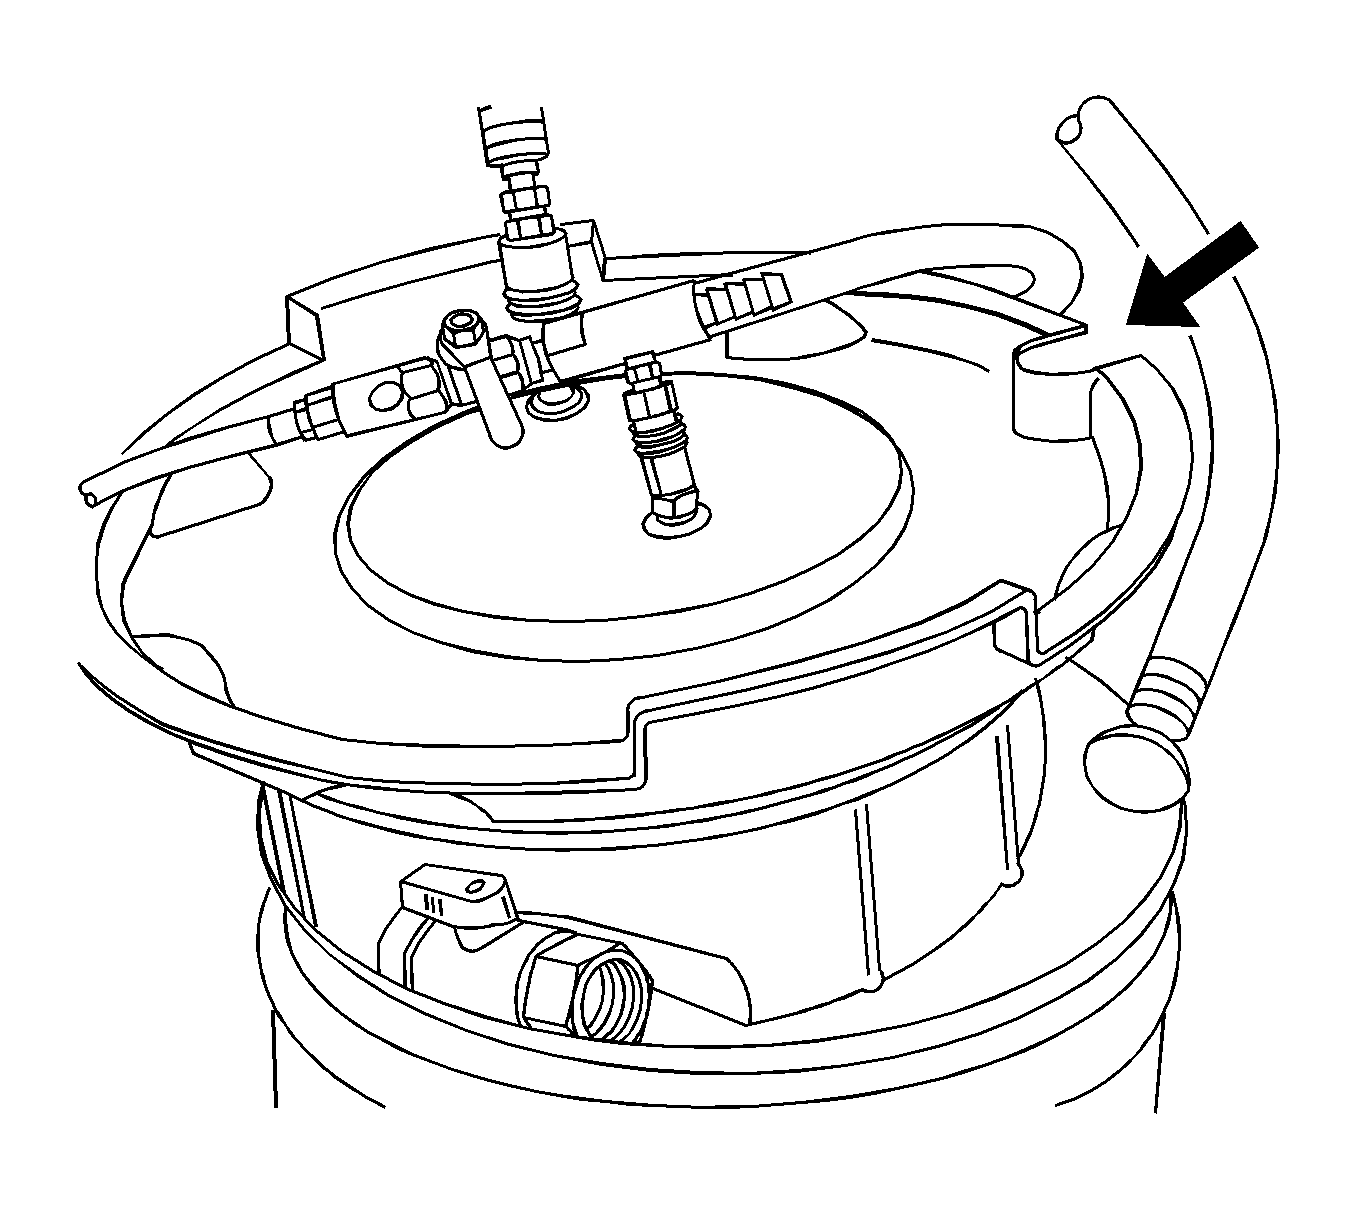
Note: Use a 50/50 mixture of DEX-COOL antifreeze and clean, drinkable water.
Always use more coolant than necessary. This will eliminate air from being drawn into the cooling system.Note: Prior to installing the vacuum tank onto the graduated reservoir, ensure that the drain valve located on the bottom of the tank is closed.
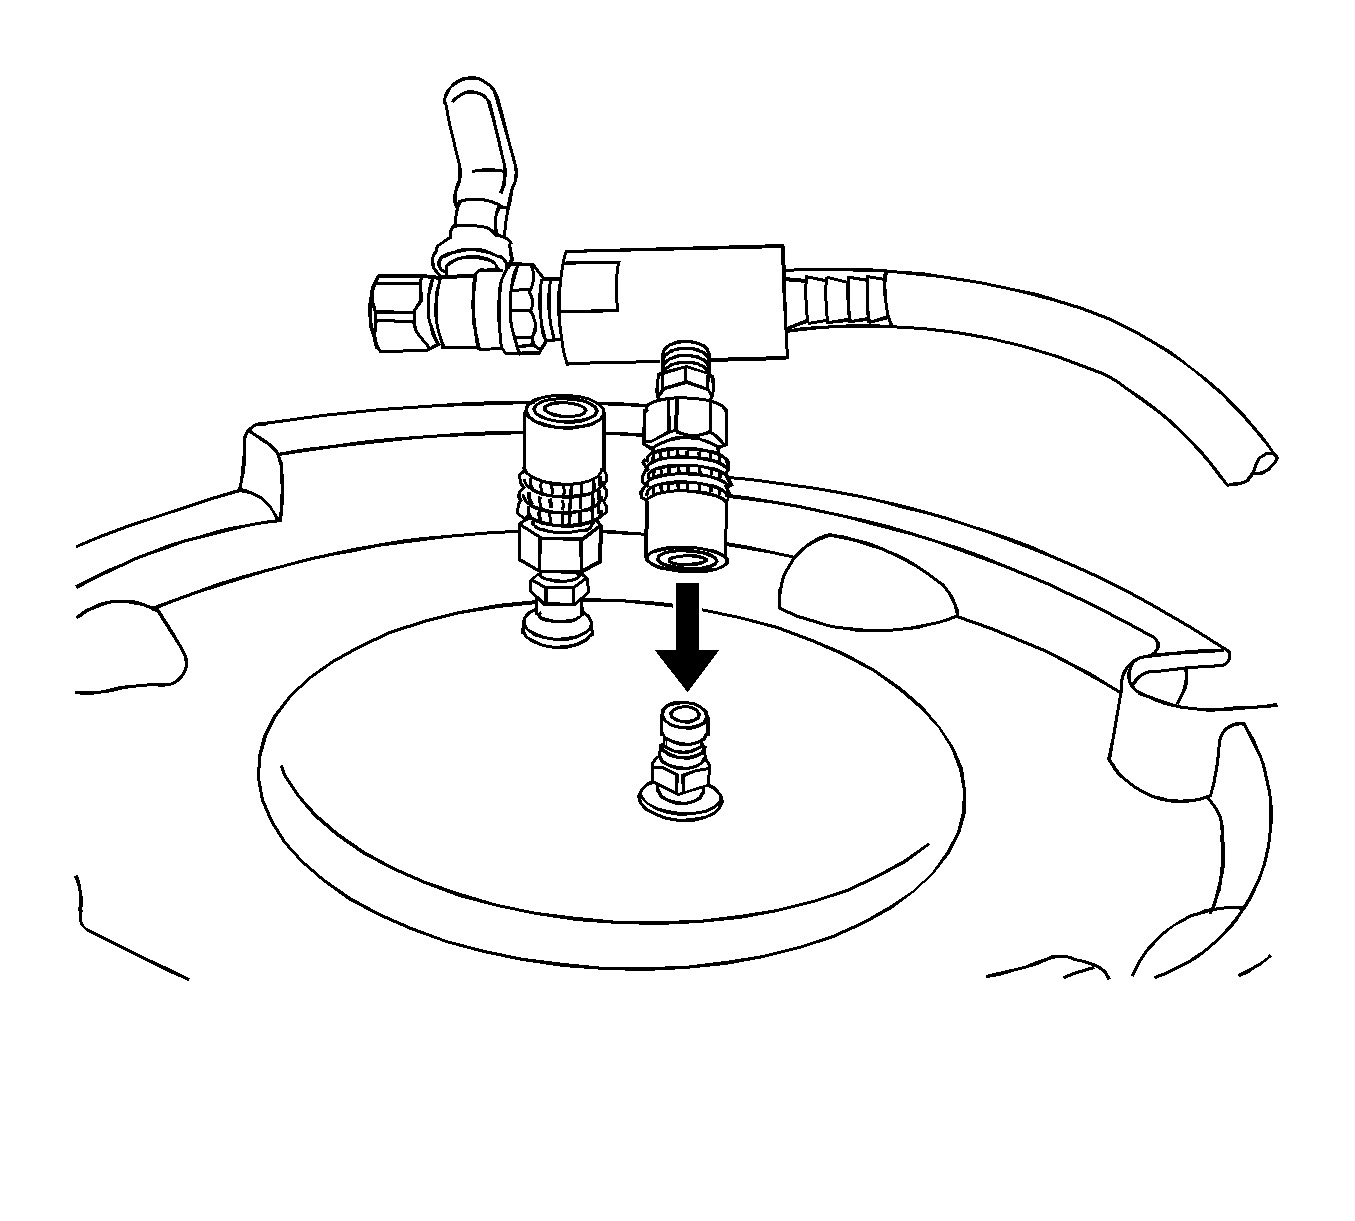
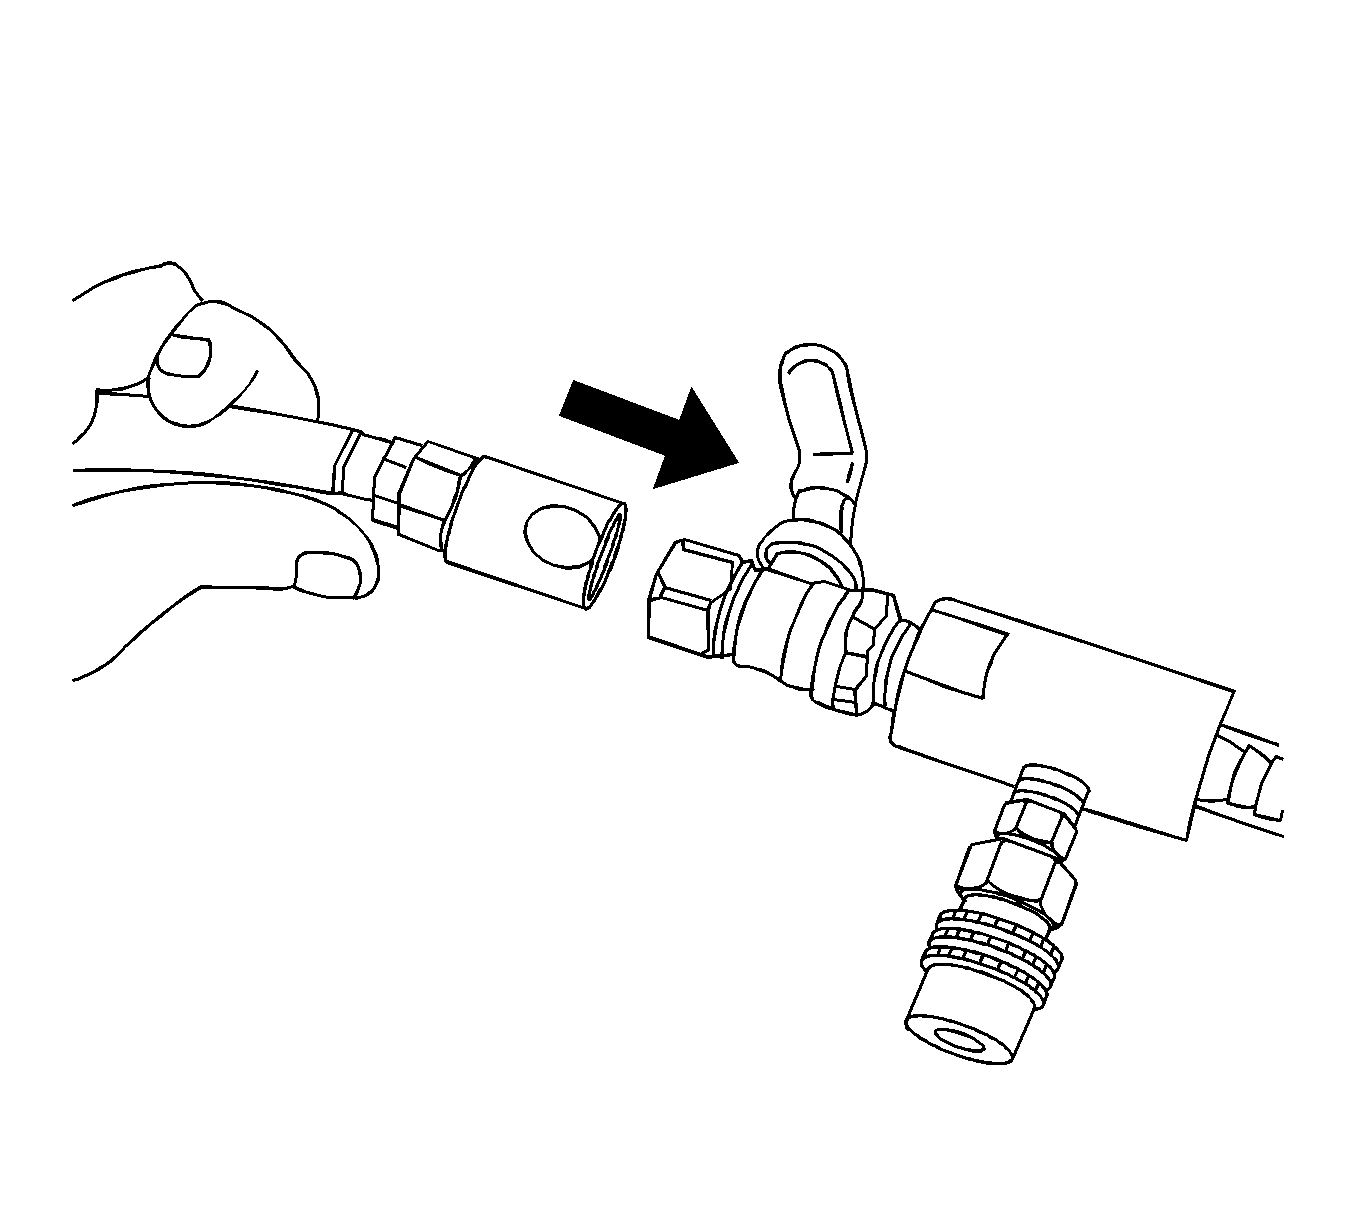
Ensure the valve on the venturi assembly is closed.
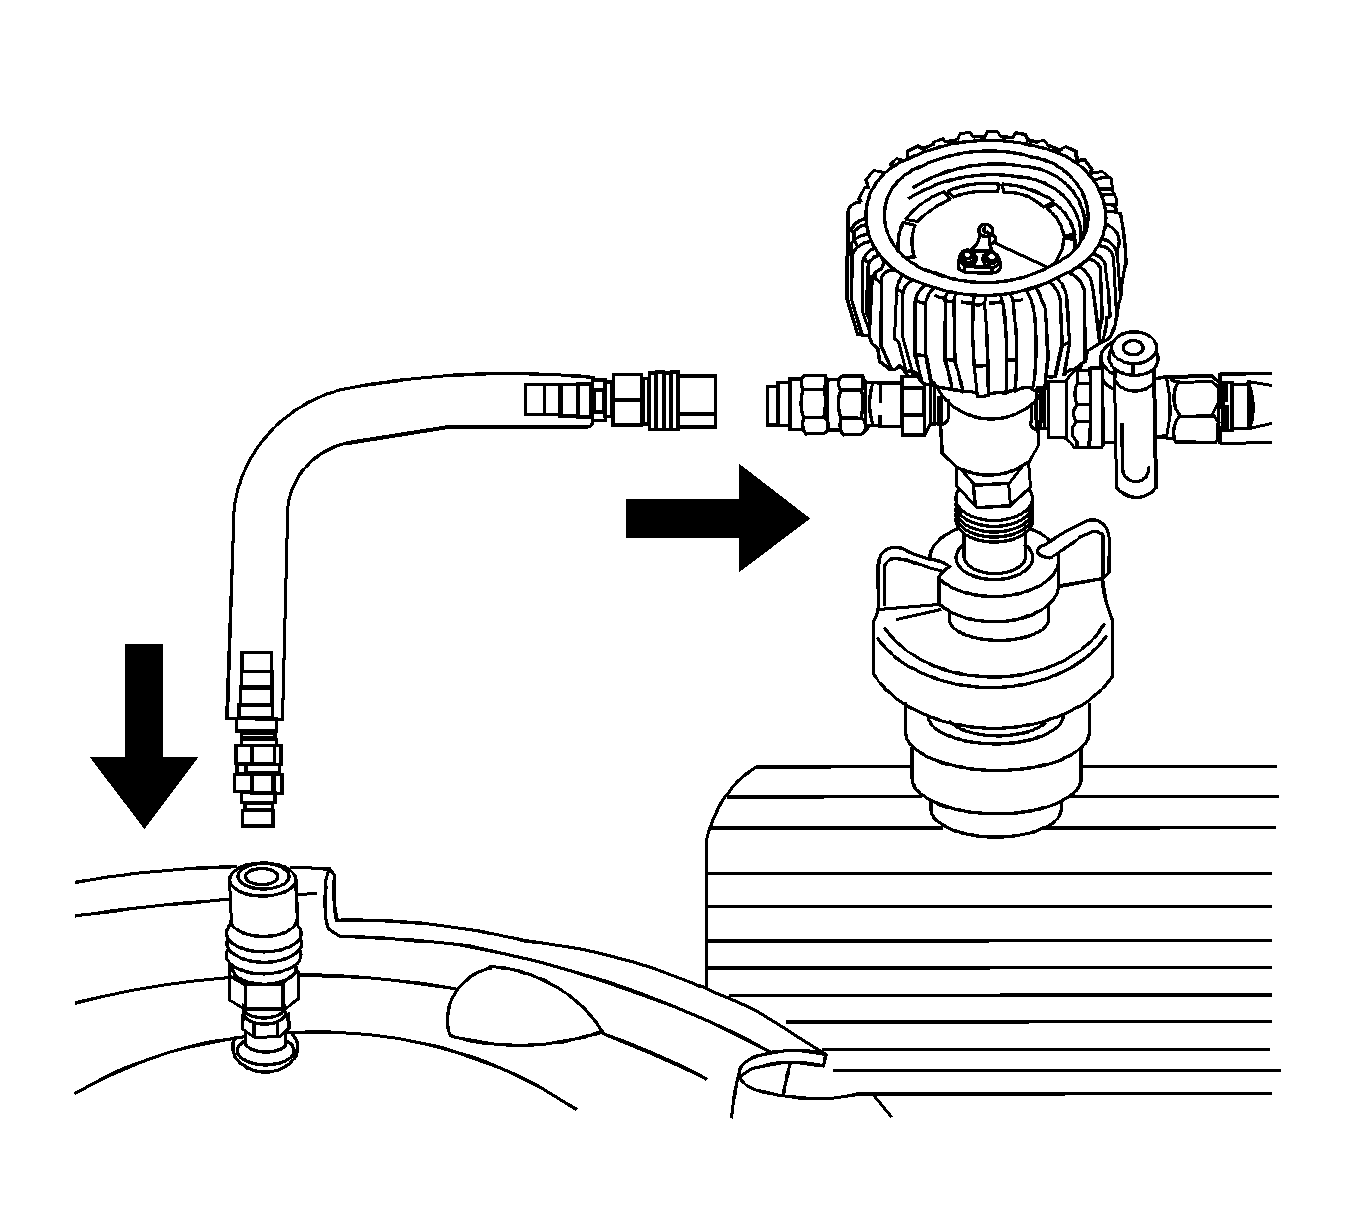
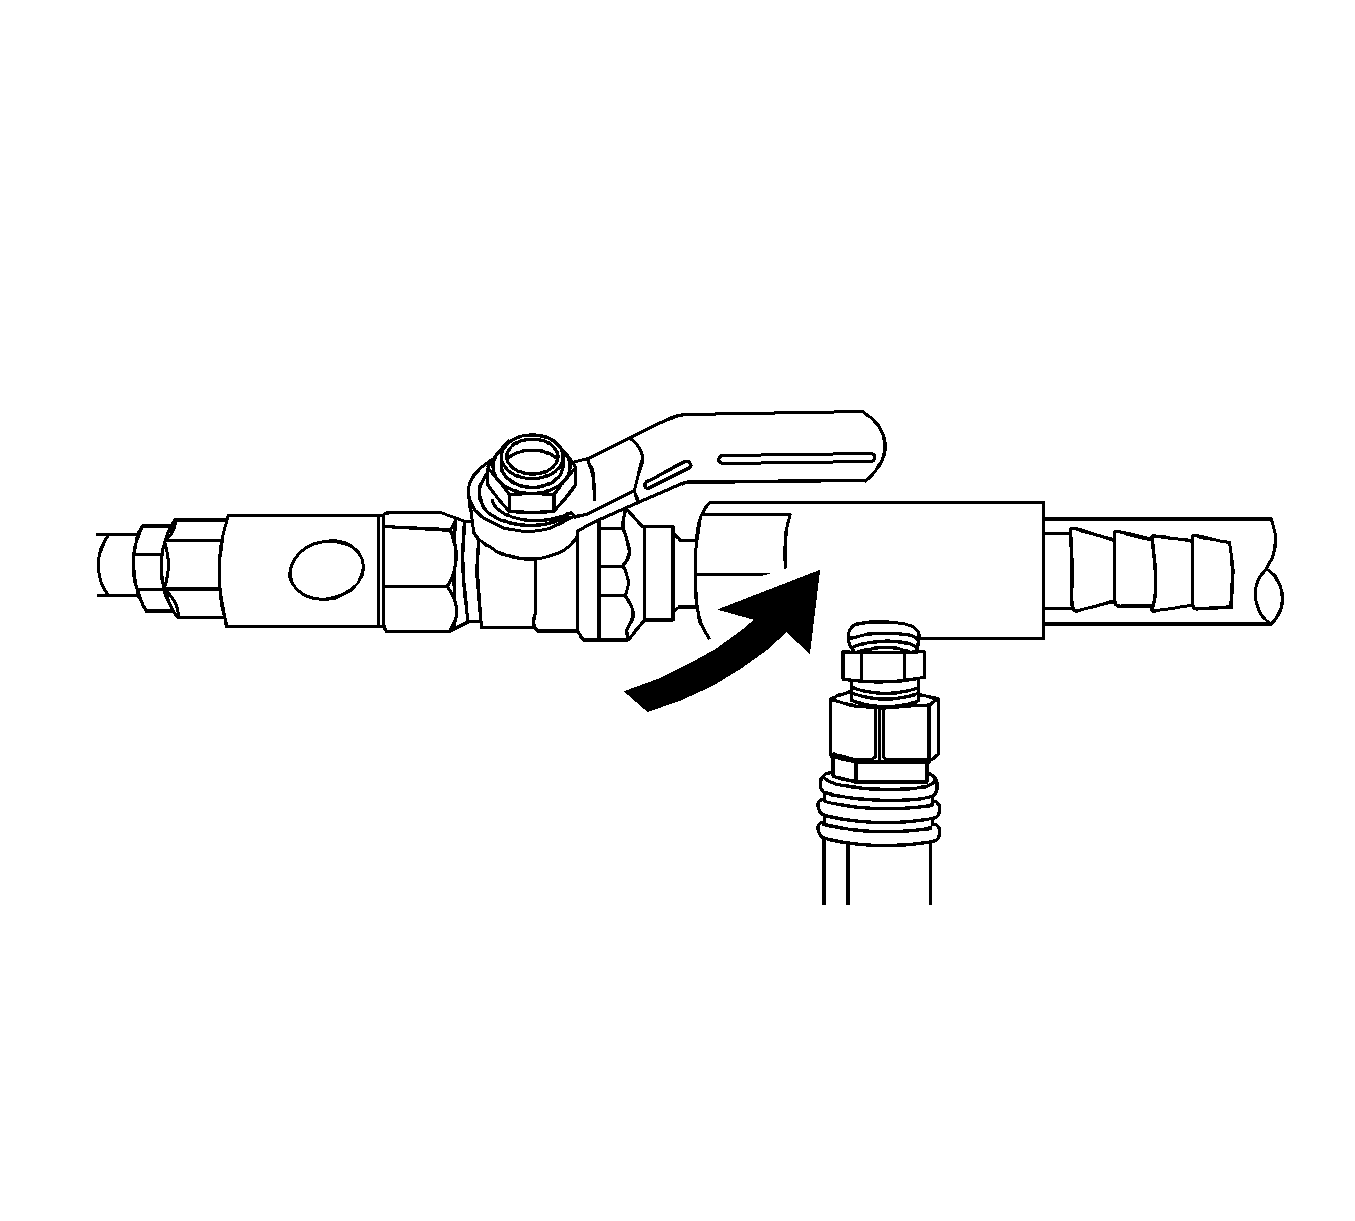
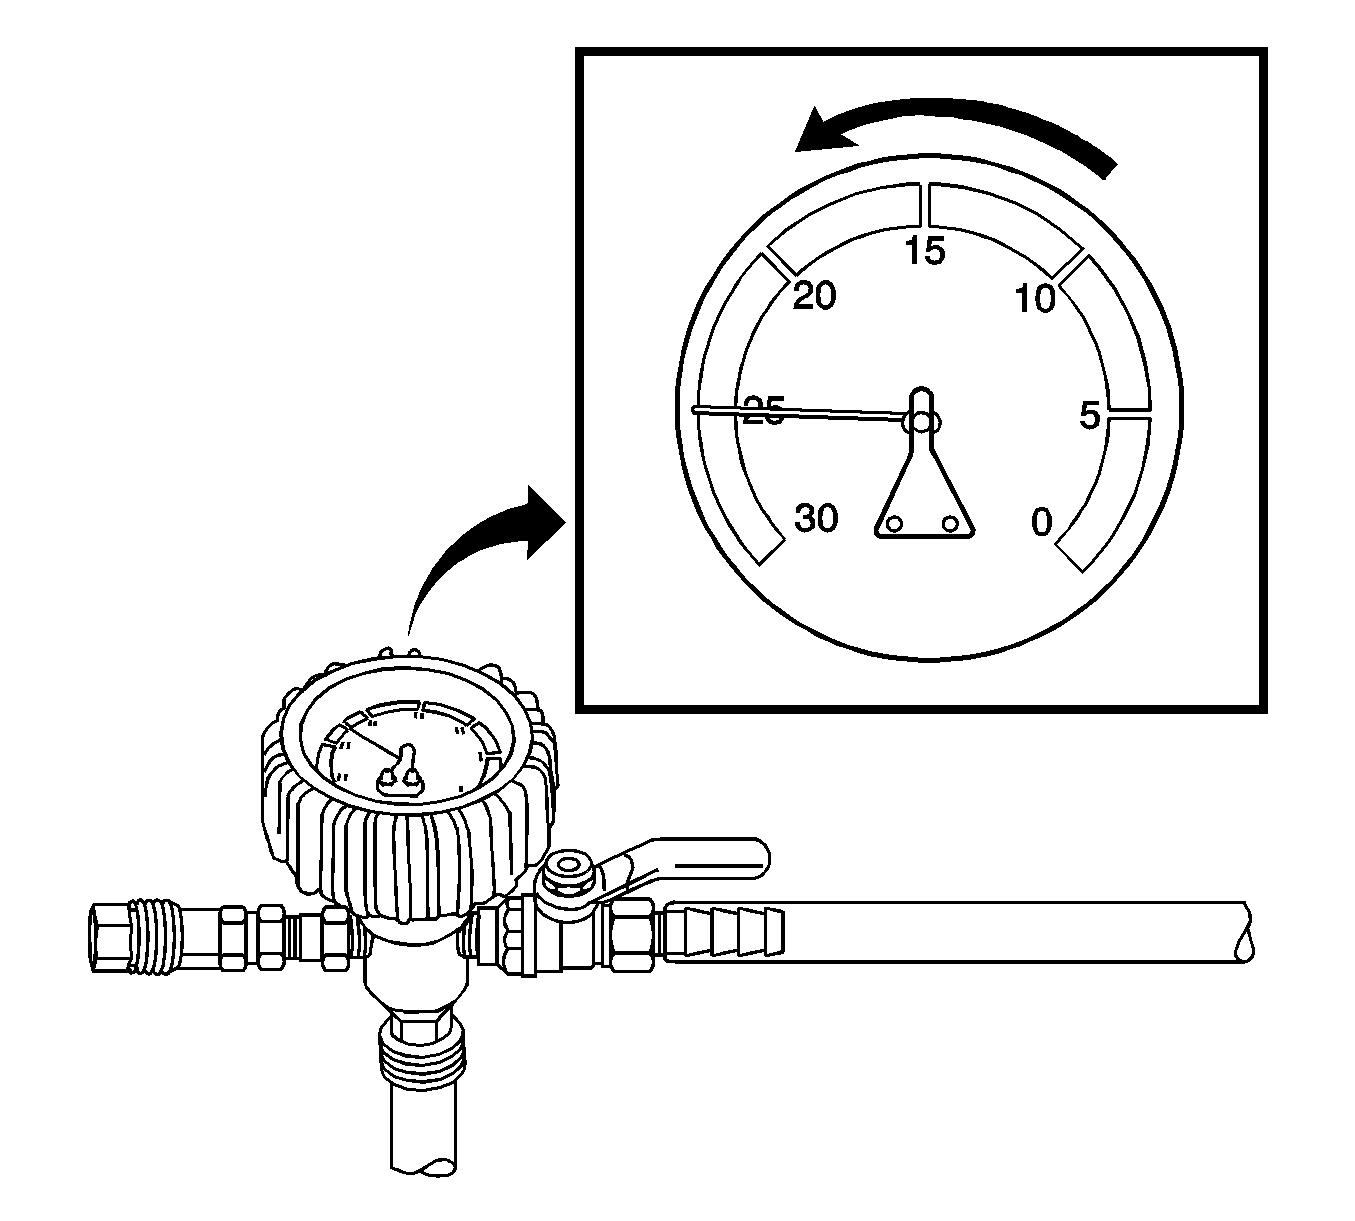
Cooling hoses may start to collapse. This is normal due to vacuum draw.
If vacuum loss is observed, refer to Loss of Coolant.
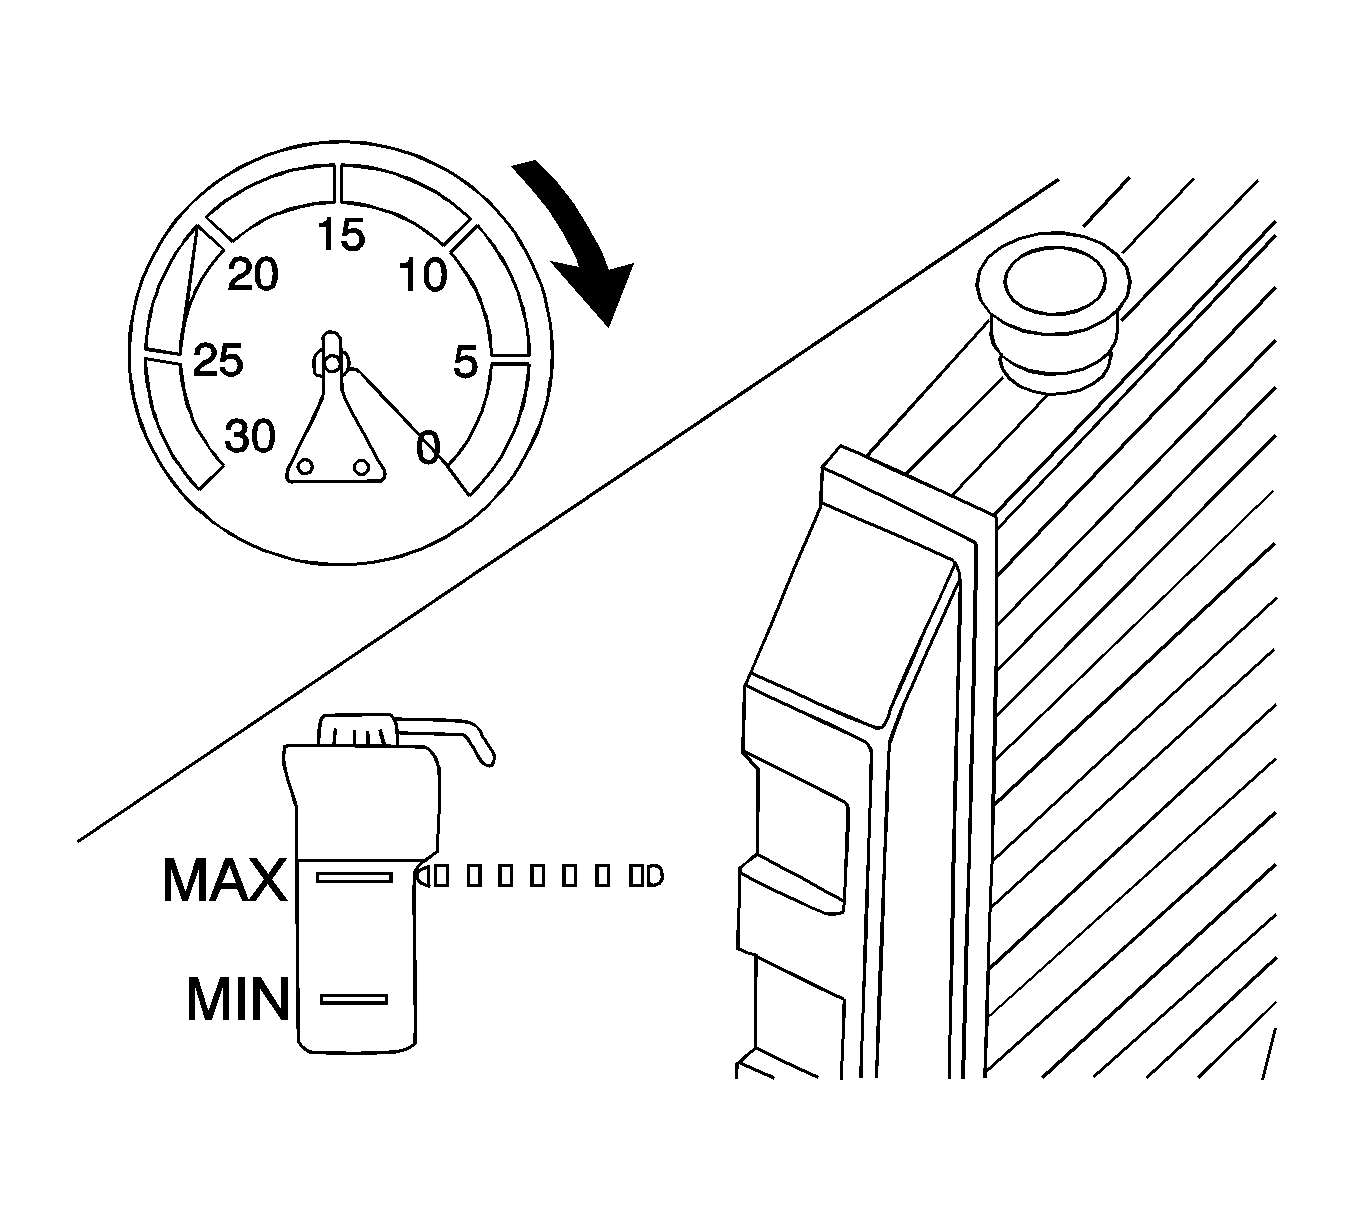
Note: After filling the cooling system, the extraction hose can be used to remove excess coolant to achieve the proper coolant level.
Cooling System Draining and Filling Static Fill-LNF
Draining Procedure
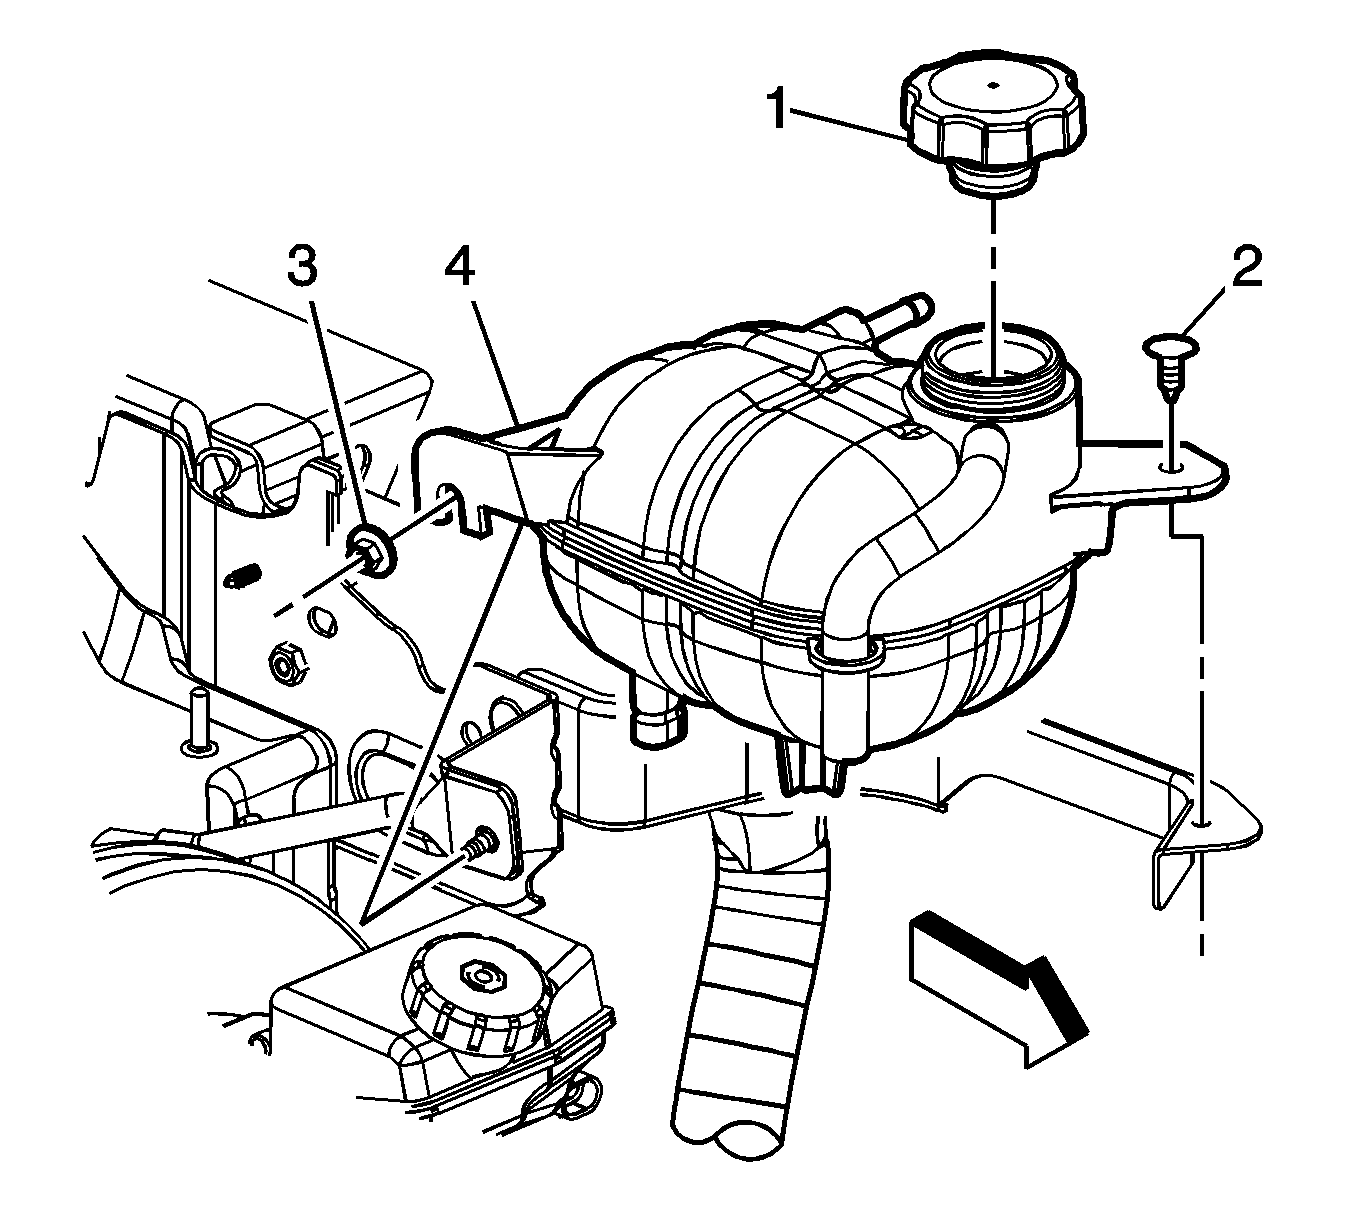
- Remove the surge tank cap (1).
- Raise and support the vehicle. Refer to Lifting and Jacking the Vehicle.
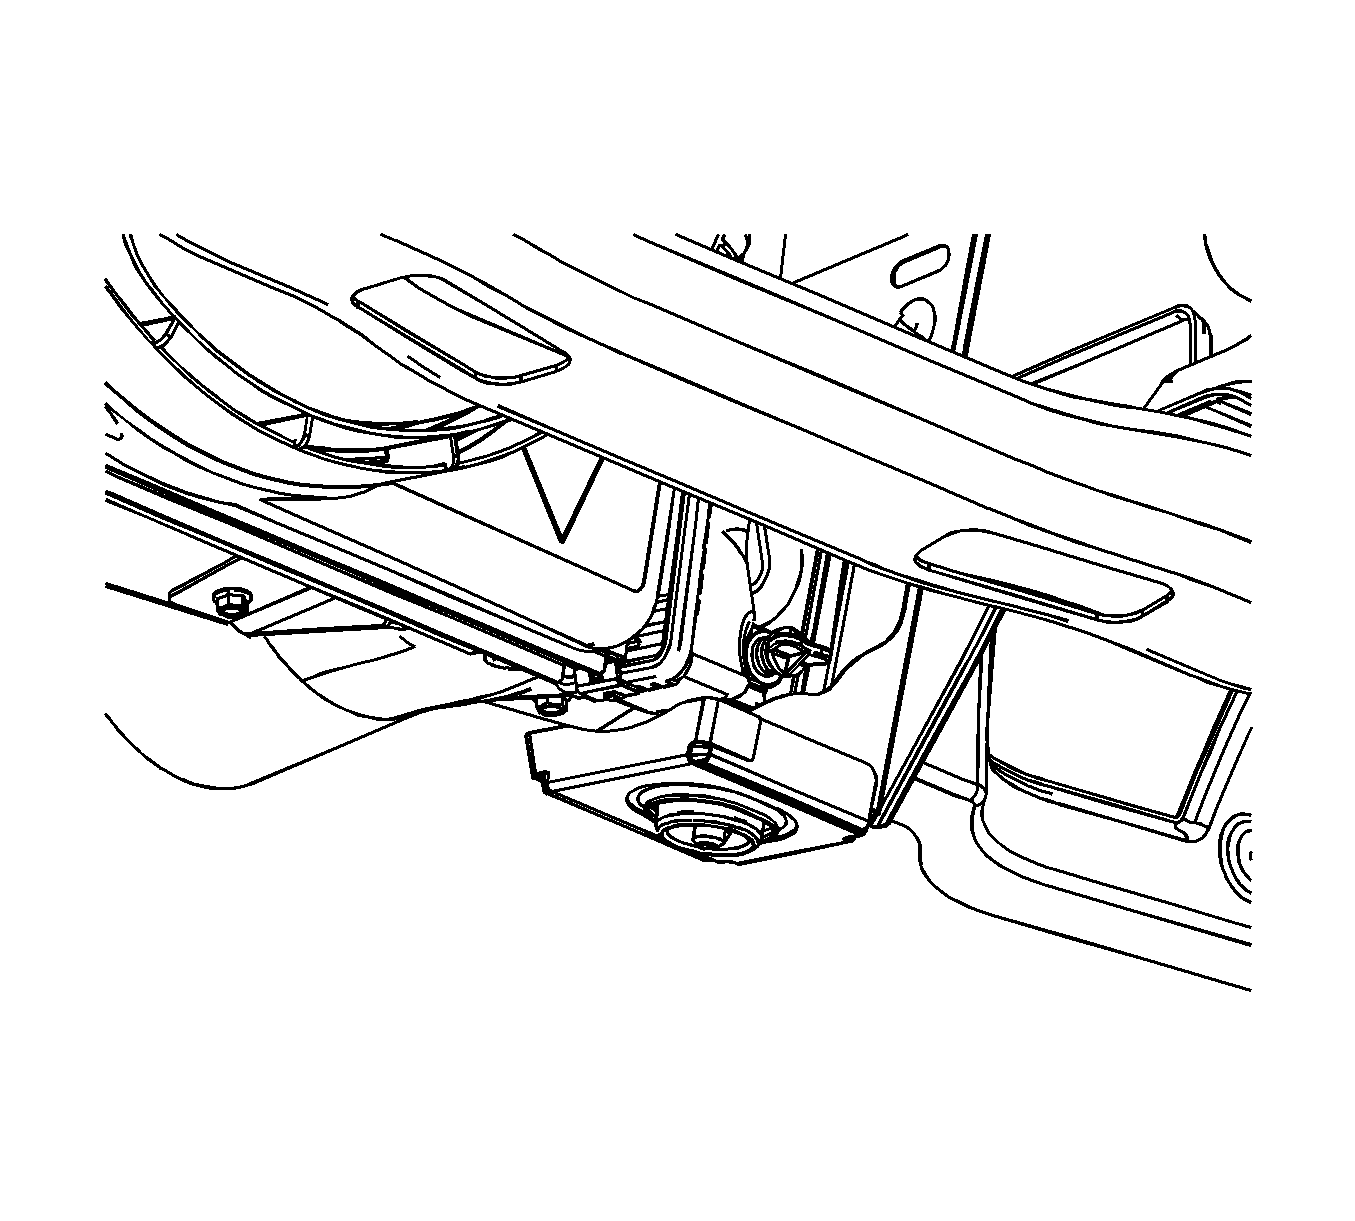
- Place a drain pan under the right side lower radiator mount.
- Open the radiator drain cock.
- Drain the cooling system.
- If a complete block drain is required, place a pan under the water pump drain.
- Remove the water pump drain plug (1).
- Drain the cooling system.
- Inspect the appearance of the engine coolant for discoloration:
Warning: To avoid being burned, do not remove the radiator cap or surge tank cap while the engine is hot. The cooling system will release scalding fluid and steam under pressure if radiator cap or surge tank cap is removed while the engine and radiator are still hot.
Note: Draining the cooling system with the pressure cap installed will syphon the coolant from the overflow tank.

| • | Discolored--Follow the flush procedure. Refer to Flushing. |
| • | Normal in appearance--Follow the filling procedure. |
Filling Procedure
- Close the radiator drain cock by hand.
- Install the water pump drain plug if removed during the draining process (1) and tighten to 22 N·m (16 lb ft).
- Lower the vehicle.
- Remove the intake cover. Refer to Intake Manifold Cover Replacement.
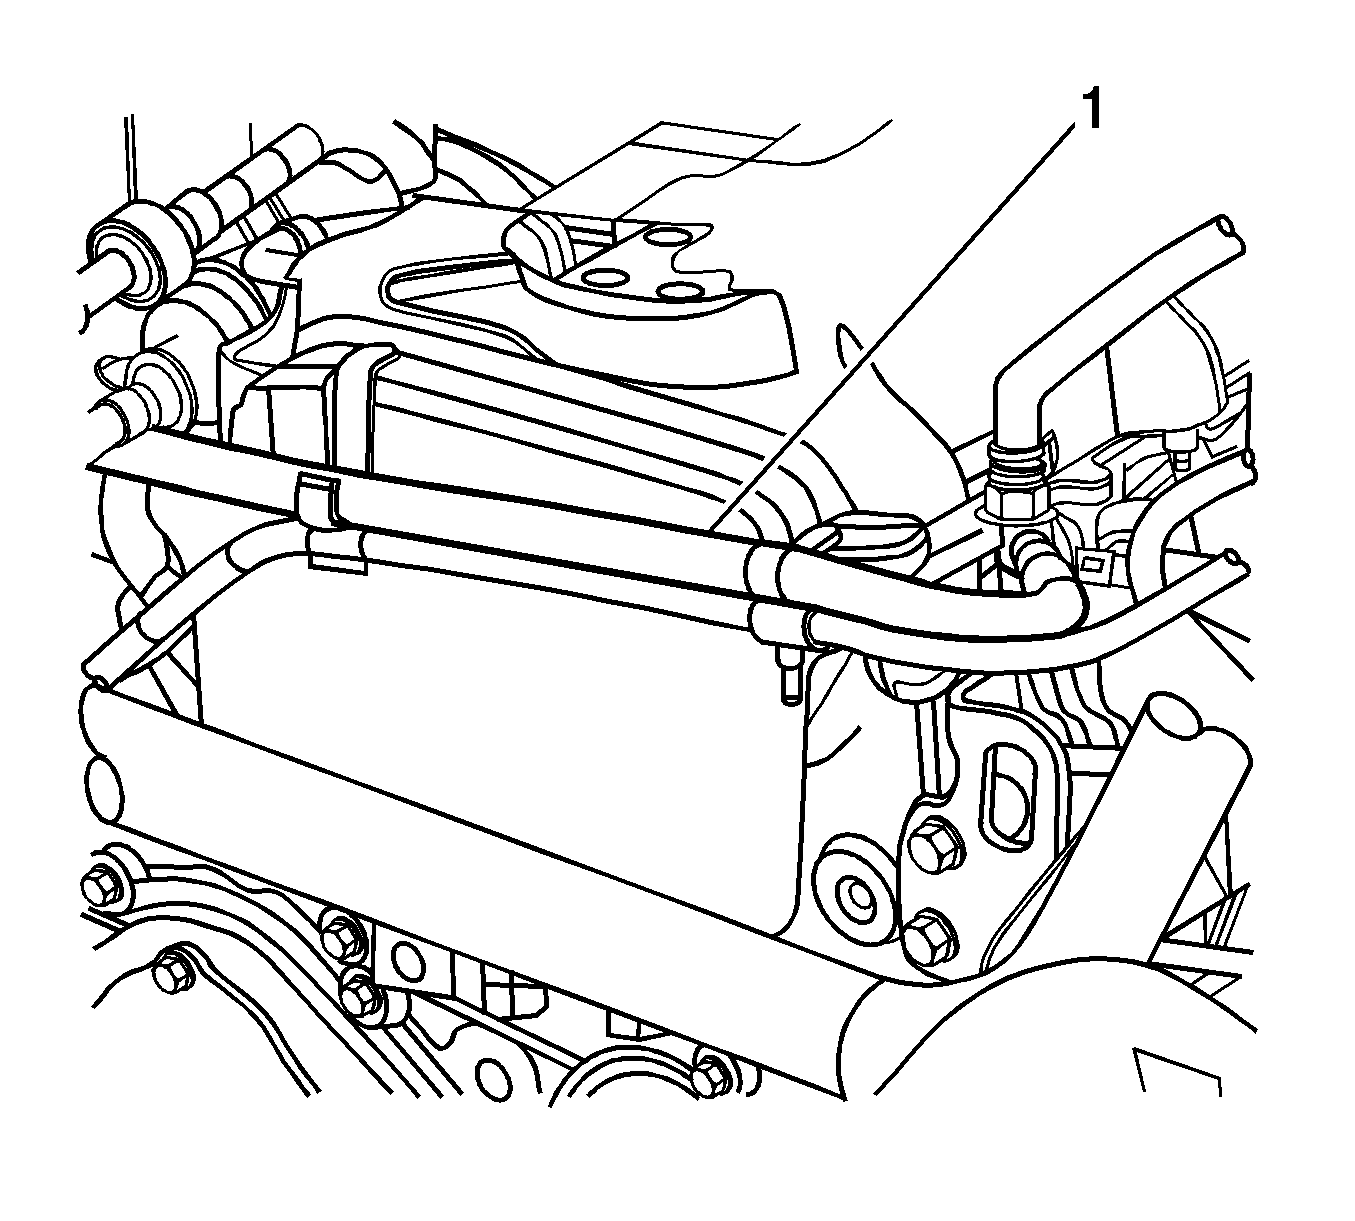
- Use Hose Pinch-Off pliers or equivalent clamp the rubber portion of the turbocharger coolant feed hose (1) near the front left of the engine. Be sure the hose is clamped tight enough not to let air or coolant pass through.
- Disconnect the coolant level sensor electrical connector.
- Remove the surge tank retainer (2).
- Remove the surge tank nut (3).
- Remove the surge tank outlet hose from the wheel retainer clip.
- Raise and support the surge tank (4) minimum 350 mm (14 in) above the surge tank bracket.
- Slowly add a mixture of 50/50 DEX-COOL antifreeze and clean, drinkable water to the cooling system until the coolant level reaches 10-15 mm below the surge tank fill neck. The system will fill slowly and may take up to 10 minutes to fill.
- Position the surge tank back on the surge tank bracket.
- Install a surge tank retainer or equivalent (2).
- Install the surge tank nut (3) and tighten to 9 N·m (80 lb in).
- Connect the coolant level sensor electrical connector.
- Start the engine.
- Install the surge tank cap (1).
- Run the engine at 2,000-2,500 RPM for 5 minutes in PARK (P) (Automatic) or NEUTRAL (N) (Manual) with the parking brake on.
- Allow the engine to return to idle.
- Remove the Hose Pinch-Off pliers or equivalent from the turbo coolant feed hose.
- Allow the engine to idle through 5 minutes.
- Turn off the engine and allow it to cool and the system pressure to decrease.
- Install the intake cover.
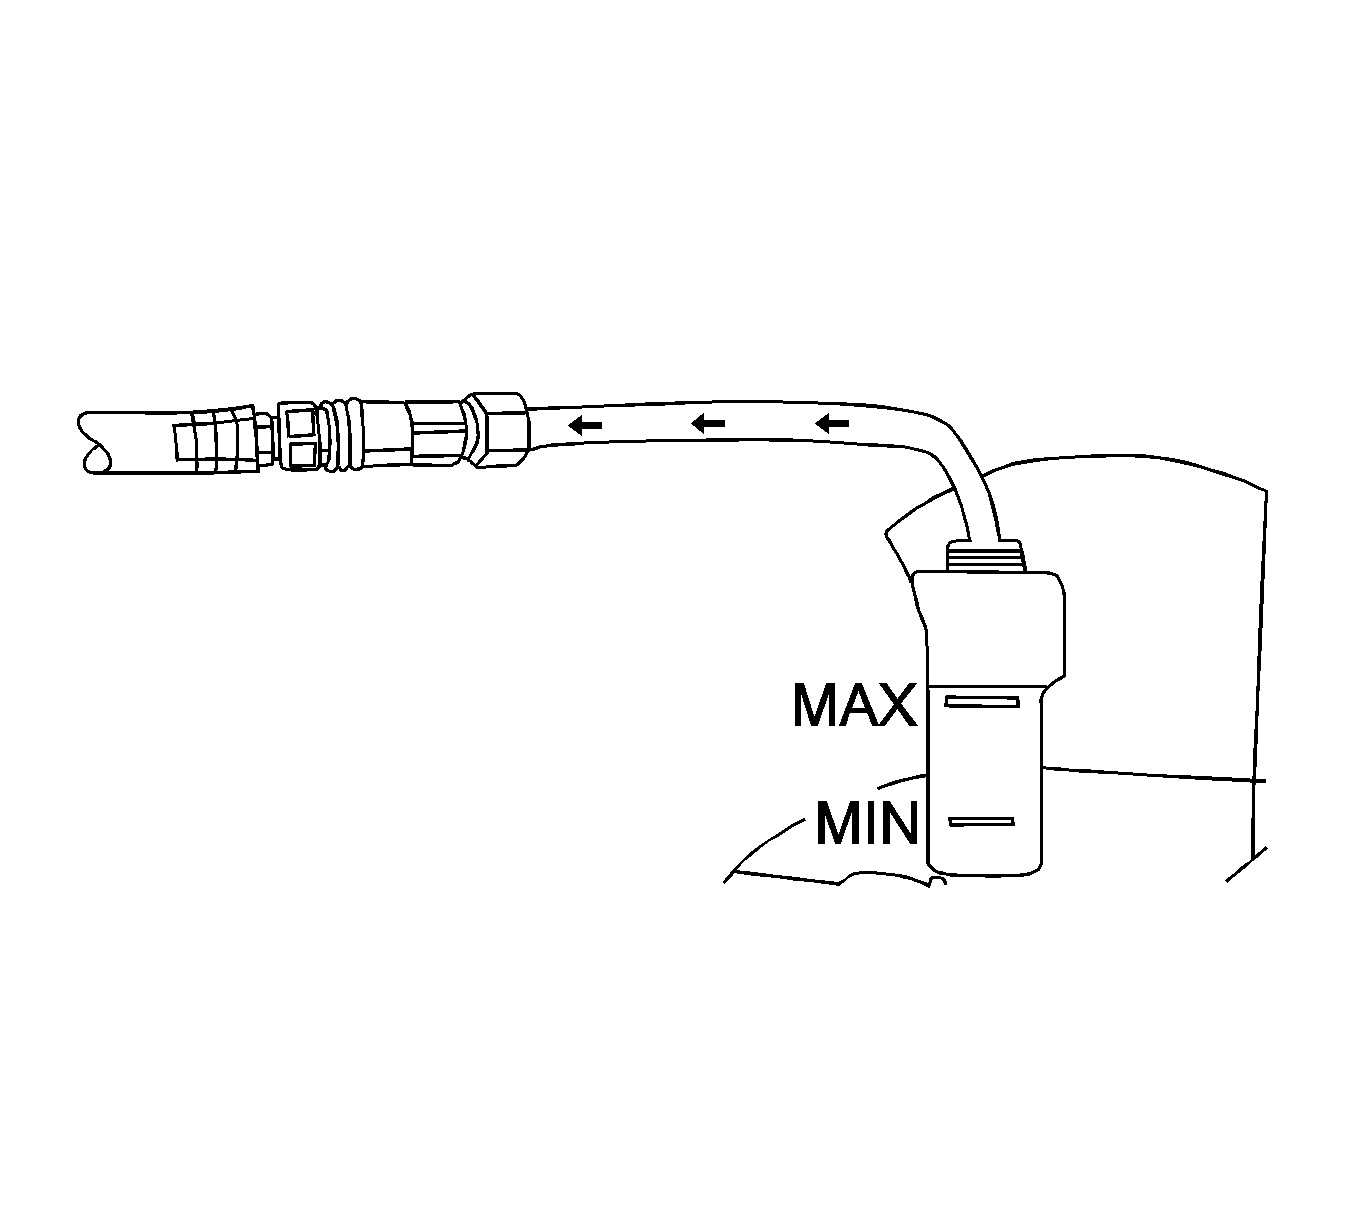
- Add coolant to the surge bottle to FULL cold mark as necessary.
- Run the engine at 2,000-2,500 RPM for 10 minutes in P (Automatic) or N (Manual) with the parking brake on.
- Allow the engine to return to idle.
- Turn off the engine and allow to cool.
- Add or remove coolant to the surge tank to FULL cold mark as necessary.
- Inspect the cooling system for leaks.
- Rinse away any excess coolant from the engine and the engine compartment.

Caution: The procedure below must be followed. Improper coolant level could result in a low or high coolant level condition, causing engine damage.
Caution: Refer to Fastener Caution in the Preface section.

Caution: Use enough clamping force to pinch off the hose, but not so much as to damage hose. If using locking pliers, cover the serrated teeth on the jaws of the pliers to prevent hose damage.

Note: Use a 50/50 mixture of DEX-COOL antifreeze and clean, drinkable water.
A minimum of 5.5L of DEX-COOL needs to be installed to ensure proper water pump priming during the first thermocycle. Refer to Approximate Fluid Capacities for the total capacity.
Caution: Failure to remove the Hose Pinch-Off pliers or equivalent from the turbo coolant feed hose may result in severe engine damage.
Cooling System Draining and Filling 2.4L LE5
Draining Procedure
- Remove the surge tank cap (1).
- Raise and support the vehicle. Refer to Lifting and Jacking the Vehicle.
- Place a drain pan under the right side lower radiator mount.
- Open the radiator drain cock.
- Drain the cooling system.
- If a complete block drain is required, place a drain pan under the water pump drain.
- Remove the water pump drain plug.
- Drain the cooling system.
- Inspect the appearance of the engine coolant for discoloration:

Warning: To avoid being burned, do not remove the radiator cap or surge tank cap while the engine is hot. The cooling system will release scalding fluid and steam under pressure if radiator cap or surge tank cap is removed while the engine and radiator are still hot.


| • | Discolored--Follow the flush procedure. Refer to Flushing. |
| • | Normal in appearance--Follow the filling procedure. |
Filling Procedure
- Close the radiator drain cock by hand.
- Install the water pump drain plug if removed during the draining process.
- Lower the vehicle.
- Disconnect the coolant level sensor electrical connector.
- Remove and discard the surge tank retainer (2).
- Loosen surge tank nut (3).
- Raise and support surge tank approximately 350 mm (13.75 in) above the surge tank bracket.
- Slowly add a mixture of 50/50 DEX-COOL antifreeze and deionized water to the cooling system until the coolant level reaches and maintains slightly above the cold fill line on the surge tank. Refer to Approximate Fluid Capacities.
- Position the surge tank back on the surge tank bracket.
- Install a new surge tank retainer (2).
- Install the surge tank nut (3).
- Connect the coolant level sensor electrical connector.
- Start the engine and idle.
- Install surge tank cap (1).
- Run the engine at 2,000-2,500 RPM for 3 minutes.
- Allow the engine to idle for 30 seconds.
- Shut the engine off.
- Top off the coolant as necessary.
- Inspect the cooling system for leaks.
- Rinse away any excess coolant from the engine and the engine compartment.
Caution: The procedure below must be followed. Improper coolant level could result in a low or high coolant level condition, causing engine damage.

Caution: Refer to Fastener Caution in the Preface section.

Tighten
Tighten the plug to 22 N·m (16 lb ft).

Note: Use a 50/50 mixture of DEX-COOL antifreeze and clean, drinkable water. It is necessary to maintain the coolant level near the cold fill line on the surge tank to ensure all the air has been purged from the cooling system.
Tighten
Tighten the nut to 9 N·m (80 lb in).
Note: If the coolant level falls below the "Full Cold" mark within 10 minutes of starting the engine, add coolant to "Full Cold" mark.
