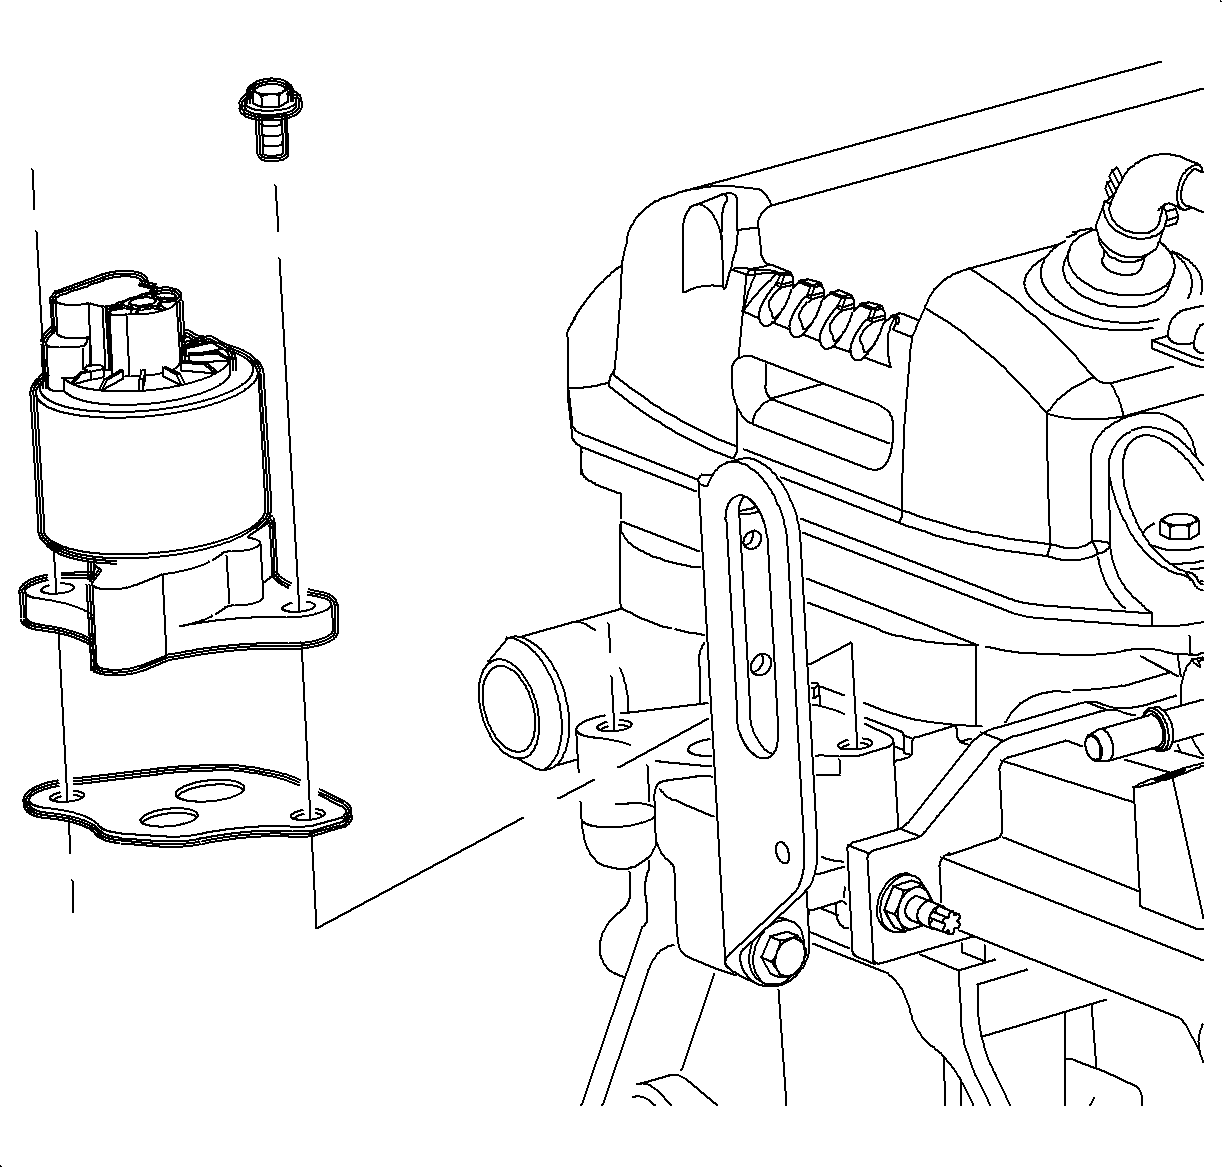
Removal Procedure
- Turn the ignition OFF.
- Disconnect the EGR valve harness connector.
- Remove the EGR valve attachment bolts and EGR valve and gasket.
- Inspect the cylinder head, EGR valve, and adapter passages for excessive carbon deposits. Deposits can be removed using a screwdriver.
- Clean the EGR valve mounting surfaces and inspect for scoring and cracks.

Notice: The EGR valve should not be soaked in any solvent. Otherwise damage to the electrical solenoid and position sensor could result.
Notice: Remove all loose deposits from the EGR inlet passage, otherwise they could clog the EGR valve.
Installation Procedure
- Install the new EGR valve gasket.
- Install the EGR valve.
- Install the EGR valve attachment bolts.
- Connect the EGR valve harness connector. Push in the connector until a click is heard and pull back to confirm a positive engagement.
- Start the engine and inspect for exhaust gas leaks.

Important: Ensure the gasket is installed correctly or a vacuum leak will occur.
Notice: Use the correct fastener in the correct location. Replacement fasteners must be the correct part number for that application. Fasteners requiring replacement or fasteners requiring the use of thread locking compound or sealant are identified in the service procedure. Do not use paints, lubricants, or corrosion inhibitors on fasteners or fastener joint surfaces unless specified. These coatings affect fastener torque and joint clamping force and may damage the fastener. Use the correct tightening sequence and specifications when installing fasteners in order to avoid damage to parts and systems.
Tighten
Tighten the EGR Valve-to-Head bolts to 25 N·m (19 lb ft).
