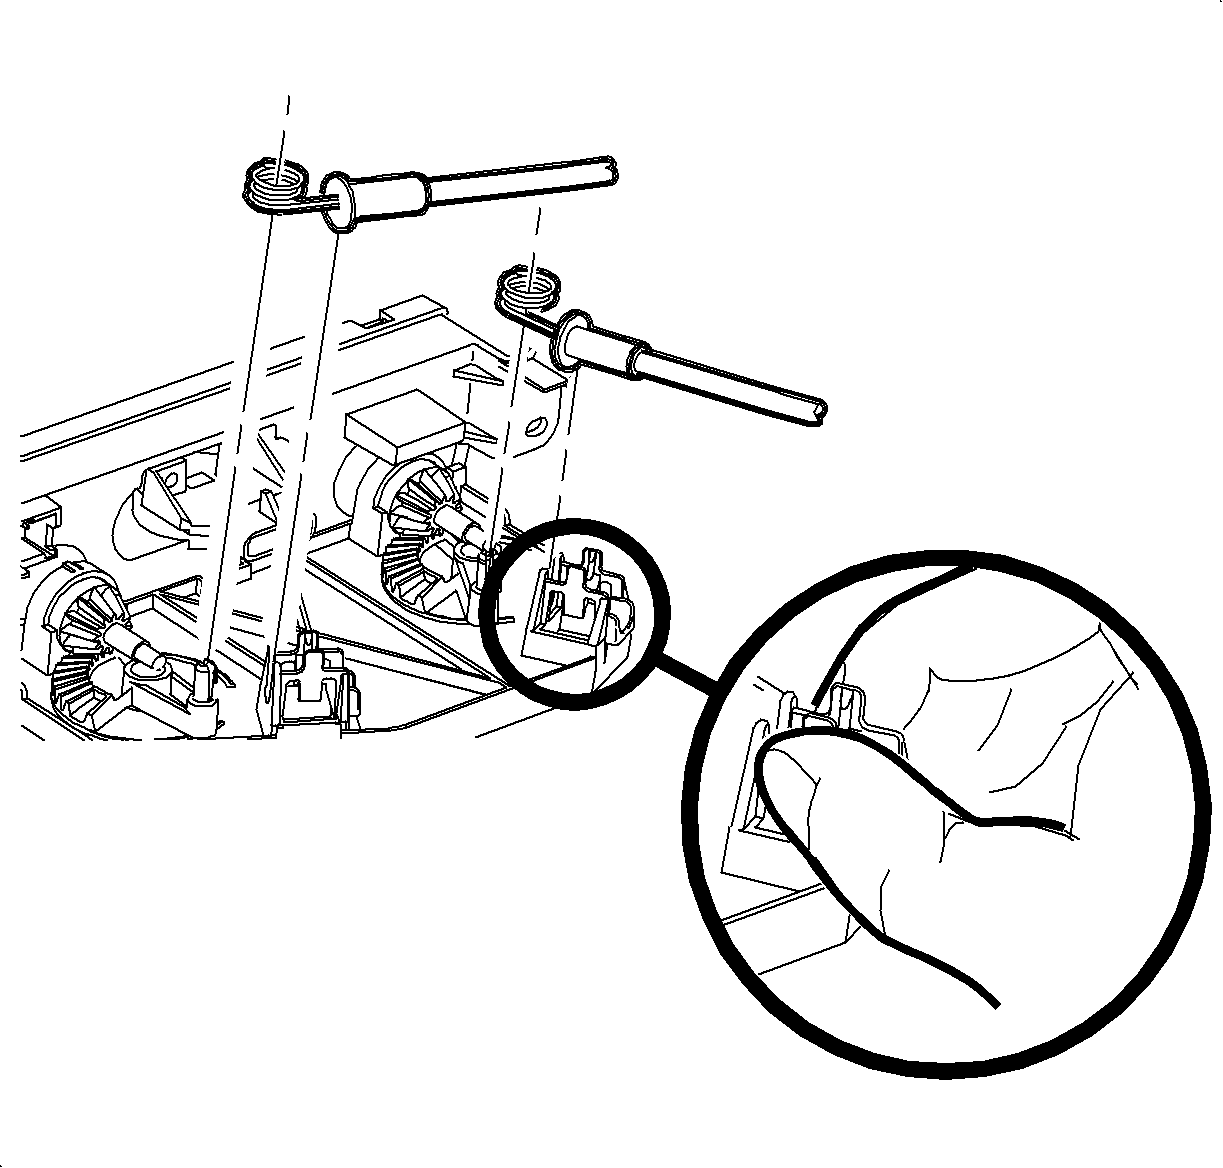
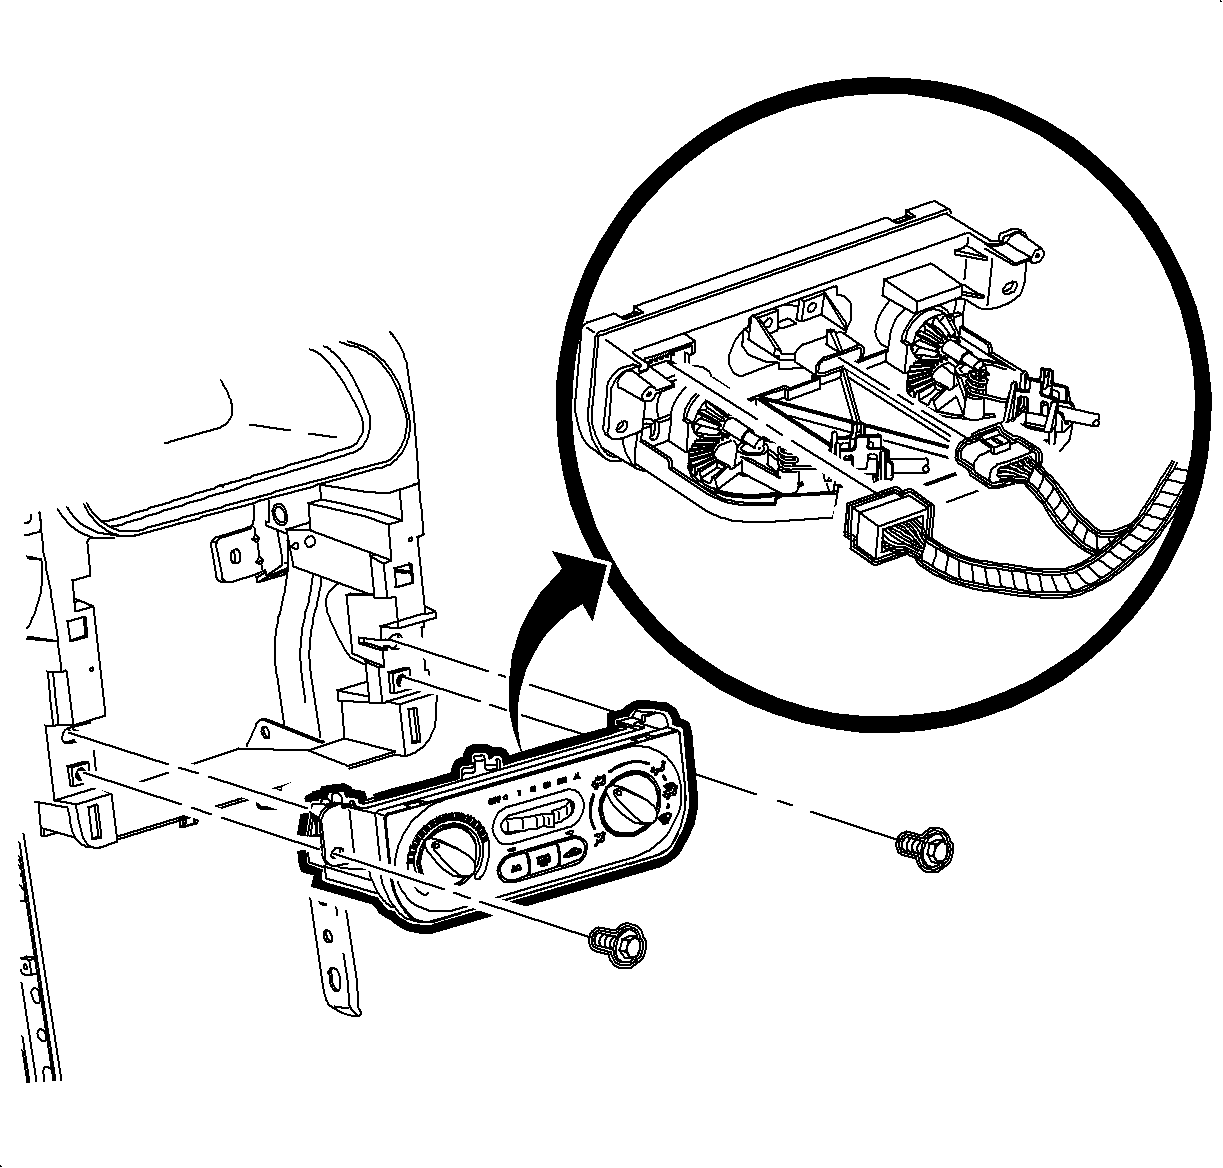
- Install the HVAC controller:
| 1.1. | Install the mode valve cable onto mode valve pin. |
| 1.2. | Snap the slot on the cable into the HVAC controller base. |
| 1.3. | Repeat the steps for the temperature cable. |
| 1.4. | Install the blower switch connector. |
| 1.5. | Install the HVAC controller connector. |
Notice: Refer to Fastener Notice in the Preface section.
Tighten
Tighten the HVAC controller-to-I/P retainer 2.5 N·m (22 lb in).
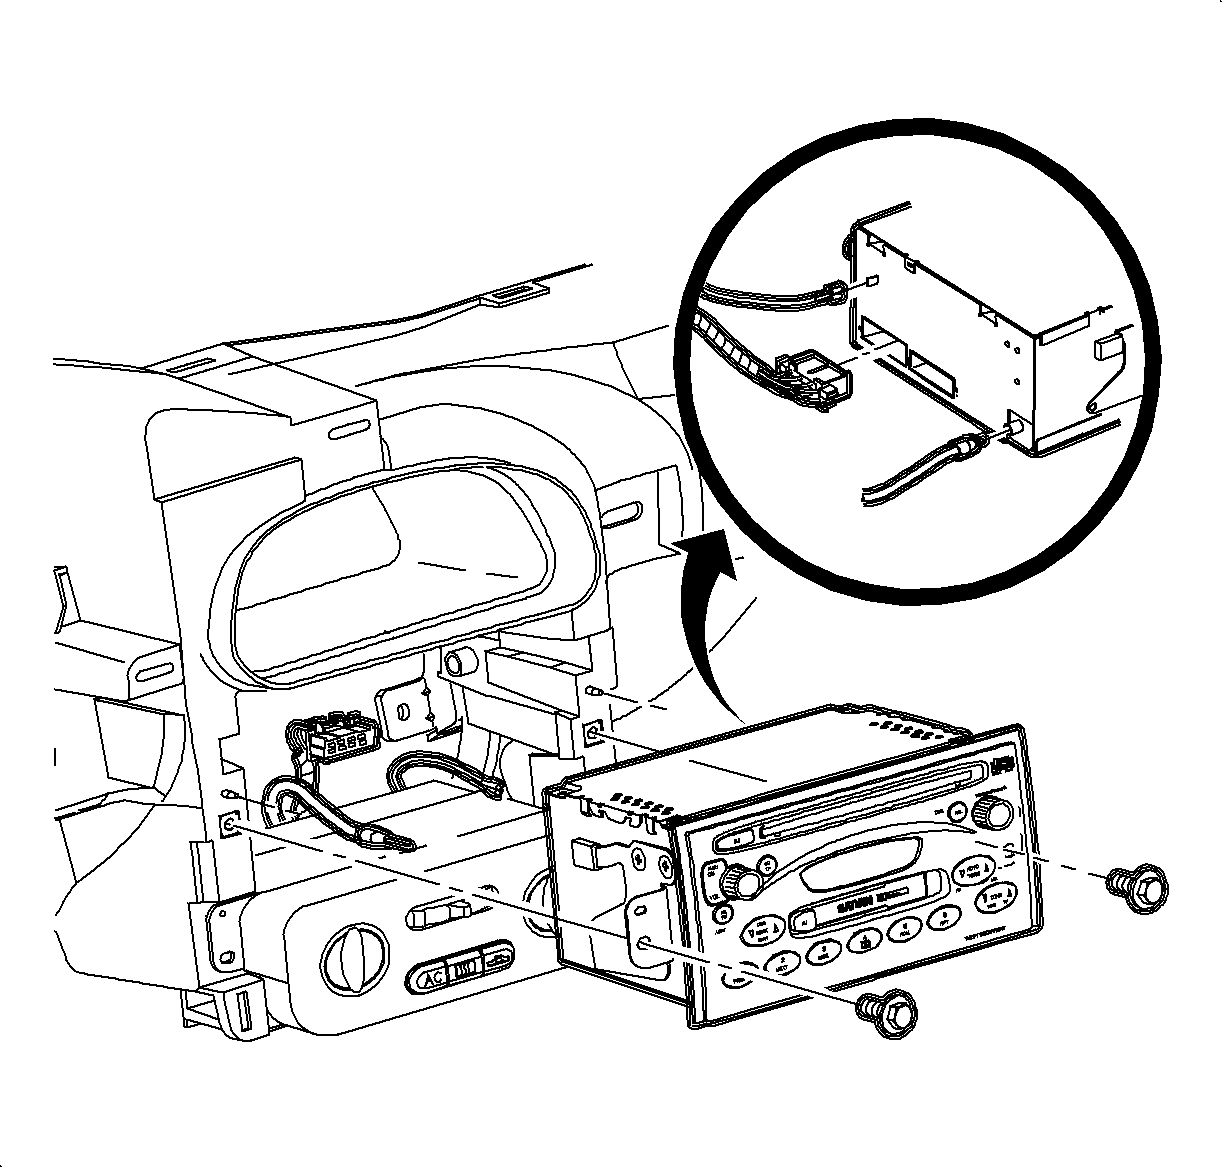
- Install the radio:
| 2.1. | Connect the wiring harnesses. |
| 2.2. | Connect the ground strap. |
| 2.3. | Connect the antenna lead. |
Tighten
Tighten the radio-to-I/P retainer 2.5 N·m (22 lb in).
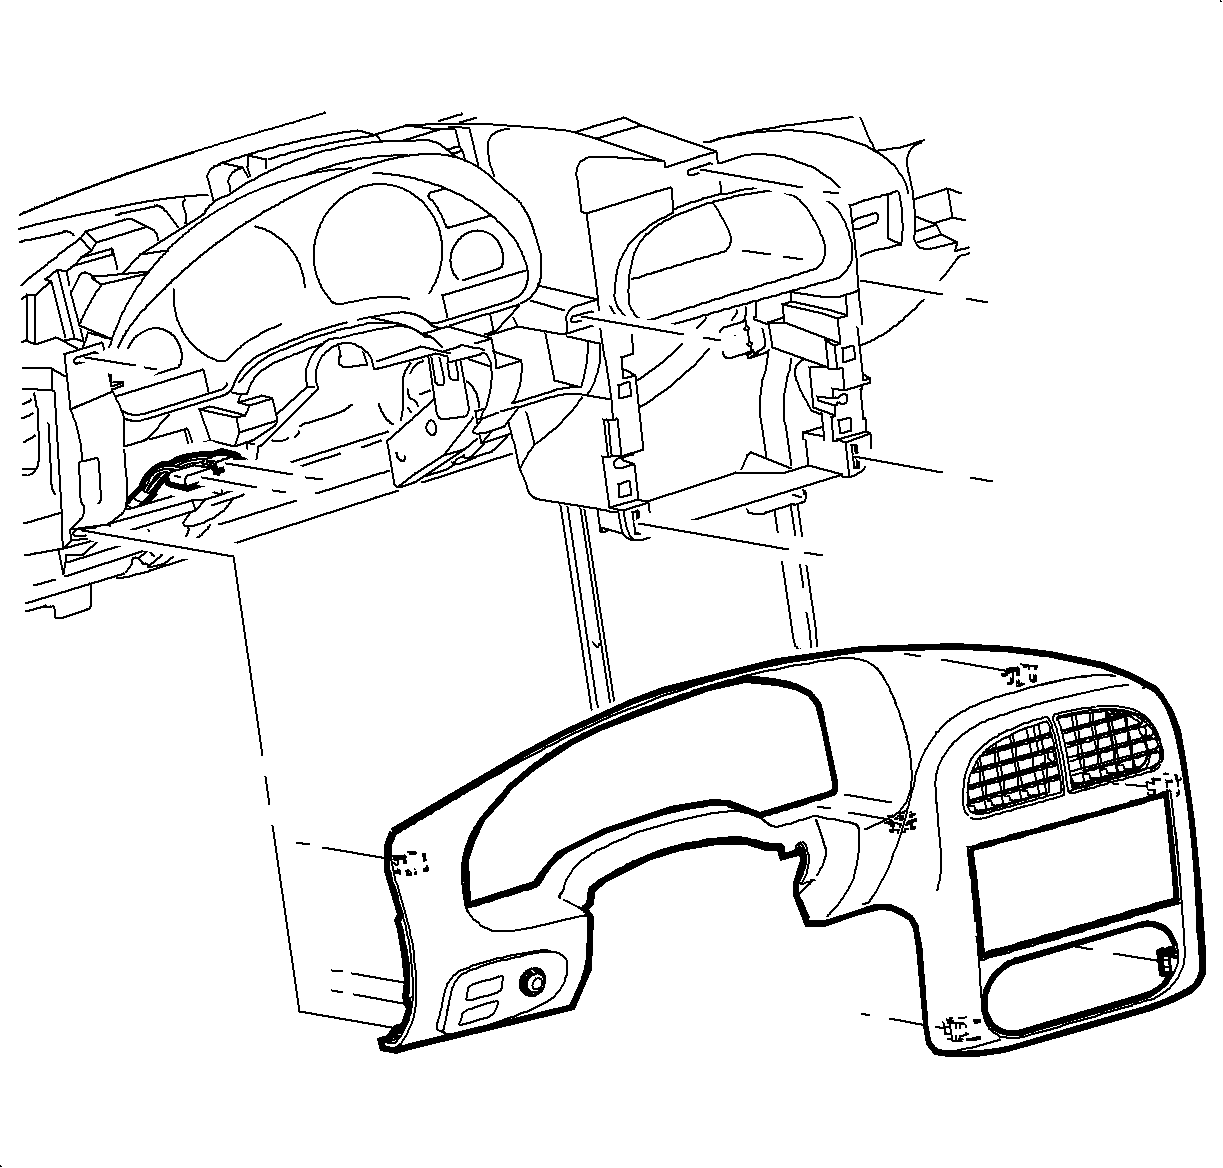
- Install the I/P cluster bezel:
| 3.1. | Connect the dimmer/traction control switch wiring harnesses. |
| 3.2. | Position the I/P cluster bezel by lining up the clip location. |
| 3.3. | Snap the I/P cluster bezel in place by pushing at the clip locations. |
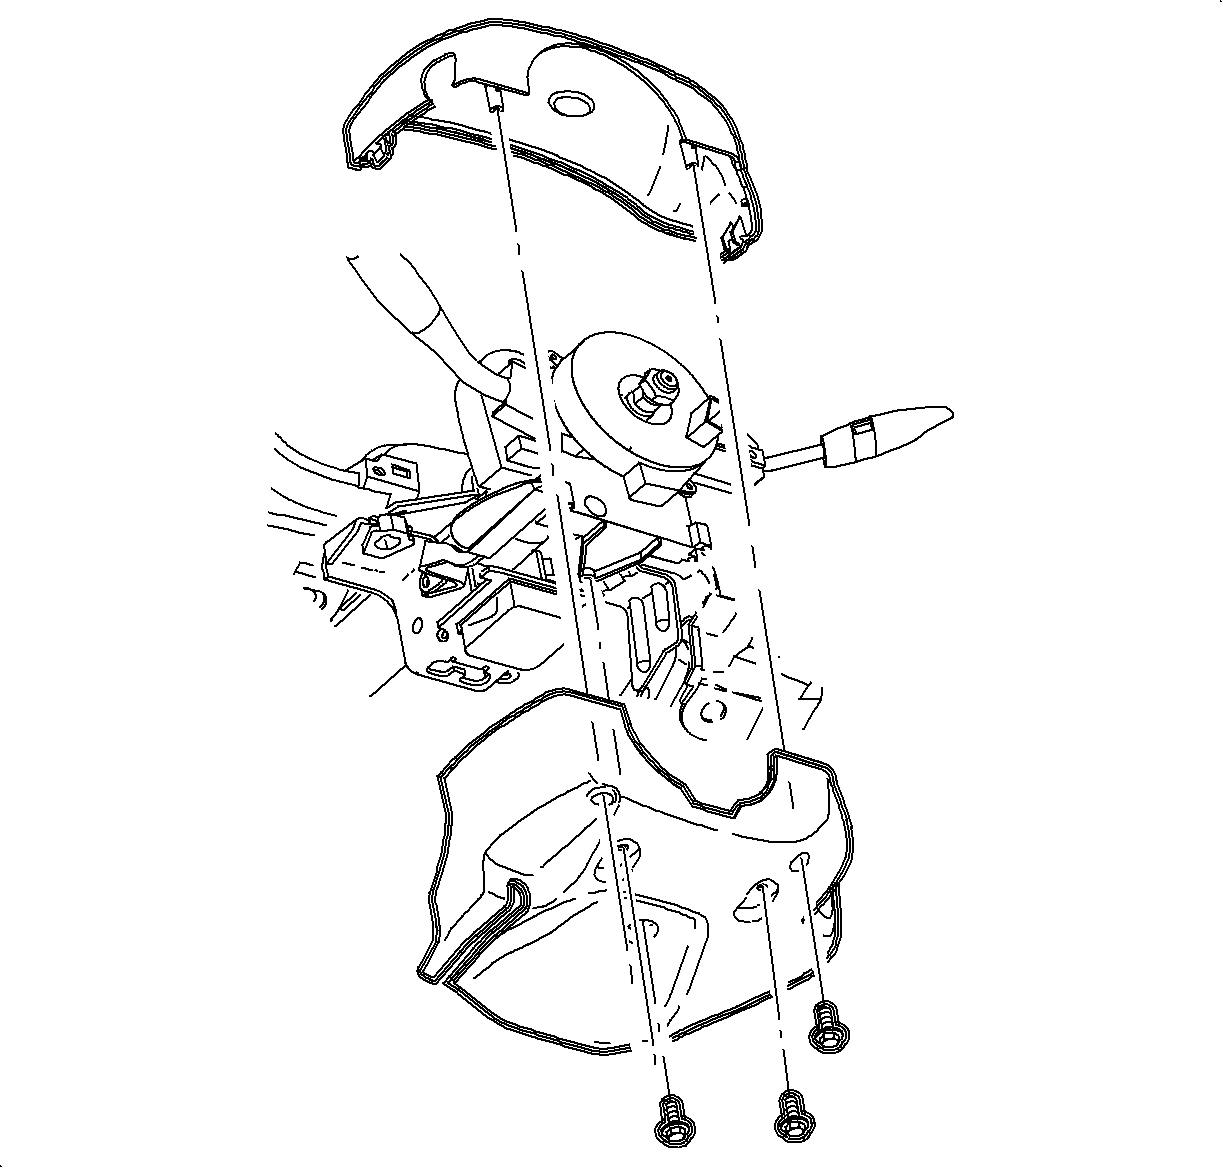
- Position the upper steering column shroud.
- Position the lower steering column shroud and the install screws.
Tighten
Tighten the steering column shroud fasteners 1.5 N·m (13 lb in).
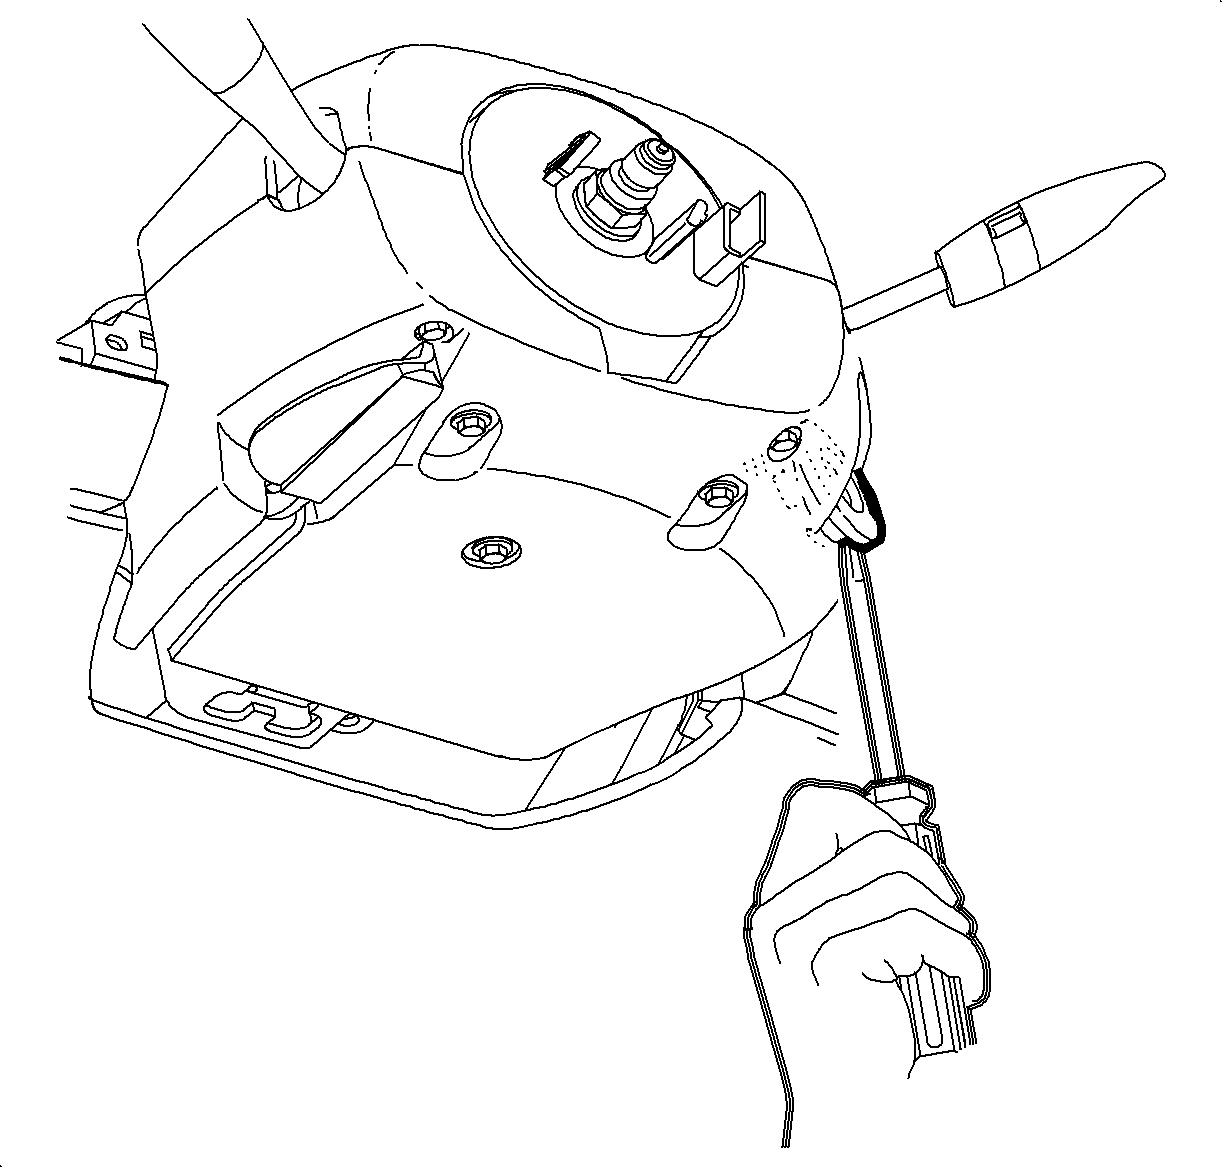
- Install the ignition bezel.
| 6.1. | Align the peg of the ignition bezel with the cut-out in the lower shroud. |
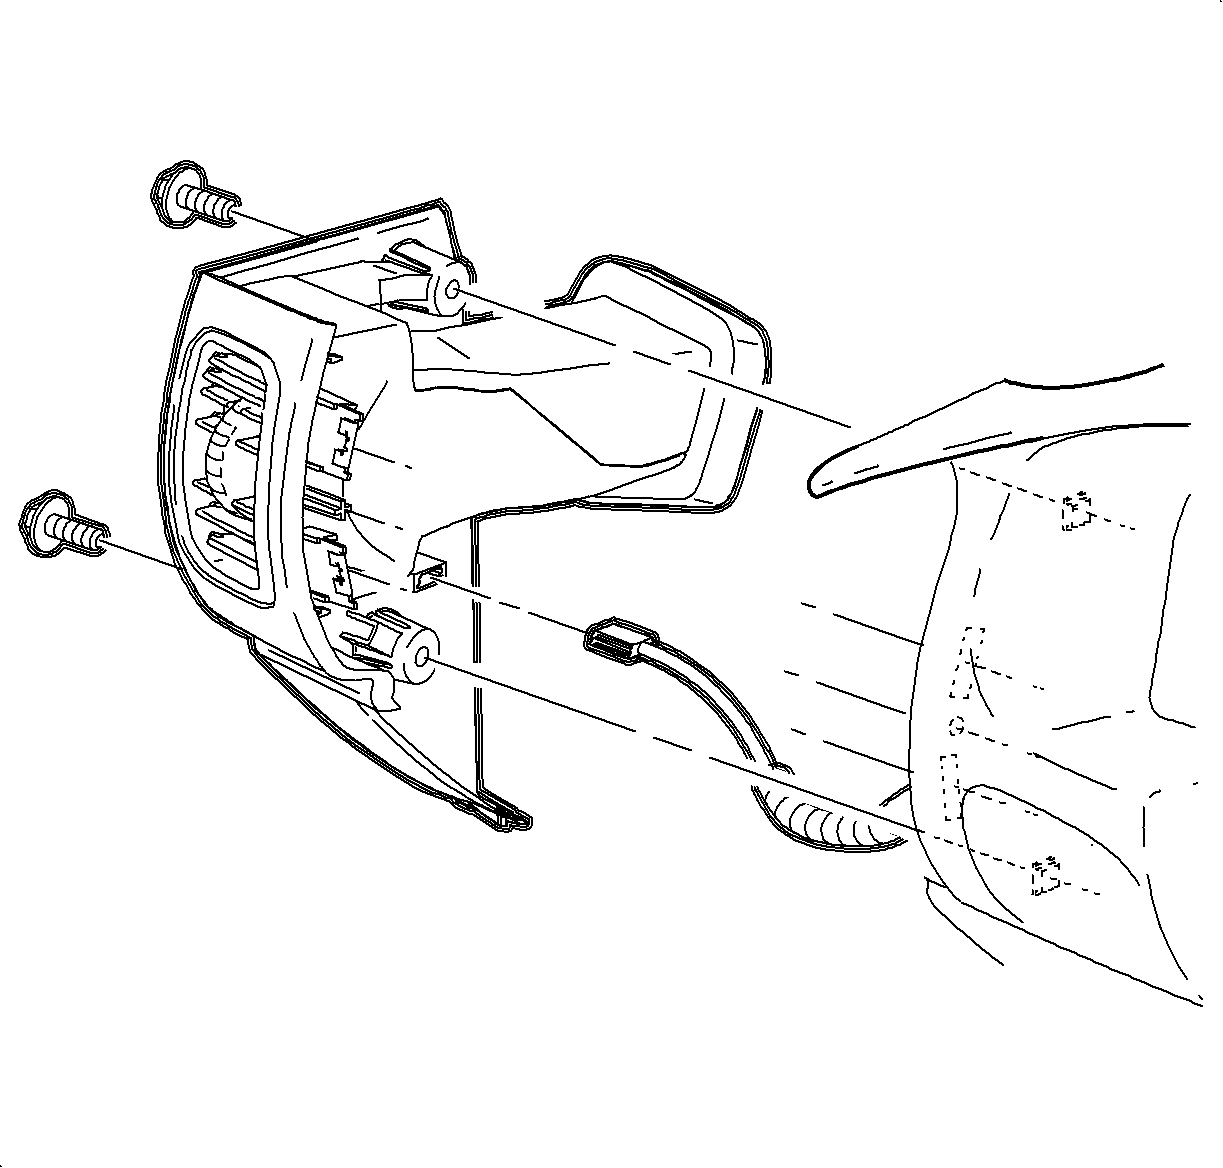
Important: Ensure that the endcap bottom portion is inside of the filler panel assembly.
- Install the left endcap assembly:
| 7.1. | Maneuver the assembly past the inner I/P retainer assembly and the weatherstrips. |
| 7.2. | Snap the clips into the I/P retainer assembly locations. |
Tighten
Tighten the I/P endcap retaining screws 2.5 N·m (22 lb in).
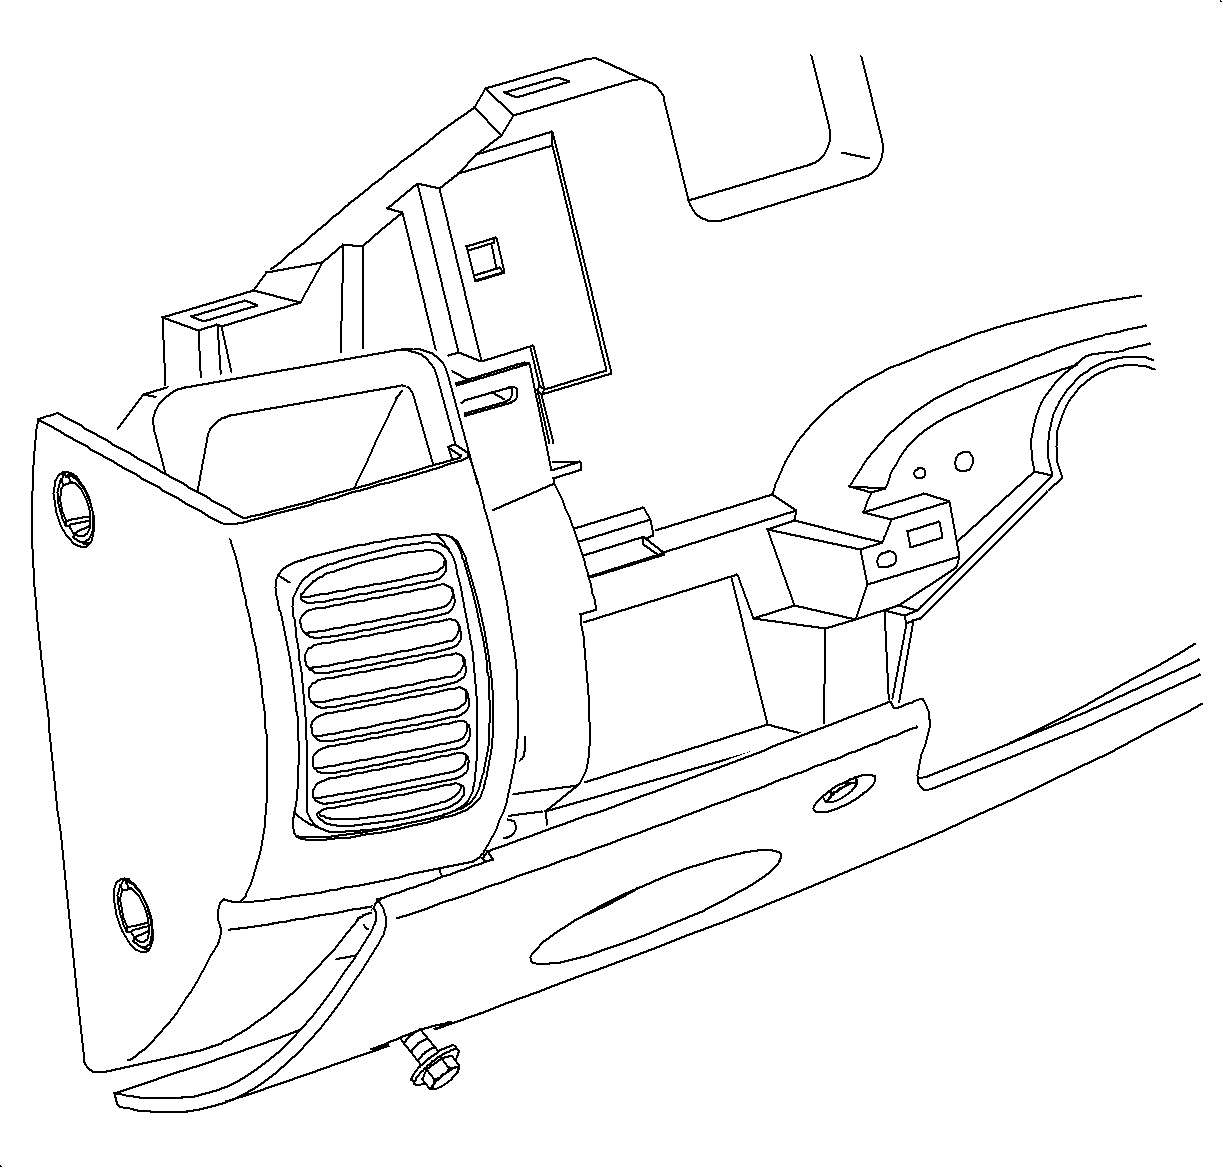
- Install the steering column filler panel screws.
Tighten
Tighten the steering column filler panel fasteners 2.5 N·m (22 lb in).
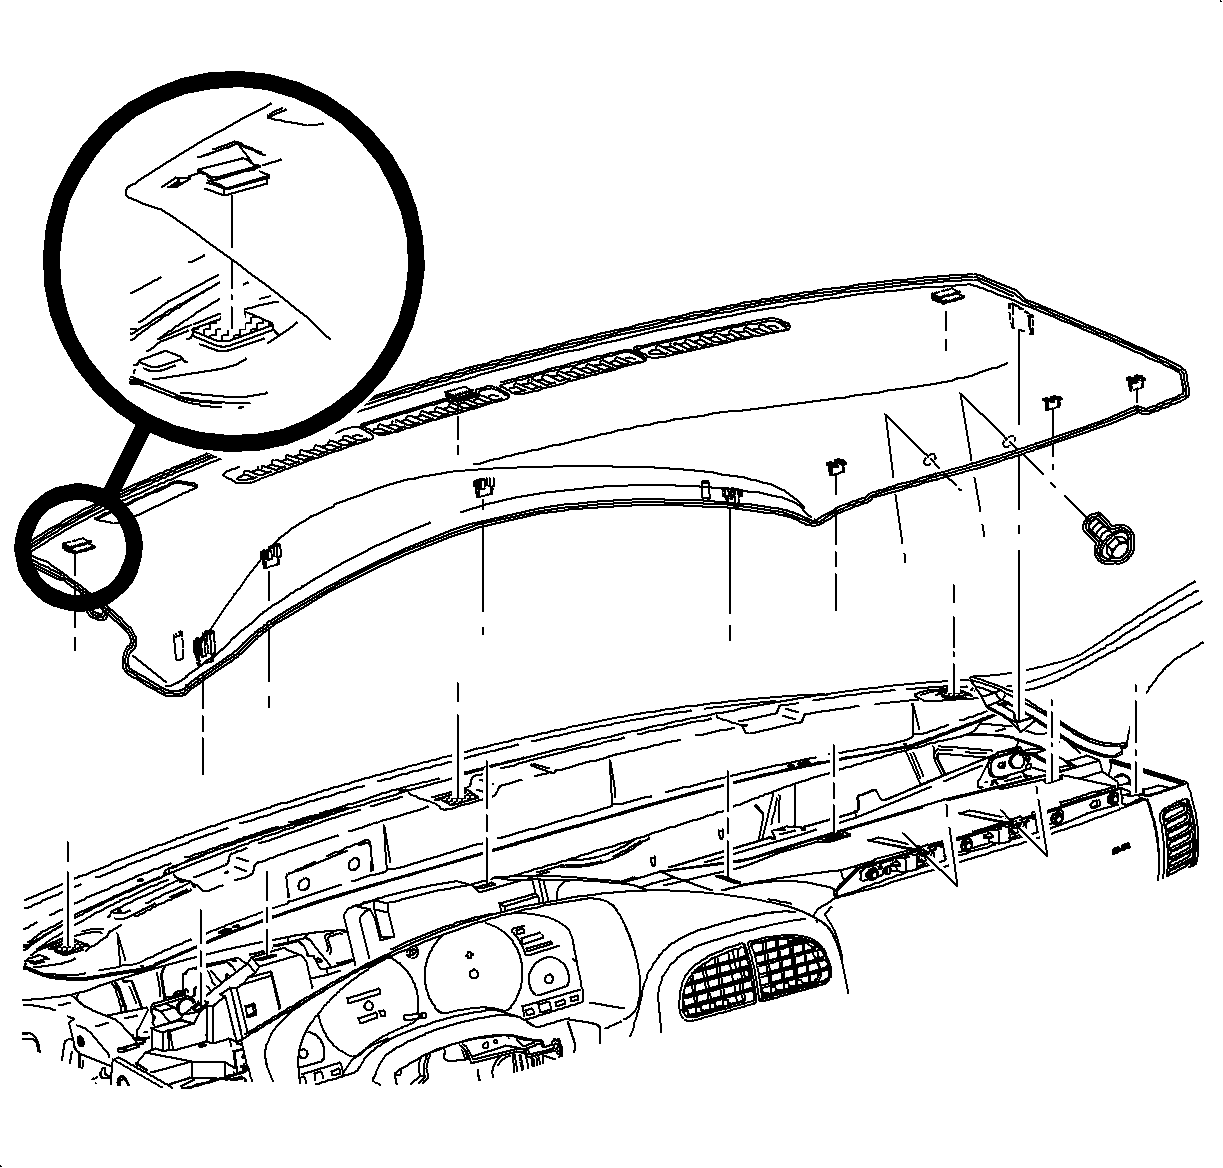
Notice: Be careful not to damage the VIN plate when removing or replacing the upper
trim panel.
Important: Ensure that the upper trim panel seal is correctly seated on the forward edge
before installing the upper trim panel.
- Install the I/P upper trim panel:
| 9.1. | Ensure that the hook-and-loop fasteners on the upper trim panel are correctly
inserted. |
| 9.2. | Position the upper trim panel on the retainer assembly. |
| 9.3. | Align the tabs on he sides of the upper trim panel with the openings in
the windshield garnish molding. |
| 9.4. | Align the clips and the clip location. |
| 9.5. | Firmly snap in the clips at the clip locations. |
| 9.6. | Install the screws on the underside of the upper trim panel on the passenger's
side of the vehicle. |
Tighten
Tighten the I/P upper trim panel fastener 6 N·m (53 lb in).


