Installation Procedure
Important: Before disconnecting the negative battery cable, make sure that the customer's
radio theft deterrent system has been deactivated. If the system is in the "SECURE"
state, refer to "Theft Deterrent Feature" procedure in this service manual to deactivate
this feature.
- Record the preset radio stations.
Caution: Refer to Battery Disconnect Caution in the Preface section.
- Disconnect the negative battery terminal.
Caution: When you are performing service on or near the SIR components or the
SIR wiring, you must disable the SIR system. Refer to Disabling the SIR System.
Failure to follow the correct procedure could cause air bag deployment,
personal injury, or unnecessary SIR system repairs.
- Disable the SIR system. Refer to
Disabling the SIR System
in SIR.
- Remove the I/P console. Refer to
Console Replacement
.
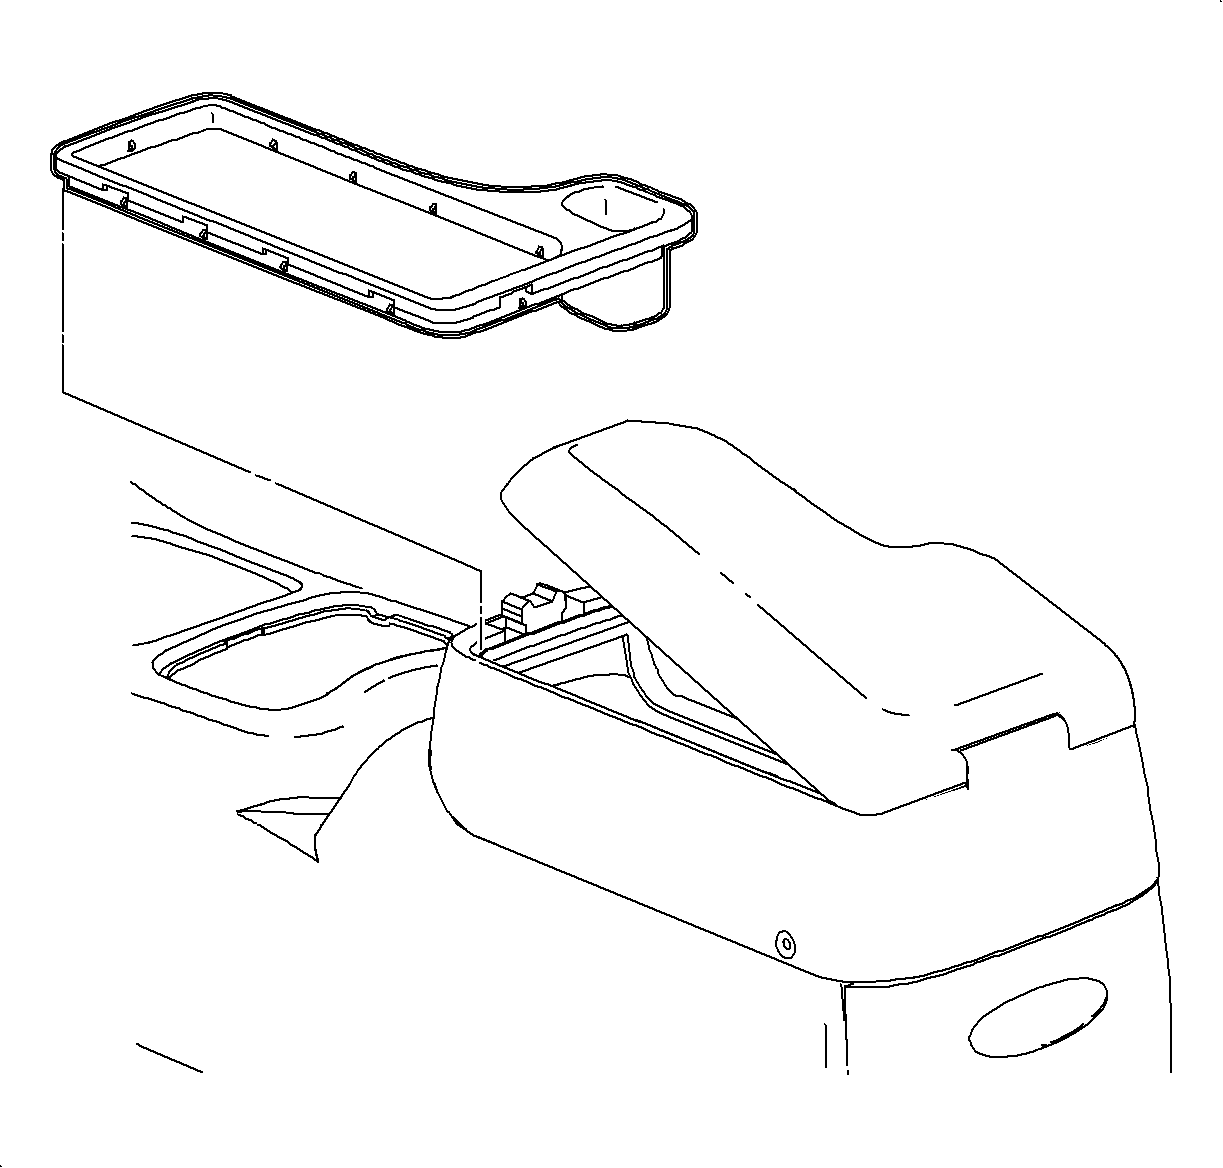
Important: If the vehicle is equipped with a storage bin, remove the bin and install a
console armrest using the Armrest Installation Instruction Sheet.
- Open the armrest.
- Remove and discard the armrest storage bin.
- Install the bezel tray.
Notice: Refer to Fastener Notice in the Preface section.
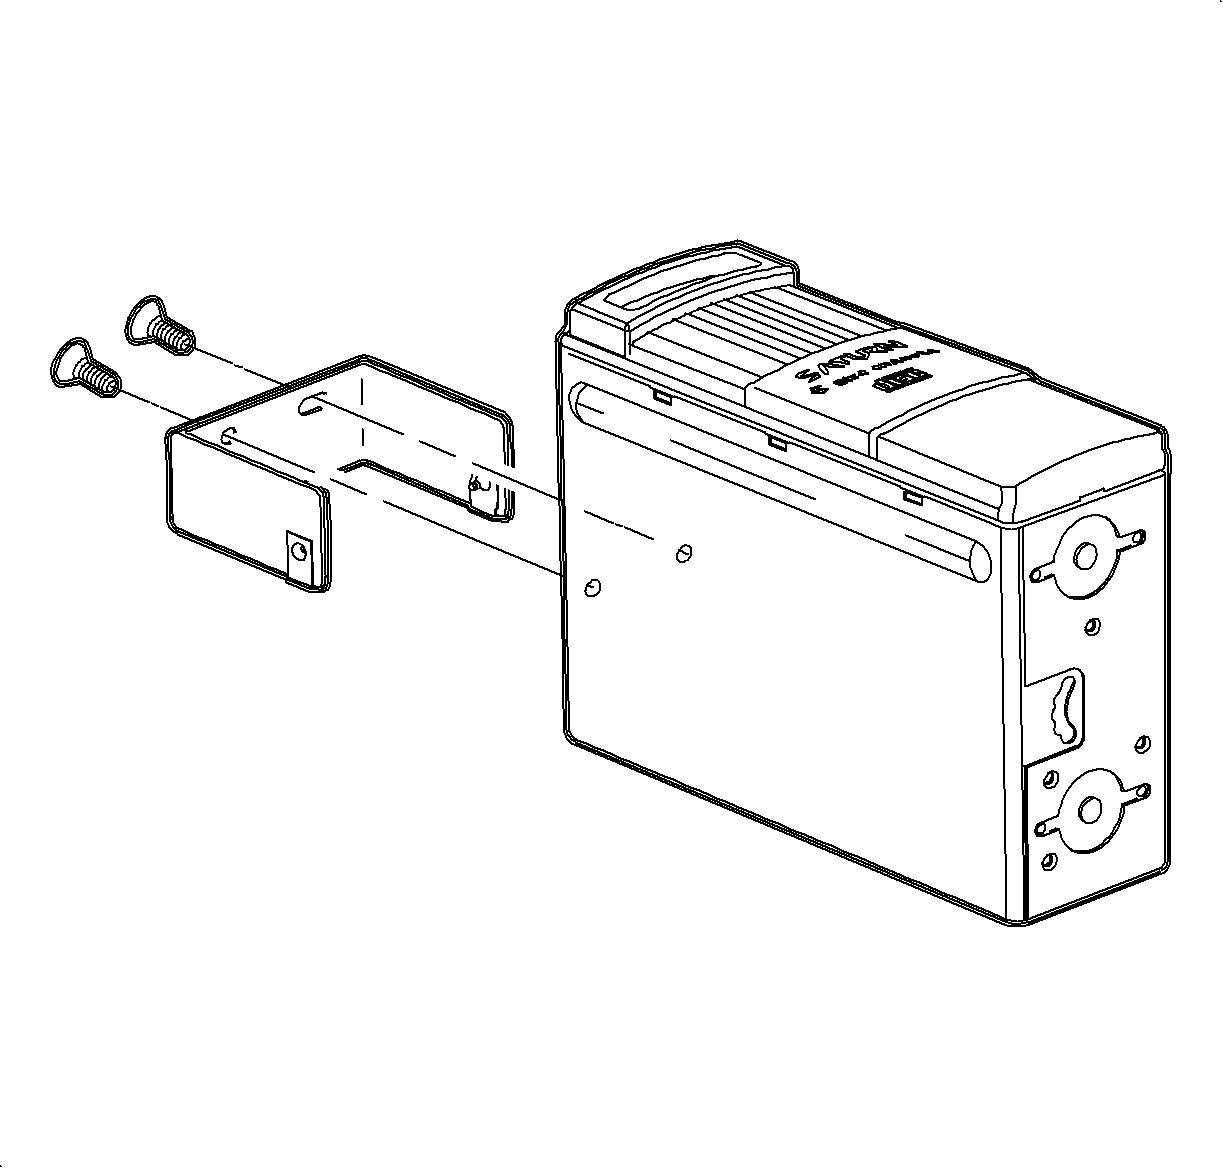
- Attach the bracket to the CD changer/player as shown.
Tighten
Tighten the CD changer/player-to-console fasteners - rear to 4 N·m
(35 lb in).
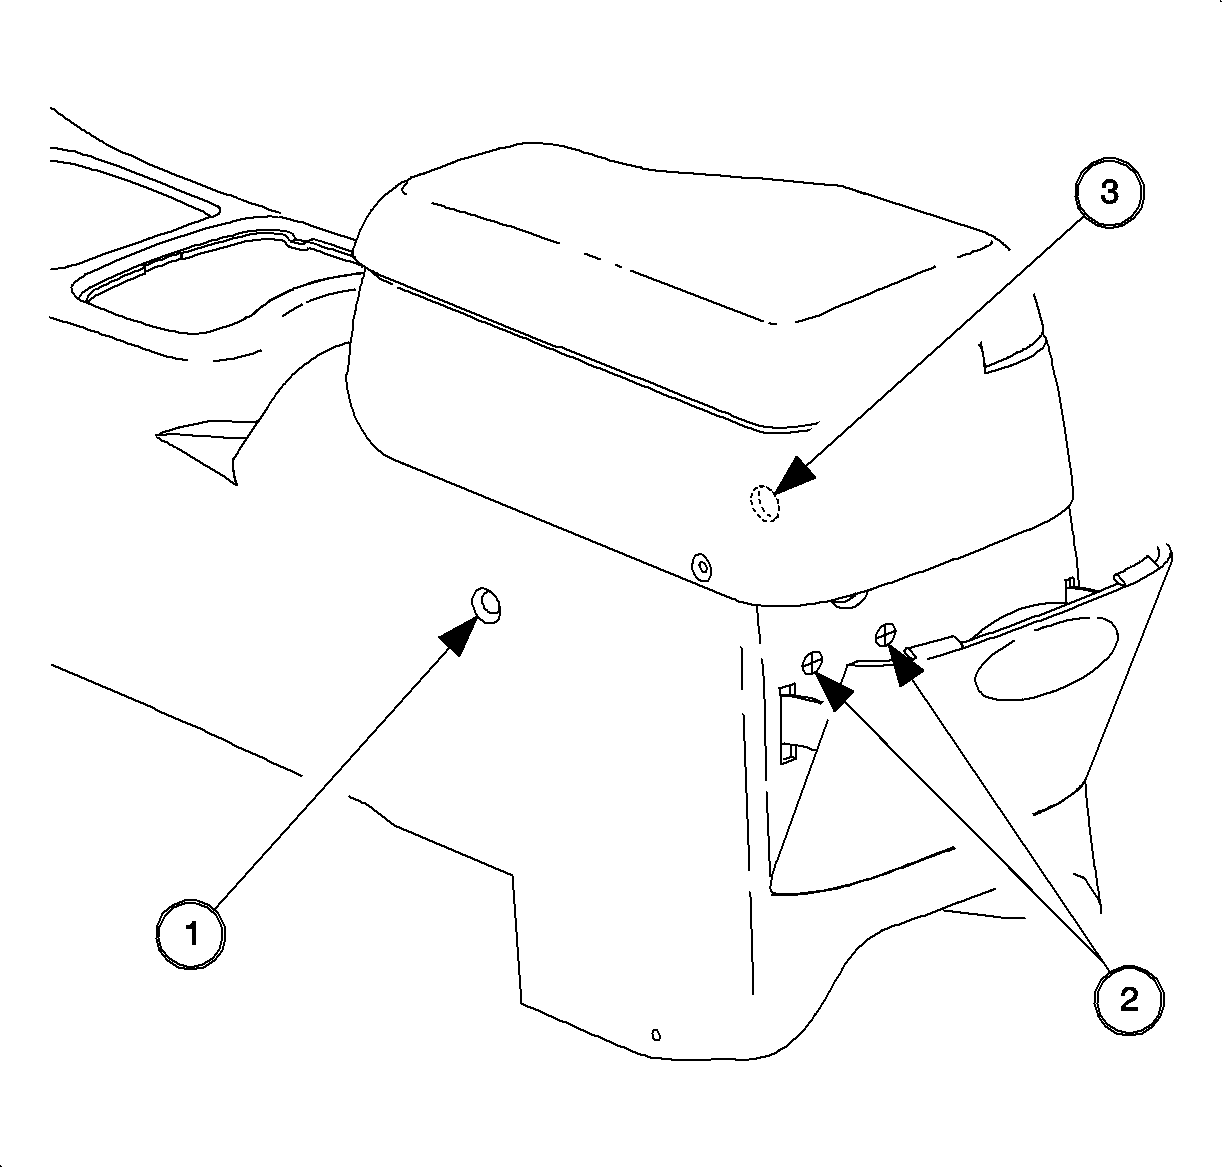
- Drill a 6.35 mm (1/4 in) hole into the console at the specified
locations:
| 9.1. | At the dimple on the left side of the console (1) |
| 9.2. | At the two crosshair markings on the rear of the console (2) |
| 9.3. | There is already a hole located on the right side of the console (3). |
- Install the fasteners to attach the CD changer/player to the console.
| 10.1. | Install the fasteners through the rear of the console (2) into
the CD changer/player. |
Tighten
Tighten the CD changer/player-to-console fasteners - rear to 4 N·m
(35 lb in).
| 10.2. | Install fasteners through the sides of the console (1) and (3)
into the CD changer/player bracket. |
Tighten
Tighten the CD changer/player-to-console fasteners - front to 2.5 N·m
(22 lb in).
- Ensure the fit of the CD changer/player to the bezel tray.
Important: You may find it easier to turn the console upside down to position the CD changer/player.
- Position the CD Changer/Player by installing it from the bottom of the console.
I/P CD Jumper Installation
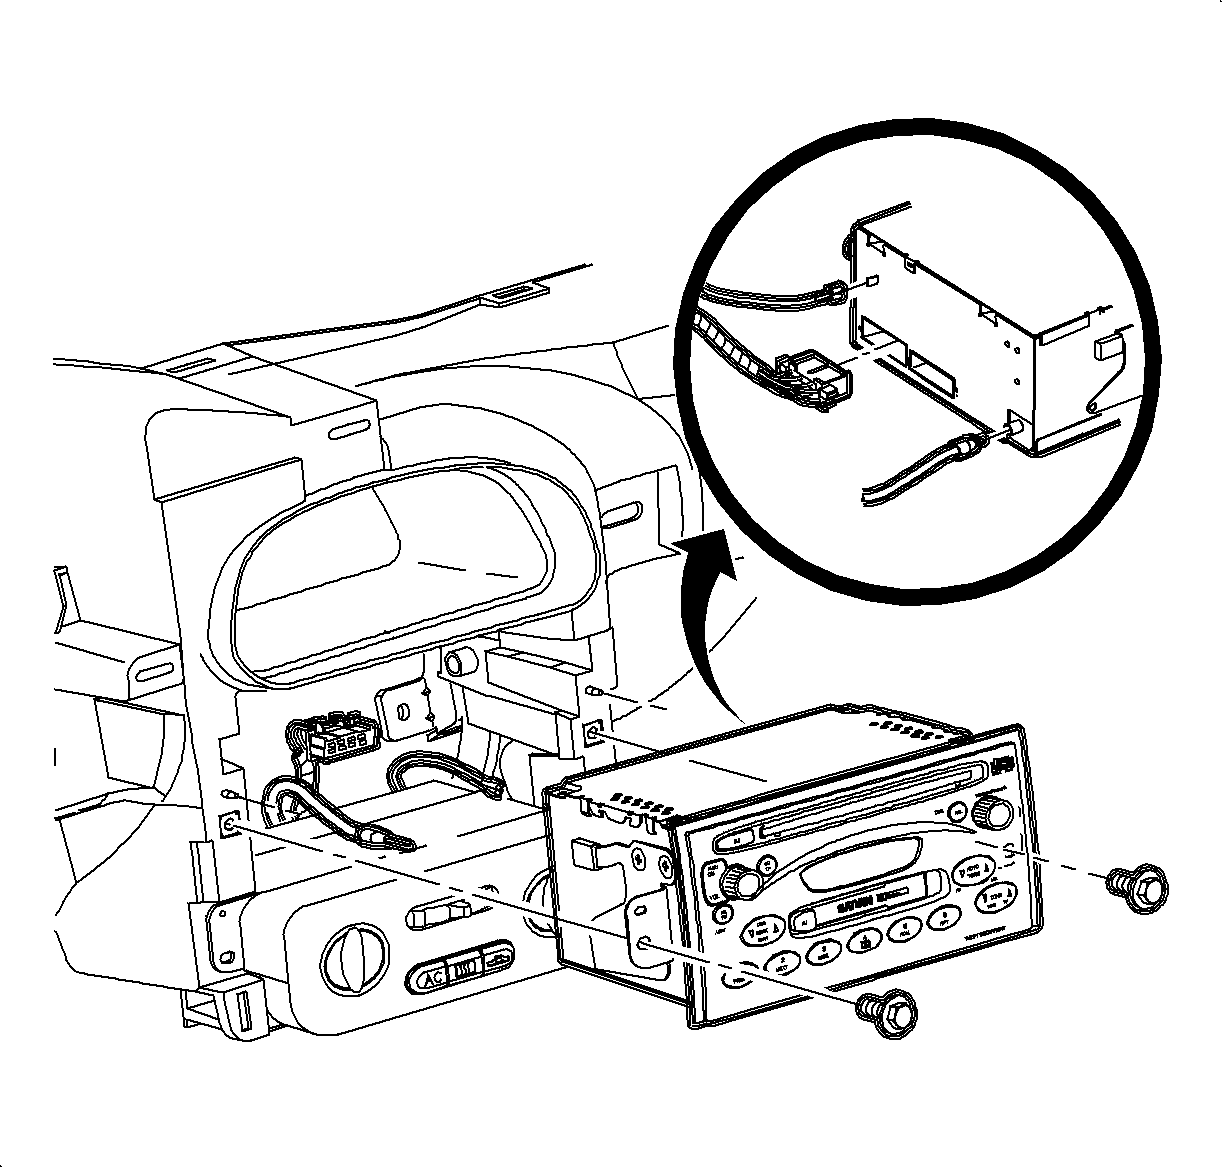
- Gain access to the rear of the radio and connect the CD I/P jumper to the radio.
| | Important: The I/P harness connector, antenna connector, and ground strap terminal do
not need to be disconnected, unless the radio needs to be upgraded. Ensure the connection.
|
| 1.2. | Upgrade the radio, if necessary, to AM/FM stereo cassette player with
equalizer (UL0) or AM/FM stereo cassette player and CD player with equalizer (UP0). |
| 1.3. | Connect the I/P CD jumper connector to the rear of the radio. |
| | Important: Do not secure the radio or trim in place until the CD Changer/Player is installed
and verified to be functioning correctly.
|
| 1.4. | Set the radio into the radio brace. |
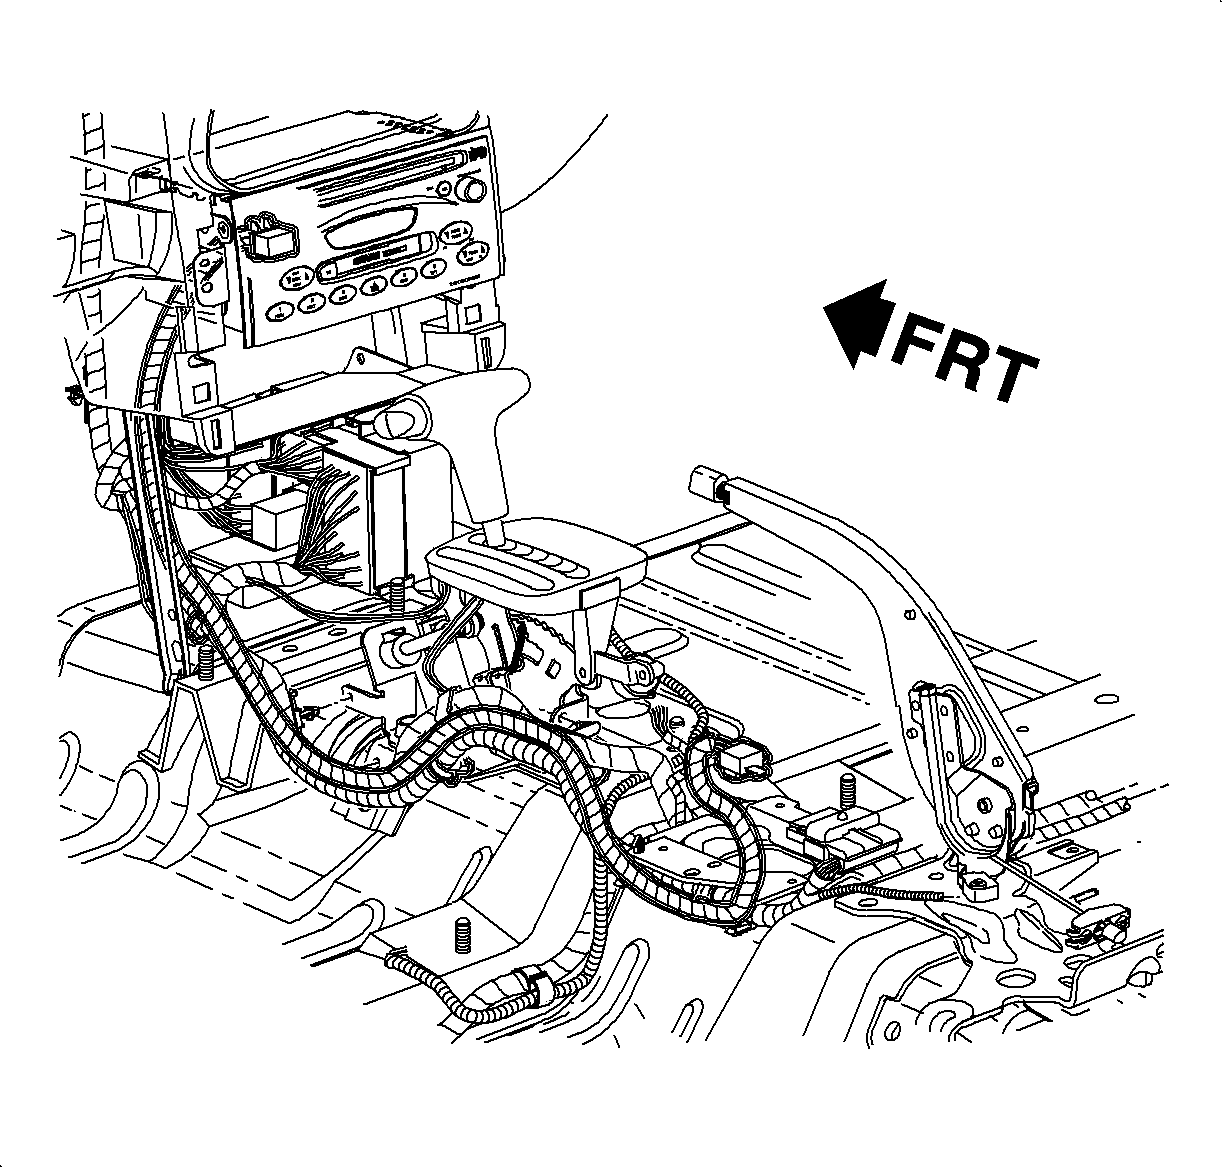
- Route the I/P CD
jumper from the rear of the radio to the CD changer/player location in the console
which is near the park brake.
| 2.1. | Route the I/P CD jumper behind the left side of the radio along side of
current routing for I/P harness. |
| 2.2. | Attach the I/P CD jumper to the I/P harness to the hold jumper in place. |
| 2.3. | Route the I/P CD jumper the rest of the way to CD changer/player. |
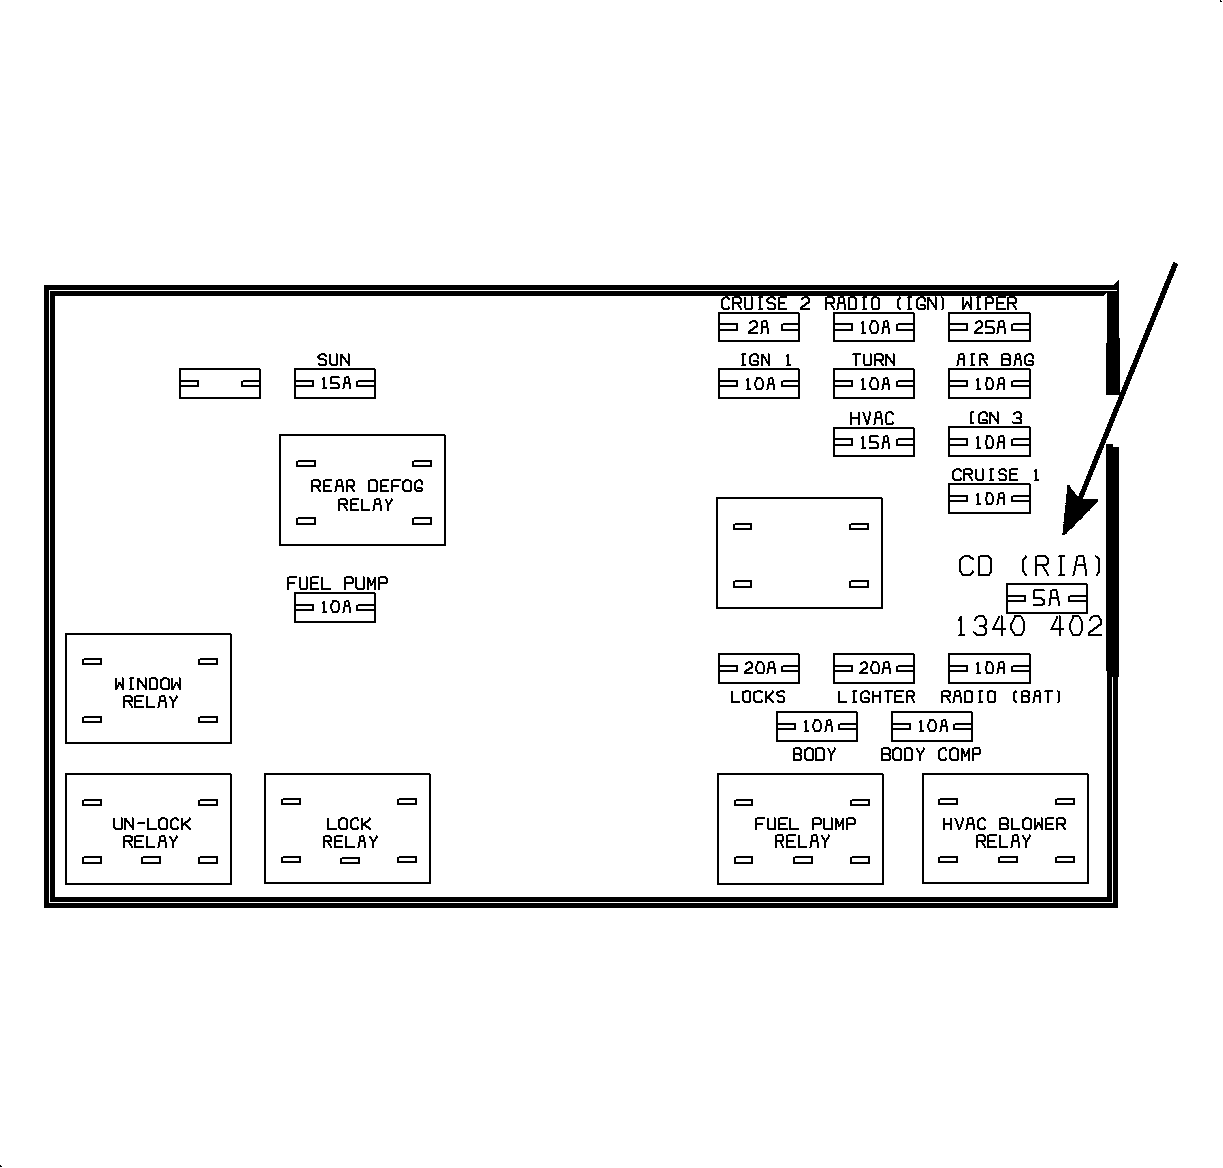
- Install the 5A CD (RIA)
fuse into the instrument panel junction block.
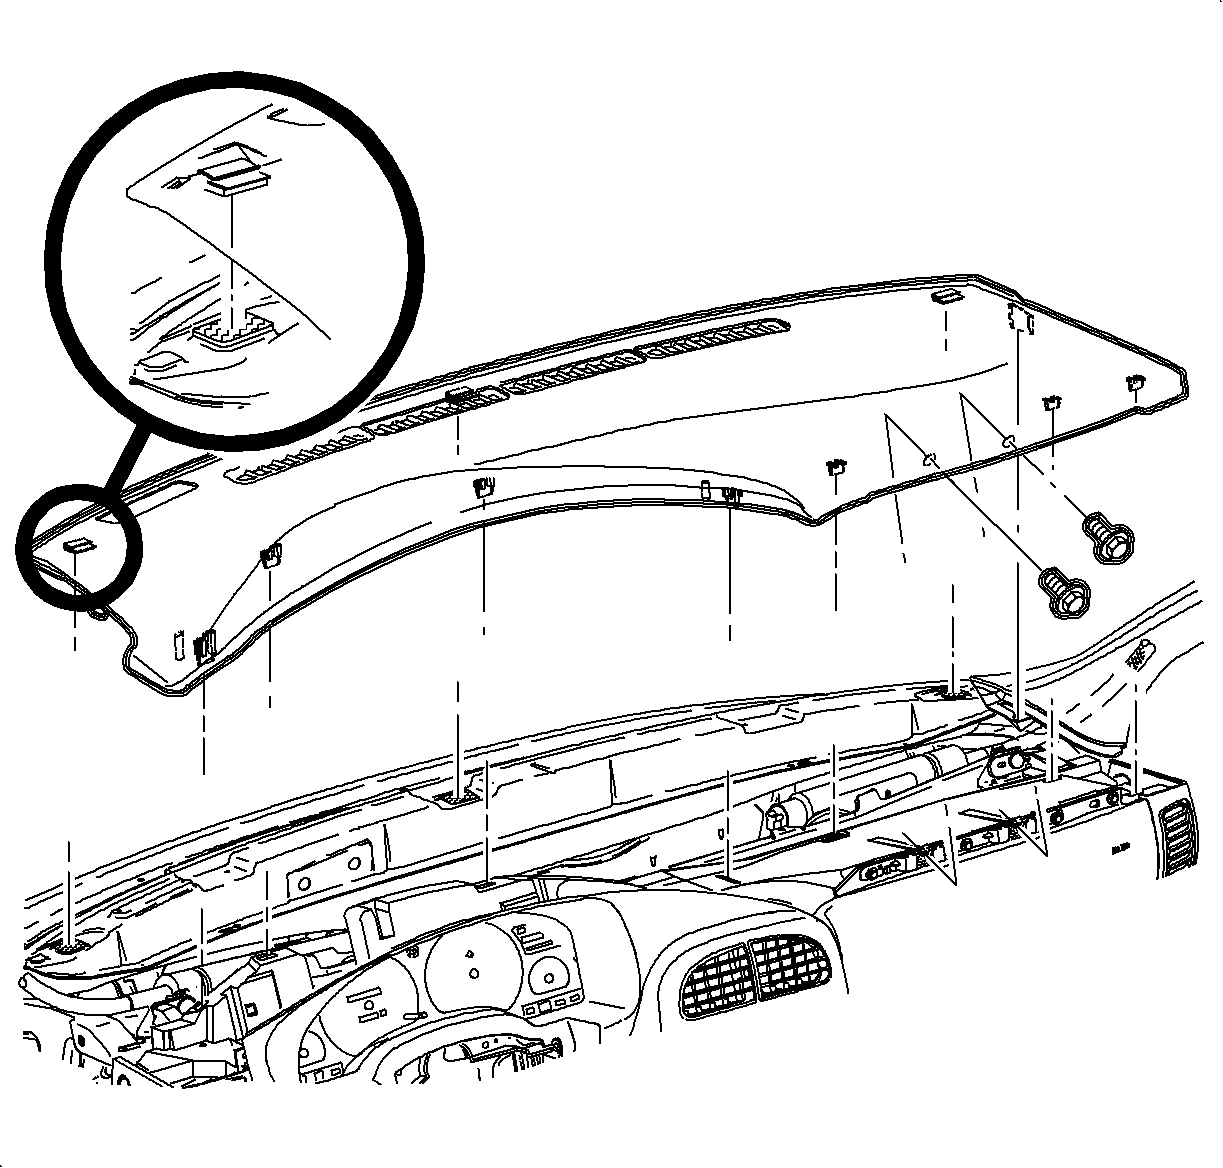
- Install the I/P console. Refer to
Console Replacement
.

- Enable the SIR System. Refer to
Enabling the SIR System
in SIR.
- Enable head curtain inflator modules, if equipped. Refer to
Enabling the SIR System
in SIR.
Caution: Refer to Battery Disconnect Caution in the Preface section.
- Connect negative battery cable.
- Test the operation of the CD changer/player. If the CD changer/player
does not operate correctly, refer to the troubleshooting portion of this audio section.
- Set the earlier recorded radio preset stations and clock time.
- Remind the customer that the Theft Deterrent System is not activated and
they need to reactivate it if they would like continued security.


