For 1990-2009 cars only
Quarter Panel Replacement Wagon
Removal Procedure
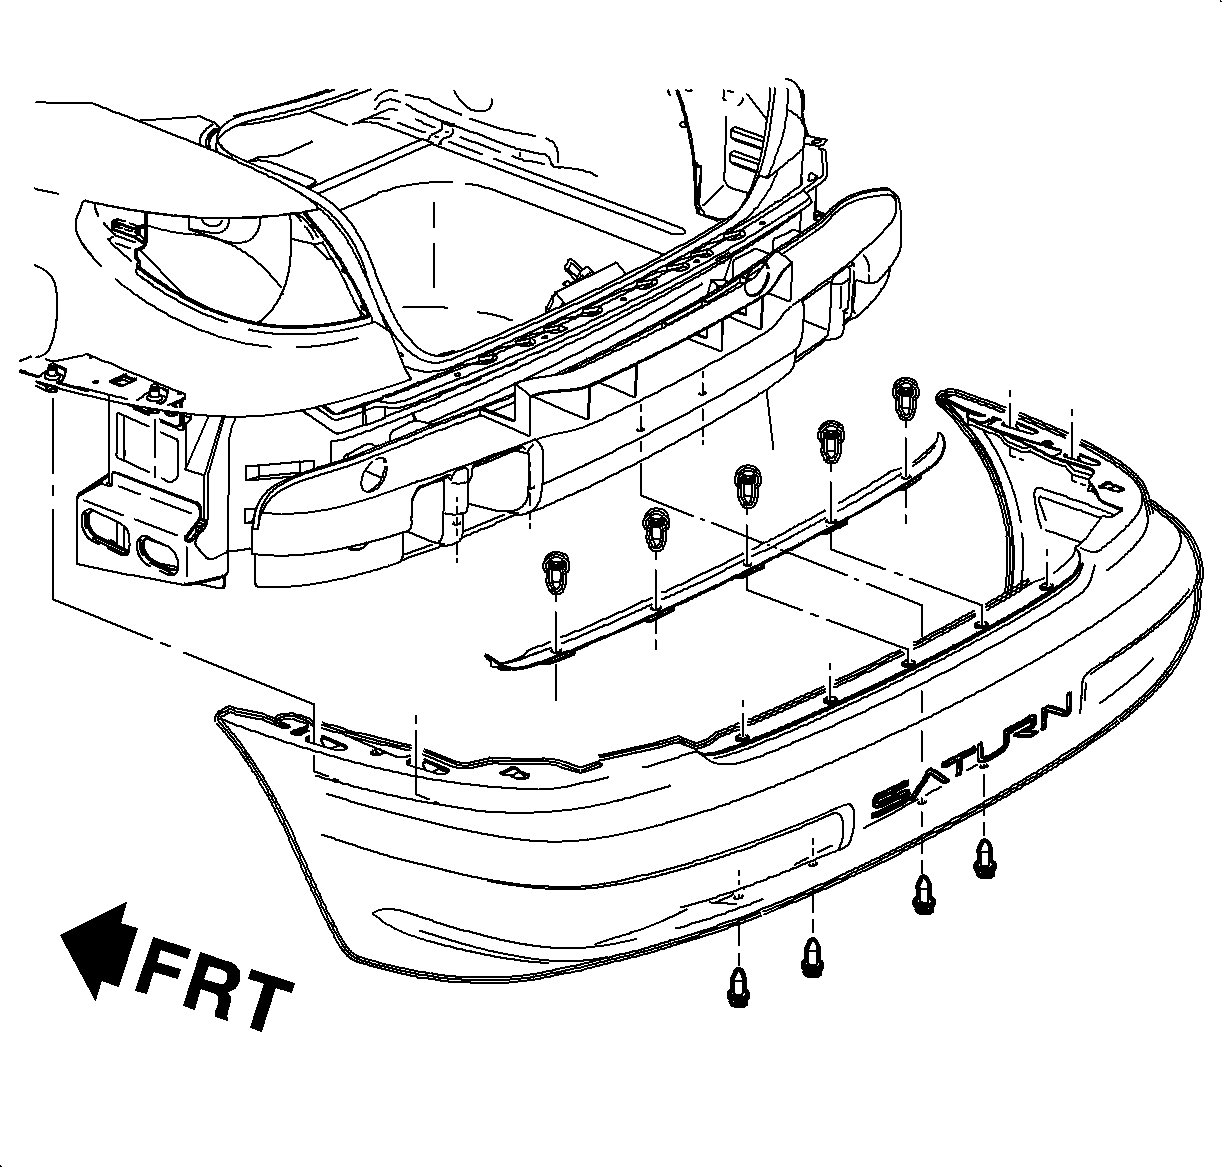
- Remove the rear fascia. Refer to Rear Bumper Fascia Replacement in Bumpers.
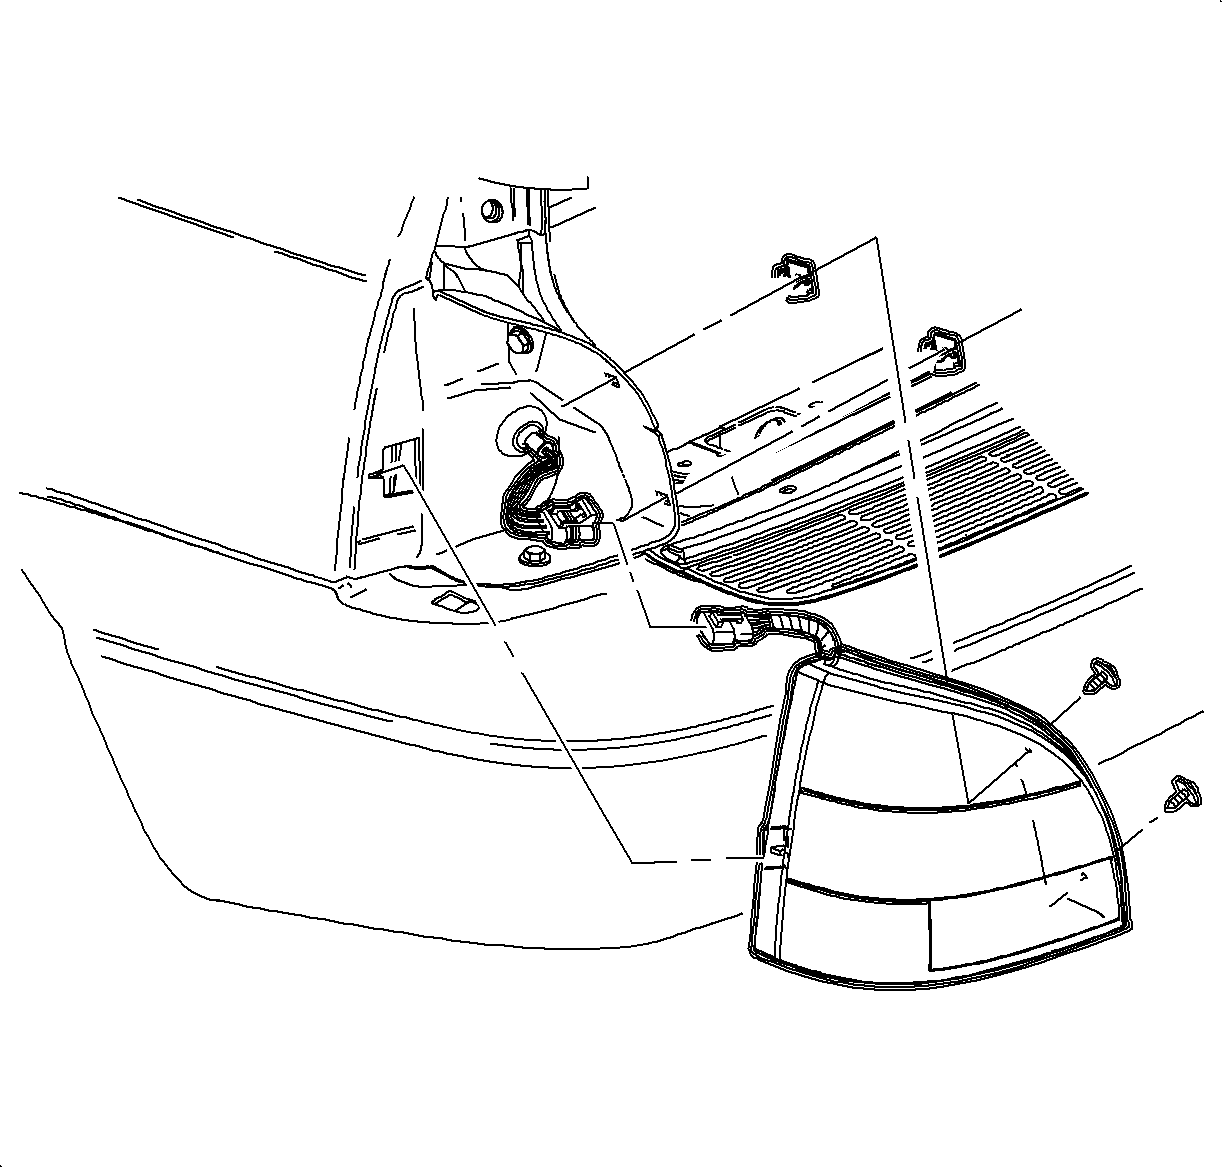
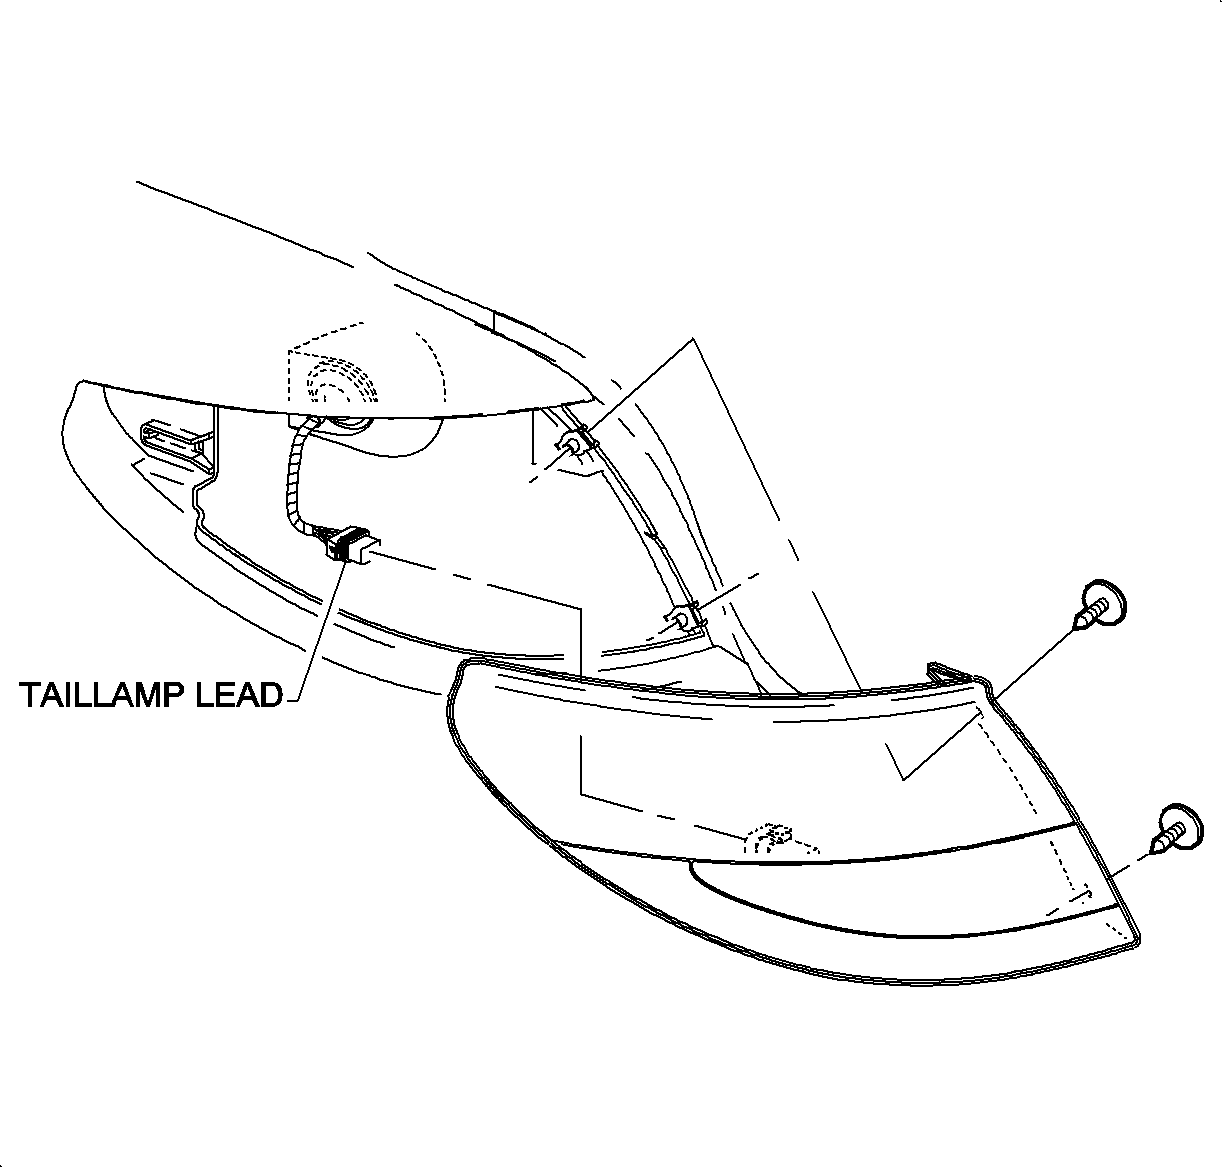
- Remove the tail lamp. Refer to Tail Lamp Replacement in Lighting Systems.
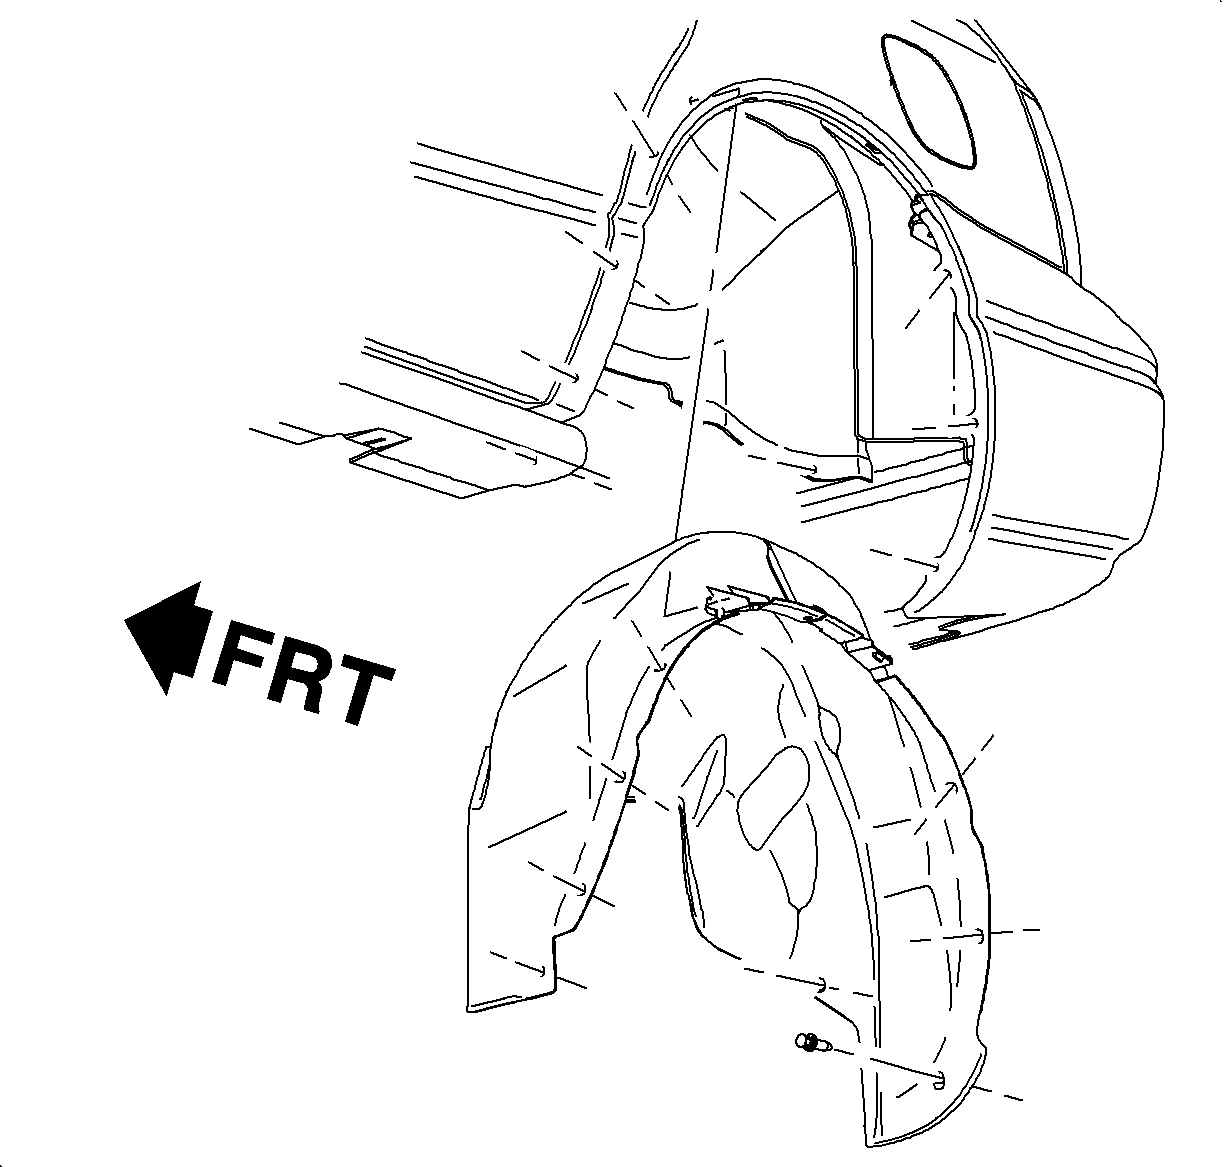
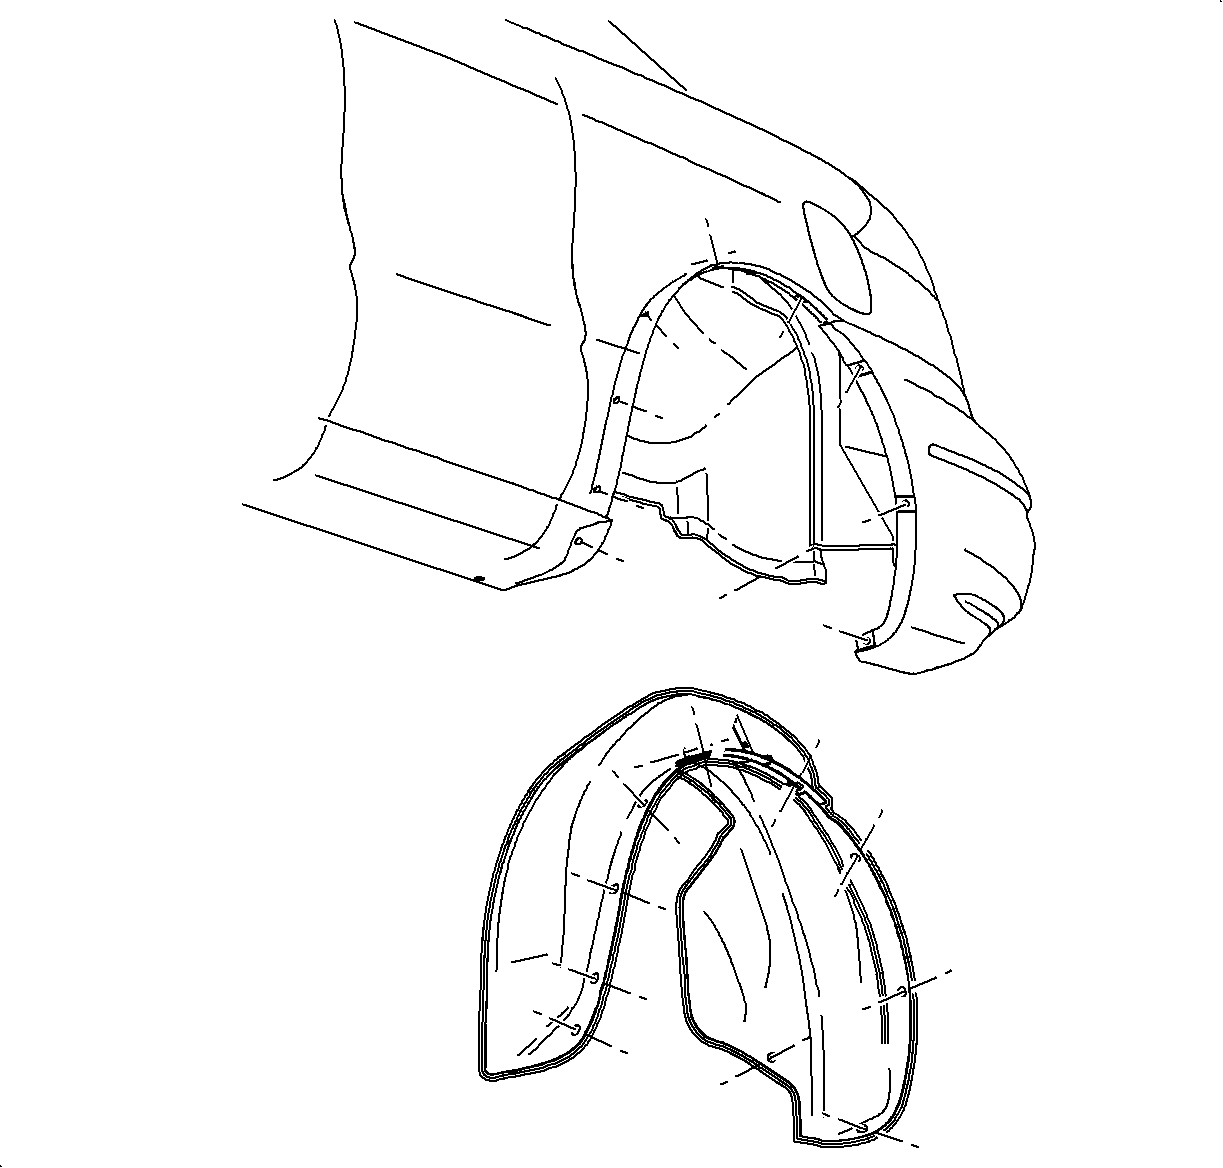
- Remove the rear wheelhouse panel outer plastic fasteners. Refer to Rear Wheelhouse Panel Liner Replacement .
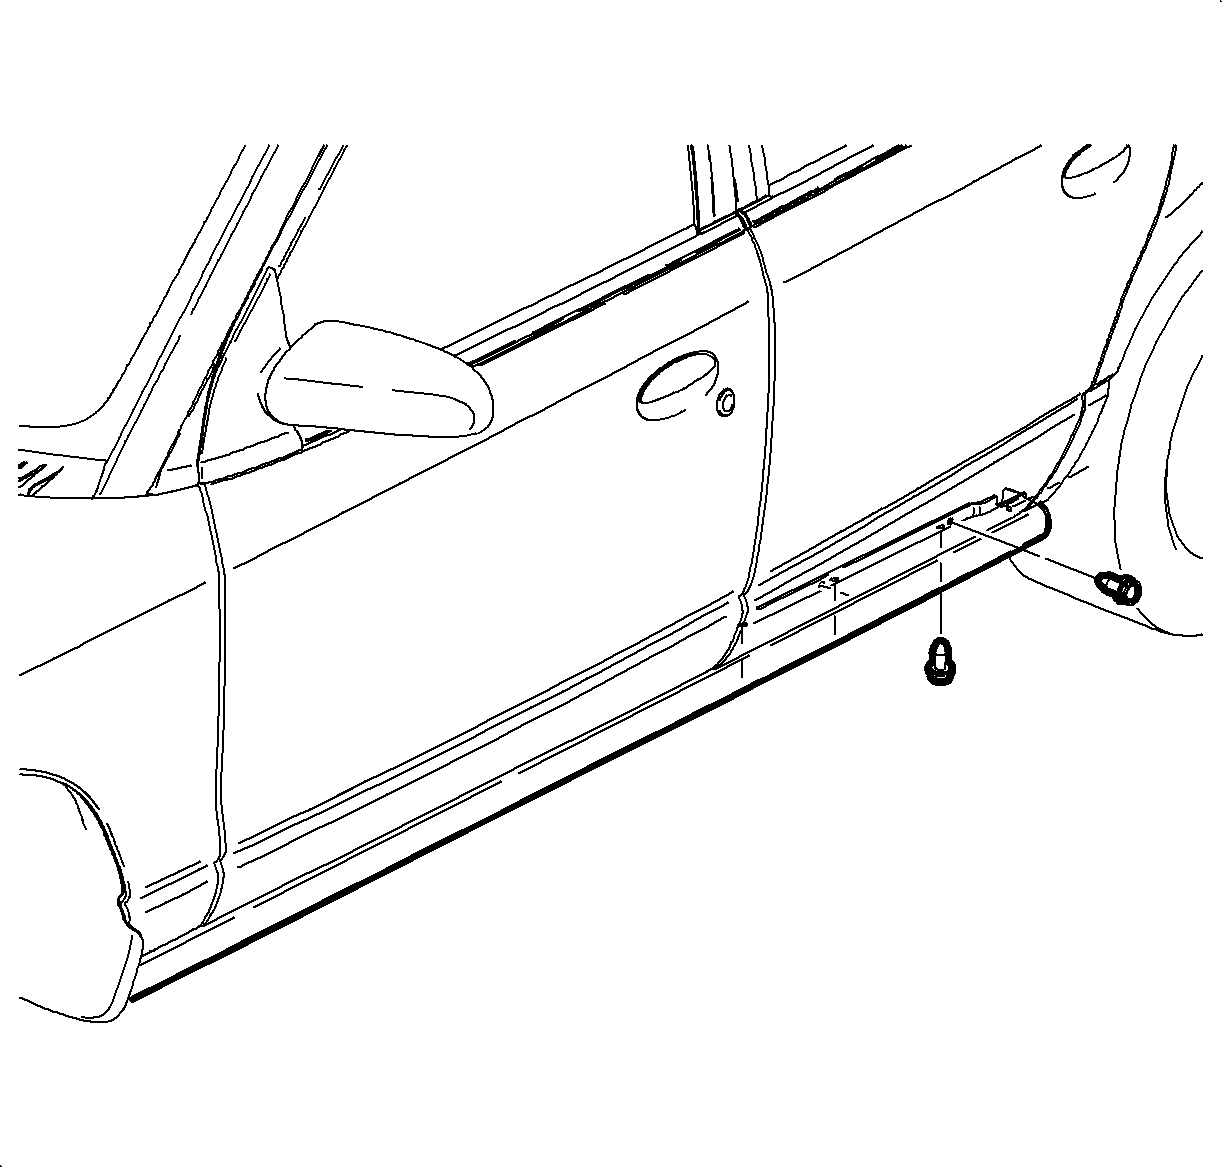
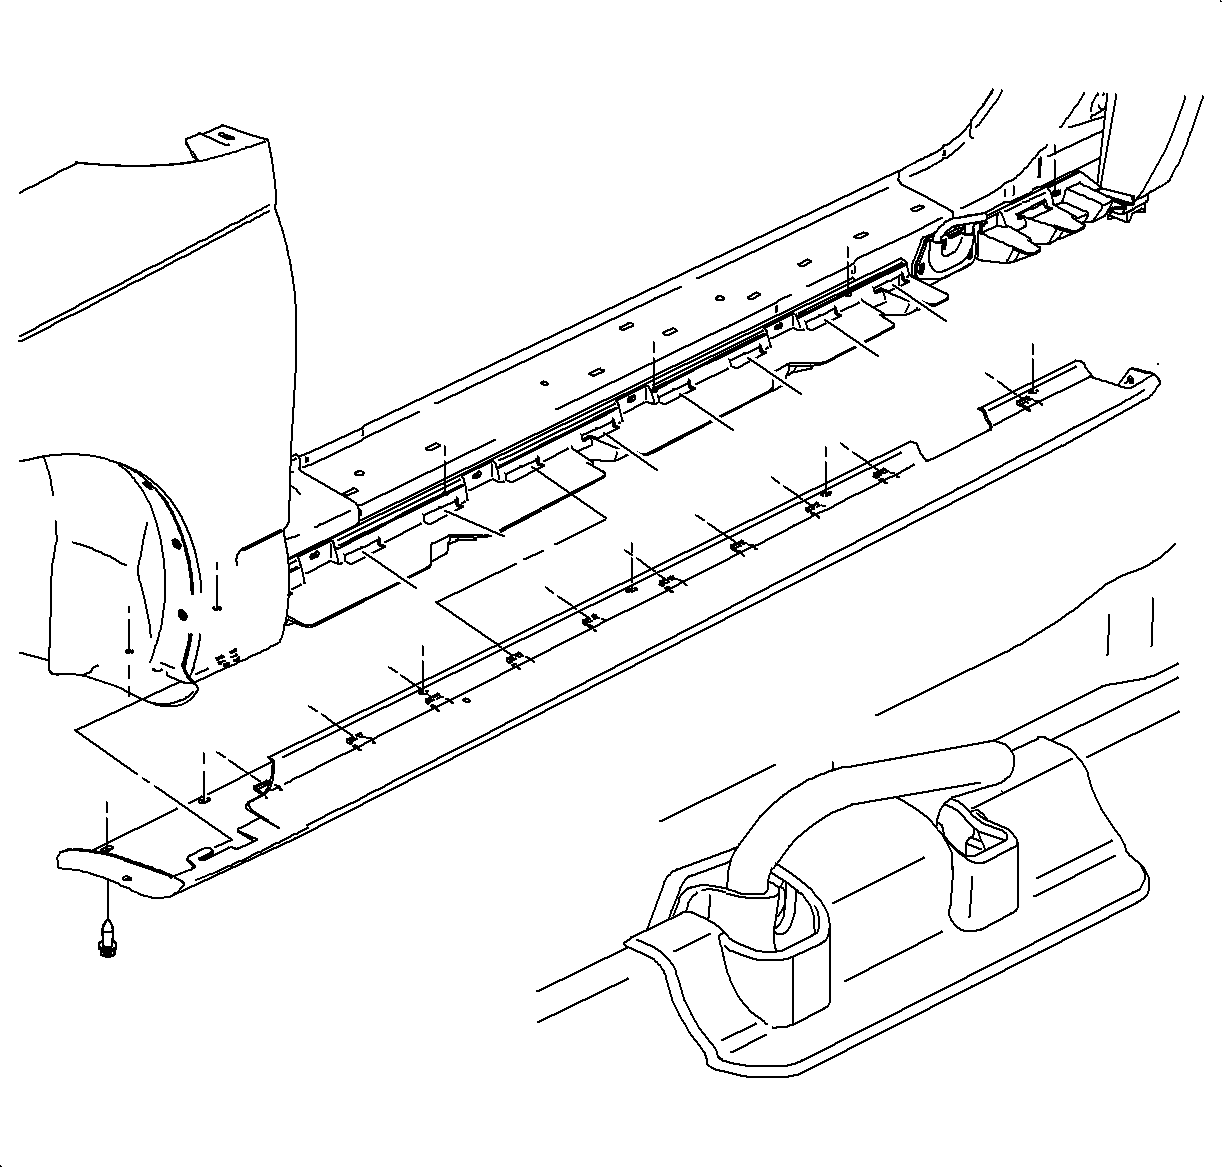
- Remove the rear and next 2 plastic fasteners on the rocker panel cover to the lower rear end of the cover.
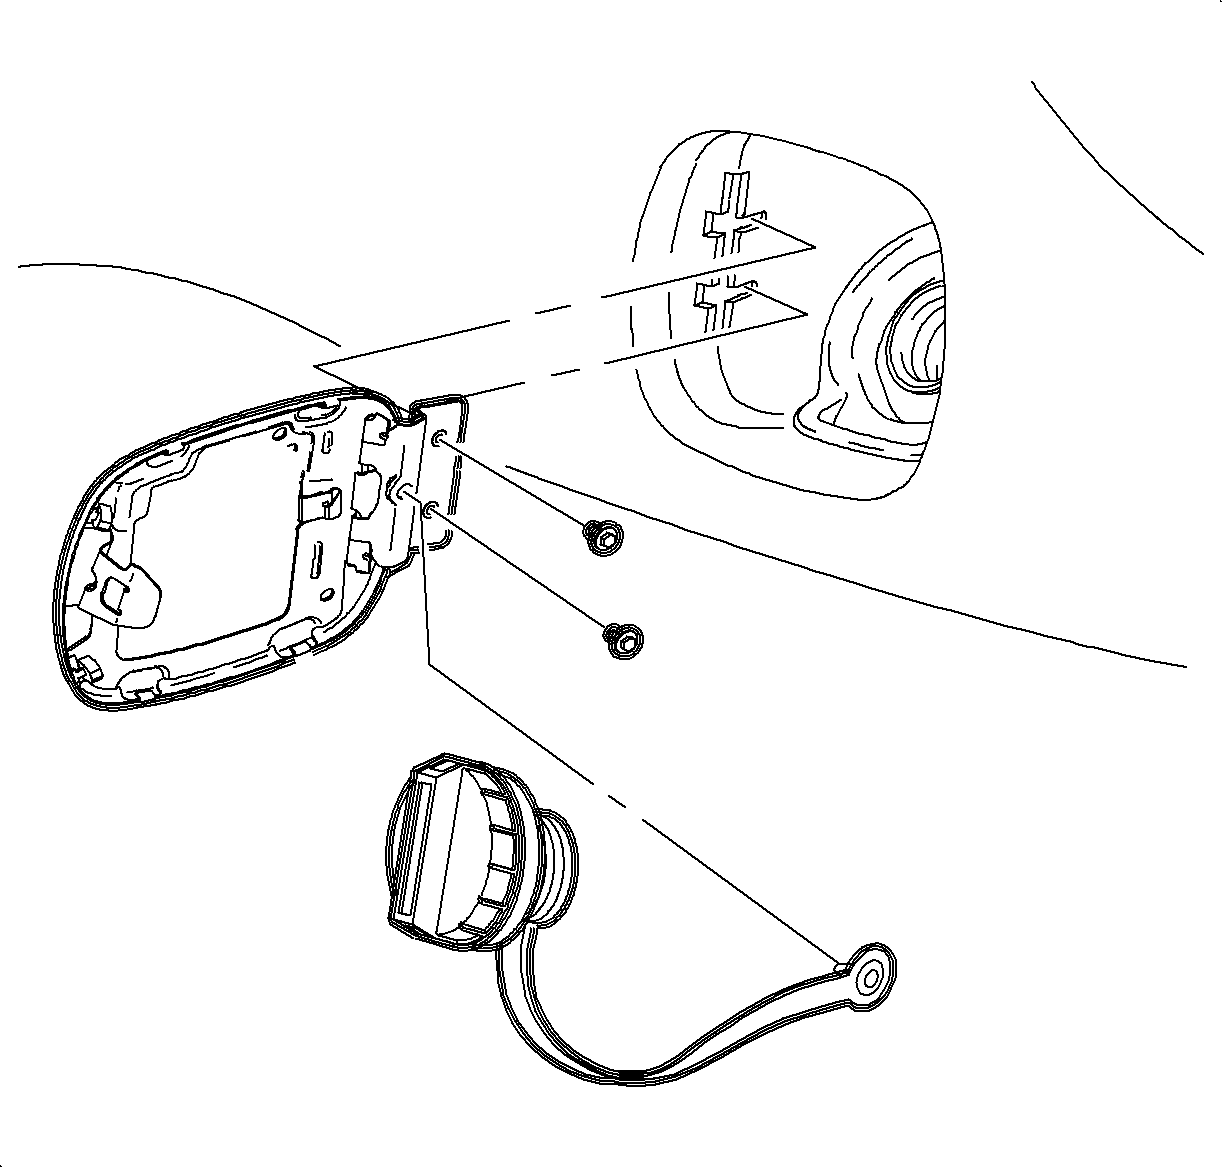
- If removing the left quarter panel, open the fuel door and remove the latch retainer.
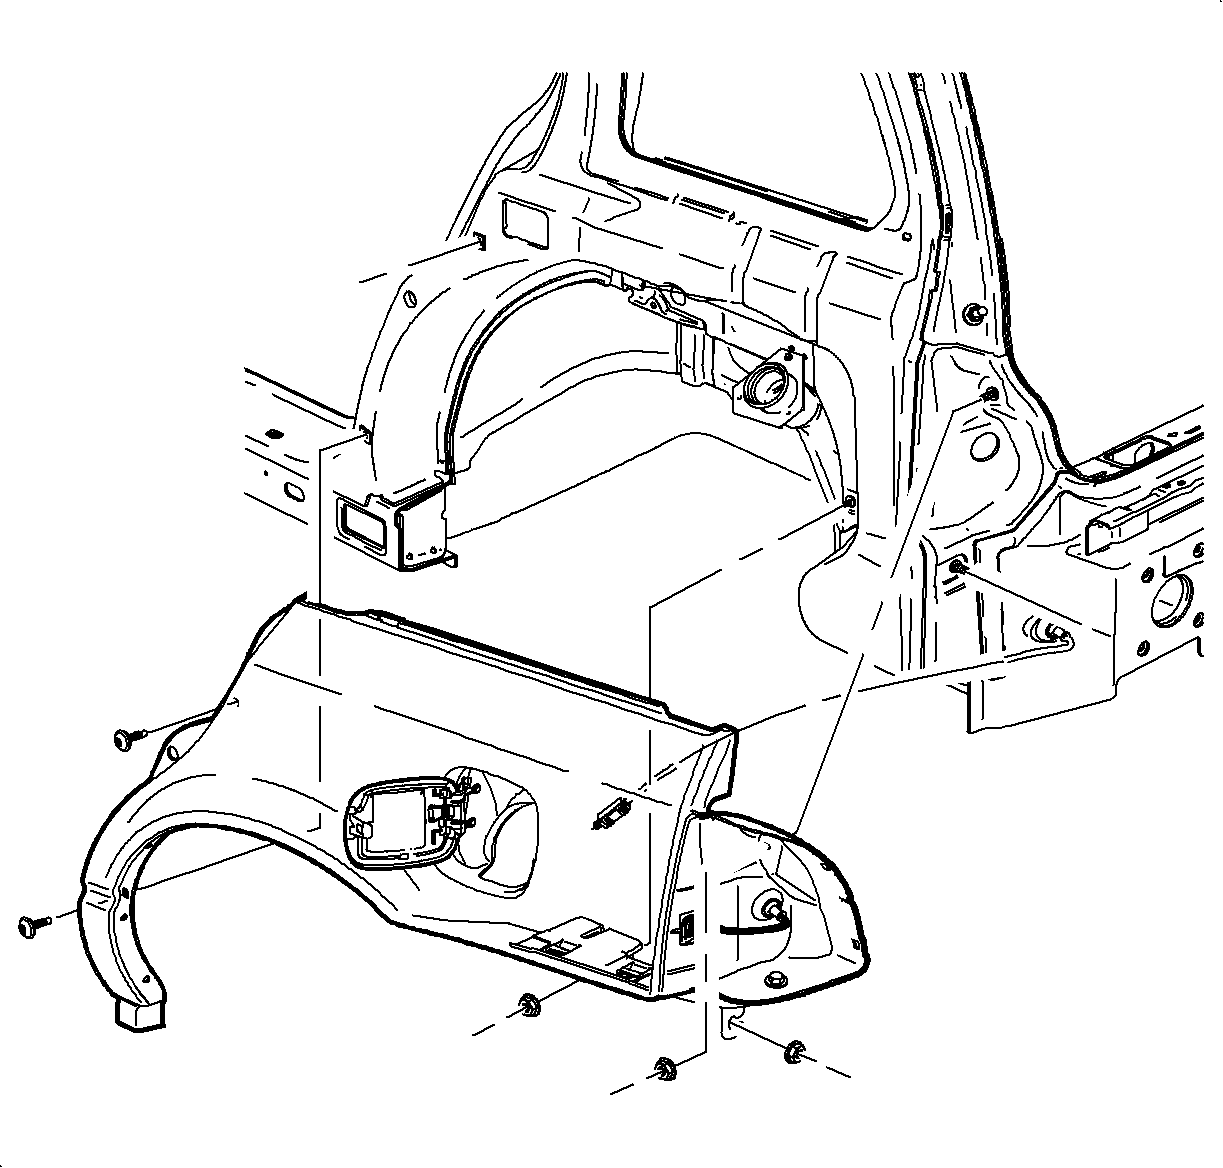
- Remove the remaining attaching bolts from the quarter panel.
- With all of the bolts removed, pull the rear bottom of the quarter panel outward.
- If removing the right quarter panel, remove the quarter panel by sliding backward.
- If removing the left quarter panel, remove the quarter panel by pulling up.
Installation Procedure
- Position the quarter panel to the body. Position the rear, then the top, then the front.
- Install ythe bolts loosely.
- Align the quarter panel with the rear door and the lift gate as necessary.
- Tighten the bolts in sequence as shown in the illustration.
- Close the lift gate and inspect the gap.
- If installing the left quarter panel, install the fuel door release latch and the retainer.
- Install the quarter panel fasteners to install the rear of the rocker panel cover.
- Install the inner wheelhouse panel outer plastic fasteners.
- Install the tail lamp. Refer to Tail Lamp Replacement in Lighting Systems.
- Install the rear fascia. Refer to Rear Bumper Fascia Replacement in Bumpers.
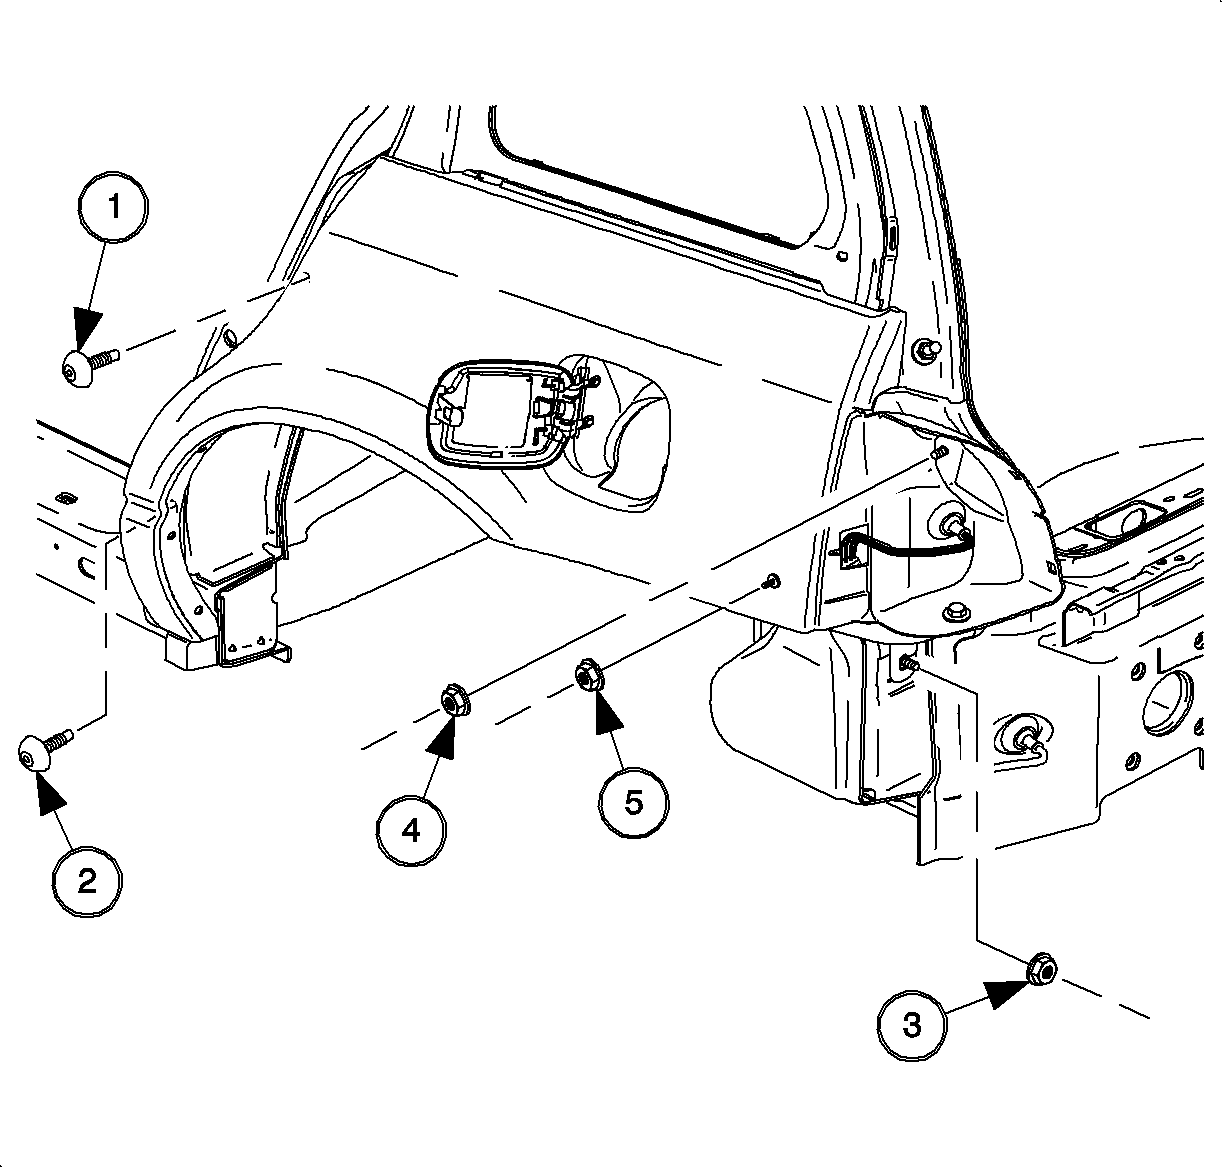
Notice: Refer to Fastener Notice in the Preface section.
Tighten
Tighten the quarter panel bolts (Wagon) to 6 N·m (53 lb in).


Quarter Panel Replacement Sedan
Removal Procedure
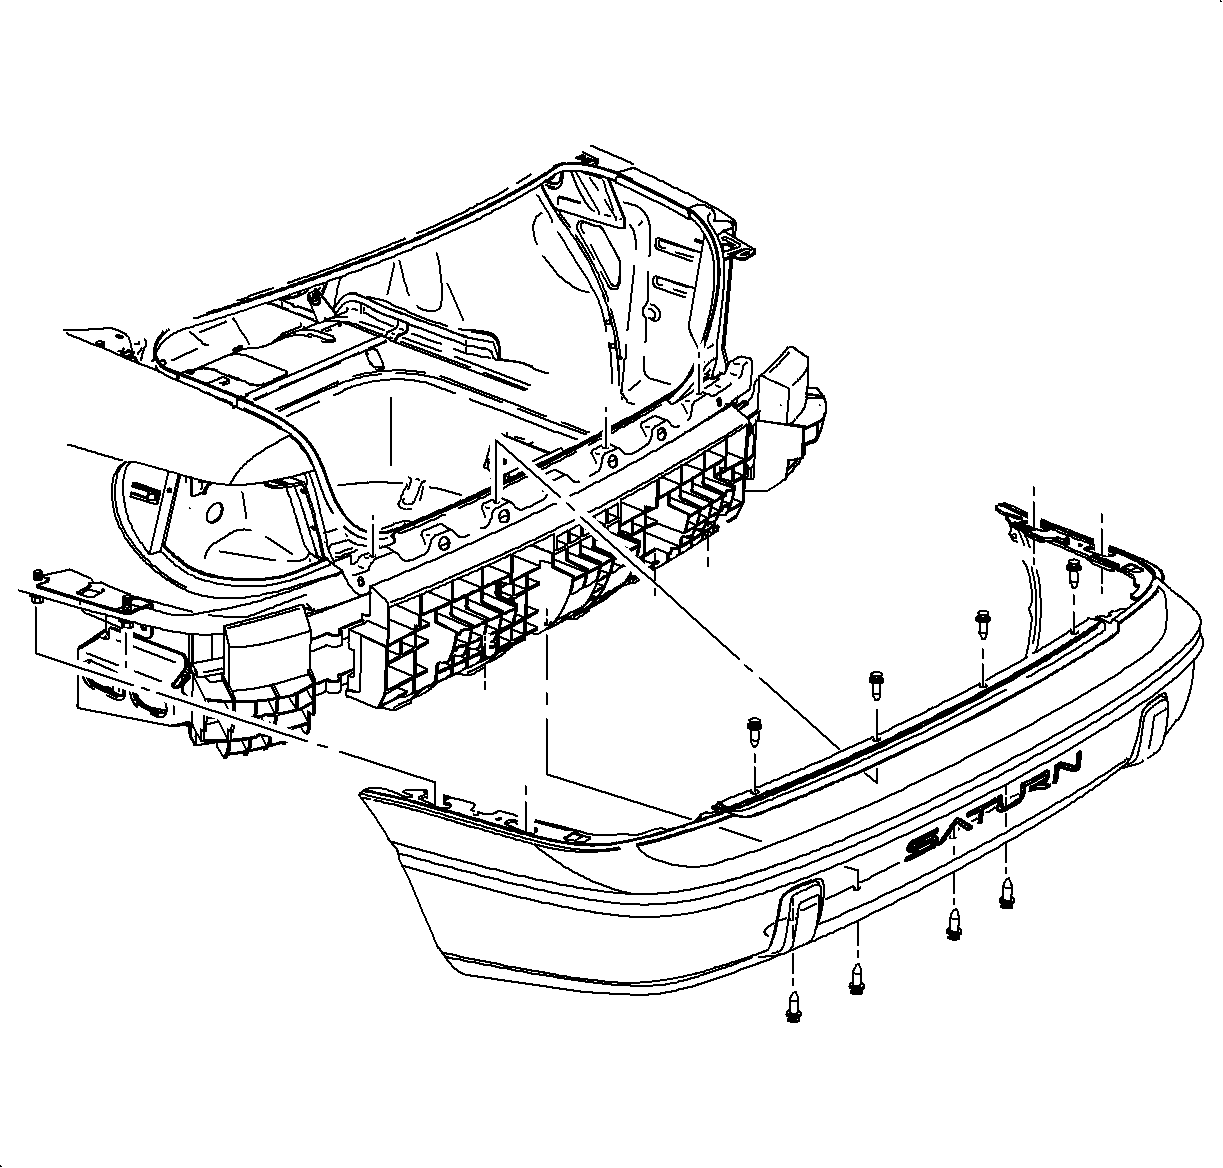
- Remove the rear fascia. Refer to Rear Bumper Fascia Replacement in Bumpers.
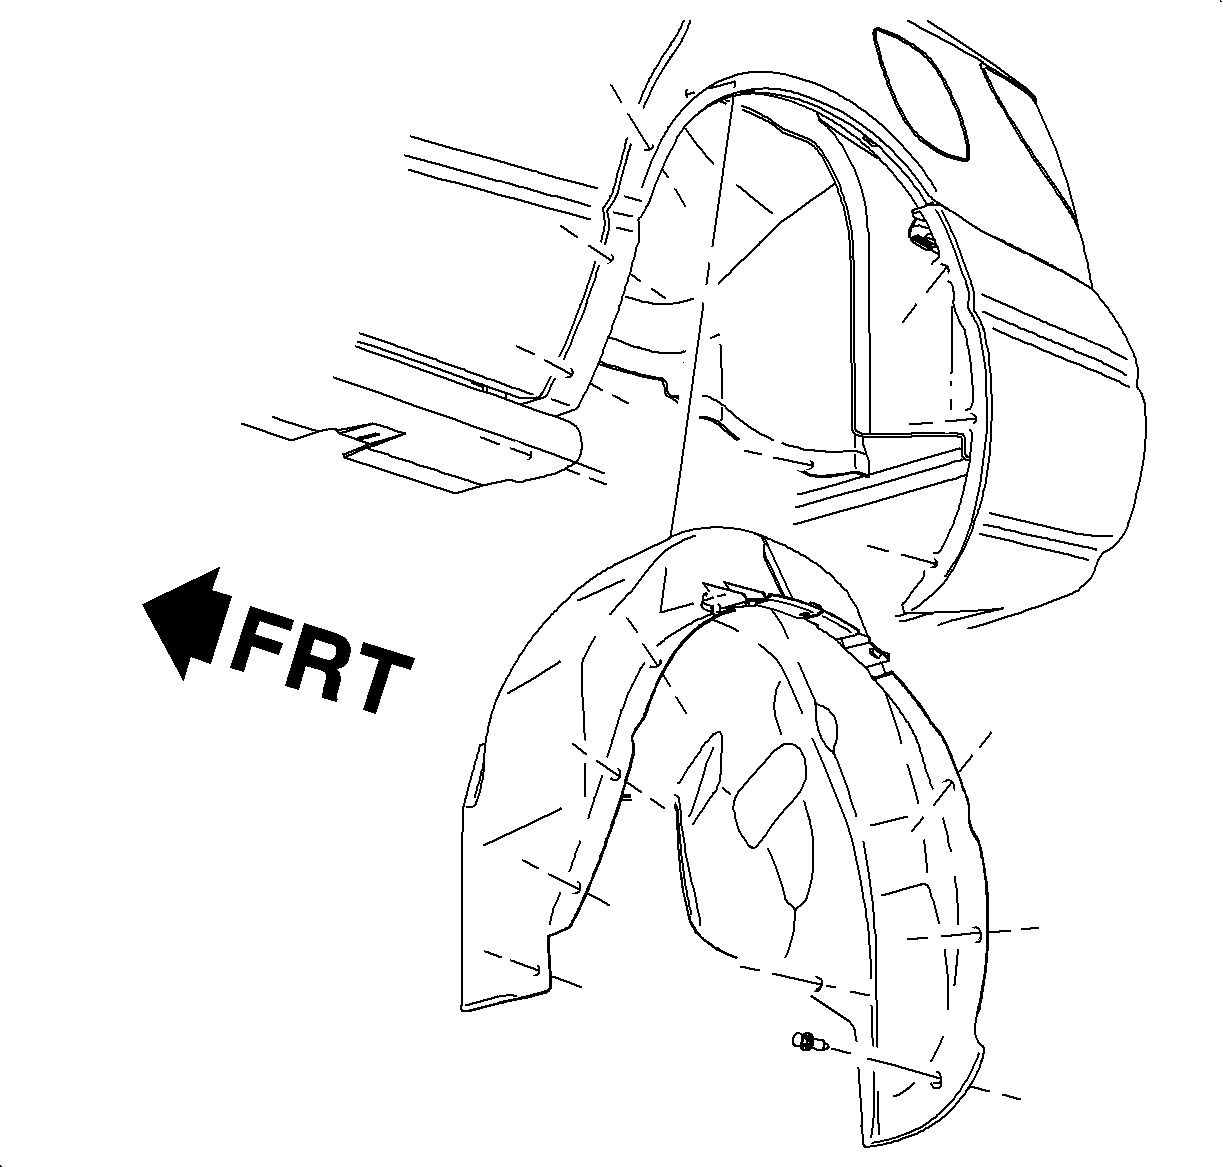
- Remove the rear wheelhouse panel outer plastic fasteners. Refer to Rear Wheelhouse Panel Liner Replacement .
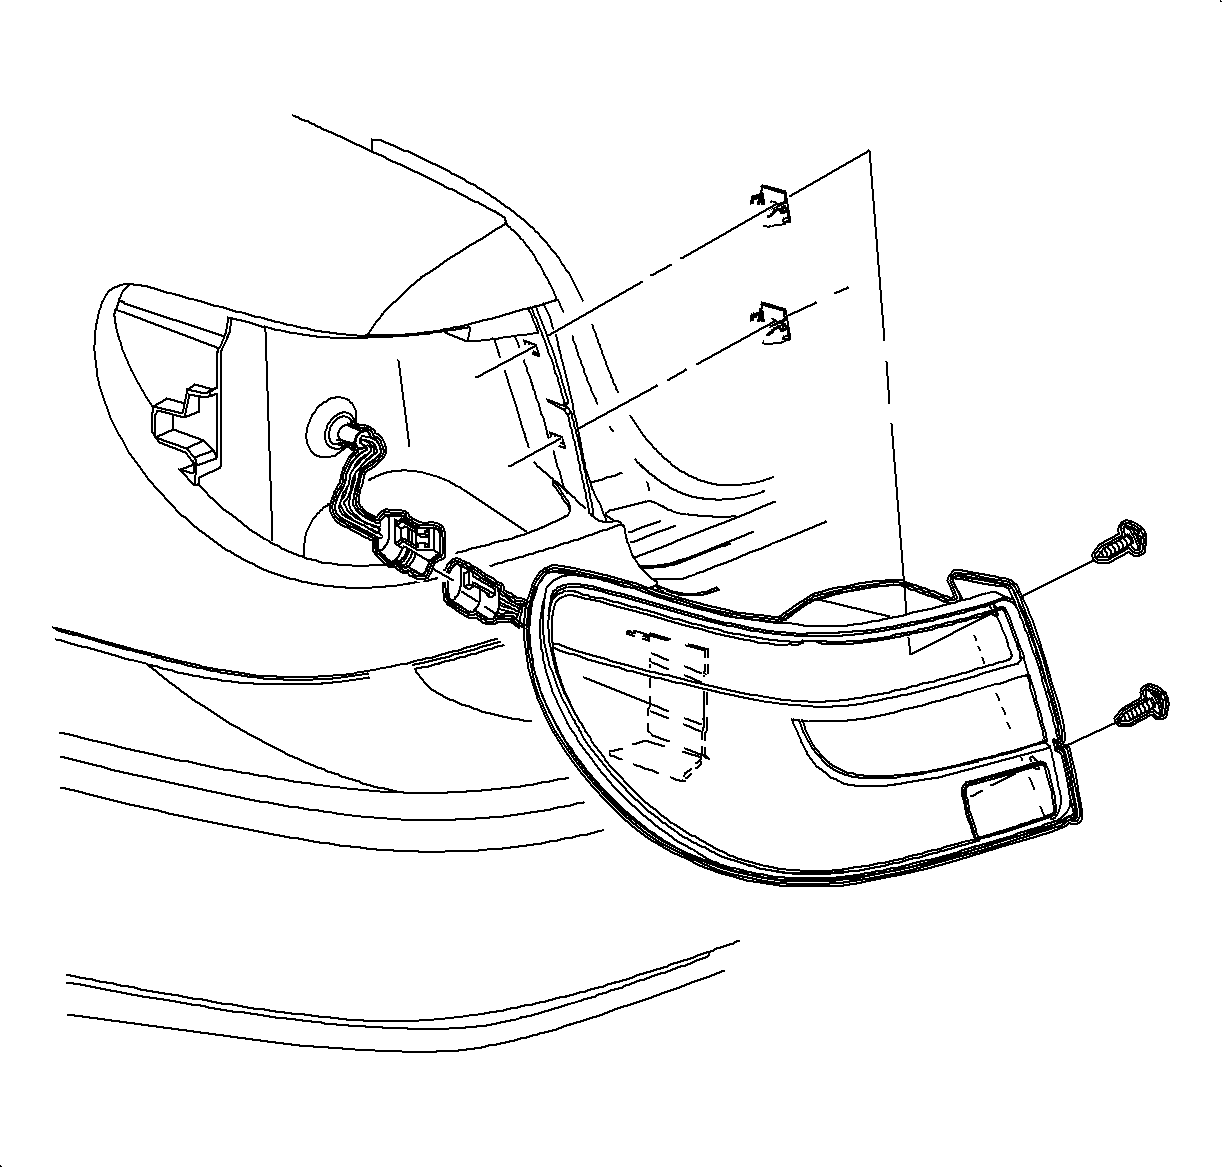
- Remove the tail lamp. Refer to Tail Lamp Replacement in Lighting Systems.
- Remove the rear and middle 2 plastic fasteners on the rocker panel cover to the lower rear end of the cover.
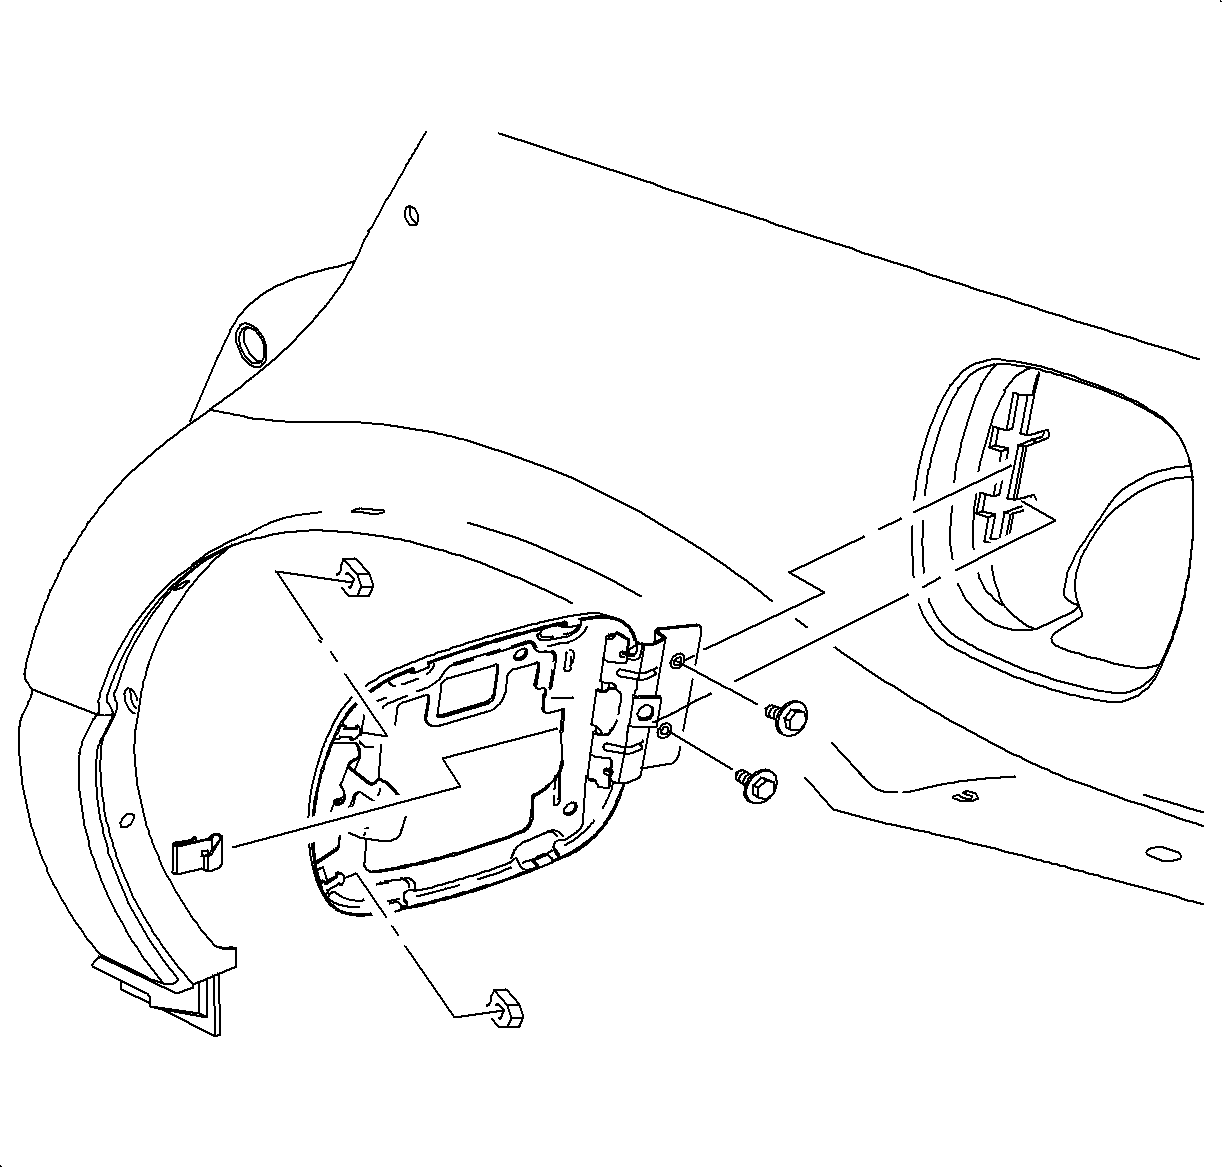
- If removing the left quarter panel, open the fuel door and remove the latch retainer nut and tether from fuel the filler cap.
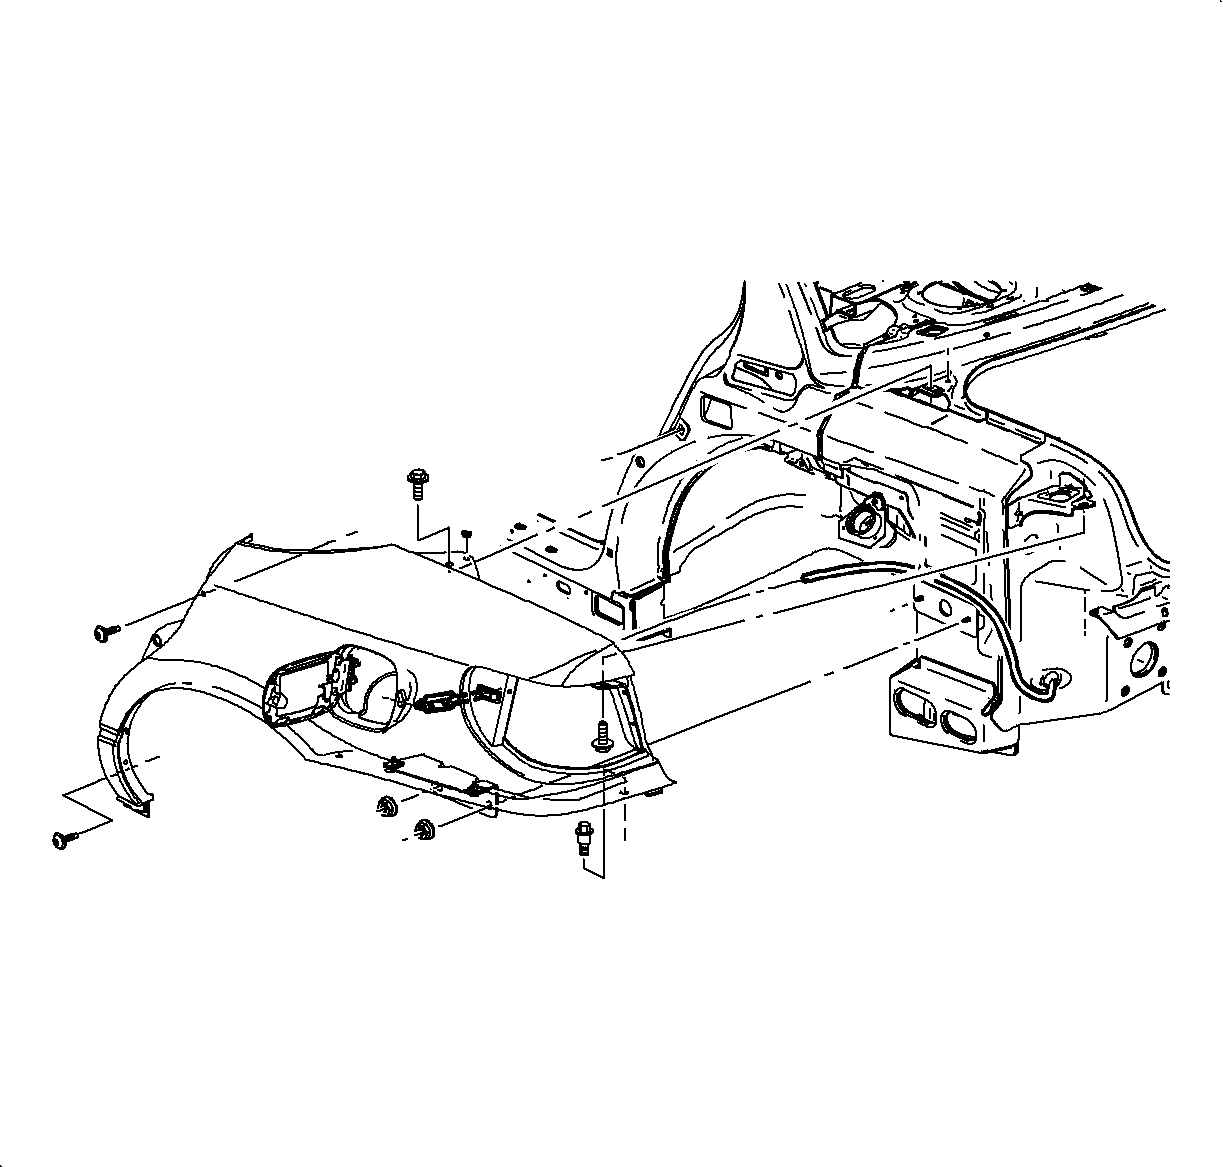
- Remove the rear quarter attaching bolts above and underneath the tail lamp.
- Remove the remaining attaching bolts from the quarter panel.
- With all of the bolts removed, pull the rear bottom of the quarter panel outward, then remove the quarter panel by sliding backward.

Installation Procedure
- If replacing the quarter panel, transfer the fascia mounting studs and the fuel door.
- If installing the left quarter panel, install the latch and the latch retainer nut.
- Position the quarter panel to the body. Position the rear, then the top, then the front.
- Install the bolts loosely.
- Align the quarter panel with the rear door and the compartment lid as necessary.
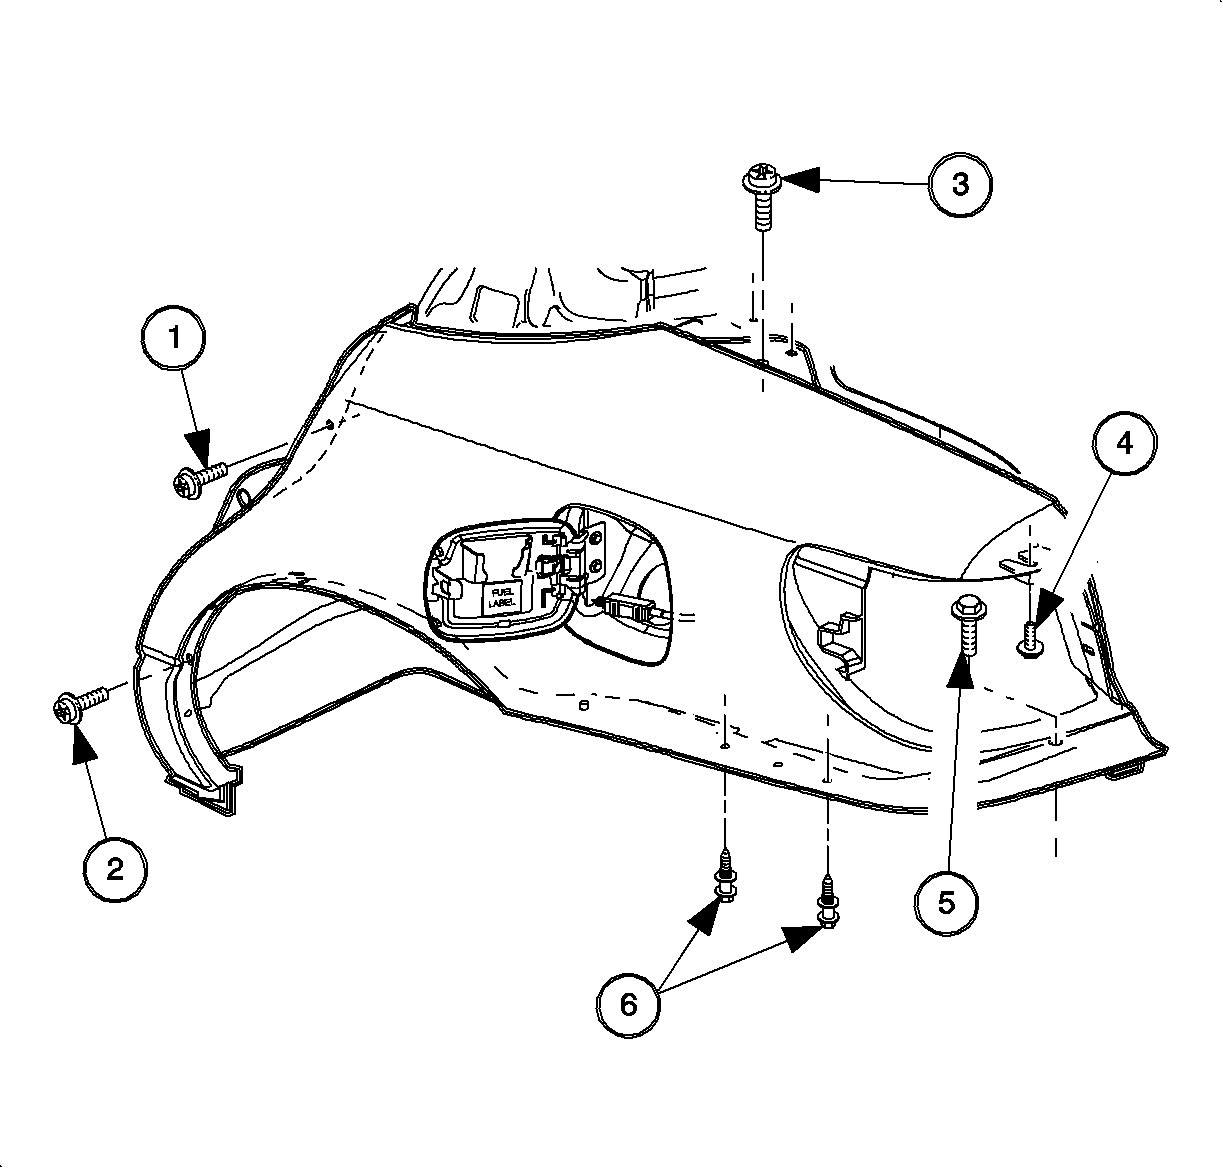
- Tighten the 6 quarter panel fasteners in sequence as shown in the illustration.
- Install the plastic retainers on the rear of the rocker panel cover.
- Install the inner wheelhouse panel outer plastic fasteners. Refer to Rear Wheelhouse Panel Liner Replacement .
- Install the rear fascia. Refer to Rear Bumper Fascia Replacement in Bumpers.
Notice: Refer to Fastener Notice in the Preface section.
Tighten
Tighten the fuel door latch retaining nut to 2 N·m (18 lb in).
Tighten
Tighten the quarter panel fasteners (Sedan) to 9 N·m (80 lb in).


Quarter Panel Replacement Coupe
Removal Procedure
- Remove the rear fascia. Refer to Rear Bumper Fascia Replacement in Bumpers.
- Remove the rear wheelhouse panel from the quarter panel being removed. Refer to Rear Wheelhouse Panel Liner Replacement .
- Remove the tail lamp. Refer to Tail Lamp Replacement in Lighting Systems.
- Remove the rocker panel cover. Refer to Rocker Panel Molding Replacement in Exterior Trim.
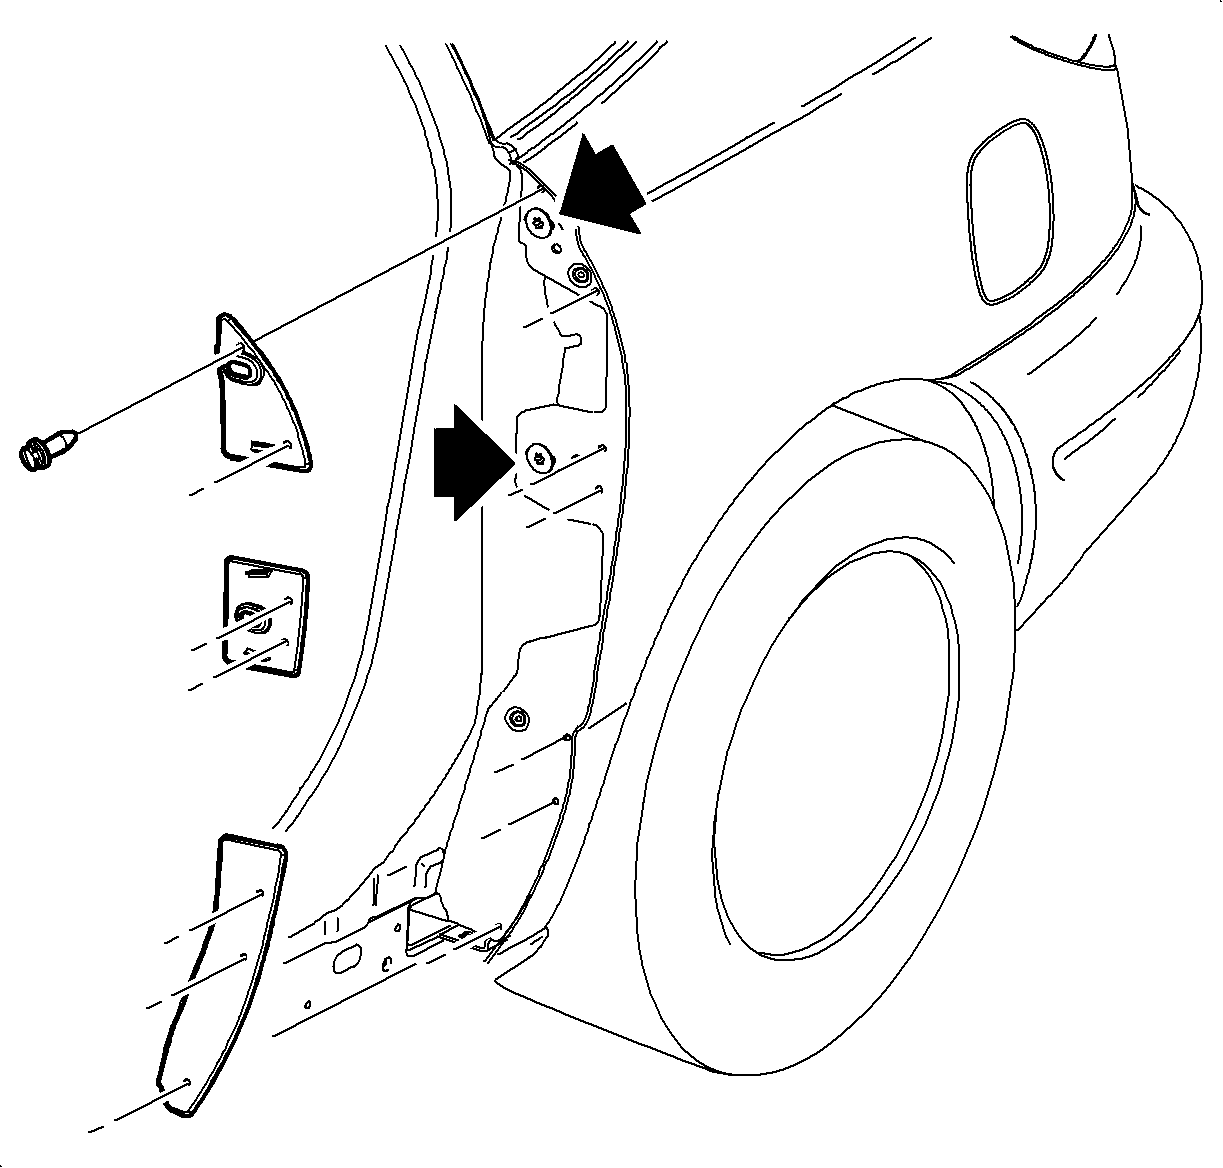
- If removing the left quarter, open the fuel door and remove the pushpins from the upper, center, and lower appliques attached to the quarter panel.
- Remove the retaining bolts behind the closeout pieces from the quarter panel.
- Close the door.
- If removing the left quarter panel, open the fuel door and remove the latch retainer nut.
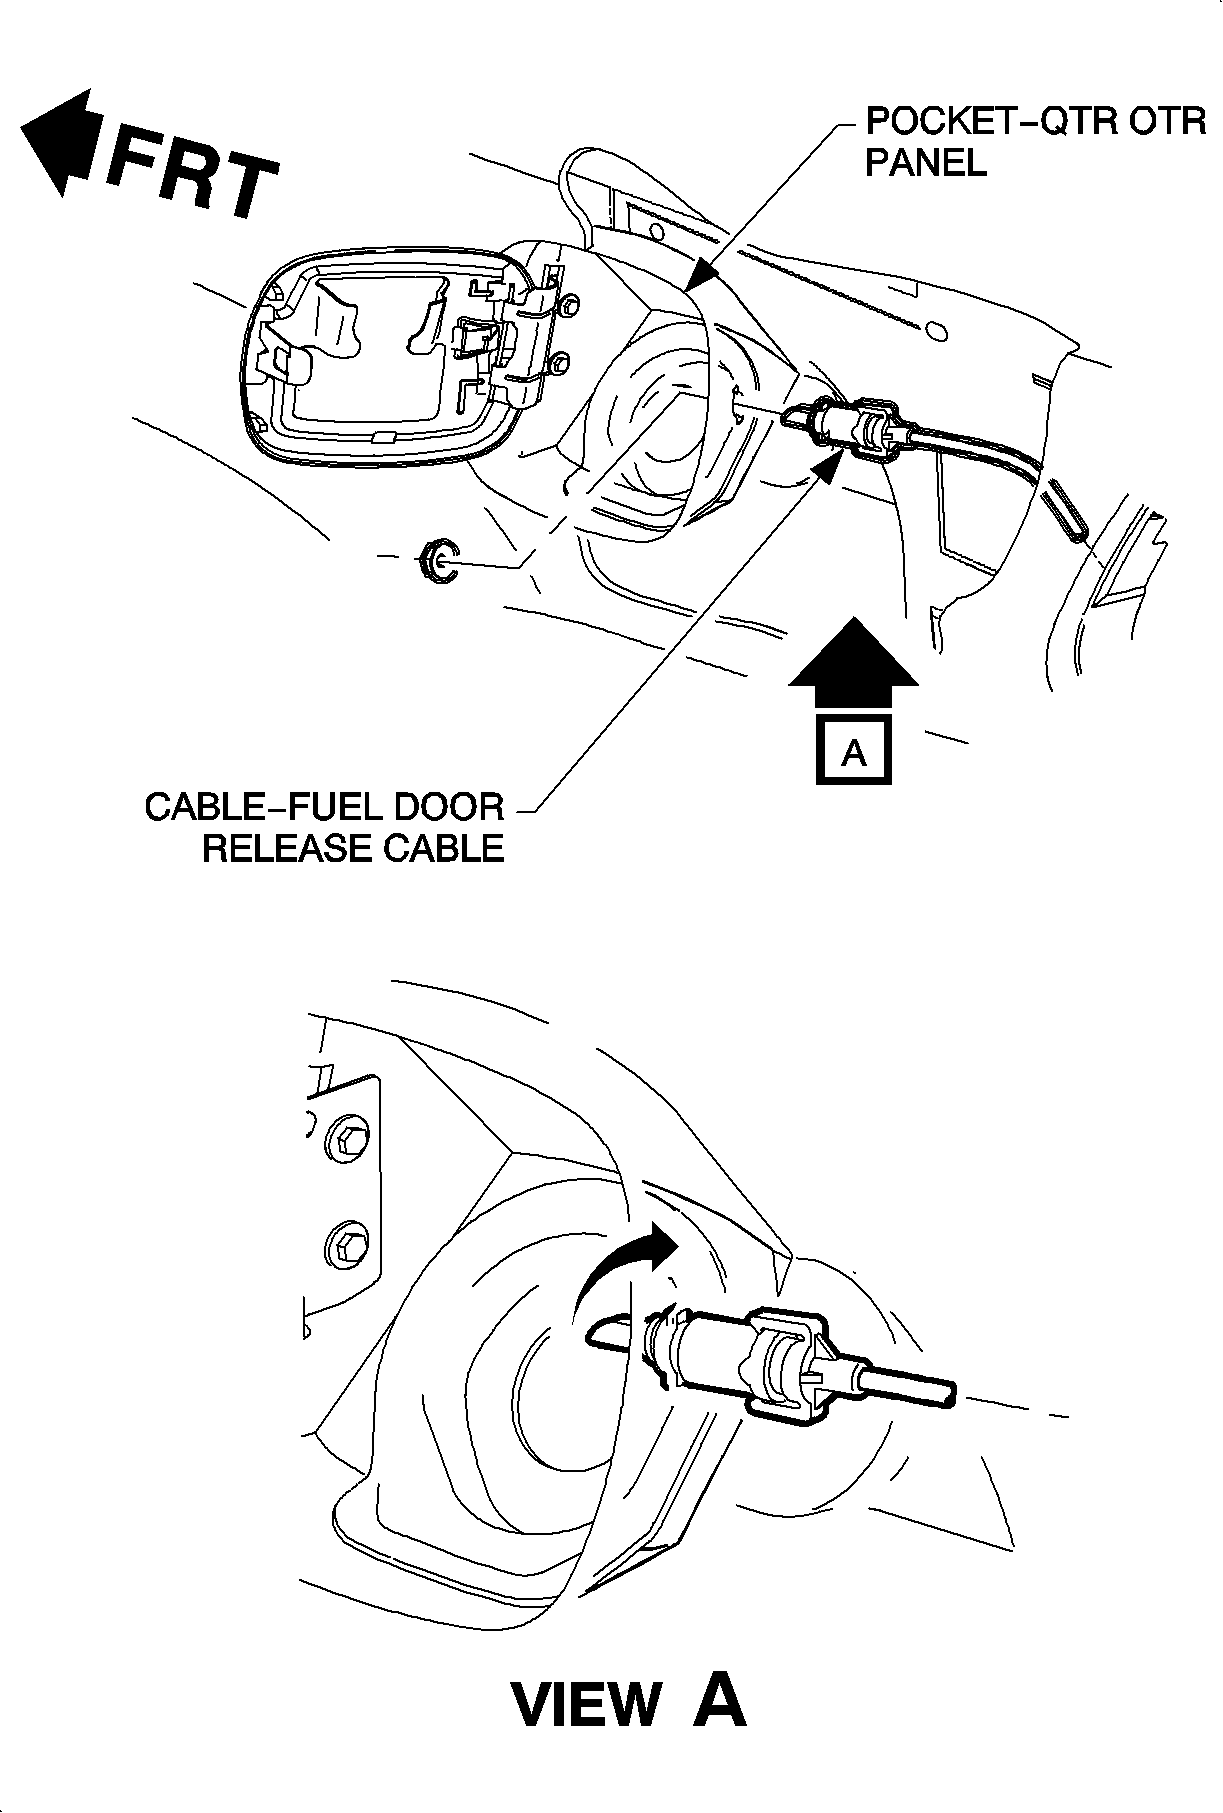
- Reach through the tail lamp opening to remove the cable from the fill pocket by twisting 1/4 turn clockwise.
- Remove the plastic fastener from the safety strap on the fuel cap.
- Remove the fuel cap.
- Remove the rubber surrounding the fuel inlet pipe and replace the cap.
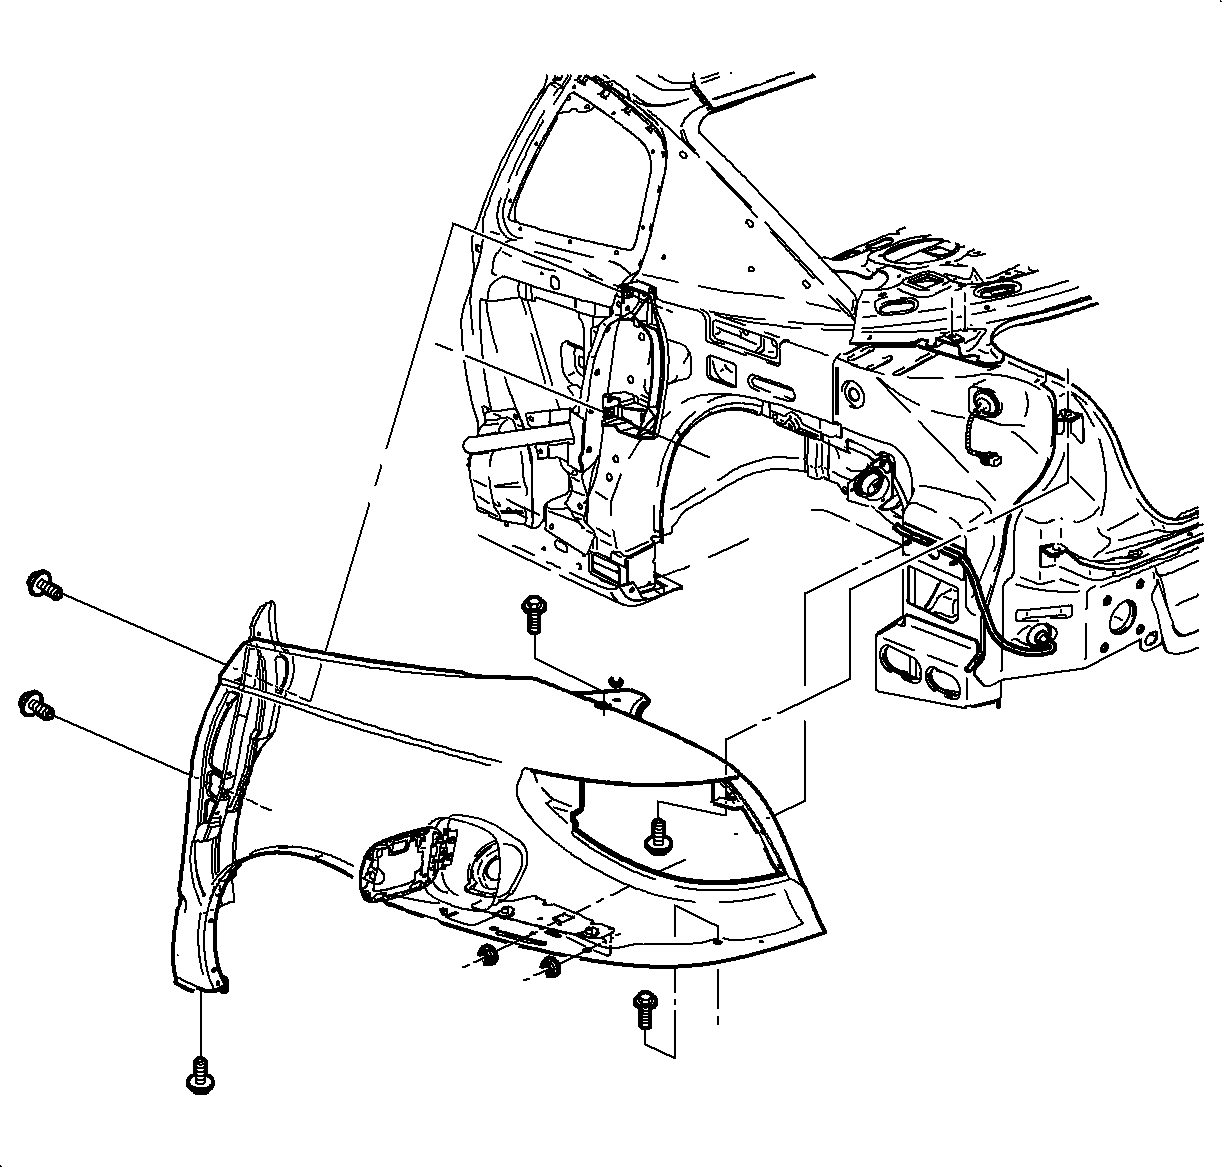
- Remove the rear quarter attaching bolts behind and underneath the inside tail lamp opening.
- Remove the retaining attaching bolts from the quarter panel.
- With all of the bolts removed, pull out the rear of the quarter panel to disconnect the attaching clip from the side window encapsulated molding.
- Remove the quarter panel.
Installation Procedure
- If replacing the outer quarter panel, transfer the fascia support discs and the retaining clips.
- Position the quarter panel to the body. Position the rear, the top, then the front.
- Secure the attaching clip located under the side window encapsulated molding.
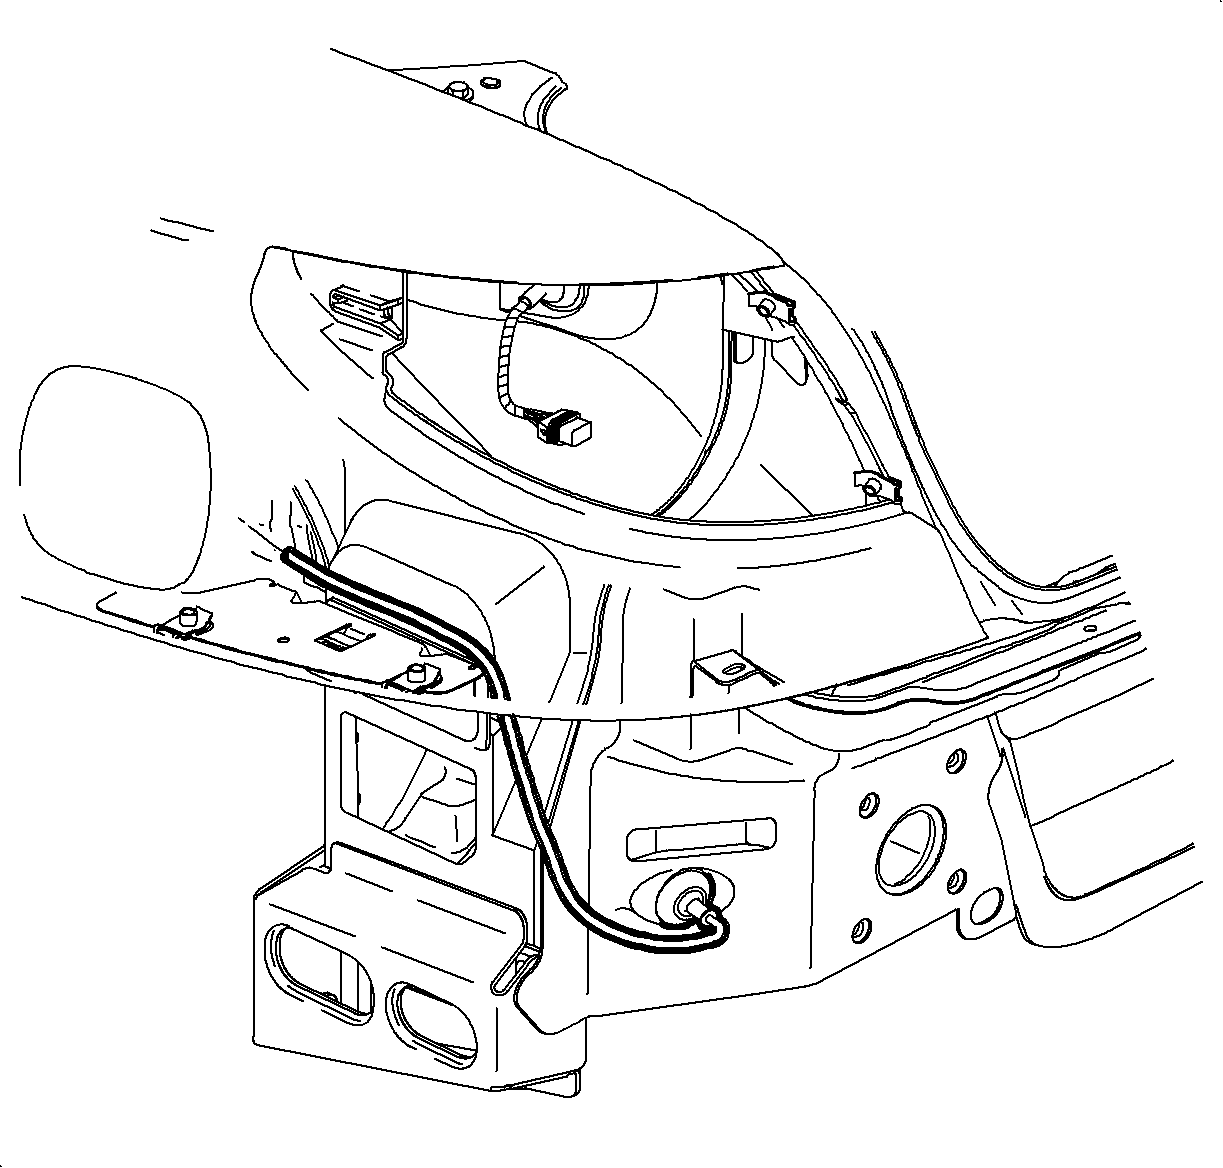
- If iinstalling the left quarter panel, install the fuel fill door release latch and twist 1/4 turn counterclockwise and install the latch retainer nut. Route the latch as shown in the illustration.
- Install the quarter panel bolts loosely.
- If installing the left quarter, open the rear door and install the retaining bolts.
- Align the quarter panel with the compartment lid and tighten the bolts.
- Align the quarter panel with the rear door and tighten the bolts.
- Close the lid and the door.
- If installing the left quarter panel, open the rear door and install the upper, center, and lower appliques to the quarter panel with pushpins.
- If installing the left quarter, install the fuel door.
- Remove the fuel cap.
- Install the rubber surrounding the fuel inlet pipe.
- Install the fuel cap.
- Install the pushpin to the safety strap on the fuel cap.
- Install the rocker panel cover. Refer to Rocker Panel Molding Replacement in Exterior Trim.
- Install the inner wheelhouse panel. Refer to Rear Wheelhouse Panel Liner Replacement .
- Install the tail lamp. Refer to Tail Lamp Replacement in Lighting Systems.
- Install the rear fascia. Refer to Rear Bumper Fascia Replacement in Bumpers.
- Inspect for gaps to the decklid, the rear fascia, and the rear of the door.


Notice: Refer to Fastener Notice in the Preface section.
Tighten
Tighten the rear quarter panel attachment bolts (Coupe) to 9 N·m
(80 lb in).
Tighten
Tighten the rear quarter panel attachment bolts (Coupe) to 9 N·m
(80 lb in).
Tighten
Tighten the rear quarter panel attachment bolts (Coupe) to 9 N·m
(80 lb in).

